Table of Contents
Advertisement
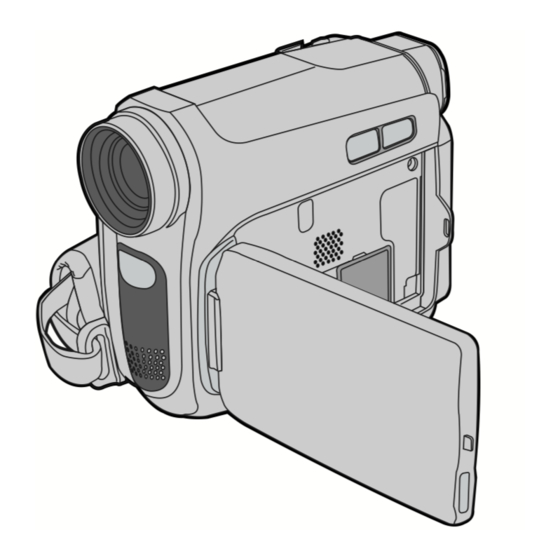
DIGITAL VIDEO CAMERA
GR-D750U
INSTRUCTIONS
Dear Customer,
Thank you for purchasing this digital
video camera. Before use, please
read the safety information and
precautions contained in the pages
3 – 5 to ensure safe use of this
product.
GETTING STARTED
RECORDING & PLAYBACK
ADVANCED FEATURES
REFERENCES
TERMS
For Customer Use:
Enter below the Model No. and
Serial No. which is located on the
bottom of the camcorder. Retain
this information for future reference.
Model No.
Serial No.
To deactivate the demonstration,
set "DEMO MODE" to "OFF".
(
pg. 22, 24)
LYT1658-001B
ENGLISH
7
16
22
34
40
Advertisement
Table of Contents

Related Manuals for JVC GR-D750U


Summary of Contents for JVC GR-D750U
-
Page 1: Digital Video Camera
DIGITAL VIDEO CAMERA GR-D750U INSTRUCTIONS Dear Customer, Thank you for purchasing this digital video camera. Before use, please read the safety information and precautions contained in the pages 3 – 5 to ensure safe use of this product. ENGLISH GETTING STARTED RECORDING &... - Page 2 You can check the battery status by simply pressing the DATA button. ( Auto Button You can change the recording mode between manual setting to the standard mode setting of the camcorder by pressing the AUTO button. ( pg. 26) button brightens the pg. 28) pg.
-
Page 3: Read This First
Remember that this camcorder is not compatible with other digital video formats. It is recommended that you use JVC brand cassette tapes. Your camcorder is compatible with all brands of commercially available cassette tapes... -
Page 4: Safety Precautions
This product includes patented and other proprietary technology and will operate only with JVC Data Battery. Use the JVC BN-VF808U/VF815U/VF823U battery packs and, to recharge them or to supply power to the camcorder from an AC outlet, use the provided multi-voltage AC Adapter. -
Page 5: Cleaning The Camcorder
When using a cleaner or chemically treated cloth refer to the cautions of each product. To clean the viewfinder, please consult your nearest JVC dealer. USE CLEANING CASSETTE Appears if dirt is detected on the heads during recording. Use an optional cleaning cassette... -
Page 6: Table Of Contents
CONTENTS GETTING STARTED Regarding This Manual ... 7 Provided Accessories ... 7 Index...8 Grip Adjustment...11 Power ...12 Language Settings... 13 Date/Time Settings ... 14 Viewfinder Adjustment... 14 Brightness Adjustment Of The Display... 14 Tripod Mounting...14 Loading/Unloading A Cassette ... 15 16:9 Wide Mode ... -
Page 7: Getting Started
NOTES: To select In order to maintain optimum performance of the camcorder, provided cables may be equipped with one or more core filter. If a cable has only one core filter, the end that is closest to the filter should be connected to the camcorder. -
Page 8: Index
Pull on the end A of the LCD monitor. The LCD monitor can rotate 270°. Power-linked operation When the power switch is set to “REC”, you can also turn the camcorder on/off by opening/ closing the LCD monitor or pulling out/pushing in the viewfinder. NOTES:... - Page 9 17) Cassette Holder Cover ( Connector Cover REC: To perform recording on the tape. pg. 12) OFF: To switch off the camcorder. PLAY: To play back a recording on the tape. pg. 12) GETTING STARTED pg. 12) pg. 8) pg.
- Page 10 7Selected Effect Indicator ( 8Selected Program AE Indicator ( 9SOUND 12BIT/16BIT: Sound Mode Indicator ( pg. 24) (Appears for approx. 5 seconds after turning on the camcorder.) !Digital Image Stabilizer (“DIS”) ( (only indicator is displayed) "Approximate Zoom Ratio ( #Zoom Indicator ( pg.
-
Page 11: Grip Adjustment
How To Attach The Lens Cap To protect the lens, attach the provided lens cap to the camcorder as shown in the illustration. NOTE: To confirm the lens cap is on correctly make sure the cap is flush to the camcorder. -
Page 12: Power
AC adapter. In this case, the battery charge AC Adapter starts if the battery is attached to the camcorder. Please do not pull or bend the AC adapter plug and cable. This may damage the AC adapter. -
Page 13: Language Settings
DATA several times, there may be a problem with your battery. In such a case, consult your nearest JVC dealer. Using AC Power Viewfinder on Perform step 4 – 5 in “Charging The Battery 2 hrs. -
Page 14: Date/Time Settings
Press MENU. Press 1 whenever you want to return to the previous menu screen. Tripod Mounting To attach the camcorder to a tripod, align the direction stud and screw to the mounting socket and stud hole on the camcorder. Then tighten the screw clockwise. -
Page 15: Loading/Unloading A Cassette
If you wait a few seconds and the cassette holder does not open, close the cassette holder cover and try again. If the cassette holder still does not open, turn the camcorder off then on again. If the tape does not load properly, open the cassette holder cover fully and remove the cassette. -
Page 16: Recording & Playback
If the Record-Standby mode continues for 5 minutes and no operation is performed, the camcorder’s power shuts off automatically. To turn the camcorder on again, push back and pull out the viewfinder again or close and re-open the LCD monitor. -
Page 17: Zooming
“TELE MACRO” to “ON”. ( Journalistic Shooting In some situations, different shooting angles may provide more dramatic results. Hold the camcorder in the desired position and tilt the LCD monitor in the most convenient direction. It can rotate 270° (90° downward, 180°... -
Page 18: Time Code
When recording is resumed, the time code starts counting up again from “00:00:00”. This means the camcorder may record the same time codes as those existing in a previously recorded scene. To prevent this, perform Recording From The Middle Of A Tape pg. -
Page 19: Video Playback
21) Lock Button If Stop mode continues for 5 minutes when power is supplied from a battery, the camcorder shuts off automatically. To turn the camcorder on again, push back and pull out the viewfinder again or close and re-open the LCD monitor. -
Page 20: Variable Shuttle Search
To cancel Blank Search, press 7 or NOTES: Before starting Blank Search, if the current position is at a blank portion, the camcorder searches in the reverse direction. If the current position is at a recorded portion, the camcorder searches in the forward direction. -
Page 21: Connections To A Tv Or Vcr
3White to AUDIO L IN* * Not required for watching still images only. Make sure all units are turned off. Connect the camcorder to a TV or VCR as shown in the illustration. If using a VCR, go to step 3. -
Page 22: Advanced Features
MENUS FOR DETAILED ADJUSTMENT Changing The Menu Settings This camcorder is equipped with an easy-to- use, on-screen menu system that simplifies many of the more detailed camcorder settings. pg. 22 – 25) Select MENU For Video Recording Menu: Set the Power Switch to “REC” while pressing down the Lock Button located on the switch. -
Page 23: Recording Menus
Switch off this mode when recording with the camcorder on a tripod. DIS cannot be activated when “NIGHT” in “PROGRAM AE”, or “STROBE” in “EFFECT” is selected or when LIGHT is set to on, or when SNAPSHOT is pressed. - Page 24 If the recording mode is switched, the playback picture will be blurred at the switching point. During playback of a tape recorded on another camcorder, blocks of noise may appear or there may be momentary pauses in the sound. SOUND MODE [12BIT]: Enables video recording of stereo sound on four separate channels.
-
Page 25: Playback Menus
Allows you to set the video recording mode (SP or LP) depending on your preference. It is recommended you use “REC MODE” in VIDEO Menu when using this camcorder as a recorder during dubbing. ( * SP indicator does not appear on the screen. -
Page 26: Features For Recording
Set the Power Switch to “REC”. Press SNAPSHOT. LED Light will be recorded for approx. 5 seconds, then the camcorder re-enters the Record-Standby mode. You can perform Snapshot also during appears.) recording. A still image will be recorded for approx. 5 seconds, then the normal recording resumes. -
Page 27: Manual Focus
Manual Focus The camcorder’s Full Range AF system offers continuous shooting ability from close-up (as close as approx. 5 cm (2") to the subject) to infinity. However, correct focus may not be obtained depending on the shooting condition. In this case, use the manual focus mode. -
Page 28: Iris Lock
FEATURES FOR RECORDING Iris Lock Like the pupil of the human eye, the iris contracts in well-lit environments to keep too much light from entering, and dilates in dim environments to allow in more light. Use this function in the following situations: When shooting a moving subject. -
Page 29: White Balance Adjustment
The white balance is usually adjusted automatically. However, more advanced camcorder operators control this function manually to achieve a more professional color/ tint reproduction. To change the setting Set “W. BALANCE” to the desired mode. -
Page 30: Wipe Or Fader Effects
During Night-Alive, it may be difficult to bring the camcorder into focus. To prevent this, use of a tripod is recommended. ”. : Compensates for subjects that... -
Page 31: Editing
(Refer to PROGRAM AE - SPORTS mode.) EDITING Dubbing To A VCR To use this camcorder as a player Following the illustration, “Connections To A TV Or VCR” , connect the camcorder and the VCR’s input connectors. Perform steps 1 - 6 ( pg. -
Page 32: Dubbing To Or From A Video Unit Equipped With A Dv Connector (Digital Dubbing)
DV IN/OUT connector. When using a DV cable, be sure to use the optional JVC VC-VDV204U or VC-VDV206U DV cable. To use this camcorder as a recorder Make sure all units are turned off. -
Page 33: Connection To A Personal Computer
13) When using a DV cable, be sure to use the optional JVC VC-VDV206U or VC-VDV204U DV cable depending on the type of DV connector (4 or 6 pins) on the PC. -
Page 34: References
➜Adjust the brightness and angle of the LCD monitor. ( When the LCD monitor’s fluorescent light reaches the end of its service life, images on the LCD monitor become dark. ➜Consult your nearest JVC dealer. pg. 15) pg. 27) pg. 26, 29) pg. 36) pg. - Page 35 Appears when the date/time is not set. pg. 14). The built-in clock battery has run out and the previously set date/time has been erased. ➜Consult your nearest JVC dealer for replacement. UNIT IN SAFEGUARD MODE REMOVE AND REATTACH BATTERY OR DC PLUG Error indications 01, 02 or 06.
-
Page 36: Cautions
AC wall outlet other than American National Standard C73 series type use an AC plug adapter, called a “Siemens Plug”, as shown. For this AC plug adapter, consult your nearest JVC dealer. Battery Packs The supplied battery pack is a lithium-ion battery. Before... - Page 37 20 seconds, it stops automatically. Also refer to the cleaning cassette’s instructions. If, after using the cleaning cassette, the problems still exist, consult your nearest JVC dealer. Mechanical moving parts used to move the video heads and video tape tend to become dirty and worn out over time.
- Page 38 Changes or modifications not approved by JVC could void the user’s authority to operate the equipment. This equipment has been tested and found to comply with the limits for a Class B digital device, pursuant to Part 15 of the FCC Rules.
-
Page 39: Specifications
Camcorder For General Power supply DC 11 V (Using AC Adapter) DC 7.2 V (Using battery pack) Power consumption Approx. 2.2 W (2.3 W*) (LCD monitor off, viewfinder on) Approx. 2.7 W (2.8 W*) (LCD monitor on, viewfinder off) Approx. 7.5 W (Maximum; when charging the... -
Page 40: Terms
TERMS AC Adapter ...13 Auto/Manual Mode ...18 Backlight Compensation 28 Battery Pack ...12, 13, 36 Blank Search ...20 Bright ...24, 25 Cam Reset ...25 Changing The Menu Settings ...22 – 25 Charging The Battery Pack ...12 Clock Adj..14, 24, 25 Connection To A Personal Computer ...33 Connections To A TV Or...