Table of Contents
Advertisement
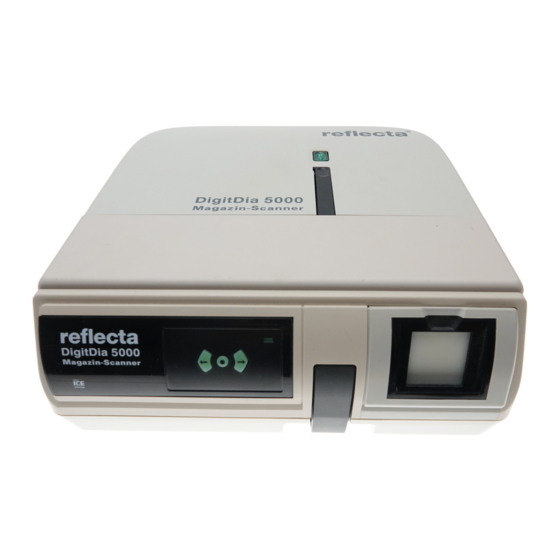
Reflecta DigitDia 5000 and Cyberview X
1 Introduction.................................................................................................................................3
2 Definitions....................................................................................................................................4
3 Cyberview Software and Firmware............................................................................................4
4 Installation of Cyberview............................................................................................................4
4.1 Pre-Requisites........................................................................................................................4
4.2 Installation..............................................................................................................................5
4.3 Reported Problems.................................................................................................................5
5 Working with Cyberview.............................................................................................................6
5.1 Starting Cyberview..................................................................................................................6
5.2 The Cyberview Workplace......................................................................................................7
5.2.1 Cyberview Menus.............................................................................................................7
5.2.1.1 Scan Menu................................................................................................................7
5.2.1.2 Digital ICE3 Menu.....................................................................................................8
5.2.1.3 Preview Menu............................................................................................................8
5.2.1.4 Image Adjustment Menu............................................................................................8
5.2.1.5 Window Menu............................................................................................................8
5.2.1.6 Help Menu.................................................................................................................8
5.2.2 Cyberview Toolbar...........................................................................................................9
5.2.2.1 Film Type..................................................................................................................9
5.2.2.2 Pre-scan..................................................................................................................10
5.2.2.3 Scan........................................................................................................................10
5.2.2.4 Image Adjustment...................................................................................................10
5.2.2.5 Output Preview........................................................................................................11
5.2.2.6 Backward One Frame..............................................................................................11
5.2.2.7 Forward One Frame................................................................................................11
5.2.2.8 Reload Magazine....................................................................................................11
5.2.2.9 Set Current Position................................................................................................11
5.2.2.10 Go To....................................................................................................................11
5.2.3 Cyberview Toolbox.........................................................................................................11
5.2.4 Define Measurement Units.............................................................................................12
6 Scanner Operations..................................................................................................................13
6.1 Define Basic Settings............................................................................................................13
6.1.1 Film Type.......................................................................................................................13
6.1.2 Scan Preferences...........................................................................................................13
6.1.2.1 Scan Setting............................................................................................................13
6.1.2.2 Advanced Setting....................................................................................................14
6.1.2.3 Default Scanning Area.............................................................................................14
6.1.2.4 ICE/ROC/GEM........................................................................................................15
6.1.3 Monitor Calibration.........................................................................................................17
6.1.4 Scanner Calibration........................................................................................................17
6.1.5 Noise During Scanner Operation....................................................................................17
6.2 Preparing To Scan................................................................................................................18
6.2.1 Load Magazine...............................................................................................................18
6.2.2 Reload Magazine and Set Frame Position.....................................................................19
6.3 Pre-scanning........................................................................................................................19
6.3.1 Overview........................................................................................................................19
6.3.2 Creating a Pre-scan.......................................................................................................19
Cyberview
Table of Contents
Page 1 of 33
Dec 2008
Advertisement
Table of Contents

Related Manuals for Reflecta DigitDia 5000


Summary of Contents for Reflecta DigitDia 5000
-
Page 1: Table Of Contents
Reflecta DigitDia 5000 and Cyberview X Table of Contents 1 Introduction..........................3 2 Definitions............................4 3 Cyberview Software and Firmware....................4 4 Installation of Cyberview......................4 4.1 Pre-Requisites........................4 4.2 Installation..........................5 4.3 Reported Problems.........................5 5 Working with Cyberview......................6 5.1 Starting Cyberview........................6 5.2 The Cyberview Workplace......................7 5.2.1 Cyberview Menus......................7... - Page 2 6.3.3 Pre-scan Thumbnail Panel.....................20 6.3.4 Manipulating the Pre-scan....................21 6.3.4.1 Defining the Selection Area..................21 6.3.4.2 Active Frame......................21 6.3.4.3 Zoom In and Zoom Out...................22 6.3.4.4 Rotate 90 Left, Rotate 90 Right, Flip Horizontal, Flip Vertical........22 6.3.5 Using ICE With Pre-scans....................22 6.3.6 Using GEM and ROC With Pre-scans................23 6.3.7 Revert..........................23 6.4 Image Adjustment.........................24 6.4.1 Apply Image Adjustments to Selection or Frame............24...
-
Page 3: Introduction
1 Introduction Prior to acquiring my Reflecta DigitDia 5000 slide scanner, I read a certain amount about it, much of it in German, and found that there are two common opinions, namely: • The Instruction Manual supplied with the scanner is very minimal •... -
Page 4: Definitions
Although marketed as the Reflecta DigitDia in Europe, the scanner is actually an American product manufactured by Pacific Image Electronics www.scanace.com. The scanner is called the Power Slide 3650 in the US. -
Page 5: Installation
4.2 Installation • Do not connect the scanner to the computer • Load the Cyberview CD into the drive. The Installation Wizard should start automatically – see section 4.3 if it does not. On completion, there will be a reboot. •... -
Page 6: Working With Cyberview
5 Working with Cyberview 5.1 Starting Cyberview Turn on the scanner before starting Cyberview, then double click on the Cyberview icon on the desktop, or select Start > Programs > Cyberview. The following message is displayed It takes about 3 minutes for the scanner to initialise, then the Cyberview Preview window appears as shown below. -
Page 7: The Cyberview Workplace
The Thumbnail Panel only appears when Pre-scan is selected for the first time (section 6.3). It can be dragged anywhere on the desktop, i.e. outside the Cyberview Preview window. On my installation, the Close function is disabled, i.e. after the first Pre-scan, the Thumbnail Panel is always displayed when Cyberview is active. -
Page 8: Digital Ice3 Menu
5.2.1.2 Digital ICE3 Menu • • • See section 6.1.2.4. 5.2.1.3 Preview Menu • Zoom In • Zoom Out • Rotate 90 Left • Rotate 90 Right • Flip Horizontal • Flip Vertical See section 6.3.4. 5.2.1.4 Image Adjustment Menu •... -
Page 9: Cyberview Toolbar
5.2.2 Cyberview Toolbar Forward/ Image Backward Current Pre-scan Adjustment One Frame Position Reload Output Go To Scan Film Type Magazine Preview 5.2.2.1 Film Type • Negative Agfa • Agfa 100 • Agfa 200 • Agfa 400 Fuji • Fuji 100 •... -
Page 10: Pre-Scan
• B&W Agfa • Agfapan APX 100 PRO • Agfapan APX 400 PRO Fuji • Fuji 100 ACROS 36 • Fuji Neopan 1600 PR 36 • Fuji Neopan 400 PR 36 Generic • Generic B&W Ilford • Ilford 100 Delta PRO •... -
Page 11: Output Preview
5.2.2.5 Output Preview See section 7.1.2 5.2.2.6 Backward One Frame Just moves the magazine one slide backward – does not initiate a scan. There is a button on the scanner which performs the same operation. 5.2.2.7 Forward One Frame Just moves the magazine one slide forward – does not initiate a scan. There is a button on the scanner which performs the same operation. -
Page 12: Define Measurement Units
5.2.4 Define Measurement Units In the top left of the Preview window, there is a clickable square which determines the measurement units – inches, centimetres or pixels – this can be useful when defining the Default Scanning Area – section 6.1.2.3. Cyberview Page 12 of 33 Dec 2008... -
Page 13: Scanner Operations
6 Scanner Operations 6.1 Define Basic Settings 6.1.1 Film Type The film type is selected from the main categories – Negative, Positive, B&W (Black and White) and then from the specific film type, as listed in section 5.2.2.1. The selection is shown in the Toolbar to the right of the file type icon. -
Page 14: Advanced Setting
6.1.2.2 Advanced Setting With the current software and firmware, JS recommends use of Auto Exposure. With the DigitDia 5000, there is hardly any difference in scanning time, but the results are sometimes dramatically better. Auto Gamma has not proved useful. The scanner makes a certain amount of noise when in use and also vibrates. -
Page 15: Ice/Roc/Gem
ICE – Image Correction and Enhancement - is one of the most important features of the DigitDia 5000. It is a hardware dust and scratch removal feature. The scanner has an infra-red detector which recognises dust and scratches, i.e. irregularities on the surface of the slide. A software compensation is then applied when the actual scan is performed. - Page 16 I have a large collection of pictures of buses, trams and trains, particularly of London buses, which are predominately red. Initially, I found that the red was being scanned as a bit orange. Reflecta suggested trying ROC and it has helped significantly. Without ROC With ROC 50 A bus is a solid block of colour, so the effects of colour variations are more noticeable.
-
Page 17: Monitor Calibration
6.1.3 Monitor Calibration Various sources, including JS, recommend monitor calibration before scanning, and report that the most usual reason for “unsatisfactory” scans is that the monitor on which they are being viewed is not correctly calibrated – the same pictures can appear greatly improved, just by viewing on a different monitor. -
Page 18: Preparing To Scan
6.2 Preparing To Scan 6.2.1 Load Magazine Slides are loaded upside down into the magazine in the same way as they are loaded for projection. Magazines are numbered to show the order in which slides are loaded. The slide changing arm on the scanner has an orange slider. When using Universal magazines (regardless of the type of slides), the orange slider must be at the end of the slide changing arm. -
Page 19: Reload Magazine And Set Frame Position
6.2.2 Reload Magazine and Set Frame Position If scanning a magazine from Slide 1, directly after turning the scanner on and starting Cyberview, proceed as described in section 6.3 (for Pre-scanning), optionally followed by section 6.4 (for Image Adjustment), or go directly to section 6.5 (for Scanning). •... -
Page 20: Pre-Scan Thumbnail Panel
Cyberview Preview Window With Pre-scan Pre-scans can be used to check: • The colouring is correct. • The hue, saturation, brightness and contrast are correct. • The scanner has correctly recognised the orientation (portrait or landscape). If everything is satisfactory, you can proceed to scan – section 6.5, otherwise you can apply Image Adjustments –... -
Page 21: Manipulating The Pre-Scan
Since I did my first pre-scan, the Thumbnail Panel is displayed every time Cyberview is started. Although it has a Close button, this seems to be permanently disabled. The Thumbnail Panel can be dragged anywhere on the desktop and need not obscure the main Preview window. 6.3.4 Manipulating the Pre-scan The following functions for manipulating the selected pre-scan are available from the Preview... -
Page 22: Zoom In And Zoom Out
• Although the width and height are shown in the user defined measurement units (section 5.2.4), the Left and Top start position of the Selection Area are shown in printer’s points (1/300 inch). • The Size value is always very large and is presumably the RAW image file size. Because I prefer to use the Image Editor Crop function rather than manipulate the Selection Area in Cyberview, I shall just summarise a few features: •... -
Page 23: Using Gem And Roc With Pre-Scans
Note: ICE is either On or Off, and the chosen setting is applied to all scans in the batch. 6.3.6 Using GEM and ROC With Pre-scans There are “scanner” values of GEM and ROC which will be applied to all scanned slides. These values are defined by Scan Menu >... -
Page 24: Image Adjustment
6.4 Image Adjustment JS says: “The Image Adjustments are another powerful tool in Cyberview, which with experimentation, can deliver results which are just as good as those obtained with Silverfast”. He does then confess that this is a slightly sarcastic sideways swipe at Silverfast, and it cannot be disputed that Silverfast offers many more options. -
Page 25: Variations
6.4.2 Variations • A set of 9 pre-defined variations is presented. Click any one to see the effect immediately. • Click the Revert button to cancel. • A drop-down list offers the option of adjusting the Highlight Midtone or Shadow. •... -
Page 26: Curves And Levels
In the example below, the following adjustments have been applied: • Brightness +20 • Contrast • Saturation +20 (These values are not chosen to produce the best picture, but to produce a difference that can be seen when viewing this document on screen or as a printed copy). Revert 6.4.4 Curves and Levels... - Page 27 Auto Gamma Revert Cyberview Page 27 of 33 Dec 2008...
-
Page 28: Scanning Slides To Files
6.5 Scanning Slides to Files Slides can be scanned whether a pre-scan has been performed or not. • Select Scan Menu > Scan or click the Scan button on the Toolbar. • Select one of the options: • Scan Current Frame to File •... -
Page 29: Scanning From Image Editor
• Define file type – JPG or TIF (also known as JPEG and TIFF respectively) Most amateur photographers will choose JPG. The differences between JPG and TIF can be researched elsewhere, but except for professionals, the differences in quality are minimal, but a TIF file is 24 times bigger than a JPG file, i.e. -
Page 30: Scanning To Image Editor
• Define the required file name (see section 6.5) and click Scan • To scan multiple slides, press and hold the Scan button. The procedure is the same as described for Multi-Scan to File in section 6.5. 6.7.2 Scanning to Image Editor •... -
Page 31: Other Features
7 Other Features 7.1 Window Menu 7.1.1 Exposure Setting Window Menu > Exposure Setting I have no idea what this is for. For me, it is permanently disabled. Explanations gratefully received. 7.1.2 Output Preview Window Menu > Exposure Setting This function does not appear to very useful. In the example shown in the pictures above, it seems to say that if you scan a slide which is 1.383 in. -
Page 32: Help Menu
The rightmost image shows that if you print a picture 1.383 in. wide by 0.9 in. high, on an A4 sheet of paper (8.27 in. x 11.69 in.) then it will be printed at the size of a large postage stamp. Does this function serve any useful purpose? 7.2 Help Menu 7.2.1... -
Page 33: Status Line
7.3 Status Line 7.3.1 Lower Left When a pre-scan is visible, and the cursor appears as a four-headed cross, the cursor X and Y coordinates are shown in the defined units of measurement (section 5.2.4), together with the Red, Green, Blue values (0 – 255) of the pixel at that position. 7.3.2 Lower Right •...
Need help?
Do you have a question about the DigitDia 5000 and is the answer not in the manual?
Questions and answers