Table of Contents
Advertisement
Quick Links
Advertisement
Chapters
Table of Contents

Related Manuals for Fiat SEDICI


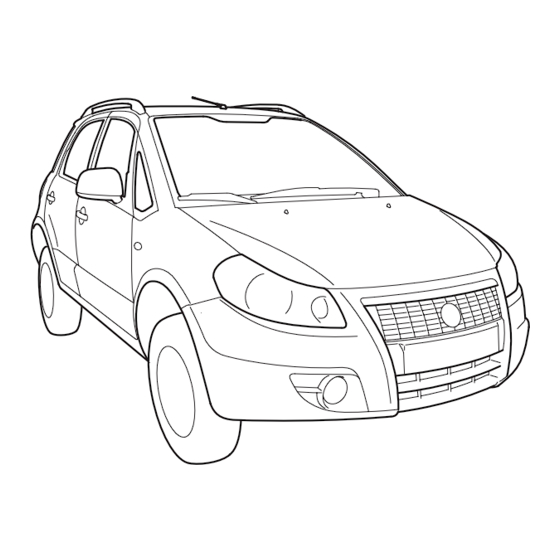
Summary of Contents for Fiat SEDICI
- Page 2 Fiat SEDICI technological features. What’s more every single component of the Fiat SEDICI is fully recyclable. At the end of your vehicle’s useful lifespan any Fiat Dealership will be pleased to make arrangements for your vehicle to be recycled and nature benefits in two ways: there’s no pol- lution from waste disposal and the demand for raw materials is reduced.
- Page 3 FIAT ORIGINAL SPARE PARTS AND FIAT RE-CONDITIONED SPARE PARTS FIAT ORIGINAL SPARE PARTS By choosing Fiat original spare parts (re- FIAT RE-CONDITIONED conditioned and non re-conditioned) you SPARE PARTS These spare parts ensure the reliability can rely on a rapid and efficient service...
- Page 4 SERVICE STATION GUIDE Engine oil dipstick (Yellow) Windshield washer fluid (See Section 8) (See Section 8) Tire pressure (RHD) (See tire information label on driver’s door lock pillar) Engine hood (See Section 4) Tire changing tools Engine oil and filter (See Section 4) (RHD) (See Section 8)
- Page 5 BATTERY LABEL SYMBOL MEANINGS No smoking, no naked flames, Keep away from children Note operating instructions no sparks Shield eyes Explosive gas Battery acid 79J001...
- Page 6 WARNING, IMPORTANT and NOTE manual and your vehicle. Fiat reserves the erwise transferred to a new owner or op- have special meanings. These special right to make production changes at any erator.
- Page 7 In addi- Consult your Fiat Dealership or qualified tion, damage or performance prob- service technician for advice on installing lems resulting from modification may such mobile communication equipment.
- Page 8 BEFORE DRIVING STEERING COLUMN CONTROLS INSTRUMENT PANEL OTHER CONTROLS AND EQUIPMENT OPERATING YOUR VEHICLE DRIVING TIPS VEHICLE LOADING AND TOWING INSPECTION AND MAINTENANCE EMERGENCY SERVICE BODY WORK CARE GENERAL INFORMATION TECHNICAL SPECIFICATIONS SUPPLEMENT INDEX...
- Page 9 Page left blank voluntarily.
-
Page 10: Table Of Contents
FUEL RECOMMENDATION ..........KEYS ..................DOOR LOCKS ..............WINDOWS ................MIRRORS ................SEAT ADJUSTMENT ............ADJUSTABLE HEAD RESTRAINTS (if equipped) ..SEAT BELTS AND CHILD RESTRAINT SYSTEMS ..SUPPLEMENTAL RESTRAINT SYSTEM (air bags) (if equipped) ............60G404... -
Page 11: Fuel Recommendation
DO NOT USE fuels containing more than 5% methanol under any circumstances. Fuel system damage or vehicle performance problems resulting from the use of such fuels are not the re- sponsibility of Fiat and may not be covered under the New Vehicle Warranty. -
Page 12: Keys
“ON” tomatic system, initial vent blowback oc- position. If you need to make spare keys, curs. see your Fiat Dealership. The vehicle must be programmed with the correct identi- fication code for the spare keys. A key WARNING... -
Page 13: Door Locks
To lock a door from inside the vehicle, essential requirements and other provi- bilizer system. Ask your Fiat dealer to in- turn the lock knob forward. Turn the lock sions of the Directive 1999/5/EC. - Page 14 UNLOCK LOCK LOCK Rear Rear UNLOCK LOCK UNLOCK Front Front 60B008 54G294 79J022 CENTRAL DOOR LOCKING You can also lock or unlock all doors by LOCK depressing the front or rear of the switch, SYSTEM (if equipped) UNLOCK respectively. You can lock and unlock all doors (in- NOTE cluding the rear door) simultaneously by using the key in the driver’s door lock.
- Page 15 DEAD LOCK SYSTEM WARNING 2 times (if equipped) Do not activate the dead This system is designed to help prevent lock system if there are oc- tamper-unlocking of the door locks. cupants in the vehicle. They will be Rear locked in the vehicle and cannot un- You can activate this system by turning the lock the doors from inside.
- Page 16 ❒ If you lose your remote controller, see To unlock only the driver’s door, insert to “Keyless Entry System” in the “BE- your Fiat Dealership as soon as possi- the key in that door lock and turn the top FORE DRIVING” section.
- Page 17 The turn signal lights will flash once when the doors are locked and then the turn signal lights will flash once again when the doors are locked with the dead lock sys- tem. 62J004 To stow the ignition key in the remote WARNING controller, push the key in the remote controller until the click is heard.
- Page 18 ❒ If a spare remote controller is in the ve- When the door (s) is (are) unlocked: hicle, the request switches may not op- 80 cm ❒ the turn signal lights will flash twice, and erate normally. ❒ the interior light will turn on for about ❒...
- Page 19 If the remote controller is left in the ve- hicle and you lock the door in the follow- ing manner, the driver’s door or the front passenger’s door will be automatically un- locked. ❒ You open the driver’s door and lock the door by turning the lock knob for- ward or pushing the power door lock- ing switch, the driver’s door will be au-...
- Page 20 Central door locking system with The turn signal lights will flash once when the doors are locked and then the turn the dead lock system (if equipped) signal lights will flash once again when the If you want to prevent tamper- unlocking doors are locked with the dead lock sys- of the door locks, use this method.
- Page 21 ❒ If you lose your transmitter/ remote transmitter of the keyless entry ❒ Do not expose it to impacts, moisture controller, ask your Fiat Dealership as ❒ Remove the screw (1), and open the or high temperature such as on the soon as possible for a replacement and transmitter cover.
- Page 22 81A186 79J112 79J113 ❒ Put the edge of a coin or a flat blade To replace the battery for the WARNING screw driver in the slot of the trans- remote controller of the keyless Swallowing a lithium battery mitter (2) and pry it open. start system may cause serious internal ❒...
- Page 23 When the lock cial containers provided, or take them to lever is in position (1), the child-proof lock a Fiat Dealership, which will deal with their is locked, and when in position (2), the disposal.
- Page 24 Refer to “Folding Rear Seats” sec- If the rear door can not be unlatched, have rear door unlatch switch (1) and lift the tion for details on how to fold the rear the vehicle inspected by your Fiat Deal- rear door. seat forward. ership.
-
Page 25: Windows
WINDOWS MANUAL WINDOW CONTROL (if equipped) Raise or lower the door windows by turn- ing the handle located on the door panel. Driver’s side (type A) 60G010 79J027 ELECTRIC WINDOW CONTROLS (if equipped) The electric windows can only be oper- ated when the ignition switch is in the “ON”... - Page 26 CLOSE OPEN Driver’s side (type B) 79J028 79J029 81A009 Driver’s side Passenger’s door To open a window, push the top part of the switch and to close the window lift up The driver’s door has a switch (1) to op- The passenger’s door has a switch (3) to the top part of the switch.
- Page 27 Lock switch (type A) Lock switch (type B) 79J030 79J031 54G011 The driver’s door also has a lock switch NOTE The rear side door windows are WARNING for the passenger’s window (s). When you not designed to open fully. They can be You should always lock the push in the lock switch, the passenger’s opened about 2/3 of the way down.
-
Page 28: Mirrors
MIRRORS INSIDE REARVIEW MIRROR You can adjust the inside rearview mirror by hand so as to see the rear of your ve- hicle in the mirror. To adjust the mirror, 79J032 set the selector tab (1) to the day posi- tion, then move the mirror up, down or sideways by hand to obtain the best view. -
Page 29: Seat Adjustment
SEAT ADJUSTMENT WARNING To avoid excessive seat belt slack, which reduces the ef- WARNING fectiveness of the seat belts as a safe- ty device, make sure that the seats Only make adjustments when are adjusted before the seat belts are the vehicle is stationary. - Page 30 79J114 79J055 79J056 ADJUSTING SEAT POSITION If the driver’s seat is equipped with a seat ADJUSTING SEATBACKS height adjuster lever on the outboard side The adjustment lever for each front seat of the seat, raise or lower the seat by is located under the front of the seat.
-
Page 31: Adjustable Head Restraints (If Equipped)
ADJUSTABLE HEAD RESTRAINTS (if equipped) Head restraints are designed to help re- duce the risk of neck injuries in the case of an accident. Adjust the head restraint to the position which places the center of the head restraint closest to the top of your ears. -
Page 32: Seat Belts And Child Restraint Systems
SEAT BELTS AND CHILD RESTRAINT SYSTEMS WARNING Wear Your Seat Belts at All Times. WARNING 63J135 65D231 An air bag supplements, or Rear adds to, the frontal crash To raise the rear head restraint, pull up- protection offered by seat belts. The ward on the restraint until it clicks. - Page 33 WARNING WARNING Seat belts should always be Never use the same seat belt adjusted as follows: on more than one occupant and never attach a seat belt over an – The lap portion of the belt should as low as possible infant or child being held on an oc- be worn low across the pelvis, not across the hips...
- Page 34 WARNING Under no circumstances should the components of the seat belts and pretensioners be 60A040 tampered with or removed. Any op- eration should be carried out by qual- ified and authorised personnel. Al- ways contact a Fiat Dealership.
- Page 35 Safety reminder To reduce the risk of sliding under the belt during a collision, position the lap portion of the belt across your lap as low on your hips as possible and adjust it to a snug fit by pulling the shoulder portion of the belt upward through the latch plate.
- Page 36 3) After step 2) has finished, the reminder light will remain on until the driver’s seat belt is buckled. If the driver has buckled his or her seat belt and later unbuckles the seat belt, the reminder system will be activated from step 1) or step 2) according to the vehi- cle’s speed.
- Page 37 WARNING Be sure that the shoulder belt is positioned on the cen- ter of the outside shoulder. The belt should be away from your face and neck, but not falling off your shoul- der. Misadjustment of the belt could reduce the effectiveness of the safe- ty belt in a crash.
- Page 38 CHILD RESTRAINT SYSTEMS the front air bags were activated). Periodically inspect the seat belts to make Fiat highly recommends that you use a sure they work properly and are not dam- child restraint system to restrain infants aged. Check the webbing, buckles, latch and small children.
- Page 39 WARNING When purchasing a child restraint and in- If your vehicle is equipped stall it to your FIAT, refer to the infor- with a front passenger air mation about suitability for child restraints bag, do not install a rear-facing child shown in “Child Restraint System for EU...
- Page 40 WARNING If your vehicle is equipped with side air bags, do not in- stall a child restraint in the front pas- senger’s seat. If the passenger’s side air bag inflates, a child in a child re- straint could be severely injured. 65D362 65D363 WARNING...
-
Page 41: Child Restraint System For Eu Countries
CHILD RESTRAINT SYSTEM FOR EU COUNTRIES CHILD RESTRAINT The suitability of each passenger’s seat position for carriage of children and fitting of child restraint system is shown in the table be- low. Whenever you carry children under 12 years of age or smaller than 150 cm, properly use the child restraints which conform to ECE-R Norm 44, the standard for child restraints, referring to the table. - Page 42 ISOFIX child restraint system(s) recommended for each position. Key of letters to be inserted in the above table: IUF = suitable for ISOFIX forward child restraint systems of universal category approved for use in this mass group Fiat recommends RÖMER DUO plus, available at Lineaccessori Fiat..
- Page 43 79J224 79J058 63J020 INSTALLATION WITH INSTALLATION WITH ISOFIX WARNING LAP-SHOULDER SEAT BELTS TYPE ANCHORAGES Install the ISOFIX type child (available to the left position of the (available to both left and right restraint system according to rear seat) position of the rear seat with the the instructions provided by the child ISOFIX type of the group 1;...
- Page 44 78F114 54G183 54G184 ❒ Place the child restraint in the rear seat, ❒ Use your hands to carefully align the Here is a general instruction: inserting the connecting bars to the an- connecting bar tips with the anchor- ❒ Pull upward on the rear head restraint chorages between the seat cushion and ages.
- Page 45 ❒ Hook the top strap to the anchor bracket and tighten the top strap ac- cording to the instructions provided by the child restraint system manufactur- er. Be sure to attach the top strap to the corresponding anchor located di- rectly behind the child restraint.
- Page 46 This section of the owner’s ❒ When routing the top strap, be sure to sioners. When the air bags are triggered, manual describes your Fiat’s the pretensioners are also triggered. For pass the top strap as shown in the il-...
- Page 47 These conditions are not harmful and do with yellow tape or yellow tubing, and the not indicate a fire in the vehicle. viced by an authorized Fiat Dealership as couplers are yellow. When scrapping your soon as possible. Fiat, ask your Fiat Dealership, body repair...
-
Page 48: Supplemental Restraint System (Air Bags) (If Equipped)
(if equipped) WARNING This section of the owner’s manual describes the pro- tection provided by your Fiat’s SUP- PLEMENTAL RESTRAINT SYSTEM (air bags). Please read and follow ALL these instructions carefully to mini- mize your risk of severe injury or death in the event of a collision. - Page 49 The driver’s front air bag is located behind the air bag system inspected by an autho- the center pad of the steering wheel and rized Fiat Dealership as soon as possible. the front passenger’s front air bag is lo- cated behind the passenger’s side of the dashboard.
- Page 50 Front air bags will not inflate Front air bags will probably not inflate 65D236A 65D237A 65D361 Front air bags are designed to inflate on- Therefore, an air bag is NOT a substitute WARNING ly in severe frontal collisions. They are not for seat belts.
- Page 51 WARNING AVERTISSEMENT ADVERTENCIA WARNUNG ATTENZIONE WAARSCHUWING VIGYÁZAT 63J115 77J052 SIDE AIR BAGS AND SIDE CURTAIN AIR BAGS (if equipped) Side air bags (if equipped) are located in the part of the front seatbacks closest to the doors. The words “SRS AIRBAG” are DO NOT place rear-facing child seat molded into the side air bag cover to iden- on this seat with airbag.
- Page 52 Side collision range Side air bags and side curtain air bags will not inflate 79J116 54G026 54G027 WARNING WARNING WARNING If your vehicle is equipped Never rest head, arms and Never lean head, arms and with a side air bag, do not in- elbows on the door, on the elbows out of window.
- Page 53 Therefore, an air bag is NOT a substitute Side air bags and side curtain air bags will probably not inflate for seat belts. To maximize your protec- tion, ALWAYS WEAR YOUR SEAT BELTS. Be aware that no system can pre- vent all possible injuries that may occur in an accident.
- Page 54 Air bags must inflate quickly and forceful- WARNING ly in order to reduce the chance of seri- The driver should not lean ous or fatal injuries. However, an un- over the steering wheel. The avoidable consequence of the quick infla- front passenger should not rest his or tion is that the air bag may irritate bare her body against the dashboard, or...
- Page 55 Please remind anyone who couplers are yellow for easy identification. services your Fiat that it has air bags. Scrapping a vehicle that has an uninflated air bag can be hazardous. Ask your Fiat Dealership, body repair shop or scrap yard for help with disposal.
- Page 56 Fiat Dealership. it is therefore normal that only the chest or with a pipe, pencil, etc. be- pretensioners are triggered.
- Page 57 WARNING Do not hook rigid objects to the coat hooks and to the support handles.
- Page 58 IGNITION SWITCH ............LIGHTING/ TURN SIGNAL CONTROL LEVER ..WINDSHIELD WIPER AND WASHER LEVER .... REAR WINDOW WIPER/ WASHER SWITCH (if equipped) ................TILT STEERING LOCK LEVER (if equipped) ....REMOTE AUDIO CONTROLS (if equipped) ....HORN ..................60G405...
-
Page 59: Ignition Switch
IGNITION SWITCH VEHICLE WITHOUT KEYLESS START SYSTEM The ignition switch has the following four positions: LOCK This is the normal parking position. It is the only position in which the key can be 65D367 60B041A removed. Turn to “LOCK” WARNING It locks the ignition, and prevents normal To avoid possible injury, do use of the steering wheel after the key is... - Page 60 Never remove the ignition pered with (e.g.: attempted key while the vehicle is mov- theft), have it checked over by a Fiat ing. The steering wheel would auto- Dealership as soon as possible. matically lock as soon as you try to turn it.
- Page 61 ❒ If the keyless start system red indicator light illuminates, the remote controller may not be in the vehicle or the battery of the remote controller may be unre- liable. The red indicator light will turn off within several seconds after the re- mote controller is returned in the ve- hicle except in the rear luggage area.
- Page 62 IMPORTANT The remote controller is LOCK (1) ACC (2) a sensitive electronic instrument. To avoid This is the normal parking position. It is Accessories such as the radio can oper- damaging the remote controller: the only position in which the key can be ate, but the engine is off.
- Page 63 Ignition key reminder tempts, check the fuel and ignition sys- tems or consult your Fiat Dealership. (When using the ignition key) ❒ Do not leave the ignition switch in the A buzzer sounds intermittently to remind 81A279S “ON”...
-
Page 64: Lighting/Turn Signal Control Lever
LIGHTING/TURN SIGNAL CONTROL LEVER LIGHTING OPERATION To turn the lights on or off, twist the knob on the end of the lever. There are three positions: OFF (1) all lights are off. 78K068 78K069 3 (2) Front parking lights, tail-lights, li- Lights “On”... - Page 65 78K070 78K071 78K072 REAR FOG LIGHT SWITCH TURN SIGNAL OPERATION Lane change signal To turn the rear fog light on, twist the With the ignition switch in the “ON” po- Some times, such as when changing lanes, knob as shown in the illustration with the sition, move the lever up or down to ac- the steering wheel is not turned far head light switch in the third position.
-
Page 66: Windshield Wiper And Washer Lever
(also after restarting the vehicle by windshield washer reservoir. It can se- wiper operation to the desired interval. the ignition key) contact Fiat Dealership. verely impair visibility when sprayed on the windshield, and can also dam- age your vehicle’s paint. -
Page 67: Rear Window Wiper/Washer Switch (If Equipped)
In these conditions, the wiper is submitted to excessive effort that results in motor protection cutting in and wiper operation inhibition for few seconds as a consequence. If operation is not re- stored contact Fiat Dealership. -
Page 68: Tilt Steering Lock Lever (If Equipped)
TILT STEERING LOCK WARNING LEVER (if equipped) It is absolutely forbidden to carry out whatever after- market operation involving steering The lock lever is located under the steer- LOCK UNLOCK system or steering column modifica- ing column. To adjust the steering wheel tions (e.g.: installation of anti-theft height: device) that could badly affect per-... -
Page 69: Remote Audio Controls (If Equipped)
REMOTE AUDIO HORN CONTROLS Press the horn button of the steering (if equipped) wheel to sound the horn. The horn will sound with the ignition switch in any po- sition. You can control basic functions of the au- dio system with the switches on the steer- ing wheel. - Page 70 HAZARD WARNING SWITCH ........“ESP OFF” SWITCH (if equipped) ........2WD/ 4WD SWITCH (if equipped) ........ HEADLIGHT LEVELING SWITCH (if equipped) ..HEATED REAR WINDOW AND HEATED OUTSIDE REARVIEW MIRRORS (if equipped) SWITCH ....ILLUMINATION CANCEL SWITCH (if equipped) ..FRONT FOG LIGHT SWITCH (if equipped) ....
-
Page 71: Instrument Panel
INSTRUMENT PANEL Right-hand drive 1. Instrument cluster 2. Ignition switch 3. Lighting switch/ Turn signal and dim- mer switch 4. Windshield wiper and washer switch/ Rear window wiper and washer switch (if equipped) 5. Hazard warning switch 6. Other switches (if equipped) 7. -
Page 72: Instrument Cluster
INSTRUMENT CLUSTER 1. Speedometer 2. Odometer/Trip meter 3. Odometer/Trip meter selector knob 4. Tachometer 5. Fuel gauge 6. Temperature gauge 7. Warning and indicator lights 79J179... -
Page 73: Warning And Indicator Lights
ABS warning light when the rear brake ditions occur, you should im- force control function (Proportioning mediately ask your Fiat Dealership to valve function) of the ABS system fails. inspect the brake system. If the brake system warning light comes... - Page 74 (other inspected by your Fiat Dealership. than ABS). You should have the system in- spected by an authorized FIAT dealer. If the ABS becomes inoperative, the brake system will function as an ordinary brake NOTE When you disconnect and re- con- system that does not have this ABS sys- ®...
- Page 75 If there is enough oil, the lubrication sys- (if equipped) so you can check that the light is working. tem should be inspected by your Fiat Deal- (Electronic Stability Program) ership before you drive the vehicle again. When the “ESP OFF” switch is pushed to IMPORTANT ®...
- Page 76 10 seconds, or comes on while driving, the air bag system or the seat belt pretensioner system (if equipped) may not work properly. Have both sys- tems inspected by an authorized Fiat CHARGING LIGHT 60G049 Dealership. When the driver doesn’t buckle his or her seat belt, this light will come on.
- Page 77 (IMMOBILIZER) (if equipped) (for Diesel Engine Model) problem with the emission control sys- tem. Bring the vehicle to your Fiat Deal- ership to have the problem corrected. IMPORTANT Continuing to drive the ve- hicle when the malfunction indicator light is on can cause permanent damage to the vehicle’s emission control system, and can...
- Page 78 If the warning this warning light will go out. light turns on contact Fiat Dealership as For details, refer to “Diesel Particulate Fil- soon as possible to have the system re- ter”...
- Page 79 If this light comes on in red, you can properly. Have the system inspected by not turn the ignition switch without us- your Fiat Dealership. ing an ignition key. For details, refer to “Ig- nition Switch” in the “STEERING COL- NOTE If the power steering system does UMN CONTROLS”...
- Page 80 If the light and the “4WD LOCK” indica- tor light stay on or come on simultane- ously when driving, there may be some- thing wrong with the 4WD system. Have the system inspected by an authorized Fiat Dealership.
-
Page 81: (If Equipped)
4WD system. Have the system inspected by an authorized 4WD Switch” in the “OPERATING YOUR VEHICLE” section. Fiat Dealership. NOTE NOTE If you restart the engine, the light will stop blinking temporarily. ❒ When the vehicle speed is increased, NOTE When the vehicle speed is in- the “4WD LOCK”... -
Page 82: Speedometer/Odometer/Trip Meter/ Meter Illumination Control
SPEEDOMETER/ODOMETER/TRIP METER/ METER ILLUMINATION CONTROL 1. Speedometer Odometer/Trip meter (Indication of illumination intensity) 2. Odometer/Trip meter (Indication of illumination intensity) When the ignition switch is turned to “ON”, the display shows the odometer or 3. Indication selector and meter illumi- trip meter. - Page 83 About 2 seconds 65D603 65D532 65D481 When the ignition switch is turned to When the ignition switch is turned to To reset the trip meter to zero, hold in “ON” with the lighting switch is in the “ON” and the lighting switch is turned to the selector knob (3) for about 2 seconds.
-
Page 84: Tachometer
TACHOMETER The tachometer indicates engine speed in (Brightest) revolutions per minute. Continue to press WARNING Never drive with the engine speed indicator in the red (Dimmest) zone or severe engine damage can re- 81A263 79J137 sult. Meter illumination control When the display shows the indication of illumination intensity (D), you can dim or brighten the meter illumination. -
Page 85: Fuel Gauge
FUEL GAUGE TEMPERATURE GAUGE/ OVERHEAT INDICATOR When the ignition switch is in the “ON” LIGHT (for Diesel position, this gauge gives an approximate Engine Model) indication of the amount of fuel in the fu- el tank. “F” stands for full and “E” stands for empty. -
Page 86: Hazard Warning Switch
“ESP OFF” SWITCH HAZARD WARNING (if equipped) SWITCH ® Push in the hazard warning switch to ac- is a registered trademark of Daim- tivate the hazard warning lights. All four lerChrysler AG. turn signal lights and both turn signal in- The “ESP OFF”... -
Page 87: Esp Off" Switch (If Equipped)
2WD/4WD SWITCH ® To turn on all of the ESP systems, push the “ESP OFF” switch again. The “ESP (if equipped) OFF” indicator light will go out. ® For details of the ESP systems, refer to The 2WD/4WD switch is located on the ®... -
Page 88: Headlight Leveling Switch (If Equipped)
HEADLIGHT LEVELING Vehicle Switch Load Condition Position SWITCH (if equipped) Driver only Level the headlight beam according to the Driver + 1 passenger load condition of your vehicle by turning (in front seat) this switch. The chart below shows the ap- propriate switch position for different ve- Driver + 4 passengers, hicle-load conditions. -
Page 89: Heated Rear Window And Heated Outside Rearview Mirrors (If Equipped) Switch
HEATED REAR Type 1 WINDOW AND HEATED OUTSIDE REARVIEW MIRRORS (if equipped) SWITCH When the rear window is frosted it is suf- ficient, with the engine started, to press the button (1) to defrost it. 79J043 79J044 If the driver’s outside rearview mirror has Type 2 the mark (2), it is also equipped with the heated outside rearview mirrors. -
Page 90: Illumination Cancel Switch (If Equipped)
FRONT FOG LIGHT ILLUMINATION SWITCH (if equipped) CANCEL SWITCH (if equipped) The front fog light comes on when the fog light switch is pushed in with the head light Operating the illumination cancel switch switch turned to the second and/ or third changes (1) the brightness of the audio dis- position. -
Page 91: Cigarette Lighter And Ashtray (If Equipped)
CIGARETTE LIGHTER Front panel ashtray AND ASHTRAY (if equipped) CIGARETTE LIGHTER To use the cigarette lighter, push it all the way into the receptacle and release it. It will automatically heat up and will pop out to its normal position when it is ready for use. -
Page 92: Glove Box
INFORMATION GLOVE BOX DISPLAY (Type I) To open the glove box, pull the latch (if equipped) lever. To close it, push the lid until it latches securely. 1. Clock 2. Thermometer WARNING 3. Instantaneous fuel consumption Never drive with the glove box lid open. - Page 93 Thermometer The thermometer shows the outside tem- perature when the ignition switch is in the “ON” position. If the outside temperature nears freezing, the mark (c) will come on. NOTE The thermometer will not indicate the actual outside temperature when dri- ving at low speed, or when stopped.
- Page 94 You can switch the unit indication of in- stantaneous fuel consumption and also you can display nothing. To switch the in- dication, follow the instruction below. ❒ Push the “DISP” knob (d) for more than 2 seconds. The unit display of in- stantaneous fuel consumption will blink.
-
Page 95: Information Display (Type Ii) (If Equipped)
INFORMATION CLOCK (1) DISPLAY (Type II) The clock is shown when the ignition switch is in the “ACC” or “ON” position. (if equipped) To set the clock, follow the instructions below. 1. Clock ❒ To set the hour display, push the “H” 2. - Page 96 THERMOMETER (2) FUEL CONSUMPTION (3) The thermometer shows the outside tem- This display can be changed to show in- perature when the ignition switch is in the stantaneous fuel consumption or average “ON” position. fuel consumption by changing the display. Also, the display of fuel consumption can If the outside temperature nears freezing, be turned off if you desire.
- Page 97 NOTE ❒ The value of fuel consumption shown in the display is affected by such as fol- lowing conditions; – road condition – surrounding traffic condition – driving condition ❒ The information display will be changed Type B (For Diesel Engine Model) to the state of initialization when you 63J148 62J143...
- Page 98 ❒ Hold in the “DISP” knob (c) for more NOTE than 2 seconds. The unit display of the ❒ The value of fuel consumption shown instantaneous fuel consumption will in the display is affected by such as fol- blink. When the display of instanta- lowing conditions;...
-
Page 99: Clock (If Equipped)
CLOCK (if equipped) THEFT DETERRENT LIGHT (c) This light will blink with the ignition switch The clock is shown when the ignition in the “OFF” or “ACC” position. The (a) (b) switch is in the “ACC” or “ON” position. blinking light is intended to deter theft by To set the clock, follow the instructions leading others to believe that the vehicle below. -
Page 100: Heating And Air Conditioning System
HEATING AND AIR CONDITIONING SYSTEM There are two types of heating and air conditioning systems as follows: ❒ manual Heating and Air Conditioning System ❒ automatic Heating and Air Condition- ing System (Climate Control) AIR OUTLET 1. Windshield defroster outlet 2. -
Page 101: Manual Heating And Air Conditioning System
MANUAL HEATING AND AIR CONDITIONING SYSTEM DESCRIPTION OF CONTROLS Temperature selector (1) This is used to select the temperature by turning the selector. 79J103 Blower speed selector (2) This is used to turn on the blower and to select blower speed by turning the selec- tor. - Page 102 79J065 79J067 79J069 Ventilation (a) Heat (c) Defrost (e) Temperature-controlled air comes out of Temperature-controlled air comes out of Temperature-controlled air comes out of the center and side air outlets. the floor outlets and the side outlets, al- the windshield defroster outlets, the side so comes out of the windshield defroster defroster outlets and the side outlets.
- Page 103 Normal heating (using outside air) Recirculated Air (g) During operation of the air conditioner, you may notice slight changes in engine When this mode is selected, the indicator Select “HEAT” and “FRESH AIR”, the speed. These changes are normal, the sys- light will come on, outside air is shut out temperature selector to the desired tem- tem is designed so that the compressor...
- Page 104 Head cooled/ Feet warmed heating Quick cooling (using recirculated air) Select “BI-LEVEL” and “FRESH AIR”, the temperature selector to the desired tem- The control settings are the same as for perature position, and the blower speed se- normal cooling except you select “RE- lector to the desired blower speed posi- CIRCULATED AIR”...
-
Page 105: Automatic Heating And Air Conditioning System
“Maintenance Schedule” in the “IN- SPECTION AND MAINTENANCE” sec- Also, this is used to turn on and off the tion. Have this job done by your Fiat Deal- air conditioning system by pushing the ership as the lower glove box must be switch. - Page 106 65D493 FRESH AIR When this mode is selected, the indicator light (a) will come on and outside air is 79J094 79J096 used. Blower speed selector/ Air intake RECIRCULATED AIR selector (2) When this mode is selected, the indicator This is used to turn on the blower and to light (b) will come on, outside air is shut select blower speed.
- Page 107 79J066 79J068 Bi-level (d) Heat & defrost (f) Temperature-controlled air comes out of Temperature-controlled air comes out of the floor outlets and cooler air comes out the floor outlets, the windshield defroster 79J097 of the center and side outlets. When the outlets, the side defroster outlets and the temperature selector (1) is in the fully side outlets.
- Page 108 SYSTEM OPERATING INSTRUCTIONS Automatic operation You can let the climate control system work automatically. To set the system in 79J069 fullyautomatic operation, follow the pro- cedure below. Defrost (g) ❒ Set the desired temperature by turning Temperature- controlled air comes out of the temperature selector (1).
- Page 109 ❒ If your vehicle has been left in the sun with the windows closed, it will cool faster if you open the windows briefly. ❒ Even under the automatic operation, you can set some of the blower speed selector/ air intake selector (2) and air flow selector (3) into manual mode.
-
Page 110: Audio Systems
Please bring the unit to an authorized IMPORTANT Using the wrong refriger- cold and the player is used soon after Fiat Dealership. ant may damage your air conditioning sys- switching on the heater, moisture may tem. Use R-134a only. Do not mix or re- form on the disc or the optical parts place the R-134a with other refrigerants. - Page 111 Proper way to hold the Removing the disc compact disc 52D274 CAUTIONS ON HANDLING This unit has been designed specifically for playback of compact discs bearing the 52D275 52D277 mark (A). To remove the compact disc from its stor- New discs may have some roughness No other discs can be played.
- Page 112 52D279 52D281 52D274 Do not use any solvents such as com- Do not expose compact discs to direct sun- LISTENING TO A CD mercially available cleaners, anti-static light or any heat source. ❒ CDs or CD-ROMs carrying no mark spray, or thinner to clean compact discs. NOTE (A) cannot be used.
- Page 113 IMPORTANT GENERAL ❒ Never insert your finger or hand into 1. Power on/ off knob – volume control the CD insertion slot. Never insert for- knob eign objects. 2. Mute button ❒ Never insert a CD with glue coming 3. Audio control button out from adhesive tape or a rental CD label or with a trace indicating that ad- 4.
- Page 114 BAS (Bass) / TRE (Treble) / BAL (Balance) / RADIO FAD (Fader) / AVC (Auto Volume Con- 4. Up button trol) (only MP3 version) 5. Down button Pressing the audio control button (3) again releases Audio Control. 6. FM/AM button Press the up button (4) or the down but- 7.
- Page 115 ❒ Stations can be preset for FM1, FM2, Manual Preset LW, MW1, and MW2 respectively. If any of the preset buttons (7) with num- ❒ Up to six stations can be preset. If sta- bers [1] to [6] is pressed for about 2 sec- onds or more, the station received cor- tions in good receiving condition are responding to the pressed button is pre-...
- Page 116 RDS (Radio Data System) TA (Traffic Announcement) 1. Power on/off knob – volume control The unit can search for stations emitting knob TP (traffic programmes), and tune in to such stations in preference to others. Sta- 4. Up button tions emitting TP are called TP stations. 5.
- Page 117 CD PLAYER TA On/off PTY Search Press the traffic announcement button Programs can be searched for by PTY. 4. Up button (10) to turn TA on. Press the traffic an- ❒ Press the program type button (11) to 5. Down button nouncement button (10) again to turn TA select PTY mode.
- Page 118 Fast Forward/ Fast Reverse REPEAT Play Play speed increases while the up button For repeat play (playing the present track (4) or down button (5) is kept depressed. repeatedly), press the repeat button (15). (4): Fast forward To release repeat play, press the repeat button (15) again.
- Page 119 Disc Up/Down CD CHANGER A CD changer is optional. Consult your The desired disc can be selected by press- Fiat Dealership for details. ing The disc up button (17) or the disc down button (18). 4. Up button (17) Next disc 5.
- Page 120 ❒ DISC SCAN Play Fast Forward/ Fast Reverse RANDOM Play ❒ RANDOM Play Play speed increases while the up button For disc scan play (playing about 10 sec- (4) or down button (5) is kept depressed. onds of the top of the first track on each For random play (playing the disc tracks disc), press the scan button (14) for about (4): Fast forward...
-
Page 121: Mp3/Wma Player (If Equipped)
MP3/WMA Player (if equipped) ❒ It is recommended to set the bit rate to “64 kbps or more” and “fixed”. 4. File up button ❒ Do not set the copy protect attribute on the WMA file to enable this unit to 5. - Page 122 ❒ The file extension “.mp3” or “.wma” Supported file systems File Up/ Down should be assigned to each file de- ISO 9660 Level 1/Level 2, Apple Extension The desired file can be selected by press- pending on the file format. to ISO 9660, Joliet, Romeo ing the file up button (4) or the file down ❒...
- Page 123 ❒ If you should forget your user ID, con- The “RPT” indicator remains lit during re- the same time; press the power on/ off sult your Fiat Dealership. peat play. knob (1) for about 1 second or more. The unit displays “SEC”.
- Page 124 ❒ Press the numbered buttons (19) with User ID Entry Erasing User ID number [1] to [4], and enter the user Once the ID is set up, this unit displays Your stored user ID can be erased. After ID. Each button corresponds to each “SEC”...
- Page 125 TROUBLESHOOTING If you suspect something is wrong, then please check and take steps as described below. If the described suggestions do not solve the problem, it is recommended to take the unit to your nearest dealer. Problem Possible cause Possible solution A mobile phone is used nearby A lot of noise If you are going to use a mobile phone, use it...
- Page 126 Fiat Dealership. ERROR 3 The player developed an error of an If CD is inserted in the unit, press the eject unidentified cause button (13) to remove the disc. If the disc cannot be ejected, consult your Fiat Dealership.
- Page 127 To scan the higher frequency radio sta- REMOTE AUDIO CONTROLS tion, push and hold the switch (5) (if equipped) To scan the lower frequency radio station, You can control basic functions of the au- push and hold the switch (6) dio system with the switches on the steer- ing wheel.
- Page 128 Mode Switch Switch operation Navigation Tuner CD player Push briefly increase the volume increase the volume increase the volume Push long increase the volume rapidly increase the volume rapidly increase the volume rapidly Push briefly decrease the volume decrease the volume decrease the volume Push long decrease the volume rapidly...
- Page 129 NOTES...
- Page 130 PARKING BRAKE LEVER ..........PEDAL ..................GEARSHIFT LEVER .............. FUEL FILLER CAP ..............FOLDING REAR SEATS ............. SUN VISOR ................INTERIOR LIGHT SWITCH ..........SPOT LIGHT (if equipped) ..........FRONT SEAT HEATER (if equipped) ......ASSIST GRIPS (if equipped) ..........ENGINE HOOD ..............
-
Page 131: Parking Brake Lever
When you return to your vehicle, the vehicle securely or does not ful- ly release, have your vehicle in- you must remember to first set the parking brake, then remove the spected immediately by an autho- wheel chocks. rized Fiat Dealership. -
Page 132: Pedal
Depressing the accelerator pedal in- braking. creases power output and speed. Brake Pedal (2) Your Fiat vehicle is equipped with either front and rear disc brakes or front disc brakes and rear drum brakes. Depress- ing the brake pedal applies both sets of brakes. -
Page 133: Gearshift Lever
GEARSHIFT LEVER FUEL FILLER CAP Your vehicle is equipped with a manual The fuel filler cap is located on the left rear transaxle. The gearshift lever is shown. For side of the vehicle. The fuel filler lid can be unlocked by pulling up the opener lever lo- details on how to use the transaxle, re- cated on the outboard side of the driver’s fer to “Using the Transaxle”... - Page 134 WARNING If you need to replace the fu- el cap, use a genuine Fiat cap or its equivalent. Use of an improper Open Close cap can result in a malfunction of the fuel system or emission control system. It may also result in fuel leakage in the event of an accident.
-
Page 135: Folding Rear Seats
FOLDING REAR SEATS The rear seats of your vehicle can be fold- ed forward to provide additional cargo space. To fold the rear seats forward: ❒ Hook the webbing of the outboard lap- shoulder belts in the belt hangers. IMPORTANT When you move a seat- back, make sure the belt webbing is 79J121 79J123... - Page 136 79J124 79J125 63J059 ❒ Unhook the strap (2) by pushing down WARNING WARNING the hook as shown in the illustration. When you unlatch the rear Luggage or other cargo ❒ Hook the strap (2) to the front seat seat cushion, be careful that should be stowed in the lug- head restraint as shown in the illustra- your face or hands are not injured...
- Page 137 79J126 79J129 63J130 ❒ Pull down the seat cushion until it locks To return the seat to the normal position, IMPORTANT When returning the rear follow the procedure below. into place. seat cushion to the normal position, make sure that there is nothing around the strik- ❒...
-
Page 138: Sun Visor
SUN VISOR The sun visors can be pulled down to block glare coming through the wind- shield, or they can be unhooked and turned to the side to block glare coming through the side window. IMPORTANT When unhooking and LOCK UNLOCK hooking a sun visor, be sure to handle it by the hard plastic parts or the sun visor... -
Page 139: Interior Light Switch
INTERIOR LIGHT SPOT LIGHT (if equipped) SWITCH This light switch has three positions which Push the switch to turn on the light and push it again to turn off the light. function as described below: 1. The light comes on and stays on re- gardless of whether the door is open or closed. -
Page 140: Front Seat Heater (If Equipped)
FRONT SEAT HEATER (if equipped) With the ignition switch in the “ON” po- sition, push in one or both of the seat heater switches to warm the correspond- ing seat(s). The indicator light below the switch will also come on. To turn off the seat heater, push in the switch again. -
Page 141: Assist Grips (If Equipped)
ASSIST GRIPS ENGINE HOOD (if equipped) To open the engine hood: ❒ Pull the hood release handle located on Assist grips are provided for passenger convenience. the outboard side of the driver’s side of the instrument panel. This will dis- IMPORTANT To avoid damaging the as- engage the engine hood lock halfway. - Page 142 79J078 ❒ Push the under- hood release lever sideways with your finger, as shown in the illustration. While pushing the lever, lift up the engine hood. 79J077 79J050 ❒ Continue to lift up the hood until it is high enough to support with the prop rod.
-
Page 143: Cup Holder And Storage Area
CUP HOLDER AND WARNING STORAGE AREA For safety reasons the bon- net must be closed properly (if equipped) to avoid its opening while the vehi- cle is travelling. Therefore, always The cup holders are provided in the cen- check it is properly closed and the ter console. -
Page 144: Frame Hooks
FRAME HOOKS Frame hooks are provided on the front (1), rear (2) and side (3) (if equipped) of the vehicle for use in emergency situa- tions. To tow your vehicle on the road or high- way, follow the instruction of “Towing” in “EMERGENCY SERVICE”... -
Page 145: Tire Changing Tool
TIRE CHANGING TOOL The jack, wheel brace, jack handle are stowed in the luggage compartment. To remove the spare tire, turn its bolt counterclockwise and remove it. To remove the jack, turn its shaft coun- terclockwise and pull the jack out of the storage bracket. -
Page 146: Front Seat Back Pocket (If Equipped)
LUGGAGE RESTRAINT FRONT SEAT BACK LOOPS (if equipped) POCKET (if equipped) This pocket is provided for holding light Four luggage restraint loops are provid- and soft things such as gloves, newspapers ed on the luggage compartment floor. An or magazines. optional rubber net can be hooked to these loops to help keep cargo from mov- ing around in the luggage compartment... -
Page 147: Luggage Compartment Cover (If Equipped)
LUGGAGE LUGGAGE COMPARTMENT LIGHT COMPARTMENT COVER (if equipped) When you open the rear door with the luggage compartment light switch in the Luggage or other cargo placed in the lug- “ON” position (1), the light comes on and gage compartment are hidden from view remains on as long as you keep the rear by a luggage compartment cover. -
Page 148: Radio Antenna (If Equipped)
To remove the an- your Fiat Dealership. If you use a roof tenna, turn it counterclockwise. To rein- rack, observe the instructions and pre-... - Page 149 ❒ Mount and secure the cargo onto the WARNING Roof rails roof rack properly according to the in- Abrupt maneuvers or failure structions provided. Be sure to stow to properly secure cargo can the heaviest items at the bottom and allow the cargo to fly off the vehicle distribute the cargo as evenly as possi- and hit others, causing personal in-...
- Page 150 EXHAUST GAS WARNING ..........DAILY INSPECTION CHECKLIST ........ENGINE OIL CONSUMPTION ........STARTING THE ENGINE ..........USING THE TRANSAXLE ..........USING THE 2WD/ 4WD SWITCH (if equipped) ..BRAKING ................® ELECTRONIC STABILITY PROGRAM (ESP (if equipped) ................RUNNING-IN ............... CATALYTIC CONVERTER (if equipped) ......
-
Page 151: Exhaust Gas Warning
EXHAUST GAS DAILY INSPECTION CHECKLIST WARNING BEFORE DRIVING WARNING ❒ Make sure that windows, mirrors, Avoid breathing exhaust gas- es. Exhaust gases contain lights, and reflectors are clean and un- carbon monoxide, a potentially lethal obstructed. gas that is colorless and odorless. ❒... -
Page 152: Engine Oil Consumption
❒ Brake fluid level ENGINE OIL CONSUMPTION ❒ Power steering (if equipped) fluid level ❒ Windshield washer fluid level It is normal for the engine to consume ❒ Battery solution level some engine oil during normal vehicle op- eration. ❒ Hood latch operation Pull the hood release handle inside the The amount of engine oil consumed de- vehicle. -
Page 153: Starting The Engine
STARTING THE ENGINE Oil consumption: Max. 1.0 L per 1000 km (1 Qt. per 600 miles) When judging the amount of oil con- BEFORE STARTING THE ENGINE sumption, note that the oil may become ❒ Make sure the parking brake is set fully. diluted and make it difficult to accurately judge the true oil level. - Page 154 The engine stops if the engine feels fuel restart cranking. Even if the third key to “START”. Release the key when emptiness. To restart the engine, stop the trial failed, consult authorized Fiat the engine starts. vehicle, hold the ignition key in “ON” po- Dealership.
- Page 155 However, you should drive carefully with NOTE keeping the legal speed limit, and take care ❒ The ignition switch can be turned to the surrounding traffic condition. the “ACC” position when the keyless If you drive your vehicle at an average start system blue indicator light illumi- speed of 50 km/h (31 mph) for about 5 min- nates.
-
Page 156: Using The Transaxle
USING THE WARNING WARNING TRANSAXLE The remote controller is a Always depress the brake sensitive electronic instru- pedal before shifting from ment. To avoid damaging it, do not “P” (Park) (or “N” (Neutral) if the ve- expose it to impacts, moisture or high hicle is stationary) to a forward or re- temperature (such as on the dash- verse gear, to help prevent the vehi-... - Page 157 D (Drive) NOTE: MANUAL TRANSAXLE Use this position for all normal driving. If you move the gearshift lever to a low- Starting off With the gearshift lever in “D” range you er gear while driving faster than the max- can get an automatic downshift by pressing imum allowable speed for the lower gear, To start off, push in the clutch pedal and the accelerator pedal.
-
Page 158: Using The 2Wd/ 4Wd Switch (If Equipped)
USING THE 2WD/ WARNING 4WD SWITCH Reduce your speed and downshift to a lower gear (if equipped) before going down a long or steep hill. A lower gear will allow the engine to This 4WD system enables you to select the provide braking. - Page 159 4WD LOCK 2WD/4WD SWITCH OPERATION In this position, engine power is supplied to the front and rear axles at reduced Operate the 2WD/4WD switch accord- speed. Use this position when it is hard to ing to the appropriate procedure de- start off in the “4WD AUTO”...
- Page 160 Have the system inspected by an au- or moving. When you operate your vehicle in the thorized Fiat Dealership. 4WD mode continuously, park the ve- ❒ Make sure that the front wheels are in IMPORTANT Unevenly worn tires can...
-
Page 161: Braking
BRAKING WARNING Even without reserve power The distance needed to bring any vehicle in the brake system, you can to a halt increases with the speed of the still stop the vehicle by pressing the vehicle. The braking distance needed, for brake pedal harder than normally re- example, at 60 km/h (37 mph) will be ap- quired. - Page 162 ABS system. Ask your Fiat Deal- Use good judgment and do not drive ership to inspect the ABS system im- faster than conditions will safely al- mediately.
-
Page 163: Electronic Stability Program (Esp (If Equipped)
ELECTRONIC STABILITY ® The ESP has the following three systems: HOW THE ABS WORKS PROGRAM (ESP ® A computer continuously monitors wheel STABILITY CONTROL SYSTEM speed. The computer compares the (if equipped) changes in wheel speed when braking. If The vehicle stability control system helps the wheels slow suddenly, indicating a provide integrated control of systems such ®... - Page 164 (other than ABS). You should have the and indicates that the brake fluid pressure ered road. systems inspected by an authorized Fiat is being controlled properly. Dealership. NOTE When the SLIP indicator light comes on and stays on while driving, in- ®...
- Page 165 (other than ABS). You should have the ABS will be deactivated and the slip indi- systems inspected by an authorized Fiat cator light will blink 1 time per second. Dealership. In this case, use the following procedure ®...
-
Page 166: Running-In
RUNNING-IN CATALYTIC CONVERTER (if equipped - Petrol IMPORTANT The future performance Engine Model) and reliability of the engine depends on the care and restraint exercised during its ear- ly life. It is especially important to observe The purpose of the catalytic converter is the following precautions during the initial to minimize the amount of harmful pollu- 960 km (600 miles) of vehicle operation. -
Page 167: Improving Fuel Economy
IMPROVING FUEL ECONOMY The following instructions will help you improve fuel economy. Avoid excessive idling If you are to wait for more than a minute while you are parked, stop the engine and start it again later. When warming up a 54G071S cold engine, allow the engine to idle until 60A183... - Page 168 HIGHWAY DRIVING ............DRIVING ON HILLS ............DRIVING ON SLIPPERY ROADS ........60G409...
-
Page 169: Highway Driving
HIGHWAY DRIVING DRIVING ON HILLS ❒ When climbing steep hills, the vehicle When driving at high-speed, pay attention to the following: may begin to slow down and show a lack of power. If this happens, you ❒ Stopping distance progressively in- should shift to a lower gear so that the creases with vehicle speed. - Page 170 DRIVING ON SLIPPERY ROADS Under wet road conditions you should drive at a lower speed than on dry roads due to possible slippage of tires during braking. When driving on icy, snow-cov- ered, or muddy roads, reduce your speed and avoid sudden acceleration, abrupt braking, or sharp steering movements.
- Page 171 If your vehicle gets stuck in snow, mud, or Do not use tires other than sand, follow the directions below: those specified by Fiat. Nev- er use different sizes or types of tires ❒ Shift the transaxle back and forth be- on the front and rear wheels.
- Page 172 VEHICLE LOADING ............TRAILER TOWING ............TOWING YOUR VEHICLE ..........54G215...
-
Page 173: Vehicle Loading
If you use your Fiat to tow a trailer, you cle. Compare these weights to the GVWR shifting if the vehicle moves sudden- should always observe the requirements and GAWR (front and rear). - Page 174 IMPORTANT Trailer towing puts addi- SAFETY CHAINS TRAILER LIGHTS tional stress on the engine, drive train, and Always attach safety chains between your Make sure your trailer is equipped with brakes of your vehicle. Never tow a trail- vehicle and trailer. Cross safety chains un- lights which meet local requirements.
- Page 175 TIRES MIRRORS Distribute cargo in your trailer so that nose weight is about 10% of gross trailer Check to see if your vehicle’s mirrors weight, but does not exceed “Maximum meet local requirements for mirrors used WARNING vertical load on trailer hitch point”. You on towing vehicles.
- Page 176 WARNING WARNING WARNING Never overload your trailer Your vehicle will handle dif- – If the trailer has over-run or your vehicle. Gross trail- ferently when towing a trail- brakes, apply the brakes er weight must never exceed the er. For your safety and the safety of gradually to avoid snatching caused “Towing capacity”.
- Page 177 WARNING WARNING – Avoid “riding” the brakes. When starting out after This could cause the brakes parking: to overheat resulting in reduced brak- – Depress the clutch and start the en- ing efficiency. Use engine braking as gine. much as possible. –...
- Page 178 TOWING YOUR TOWING INSTRUCTION TABLE VEHICLE TRANSAXLE TOWING DRIVE Your vehicle may be towed behind an- METHOD TRAIN other vehicle (such as a motorhome), pro- vided your vehicle is 2 wheel drive (2WD) and you use the proper towing method specified for your vehicle.
- Page 179 A: 2WD VEHICLES WITH MANUAL TRANSAXLE OR TOWING METHOD A AUTOMATIC TRANSAXLE FROM THE FRONT: FRONT WHEELS ON A DOLLY ❒ Secure the front wheels on a towing AND REAR WHEELS ON THE GROUND dolly according to the instructions pro- vided by the dolly manufacturer.
- Page 180 B: 2WD VEHICLES WITH MANUAL TRANSAXLE TOWING METHOD B ❒ Shift the manual transaxle lever into FROM THE FRONT: FOUR WHEELS ON THE GROUND neutral. ❒ Turn the ignition key to the “ACC” po- sition to unlock the steering wheel. ❒...
- Page 181 NOTES...
- Page 182 MAINTENANCE SCHEDULE ........... MAINTENANCE RECOMMENDED UNDER SEVERE DRIVING CONDITIONS ............ DRIVE BELT ................ENGINE OIL AND FILTER ..........GEAR OIL ................AUTOMATIC TRANSAXLE (AT) FLUID ...... ENGINE COOLANT ............WINDSHIELD WASHER FLUID ........AIR CLEANER ..............SPARK PLUGS (Petrol engine) .......... 60G410 FUEL FILTER (Diesel engine) ..........
- Page 183 – Do not allow smoking, sparks, or service work on your Fiat. Do not flames around gasoline or the bat- touch air bag system components, tery. Flammable fumes are present.
-
Page 184: Maintenance Schedule
WARNING have the proper equipment, genuine Fiat spare parts and the necessary flu- The shock absorbers are ids; do not however carry out these filled with high pressure gas. - Page 185 SERVICE SCHEDULE PETROL VERSIONS Service coupons shall be carried out every 15,000 km 30 45 90 105 120 135 150 165 180 Thousands of km ● ● ● ● ● ● ● ● ● ● ● ● Check tyre conditions/wear and adjust pressure if required Check electric system operation headlights, direction indicators, hazard lights, passenger compartment/ boot light, instrument panel warning lights, etc.)
- Page 186 Thousands of km 30 45 90 105 120 135 150 165 180 ● ● ● ● ● ● Check exhaust emissions/smoke Check cleanness of bonnet and boot locks and lever ● ● ● ● ● ● ● ● ● ● ●...
- Page 187 SERVICE SCHEDULE DIESEL VERSIONS Service coupons shall be carried out every 15,000 km 30 45 90 105 120 135 150 165 180 Thousands of km ● ● ● ● ● ● ● ● ● ● ● ● Check tyre conditions/wear and adjust pressure if required Check electric system operation headlights, direction indicators, hazard lights, passenger compartment/ boot light, instrument panel warning lights, etc.)
- Page 188 Thousands of km 30 45 90 105 120 135 150 165 180 ● ● ● ● ● ● Change engine oil and oil filter (Diesel versions - DPF)** ● ● ● ● ● ● ● ● Check air cleaner conditions ●...
-
Page 189: Maintenance Recommended Under Severe Driving Conditions
MAINTENANCE RECOMMENDED UNDER SEVERE DRIVING CONDITIONS If the vehicle is usually used under the conditions corresponding to any severe condition code given below, it is recommended that applicable maintenance operation be performed at the particular interval as given in the chart below. Severe condition code Leaded fuel use A Repeated short trips... -
Page 190: Drive Belt
DEF: Deflection sure that they are not damaged. AC: Air conditioner compressor If you need to replace or adjust the belt 63J132 have it done by your Fiat Dealership. For Diesel Engine Model The drive belts tension is adjusted auto- matically. - Page 191 Open Close For Petrol Engine Model For Diesel Engine Model 80G064 79J170 81A147 OIL LEVEL CHECK 1. MIN REFILLING It is important to keep the engine oil at the 2. MAX Remove the oil filler cap and pour oil correct level for proper lubrication of slowly through the filler hole to bring the 3.
- Page 192 WARNING Close Open To minimize your exposure to used oil, wear a long- sleeve shirt and moisture- proof gloves (such as dishwashing gloves) when changing oil. If oil contacts your skin, wash thoroughly with soap and water. Launder any clothing or rags if wet with oil.
- Page 193 Tightening (viewed from filter top) 54G092 79J142 54G093 For Petrol Engine Model: For Diesel Engine Model 1. Oil filter 1. Loosen 1. Loosen 2. 3/4 turn 2. Tighten 2. Tighten Tightening torque for oil filter IMPORTANT To tighten the oil filter For Petrol Engine Model: REPLACE THE OIL FILTER properly, it is Important to accurately...
-
Page 194: Gear Oil
❒ When replacing the oil filter, it is rec- differential oil (4WD). ommended that you use a genuine Fiat replacement filter. If you use an af- termarket filter, make sure it is of equivalent quality and follow the man- ufacturer’s instructions. -
Page 195: Automatic Transaxle (At) Fluid
Gear Oil Change touch with your bare hands before in- specting transaxle oil. Since special procedures, materials and tools are required, it is recommended that you trust this job to your authorized Fiat Dealership. - Page 196 The fluid level move the gearshift lever through each FIAT dealer. should be between the two marks in range, pausing for about three seconds the “HOT” range on the dipstick.
-
Page 197: Engine Coolant
Failure to use the proper coolant can dam- mixture concentration. age your cooling system. Your authorized water. Fiat Dealership can help you select the ❒ Do not add extra inhibitors or addi- proper coolant. tives. They may not be compatible with your cooling system. - Page 198 ADDING COOLANT IMPORTANT WARNING ❒ The mixture you use should contain Engine coolant is harmful or 50% concentration of antifreeze. fatal if swallowed or inhaled. WARNING Do not drink antifreeze or coolant so- ❒ If the lowest ambient temperature in It is hazardous to remove the lution.
- Page 199 ❒ Loosen the drain plug attached to the Fiat Dealership for coolant replacement. WARNING lower part of the radiator and drain the It is hazardous to remove the coolant into a suitable container.
-
Page 200: Windshield Washer Fluid
WINDSHIELD WASHER AIR CLEANER Front and rear FLUID If the air cleaner is clogged with dust, there will be greater intake resistance, result- Check windscreen washer fluid level in the ing in decreased power output and in- tank and if required top up with TUTELA creased fuel consumption. -
Page 201: Spark Plugs (Petrol Engine)
SPARK PLUGS Petrol engine (Petrol engine) For Nickel spark plugs (traditional type): You should inspect spark plugs periodi- cally for carbon deposits. When carbon accumulates on a spark plug, a strong spark may not be produced. Remove car- bon deposits with a wire or pin and adjust the spark plug gap. - Page 202 “SPECIFICA- electrode, as it is easy to damage. TIONS” section at the end of this book. If you wish to use a brand of spark plug oth- er than the specified plugs, consult your Fiat Dealership.
-
Page 203: Fuel Filter (Diesel Engine)
❒ Place a pan or ample rag under the fu- problem, have the ignition wiring and oth- el filter drain nozzle. er ignition system inspected by your Fiat Dealership. ❒ Loosen the drain knob (1). The water 79J147 will be drained. -
Page 204: Brakes
Should the light come on, immediately ask your Fiat Deal- ership to inspect the brake system. – A rapid fluid loss indicates a leak in the brake system which should be in- spected by your Fiat Dealership im- mediately. - Page 205 If not, have the brake sys- your vehicle’s brake system, have the ment. tem inspected by your Fiat Dealership. If vehicle inspected immediately by you doubt the brake pedal for the regu- your Fiat Dealership.
-
Page 206: Steering
If the parking brake is not properly adjusted or the brakes drag after the lever has been fully released, have the parking brake inspect- ed and/ or adjusted by your Fiat Dealer- ship. -
Page 207: Clutch Pedal
If clutch dragging is felt with the ped- al fully depressed, have the clutch in- Note that the value does not apply to the spected by your Fiat Dealership. If the compact spare tire. clutch fluid level is near the “MIN” line, fill it up to the “MAX”... - Page 208 Be sure ings. to have tires and wheel alignment checked periodically by your Fiat – Check the inflation pressure from Dealership. time to time while inflating the tire gradually, until the specified pressure is obtained.
- Page 209 The size and type of ferent size, or using different brands tires used should be only those ap- among the four tires can result in dam- proved by Fiat as standard or op- age to the drive train. tional equipment for your vehicle. 54G114 –...
- Page 210 WARNING WARNING The compact spare tire and – The compact spare tire has wheel are intended for tem- a much shorter tread life porary emergency use only. Continu- than the conventional tires on your ous use of this spare can result in tire vehicle.
- Page 211 Clean the hub carefully; it may be hot torque wrench, have the wheel bolt from the vehicle. from driving. torque checked by an authorized Fiat ❒ Loosen, but do not remove the wheel ❒ Install the new wheel and replace the Dealership.
-
Page 212: Battery
BATTERY WARNING – Batteries produce flam- mable hydrogen gas. Keep flames and sparks away from the bat- tery or an explosion may occur. Nev- er smoke when working in the vicini- ty of the battery. – When checking or servicing the bat- 60G309A 60A269 tery, disconnect the negative cable. - Page 213 For more detailed in- cables securely. the battery when you remove it from formation about disposing or recycling of the vehicle. Otherwise, sulfuric acid the used battery, consult your Fiat Deal- could run out and you might get in- ership. jury.
-
Page 214: Fuses
Individual fuses your vehicle inspected by an autho- These fuses are for individual electrical cir- rized Fiat Dealership. Always use a cuits. genuine Fiat replacement. Never use a substitute such as a wire even for a temporary repair, or extensive elec- trical damage and a fire can result. - Page 215 FUSES IN THE ENGINE COMPARTMENT Petrol engine Main fuse / Primary fuse All electric load Power window, Ignition Wiper, Starter Tail light, Rear defogger, Door lock, Hazard/ Horn, Dome 62J085 Heater, Air compressor, Power steering Radiator fan, Front fog light, Head light (6) (7) (10) (11)
- Page 216 Main fuse / Primary fuse (13) Starting motor fuse (14) Ignition switch fuse (15) Blower fan fuse (16) Air compressor fuse (17) Throttle motor fuse (18) Automatic transaxle fuse (if equipped) (19) Fuel injection fuse (20) – Automatic transaxle relay (if equipped) (21) –...
- Page 217 Diesel engine Main fuse / Primary fuse Glow Fuel heater 140A All electric load Light 79J172 Sub heater Sub heater Sub heater (8) (9) (10) (11) (12) (13) (14) (15) (16) (17) (18) (19) (20) (21) (22) Head light (Right) fuse (23) (24) (25)
- Page 218 Main fuse / Primary fuse (19) Air compressor fuse (20) Fuel pump fuse (21) Condenser fan fuse (22) Fuel injection fuse (23) – Sub heater relay 3 (24) – Air compressor relay (25) – Fuel pump relay (26) – Condenser fan relay (27) –...
- Page 219 (12) Tail light (13) Stop light Door lock (14) (15) 4WD light 79J011 (16) ST SIG (17) Seat heater (18) IG 2 SIG Rear fog lamp (19) (20) Dome (21) Rear defogger (22) Horn / Hazard (23) Fiat CODE (Immobilizer)
-
Page 220: Bulb Replacement
Fiat Dealership. IMPORTANT Frequent replacement of a bulb indicates the need for an inspection of the electrical system. This should be NOTE Make sure that the fuse box always carried out by your Fiat Dealership. carries spare fuses. - Page 221 60G115 54G121 64J195 CENTER INTERIOR LIGHT HEADLIGHT SIDE TURN SIGNAL LIGHT (if equipped) Open the engine hood. Disconnect the As the bulb is built-in type, the light as- coupler. Remove the sealing rubber. sembly must be replaced. Remove the light Pull down the lens by using a plane screw assembly by sliding the light housing left- driver covered with a soft cloth as shown.
- Page 222 Front fog light 54G123 54G124 79J013 OTHER GENERAL LIGHTS Front parking light (1) Rear combination light (tail, stop, turn signal, etc.) Front turn signal light (2) Bulb holder 1. Removal 2. Installation To remove a bulb holder from a light housing, turn the holder counterclockwise and pull it out.
- Page 223 License plate light High-mount stop light (if equipped) 75F087 63J106 63J108 Luggage compartment light 79J015 63J127 63J107 ❒ Close the tailgate. Remove a high- ❒ Replace the bulbs. To remove a high-mounted stop light housing the following procedure: mounted stop light housing (2) from To install a high-mounted stop light the tailgate.
-
Page 224: Windscreen - Rear Window Washer / Wipers
NOTE Some wiper blades may be differ- ent from the ones described here de- pending on vehicle specifications. If so, consult your Fiat Dealership for proper replacement method. WARNING 70G119A 54G130... -
Page 225: Air Conditioning System
AIR CONDITIONING Operate the air conditioner at least once a month for one minute with the engine SYSTEM idling. This circulates the refrigerant and oil and helps protect the internal compo- If you do not use the air conditioner for nents. - Page 226 JACKING INSTRUCTIONS ..........JUMP STARTING INSTRUCTIONS ........ TOWING ................IF THE STARTER DOES NOT OPERATE ..... IF THE ENGINE IS FLOODED ......... IF THE ENGINE OVERHEATS ......... IF YOU CAN NOT SHIFT AUTOMATIC TRANSAXLE GEARSHIFT LEVER OUT OF “P” (PARK) ..............60G411...
-
Page 227: Jacking Instructions
JACKING INSTRUCTIONS ❒ Place the vehicle on level, hard ground. ❒ Set the parking brake firmly and shift in- to “P” (Park) if your vehicle has an au- tomatic transaxle, or shift into “R” (Re- verse) if your vehicle has a manual transaxle. -
Page 228: Jump Starting Instructions
– If the booster battery you use for 79J018 jump starting is installed in another vehicle, make sure the two vehicles are not touching each other. – If your battery discharges repeat- edly, for no apparent reason, have your vehicle inspected by an autho- rized Fiat Dealership. - Page 229 WARNING WARNING – To avoid harm to yourself Never connect the jump lead or damage to your vehicle or directly to the negative (–) battery, follow the jump starting in- terminal of the discharged battery, or structions below precisely and in order. an explosion may occur.
-
Page 230: Towing
❒ From the front, with the front wheels Fiat Dealership. for towing service. lifted and the rear wheels on the IMPORTANT The steering column is not ground. Before towing, make sure that strong enough to withstand shocks trans- the parking brake is released. -
Page 231: If The Engine Is Flooded
IF THE ENGINE IS IF THE ENGINE WARNING FLOODED OVERHEATS If you see or hear escaping steam, stop the vehicle in a safe place and immediately turn off If the engine is flooded with gasoline, it The engine could overheat temporarily the engine to let it cool. - Page 232 If the temperature indication does not WARNING come down to within the normal, accept- – It is hazardous to remove able range: the radiator cap when the ❒ Turn off the engine and check that the water temperature is high, because water pump belt and pulleys are not scalding fluid and steam may be damaged or slipping.
-
Page 233: Transaxle Gearshift Lever Out
IF YOU CAN NOT SHIFT AUTOMATIC TRANSAXLE GEARSHIFT LEVER OUT OF “P” (PARK) Left Hand Drive Vehicle Vehicles with an automatic transaxle have an electrically operated park- lock feature. 62J083 63J142 If the vehicle’s battery is discharged, or ❒ Be sure the parking brake is firmly ap- This procedure is for emergency use on- there is some other electrical failure, the ly. - Page 234 CORROSION PREVENTION ........... VEHICLE CLEANING ............60G412...
-
Page 235: Corrosion Prevention
CORROSION HOW TO HELP PREVENT Environmental conditions which accelerate corrosion CORROSION PREVENTION ❒ Road salt, dust control chemicals, sea Wash your vehicle frequently air or industrial pollution will all ac- It is important to take good care of your celerate the corrosion of metal. vehicle to protect it from corrosion. - Page 236 Remove foreign material deposits Keep passenger and luggage Store your vehicle in a dry, well- compartments clean ventilated area Foreign material such as salts, chemicals, road oil or tar, tree sap, bird droppings Moisture, dirt or mud can accumulate un- Do not park your vehicle in a damp, poor- and industrial fall-out may damage the fin- der the floor mats and may cause corro-...
-
Page 237: Vehicle Cleaning
VEHICLE CLEANING Vinyl floor mats Ordinary dirt can be removed from vinyl with water or mild soap. Use a brush to help loosen dirt. After the dirt is loosened, WARNING rinse the mat thoroughly with water and When cleaning the interior dry it in the shade. - Page 238 When washing the vehicle, park it where Rinse the body to loosen the dirt. Remove direct sunlight does not fall on it and fol- dirt and mud from the body exterior with running water. You may use a soft sponge low the instructions below: or brush.
- Page 239 ❒ Once the dirt has been completely re- moved, rinse off the detergent with running water. ❒ After rinsing, wipe off the vehicle body with a wet chamois or cloth and allow it to dry in the shade. ❒ Check carefully for damage to painted surfaces.
- Page 240 VEHICLE IDENTIFICATION ........... FUEL CONSUMPTION - CO EMISSIONS ....
- Page 241 They are also used to assist your dealer when or- dering or referring to special service in- formation. Whenever you have occasion to consult your Fiat Dealership, remem- 79J019 54G082 ber to identify your vehicle with this num- ber.
- Page 242 FUEL CONSUMPTION - CO EMISSIONS Fuel consumption according to 2004/3/EC directive. emission levels given in the following table refer to combined consumption according to 1999/100/EC directive. 1.9 Multijet 1.6 L 2WD 1.6 L 4WD 1.9 L 2WD 1.9 L 4WD Urban (L/100km) (g/km)
- Page 243 NOTES...
- Page 244 ENGINE .................. FUEL FEED – IGNITION ............ ELECTRICAL COMPONENTS ......... BULBS ..................TRANSMISSION ..............BRAKES .................. SUSPENSIONS ..............STEERING ................WHEELS ................. DIMENSIONS ............... WEIGHTS ................PERFORMANCE ..............CAPACITIES ................
-
Page 245: Engine
TECHNICAL SPECIFICATIONS NOTE Technical specifications are subject to change without notice ENGINE 1.9 Multijet Code - type M16A (DOHC) - Euro 4 D19AA - Euro 4 with Diesel Particulate Filter 4 in line Number and layout of cylinders 4 in line 78 x 83 mm (3.07 x 3.27 in.) Piston bore and stroke 82 x 90.4 mm (3.23 x 3.56 in.) -
Page 246: Electrical Components
ELECTRICAL COMPONENTS 1.9 Multijet Battery 12V 36Ah/20HR, CCA 180A (DIN) or 12V 70Ah/20HR, CCA 450A (DIN) 12V 44Ah/ 20HR, CCA 210A (DIN) – Spark plugs Iridium NGK IFR6J11 – Nickel DENSO K20PR-U11, NGK BKR6E-11 Fuses See “INSPECTION AND MAINTENANCE” section BULBS Power Type... -
Page 247: Transmission
TRANSMISSION 4-wheel drive, electronic-control self-locking differential Drive 4WD Dry single disc, Belleville washer, Clutch hydraulic control 5 forward gears + reverse Gearbox 6 forward gears + reverse 1.9 Multijet BRAKES Service brakes Front Disc (Ø 280 mm - 11 in.) Rear Drum (Ø... -
Page 248: Wheels
WHEELS Tyres 205/60 R16 Rims 16 x 6J Tyre pressure Tyre inflation pressure values are specified on the label located on the driver’s door post Recommended snow chains Radial thickness: 10 mm (254 in.) Axial thickness: 10 mm (254 in.) Wheel geometry Toe-in, front 1 ±... -
Page 249: Weights
WEIGHTS kg (lbs) 1.9 Multijet Kerb weight (including fuel, spare wheel, 1,270 – 1,320 (2,800 – 2,910) 1,135 – 1,185 (2,502 – 2,612) tools and accessories) 1,330 – 1,380 (2,932 – 3,042) 1,195 – 1,245 (2,634 – 2,745) Gross vehicle weight (GVWR) 1,650 (3,638) 1,790 (3,946) 1,670 (3,682) - Page 250 DECLARATION OF CONFORMITY ......
-
Page 253: Declaration Of Conformity
DECLARATION OF CONFORMITY We, Calsonic Kansei Corp. hereby declare, at our sole responsibility, that the following product conforms to the Essential Requirements of the Radio and Telecommunications Terminal Equipment Directive 1999/5/EC in accordance with the tests conducted to the appropriate requirements of the relevant standards, as listed herewith. Product: Controller of Intelligent Key System (Keyless Start System) Model/Type Number: S62J1 Year of affixing CE marking: 2004... - Page 254 DECLARATION OF CONFORMITY We, Calsonic Kansei Corp. hereby declare, at our sole responsibility, that the following product conforms to the Essential Requirements of the Radio and Telecommunications Terminal Equipment Directive 1999/5/EC in accordance with the tests conducted to the appropriate requirements of the relevant standards, as listed herewith. Product: Transmitter of Keyless Entry System Model/Type Number: TS002 Year of affixing CE marking: 2004...
- Page 258 Clock ............. 98 BS ............160 attery ........211-245 Clutch ..........131-206 Air bags ..........47 Before driving ........emissions ........241 – Front ..........48 Bodywork care ........ 233 Cup holder ........... 142 – How the system works ....52 Brake fluid ..........
- Page 259 – If the engine overheats ....230 – Fuel filter ........... 202 dentification data ......230 – If the starter does not operate .. 229 – Fuel filler cap ........132 Ignition switch ........58 – Jump starting ......... 227 –...
- Page 260 Luggage compartment light ....146 Rear window washer Spot light..........138 Luggage restraint loops ..... 145 – Switch ..........66 Starting the engine....... 152 Rear window wiper Steering ........... 205-246 ain beam headlights ......63 – Blades ..........224 Steering column controls ..57 –...
- Page 261 – Gear oil change ..... 194-248 Windshield washer – Control .......... 65 – Gearshift lever ......132 – Fluid ..........198 – Using the transaxle ...... 155 Windshield wiper Transmission ........246 – Blades ..........223 Trip meter ........... 81 –...
- Page 262 “End of Life Vehicles” to approved environmental standards. To find out the location of your nearest authorised treatment facility, offering free of charge take-back, simply contact one of our dealers or refer to the Fiat web site or call the toll free number 00800 3428 0000.
- Page 265 Fiat Group Automobiles S.p.A. - Customer Services - Technical Services - Service Engineering Largo Senatore G. Agnelli, 5 - 10040 Volvera - Torino (Italia) 603.81.321 - 09/2008 - 3 Print N. edition...
Need help?
Do you have a question about the SEDICI and is the answer not in the manual?
Questions and answers
ΠΟΥ ΕΙΝΑΙ ΤΟ ΚΑΠΑΚΙ ΓΙΑ ΡΥΜΟΥΛΚΗΣΗ
The towing cover for the Fiat Sedici is available for purchase online at AUTODOC.
This answer is automatically generated
@Mr. Anderson Δηλαδή δεν εχει
;Που είναι το καπάκι για ρυμουλκηση??????
The towing cover for the Fiat Sedici is available for purchase online at AUTODOC.
This answer is automatically generated