Table of Contents
Advertisement
Available languages
Available languages
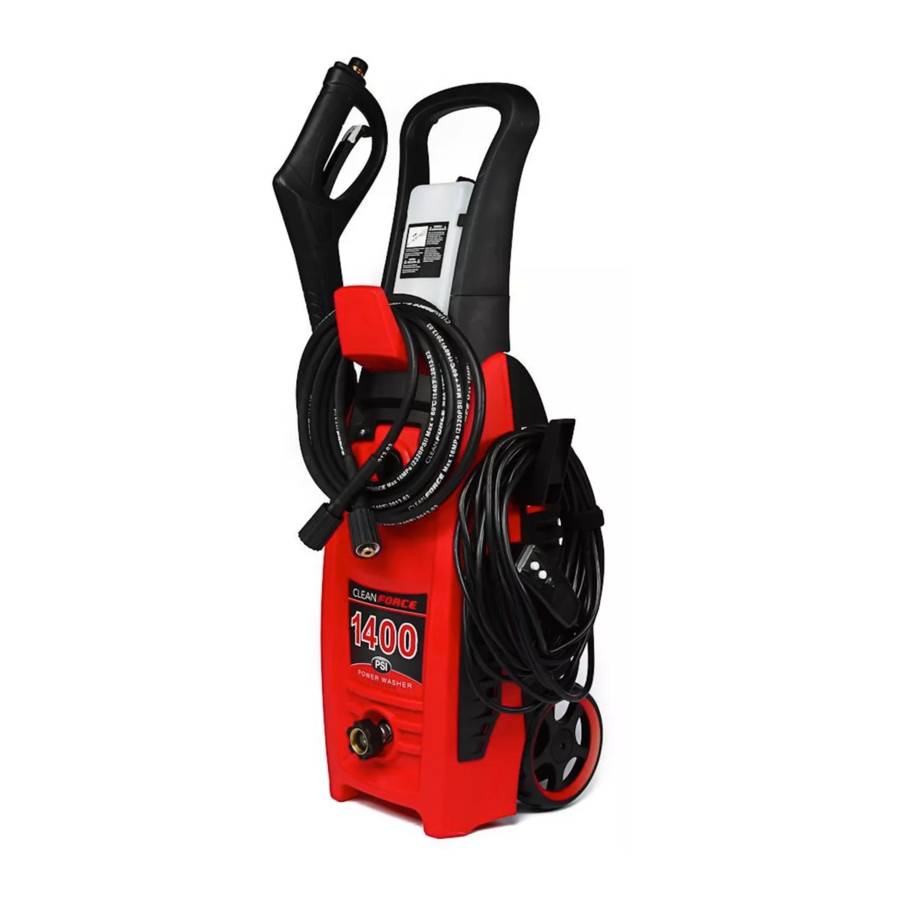
ELECTRIC HIGH PRESSURE WASHER - OPERATOR MANUAL
LAVADORA ELÉCTRICA DE PRESIÓN ALTA - MANUAL DE INSTRUCCIONES
Before operating this unit, please read this manual thoroughly and retain it
for future reference.
Lea estas instrucciones de uso atentamente antes de la primera puesta en
marcha del aparato.
CF1400
English
1
Español
19
DO NOT RETURN PRODUCT TO PLACE OF PURCHASE.
IF YOU HAVE ANY QUESTIONS, CALL OUR TOLL FREE HOTLINE.
NO DEVOLVER EL PRODUCTO AL LUGAR DE COMPRA.
SI TIENE ALGUNA CONSULTA, LLAME A NUESTRA LÍNEA GRATUITA:
1-866-902-9690
ww
w.ForceToolsUSA.com
Rev: CF1400-v2
Advertisement
Chapters
Table of Contents
Troubleshooting

Related Manuals for CleanForce CF1400


Summary of Contents for CleanForce CF1400
- Page 1 LAVADORA ELÉCTRICA DE PRESIÓN ALTA - MANUAL DE INSTRUCCIONES 1-866-902-9690 Before operating this unit, please read this manual thoroughly and retain it w.ForceToolsUSA.com for future reference. Lea estas instrucciones de uso atentamente antes de la primera puesta en marcha del aparato. Rev: CF1400-v2...
-
Page 2: Table Of Contents
IMPORTANT SAFETY INSTRUCTIONS TABLE OF CONTENTS WARNING Important safety instructions ....................1 Risk of injury Safety features ........................4 Injection Hazard Parts and diagram list ......................5 the skin. case of penetration, seek Assembly and operating instructions..................6 medical aid immediately. -
Page 3: Important Safety Instructions
SAFETY FEATURES IMPORTANT SAFETY INSTRUCTIONS Total stop system (TSS) 8. Always wear safety glasses or goggles when operating or performing maintenance. 9. Always move switch on unit to “OFF” position before connecting or disconnecting The pressure washer is equipped with a total stop system (TSS) that will sense when the cord to electrical outlets. -
Page 4: Parts And Diagram List
PARTS AND DIAGRAM LIST ASSEMBLY AND OPERATING INSTRUCTIONS Surface Preparation Before starting any cleaning task, it is important to inspect the area for objects that could create a hazard. Remove any objects from the work area that could be tripped over, such as toys or outdoor furniture. - Page 5 ASSEMBLY AND OPERATING INSTRUCTIONS ASSEMBLY AND OPERATING INSTRUCTIONS Make sure the ON/OFF switch is in the Completely unwind power cord and plug the Connect detergent suction tube to the tank. Attach high pressure hose to the machine’s OFF position. GFCI into an outlet, ensure there are no other Insert the tank into the recesses and push water outlet (hand tighten only) items using this circuit.
-
Page 6: Using The Accessories
ASSEMBLY AND OPERATING INSTRUCTIONS ASSEMBLY AND OPERATING INSTRUCTIONS USING THE ACCESSORIES Adjustable Spray Nozzle The adjustable spray nozzle can be adjusted from fan to jet. The spray is adjusted from jet to fan spray by turning the nozzle. CAUTION Jet spray adjustment is very strong. Do not adjust whi le spra ying. Gently pull detergent container out of storage position, and fill with detergent. -
Page 7: Shutting Down And Cleaning Up
ASSEMBLY AND OPERATING INSTRUCTIONS WINTERIZING AND LONG-TERM STORAGE OPTIMUM WINTERIZING PROCEDURE TAKING A BREAK Winterizing your pressure washer will help protect and prolong its life. We strongly If taking a break of five minutes or more: recommend you follow the below steps using * Engage gun safety lock. -
Page 8: Cleaning And Maintenance
CLEANING AND MAINTENANCE TROUBLESHOOTING Disconnect the machine from the power source before making any repairs. Connections Connections on pressure washer hoses, gun Symptom Cause Solution and spray wand should be cleaned regularly and lubricated with non-water soluble grease. Motor does not run when On/Off switch is in the Turn switch to the “ON”... -
Page 9: Troubleshooting
TROUBLESHOOTING TROUBLESHOOTING Symptom Cause Solution Symptom Cause Solution Motor buzzes but fails to run. Supply voltage Verify that only the pres- Output pressure varies high Discharge nozzle is obstructed. Blow out or remove debris and low. (continued) with a fine needle. below minimum. -
Page 10: Technical Specifications
TECHNICAL SPECIFICATIONS WARRANTY Rated Pressure: 1400 PSI Product Warranty Power Source Requirement: 120 V / 60 Hz Always keep your receipt as proof of purchase. This product has a Parts Replacement, Product Exchange only. Electrical Cord: 35’ NO REFUNDS will be provided. Please see stores for Product Exchange details High-pressure Hose: 19’... - Page 11 IMPORTANTES INSTRUCCIONES DE SEGURIDAD TABLA DE CONTENIDO Importantes instrucciones de seguridad ..................19 10 Este producto, o el cable de alimentación contiene plomo, que es una sustancia química que causa cáncer, defectos de nacimiento u otros daños reproductivos. Función de seguridad ......................23 Lávese las manos después de manipular.
-
Page 12: Importantes Instrucciones De Seguridad
IMPORTANTES INSTRUCCIONES DE SEGURIDAD IMPORTANTES INSTRUCCIONES DE SEGURIDAD 3. Nunca coloque la mano o los dedos sobre la boquilla o la boquilla de aspersión durante ADVERTENCIA el funcionamiento de la unidad. 4. Nunca rocíe líquidos inflamables o use la lavadora de presión en zonas con polvo Conectarse directamente a la salida. -
Page 13: Función De Seguridad
FUNCIÓN DE SEGURIDAD LISTA DE PARTES Sistema de parada total (TSS) La lavadora de presión está equipado con un sistema de parada totales (SST) que detectará cuando el gatillo de la pistola está deprimido o en libertad. Se abrirá el circuito de potencia al motor, y hacer que el motor de lavar a presión para parar. -
Page 14: Instrucciones De Montaje Y Funcionamiento
INSTRUCCIONES DE MONTAJE Y FUNCIONAMIENTO INSTRUCCIONES DE MONTAJE Y FUNCIONAMIENTO Preparación Del Area De Trabajo Antes de comenzar el trabajo de limpieza, es importante revisar el area para retirar objetos que puedan causar daños, Remueva objetos del area de trabajo que puedan dañarse como jugetes o muebles. -
Page 15: Utilizando Accesorios
INSTRUCCIONES DE MONTAJE Y FUNCIONAMIENTO INSTRUCCIONES DE MONTAJE Y FUNCIONAMIENTO UTILIZANDO ACCESORIOS Asegurar que el interruptor de “ON/OFF” Desenrolle completamente el cable de Boquilla De Chorro Ajustable: está en la posición de “OFF”. corriente y conectelo a la toma de corriente. La boquilla ajustable puede ajustarse de abanico a jet. -
Page 16: Apagado Y Limpieza
INSTRUCCIONES DE MONTAJE Y FUNCIONAMIENTO INSTRUCCIONES DE MONTAJE Y FUNCIONAMIENTO TOMARSE UN DESCANSO Si toma un descanso de cinco minutos o más: Enganche el seguro de bloqueo. Apague la unidad en la posición de "OFF" (O). Desconecte el cable de alimentación de la toma de corriente. APAGADO Y LIMPIEZA (Si no está... -
Page 17: Anticongelación Y Conservación A Largo Plazo
ANTICONGELACIÓN Y CONSERVACIÓN A LARGO PLAZO LIMPIEZA Y MANTENIMIENTO PROCEDIMIENTO ÓPTIMO PARA LA ANTICONGELACIÓN Conexiones Conexiones en tubos de lavado a presión, La anticongelación de la lavadora a presión ayudará a proteger la máquina y prolongar su de pistola y la varita de pulverización se deben vida. -
Page 18: Solución De Problemas
SOLUCIÓN DE PROBLEMAS SOLUCIÓN DE PROBLEMAS Desconecte la máquina de la fuente de alimentación antes de hacer cualquier Síntoma Causa Solución reparación. Compruebe que las mangueras y los accesorios Síntoma Causa Solución son herméticos. "Apagar" la La bomba se succiona el Interruptor On / Off está... - Page 19 SOLUCIÓN DE PROBLEMAS SOLUCIÓN DE PROBLEMAS Síntoma Causa Solución Síntoma Causa Solución Sellos de agua están Llame al teléfono gratuito de Línea Directa. dañadas o desgastadas. Deje correr el agua caliente Filtro en el tubo de succión de detergente está a través de filtro para El aceite está...
-
Page 20: Datos Técnicos
DATOS TÉCNICOS GARANTÍA Presión Nominal: 1400 PSI Garantía del producto Conserve siempre el recibo como comprobante de compra. Requisitos para Fuente de alimentación: 120 V / 60 Hz Consumo de energia: 35’ Este producto solamente cuenta con un reemplazo de partes y cambio del producto. Manguera de alta presión: 19’...
Need help?
Do you have a question about the CF1400 and is the answer not in the manual?
Questions and answers