Advertisement
Advertisement
Table of Contents

Related Manuals for FoodSaver Vacuum Sealing System


Summary of Contents for FoodSaver Vacuum Sealing System
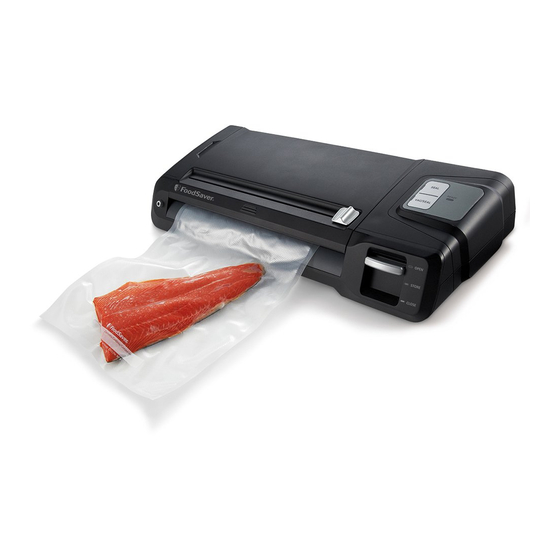
- Page 1 Vacuum Sealing System User Manual www.foodsaver.com 1-877-777-8042...
-
Page 2: Important Safeguards
& T MPORTANT AFEGUARDS Important Safeguards Important Tips For your own safety, always follow these basic 1. Vacuum packaging is NOT a substitute for the precautions when using a FoodSaver appliance: ® heat process of canning. Perishables still need to 1. -
Page 3: Welcome To Foodsaver
Welcome to FoodSaver ® Congratulations… Free Gift with Registration! Register now and you’ll receive You are about to enjoy the freshness a free gift. It’s our “thanks” to you benefits of FoodSaver , The #1 Selling ® for being a FoodSaver customer. Brand of Vacuum Packaging Systems. - Page 4 Features of Your FoodSaver Appliance ® A. Accessory Storage Compartment – Stores E. Sealing Strip - Provides extra secure, airtight seal that’s two times wider Accessory Hose. B. Bag Cutter on Lid – Simplifies making F. Foam Gasket – make sure this is correctly positioned to ensure proper vacuum sealing custom-sized bags C.
- Page 5 Features of Your FoodSaver Appliance ® L. Closed Light - Comes on when latch is I. Power Cord Storage – On back side of pushed down to Close position, which locks appliance down the lid. J. Rubber Feet for Vertical Storage – space- M.
- Page 6 How to Seal Only If you want to seal a bag without vacuuming, use 3. When Motor and Red Indicator Light turn off, the Seal Button on the Control Panel. You can even unlock latch, open lid and remove bag. reseal bags such as mylar-type bags.
- Page 7 How to Make a Bag from a FoodSaver Vacuum Sealing Roll ® 1. Open Lid and pull bag material over the Sealing Strip.(Fig. 1) Fig. 1 2. Close and Latch Lid.(Fig.2) Fig. 2 3. Press Seal Button.(Fig.3) Fig. 3 Fig. 4 4.
- Page 8 Vacuum Sealing Bags ® Fig. 1 1. Begin with a FoodSaver Vacuum Sealing System Bag (or create ® a bag as described in the “How to Make a Bag from a Roll” section). 2. Place item(s) in bag, allowing at least 3 inches of space between bag contents and top of bag (Fig.
-
Page 9: Care And Cleaning
Tips for using Your FoodSaver Appliance ® Tips on Sealing a Bag 1–2 hours before vacuum packaging, or place a When making a bag from a roll, make sure end of folded paper towel between food and end of bag cut piece is on Sealing Strip, not over rubber gasket to absorb excess liquids. -
Page 10: Guidelines For Vacuum Packaging
Guidelines for Vacuum Packaging Vacuum Packaging and Food Safety To reheat foods in a microwave in a FoodSaver ® Bag, always cut corner of the bag before placing it The vacuum packaging process extends the life of on a microwave-safe dish. However, to avoid hot foods by removing most of the air from the sealed spots, do not reheat bone-in meat or greasy foods container, thereby reducing oxidation, which affects... - Page 11 When freezing vegetables, it is best to pre-freeze Preparation Guidelines for Liquids: them for 1-2 hours or until solidly frozen. To freeze Before you vacuum package liquids such as soup stock, pre-freeze in a casserole dish, loaf pan or ice vegetables in individual servings, first place on a baking sheet and spread them out so they are cube tray until solid.
-
Page 12: Storage Guide Meat, Cheese, Vegetables, Fruits
Storage Guide Meat, Cheese, Vegetables, Fruits Recommended Where FoodSaver Storage Life Normal ® Foods to Store Bag/Accessory with FoodSaver Storage Life ® Meat Beef, Pork, Lamb Freezer FoodSaver 2-3 years 6 months ® Ground Meat Freezer FoodSaver 1 year 4 months ®... - Page 13 Storage Guide Baked Goods, Coffee, Snacks and Liquids Recommended Storage Where FoodSaver life with Normal ® Foods to Store Bag/Accessory FoodSaver Storage Life ® Baked Goods Bagels, Bread, Freezer FoodSaver 1-3 years 6-12 months ® Pastries Nuts Almonds, Pantry FoodSaver Bag, Canister 2 years 6 months...
- Page 14 Recipes Go to FoodSaver.com for your FoodSaver Appliance ® for more tips and recipes. Wild Rice & Almond-Stuffed Game Hens ¾ cup wild rice, cooked to 2 tablespoons butter package instructions 1½ cups beef broth ½ cup almonds, slivered ¾ cup dry red wine ¼...
- Page 15 Fresh Meat Jerky Recipe Using Oster™ Jerky Seasonings to Make Jerky: Jerky may be made from a variety of different meats. When selecting meats for making jerky, choose lean meats with minimal fat, as fat tends to go rancid during storage. A lean flank steak or round steak makes excellent jerky.
-
Page 16: Troubleshooting
Troubleshooting Problem Solution Red Seal LED flashes • Unit is overheated, wait for 20 minutes for unit to cool down • If trying to seal an end of a roll to make a bag, make sure the bag is on the seal strip •... -
Page 17: One Year Limited Warranty
One Year Limited Warranty Sunbeam Products, Inc. doing business as Jarden Consumer Solutions or if in Canada, Sunbeam Corporation (Canada) Limited doing business as Jarden Consumer Solutions (collectively “JCS”) warrants that for a period of one year from the date of purchase, this product will be free from defects in material and workmanship. JCS, at its option, will repair or replace this product or any component of the product found to be defective during the warranty period. - Page 18 Notes www.foodsaver.com 1-877-777-8042...
- Page 19 Notes www.foodsaver.com 1-877-777-8042...
- Page 20 Registering your appliance is quick and easy at www.foodsaver.com/register. If you register on our website, you will have the opportunity to receive special bag and accessory introductory offers. Refer to the registration card inside the box. For important safety information and helpful tips, please visit us at www.foodsaver.com to get tips on vacuum sealing and order FoodSaver brand accessories, bags and rolls, ®...
Need help?
Do you have a question about the Vacuum Sealing System and is the answer not in the manual?
Questions and answers
I need the user manual for model number 3180 and I’m not seeing it as a PDF anywhere on this site.