
Related Manuals for Sunbeam BVSBJWX Series


Summary of Contents for Sunbeam BVSBJWX Series
-
Page 1: User Manual
User Manual / Notice d’emploi Coffeemaker / Cafetière BVSBJWX Series www.sunbeam.ca... -
Page 2: Important Safeguards
Follow the instructions below to reduce or eliminate the chance of breaking the glass decanter or thermal carafe: • This decanter is designed for use with your SUNBEAM coffeemaker and therefore must never be used on a range top or in any oven, including a microwave oven. -
Page 3: Introduction
SAVE THESE INSTRUCTIONS INTRODUCTION Welcome and congratulations on the purchase of your new SUNBEAM Coffeemaker. Your new coffeemaker will wake up with you in the morning and provide you breaks and treats during your hectic daily activities. -
Page 4: Table Of Contents
Cleaning and Maintaining Your Coffeemaker ......16 Troubleshooting Your Sunbeam Coffeemaker ......18 Service and Maintenance . -
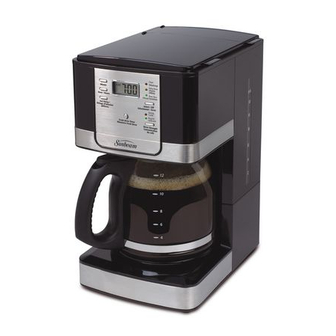
Page 5: Parts Diagram
PARTS DIAGRAM 1. Brew Basket Lid 6. Warming Plate (not on thermal models) 2. Shower Head 7. Decanter 3. Water Reservoir 8. Removable Filter Basket 4. Pause ‘n Serve 9. Pour Through Reservoir Lid 5. Water Window... -
Page 6: Control Panel
Control Panel a. Clock Display / Fresh Brew™ Timer Display b. Clock Display / Fresh Brew™ Timer Display Button c. Clean Cycle Indicator d. Delay Brew Indicator e. Brew Now Indicator f. Select/Off Button g. Brew Strength Indicators (Regular/Strong) h. Brew Strength Button I. -
Page 7: Coffeemaker Features And Benefits
COFFEEMAKER FEATURES AND BENEFITS Your new SUNBEAM coffeemaker has the following features: • Brewing Capacity – 12 Cups – glass decanter series – 8 Cups – thermal carafe series • Removable Filter Basket – The filter basket lifts out for fast and easy cleaning and filling. -
Page 8: Clean Your Coffeemaker Before Using The First Time
CLEAN YOUR COFFEEMAKER BEFORE USING THE FIRST TIME Make sure your first cup of coffee is as good as can be by cleaning your SUNBEAM Coffeemaker before its first use. Just follow these simple steps: 1. Wash the decanter, decanter lid and the filter basket in a mixture of mild detergent and water. -
Page 9: Setting The Clock And Delay Brew Time
SETTING THE CLOCK AND DELAY BREW TIME To Set the Clock: 1. Plug the power cord into a standard electrical outlet. The clock will flash on the control panel to indicate that the time has not been set yet. 2. Press and hold the HOUR and MINUTE buttons until you reach the current time. -
Page 10: Preparing For Use
PREPARING FOR USE Selecting and Measuring Ground Coffee For best results, use a level tablespoon for ground coffee measurement. Make sure you use medium grind coffee for a perfect brew. A. Suggested Coffee Measurement Chart To Brew Ground Coffee 12 Cups 9 tbsp. -
Page 11: Water Filtration System
This carbon-based water filter improves the taste of your coffee by removing up to 97% of the chlorine from the water you may use to brew your coffee. First, look for the SUNBEAM Filtration Friendly symbol on the bottom of your filter basket. - Page 12 See the Suggested Coffee Measurement Chart. IGURE 4. After following instructions in the Water Filtration System, place the SUNBEAM ® water filter in the basket (not available on all models), making sure that the side marked “this side up”...
-
Page 13: Brewing Coffee Now
BREWING COFFEE NOW 1. After completing the steps in the Adding Water and Coffee section and with the glass decanter and the filter basket securely in place, turn the coffeemaker on by pressing the SELECT button once. The BREW NOW green light will turn on to signal that the coffeemaker is on and brewing (Figure 6). - Page 14 4. Prior to making a second pot of coffee, turn the coffeemaker off. This will reset the FRESH BREW ™ TIMER feature. To turn the coffeemaker off, press the SELECT button until all lights turn off. 5. Make sure the decanter is empty before starting to brew coffee.
-
Page 15: Brewing Coffee Later (Delay Brew)
BREWING COFFEE LATER 1. You must first set the time for when you would like the coffeemaker to begin brewing your coffee as described in Setting the Clock and the Delay Brew Timer section. 2. Prepare your coffeemaker as described in Adding Water and Ground Coffee section. -
Page 16: Cleaning And Maintaining Your Coffeemaker
CAUTION! Never immerse the coffeemaker itself in water, in any other liquid or place in the dishwasher. Regular Cleaning and Maintenance Decalcifying your SUNBEAM Coffeemaker Minerals (calcium/limestone) found in water will leave deposits in your coffeemaker and affect its performance. It’s recommended that you regularly remove these deposits using vinegar. -
Page 17: Cleaning The Decanter
5. Discard the cleaning solution and rinse the decanter thoroughly with clean water. 6. Fill the water reservoir with clean, fresh water. 7. Place the empty decanter back on the coffeemaker, centered on the warming plate. 8. Remove and discard the the paper filter used during the cleaning cycle. If a permanent filter was used during cleaning, remove it and rinse it thoroughly before replacing it in the filter basket. -
Page 18: Troubleshooting Your Sunbeam
Coffeemaker has been carefully designed to give you many years of trouble-free service. In the unlikely event that your new coffeemaker does not operate satisfactorily, please review the following potential problems and try the steps recommended BEFORE you call an Authorized Sunbeam Service Center. PROBLEM POSSIBLE CAUSE SOLUTION THE “BREW NOW”/ON... - Page 19 WITHIN THE FILTER BASKET. • The filter collapsed. • REMOVE FILTER AND REPLACE. Do you still have questions? You can call us toll-free at the Jarden Consumer Solutions Consumer Service Department, 1-800-667-8623 or you can visit us at www.sunbeam.ca.
-
Page 20: Service And Maintenance
If your coffeemaker requires service, do not return it to the store where you purchased it. All repairs and replacements must be made by Sunbeam or an authorized Sunbeam Service Center. Please call us at the following toll-free telephone number to find the... -
Page 21: Warranty Information
1-800-667-8623 and a convenient service center address will be provided to you. In the U.S.A., this warranty is offered by Sunbeam Products, Inc. doing business as Jarden Consumer Solutions located in Boca Raton, Florida 33431. In Canada, this warranty is offered by Sunbeam Corporation (Canada) Limited doing business as Jarden Consumer Solutions, located at 20 B Hereford Street, Brampton, Ontario L6Y 0M1. - Page 22 Canada: 1.800.667.8623 États-Unis: 1.800.458.8407 www.sunbeam.ca ©2012 Sunbeam Products, Inc., faisant affaires sous le nom de Jarden Consumer Solutions. Tous droits réservés. Aux États-Unis, distribué par Sunbeam, Products, Inc. faisant affaires sous le nom de Jarden Consumer Solutions, Boca Raton, FL 33431.
Need help?
Do you have a question about the BVSBJWX Series and is the answer not in the manual?
Questions and answers