Garmin eMap Owner's Manual
Portable electronic map
Hide thumbs
Also See for eMap:
- Owner's manual (52 pages) ,
- Declaration of conformity (1 page) ,
- Owner's manual (52 pages)
Table of Contents
Advertisement
Quick Links
Advertisement
Table of Contents

Subscribe to Our Youtube Channel
Related Manuals for Garmin eMap


Summary of Contents for Garmin eMap
- Page 1 guide...
- Page 2 GARMIN products. Website address: www.garmin.com GARMIN, AutoLocate, MapSource and TracBack are registered trademarks and eMap is a trademark of GARMIN Corporation and may not be used without the expressed permission of GARMIN Corporation. October 1999 Part Number 190-00152-00 Rev.
-
Page 3: About This Manual
About This Manual Thank you for choosing the GARMIN eMap. To get the most from your new eMap, take time to read through this owner’ s manual in order to understand all of the operating features. This manual is organized into three sections. -
Page 4: Warnings And Precautions
The system is subject to changes which could affect the accuracy and performance of all GPS equipment. Although the eMap is a precision electronic NAVigation AID (NAVAID), any NAVAID can be misused or misinter- preted and, therefore, become unsafe. - Page 5 GPS unit so that it will not cause damage or personal injury in the event of an accident. Do not mount the eMap over airbag panels or in a place where the driver or passengers are likely to have an impact with it in an accident or collision.
-
Page 6: Table Of Contents
Section One – Introduction Contents About This Manual....................i FCC Compliance Statement................ii Warnings and Precautions.............ii-iii “How To” Index....................v eMap Unit Features................vi Section Two - Reference Battery Installation..................1 Map Cartidge Installation..............1 Keypad Usage....................2 A Guide Through the Screen Displays..........3 Selecting Program Options and Data Entry......4-5 About GPS....................6... -
Page 7: How To" Index
Introduction “How To” The list below is provided to help you Index quickly find some of the more important procedures you will use on your new eMap. TO DO THIS: SEE PAGE(S): Install batteries..............1 Load Map Data Cartridges............1 Turn the unit on or off............2,7 Learn how to operate the unit’... -
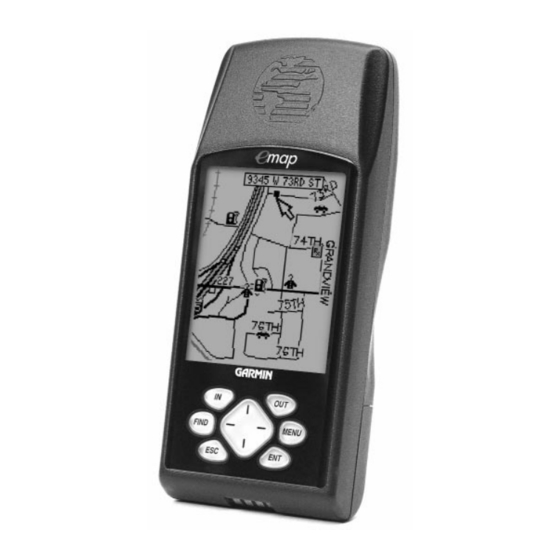
Page 8: Emap Unit Features
Introduction eMap Unit Features OUT Key (Map Zoom) -
Page 9: Battery Installation
Reference Installing the Batteries Battery The eMap operates on two AA batteries, which are installed by removing the cover on the back of the unit. Installation These batteries will provide more than 10 hours of continuous use. Rechargeable NiCad or lithium batteries may be also used. -
Page 10: Keypad Usage
Reference Keypad Usage The POWER Key The POWER key turns the unit off and on. The BACKLIGHT /CONTRAST Key The BACKLIGHT/CONTRAST key turns on the display illumination. When pressed held for more than one second it allows contrast adjustment. The MENU Key The MENU key displays a menu of available options for the current page. -
Page 11: A Guide Through The Screen Displays
Menu. This introduction is designed to provide you with Screen Displays a general overview of the operating structure. When you press the POWER key, the eMap turns ON and displays the Title and Information pages and Main Menu Title Page then the Map Page with a map and navigation informa- tion. -
Page 12: Selecting Program Options And Data Entry
How To Select Options and Enter Data Options Before moving ahead into eMap features you will need to learn basic eMap operation. You can select and activate options and enter data to customize the eMap to fit your requirements. You can use the ENTER key and ROCKER keypad to select options, enter names and numbers in data fields, and activate your selections. -
Page 13: Entering Data
Reference Entering Data Naming a waypoint, entering a street address or placing any sort of data that has not been pre-defined requires the use of both the ROCKER keypad and the ENTER key. To enter a name or number in a data field: 1. -
Page 14: About Gps
North or to Track Up name shown directly above the symbol. We’ll cover more to match your direction of about the eMap’ s waypoint features and the Map Page in travel. You can change the this reference section. map scale by Zooming In or Zooming Out. -
Page 15: Start Up
Map Page. The first time you use the eMap it must eMap is first turned on. determine its location using a feature called ‘AutoLocate’. -
Page 16: Contrast Settings
Using the Backlighting Feature Backlighting You can set you eMap unit to backlight the screen for easy viewing in dim and dark lighting conditions. You can select ‘Stays On’, or enable the automatic shut-off feature to preserve battery life. Automatic shut-off times from 15 seconds to 2 minutes (since last key press) are available. - Page 17 Detailed map features as well as information about those features can be displayed using a map cartridge containing data downloaded from a GARMIN MapSource Zoom IN to view more map CD-ROM. Refer to Appendix A for ordering information.
- Page 18 (refresh) the screen to show the new area of the map. When using the Use the ROCKER keypad eMap with the GPS receiver operating, map to move the panning arrow redrawing will be slower. To significantly speed the about the Map Page.
-
Page 19: Map Page
Reference Using the Map Page Options Map Page The Map Options Menu allows you to choose from a Options full page map or a map with data fields, from ‘Use Indoors’ or ‘Use Outdoors’, to stop an active navigation program, to measure distance between points on the map, and to setup how geographic features will appear on the map. -
Page 20: Map Page Options
Reference Map Page The ‘Measure Distance’ option displays at the top of Options the map and allows you to view the name of a location on the Map Page, the distance and direction from your current location to that location. Measuring distance from point to point on the map is accomplished by using the panning arrow to mark locations you want to measure the distance between. -
Page 21: Marking A Waypoint
Marking a Waypoint A waypoint is any identified point on the map that has been named and recorded. The eMap can store 500 waypoints in memory. Waypoints are used to build routes and as destinations to Goto. To create a personal waypoint: 1. -
Page 22: Editing A Waypoint
Reference To create a new waypoint by manually Marking a entering its coordinates: Waypoint 1. Press and hold the ENTER key to access the Mark Waypoint Page. 2. Highlight the Location field on the Mark Waypoint Page and press ENTER to highlight the first character of the location coordinates. -
Page 23: Going To A Waypoint
Reference Going To Once you’ve stored a waypoint in memory, you can use the eMap to guide you to it by using the Goto feature. A Goto is really nothing more than a straight-line course from Waypoint your present position to a location you’ve selected. A Goto... -
Page 24: Using The Find Features
Reference You can locate Personal Waypoints, Cities, and Using the Interstate Exits included in the eMap basemap. If you are Find Feature using a data cartridge with MetroGuide map data, you can also locate Points of Interest, Addresses and Intersec- tions. - Page 25 Reference Using the Find Feature to Locate a City Using the Find Feature If you want to locate or travel to a city you can use the Cities List in the Find Feature Menu. You can display it on the Map Page, Goto it, and view information about population size and distance from your present location.
- Page 26 Reference Using the Find Option to Locate an Exit Using the Find Feature If you want to locate a nearby exit on an interstate highway you may find it on the Exits List in the Find Feature Menu. You can choose from a list of exit types to view and view a list of services.
- Page 27 Reference Using the Find Feature to Locate a Point of Using the Interest: Find Feature If you are using a map data cartridge and you want to locate a point of interest within the scope of the map data on the cartridge such as a restaurant, museum, motel, etc., you can select the ‘Point of Interest’...
- Page 28 Reference Using the Using the Find Option to Locate an Address or an Intersection Find Feature If you want to locate an address or intersection contained in the data on your map cartridge, you can select ‘Address’ or ‘Intersection’ from the ‘Find’ menu. To locate an address: 1.
-
Page 29: Using The Main Menu
Reference Using the The eMap’ s Main Menu provides access to the Trip Computer Page, the Routes Page, the Tracks Page, GPS Main Menu Information Page, and the Setup Options Files. The Main Menu can be accessed using the MENU key. -
Page 30: The Tracks Page
‘Track’ automatically stored in the eMap, eliminating the need to store waypoints along the way. Once saved, it becomes a ‘Track’. The ‘Track’ is an electronic ‘breadcrumb’ trail, showing the path you have traveled. -
Page 31: The Route Page
Route Page intermediate waypoints which lead you to your final destination. The eMap will store one route, with up to 50 waypoints. A Route can be created and modified from the Route Page or can be created in MapSource and saved into the eMap. -
Page 32: The Gps Info Page
Each satellite has a 30-second data transmission that must be collected before that satellite can be used for navigation. Once a fix has been calculated, the eMap will 04 06 07 10 13 15 17 18 24 30 update your position, track and speed, by using the best... -
Page 33: Mapsource Info
The MapSource Information Page shows you information about detailed map data contained on the optional map cartridge you can install in your eMap unit. This page displays the map set name of the MapSource map data on the map cartridge. The name of the maps installed on the cartridge will be displayed in the center field along with a check box. -
Page 34: Emap Setup Options
‘Battery Saver’ with a less frequent satellite signal updating process to save on battery power, and ‘GPS Off’ which allows you to operate the eMap with ‘General’ Settings File GPS receiver turned off to also save on battery power. The ‘Use Indoors‘... - Page 35 When you select 12 hour time formatting, the clock will read like a standard clock with 12 hour AM and 12 hour PM cycles. The 24 hour option sets the eMap to display a 24 hour cycle (Military Time). The time zone can be set to any one of nine pre- programmed zones or by entering the UTC Time Offset ‘Time’...
- Page 36 The ‘Interface’ Settings Page allows you to choose from 7 different input/output serial data formats, or none at all. This feature is used when connecting your eMap unit to external NMEA devices, DGPS beacon receiver, a personal computer, etc. Below is a description of each...
-
Page 37: Section Three - Appendices Appendix A: Accessories
GA 27C Remote GPS Antenna..Part No. 010-10052-05 Magnetic or windshield mount for enhanced satellite acquisition. PC Data Cable ....Part No. 010-10206-00 Allows transfer of map data from a PC to an eMap data cartridge. Vehicle Suction Mount Data Cable ......Part No. 010-10205-00 Wiring harness. -
Page 38: Appendix B: Specifications
DoD-imposed Selective Availability Program. **With optional GARMIN GBR 21 Beacon Receiver input The temperature rating for the eMap may exceed the usable range of some batteries. Alkaline batteries can rupture at high temperatures. Alkaline batteries lose a significant amount of their capacity as temperature decreases. -
Page 39: Appendix C: Messages
None Found - There is no such address, intersection, point of interest, or city in the map information database. Check spelling or number entry and try again. RAM Failed - The eMap has detected a failure in its internal memory. If the message persists, service is required. -
Page 40: Appendix C: Messages
Track Truncated - A complete uploaded track will not fit into memory. Clear existing track memory or reduce the amount of new track data. Transfer Complete - The eMap has finished uploading or downloading information to the connected device. Waypoint Already Exists - The name you selected has already been assigned. -
Page 41: Appendix D: Maintenance
GARMIN for service. 913-397-8200 impact. Unit powers up, but Batteries may be nearly Replace batteries. then turns OFF . exhausted. The eMap is programmed to provide “pop-up” messages concerning operational characteristics and conditions. Refer to Appendix C. -
Page 42: Appendix E: Utc Time Chart
Appendix E UTC Time This chart is provided to help you determine the time Offset Chart offset settings for your current location if it not in one of the time zones listed on the Time Setup Page. To change the UTC Offset, if necessary, press the MENU key twice to access the Main Menu. -
Page 43: Appendix F: Wiring/Interfaces
PC’ s , differential beacon receivers, marine autopilots and /or a second GPS receiver. The NMEA 0183 version 2.0 interface format is supported by the eMap and enables the unit to drive up to three NMEA devices. NMEA 0183 Version 2.0 Approved Sentences:... -
Page 44: Appendix G: Index
Appendix G Index Goto Functions........15 Nearest Cities ....17 Nearest Exits.......18 Nearest Waypoints....16 Almanac........... 6 GPS Info Page.........24 Altitude Entry........14, 24 GPS Overview...........6 Antenna..........vi, 7 Arrival Alarm........15, 19 Arrow, Panning........10 Highlighting..........4-5 AutoLocate Mode........7, 24 AutoZoom..........12 Initialization..........7 Backlighting..........8 In Key..........vi, 2 Battery Installation/Replacement....1 Interface Formats........28 Battery Level Indicator......16 Battery Type........1, 30... -
Page 45: Appendix G: Index
Appendix G Index Receiver Status........24 Rocker Keypad........vi, 2 Route............23 Warranty..........38 Activating......23 Waypoints..........13-15 Creating........23 Deleting.......14 Naming.......23 Deleting by Symbol....14 Options.......23 Display Options.......12 Editing Routes.......23 Editing........14 Inverting......23 Marking.........13 Planning.........23 Naming........13 Nearest........16 Symbols........13 Setup Options........26-28 Waypoint Edit Page........14 Signal Strength Bars.........24 Waypoint List...........16 Sky View Display........24 Wiring/Interfaces........35 Specifications..........30... -
Page 46: Appendix H: Warranty
GARMIN Corporation warrants this product to be free from defects in materials and workmanship for one year from the date of purchase. GARMIN will, at its sole option, repair or replace any components which fail in normal use. Such repairs or replacement will be made at no charge to the customer for parts or labor. - Page 48 © 1999 GARMIN Corporation GARMIN International 1200 E 151 Street, Olathe, KS 66062 U.S.A. GARMIN (Europe) Ltd. Unit 5, The Quadrangle, Abbey Park Industrial Estate, Romsey, SO51, 9AQ U.K. GARMIN (Asia) Corp. 3rd Floor, No. 1, Lane 45, Pao Hsing Road, Hsin Tien, Taipei, Taiwan www.garmin.com...
Need help?
Do you have a question about the eMap and is the answer not in the manual?
Questions and answers