Table of Contents
Advertisement
Advertisement
Table of Contents

Related Manuals for Ambir ImageScan Pro 820i


Summary of Contents for Ambir ImageScan Pro 820i
-
Page 2: Environmental Information
Trademarks ©2011 Ambir Technology, Inc. All rights are reserved. All trademarks and brand names mentioned in this publication are property of their respective owners. ImageScan Pro 820i User's Guide Ambir_Ver 1.3.doc Liability While all efforts have been made to ensure the accuracy of all contents in... -
Page 3: Table Of Contents
Table of Contents INTRODUCTION ........................... 5 ..........................5 OW TO UIDE ............................. 5 UIDE ONVENTIONS A Note About Icons ..........................6 ............................. 6 AFETY RECAUTIONS ........................7 INIMUM YSTEM EQUIREMENTS .............................. 8 ONTENTS ............................9 CANNER EATURES CHAPTER I. INSTALLING THE SCANNER ....................11 ...................... - Page 4 ............................... 32 OWER CHAPTER IV. TROUBLESHOOTING ....................... 33 ..........................33 CANNER ONNECTION ..........................33 LEARING APER APPENDIX A: SPECIFICATIONS ......................35 APPENDIX B: CUSTOMER SERVICE AND WARRANTY ................36 ............................. 36 ECHNICAL UPPORT Free Support Through Email & Web ....................36 Technical Support by Telephone ......................
-
Page 5: Introduction
INTRODUCTION Thank you for purchasing an Ambir scanner. We have designed this product to provide you with an effective tool to capture, manage, and archive documents of many types. We encourage you to read this important User’s Guide carefully. How to Use This Guide This User’s Guide provides instructions and illustrations on how to install and... -
Page 6: A Note About Icons
A Note About Icons This guide uses the following icons to point out information that deserves special attention. A procedure that must be followed carefully to prevent injury, or accidents. Warning Instructions that are important to remember and may prevent mistakes. Attention Optional tips for your reference. -
Page 7: Minimum System Requirements
5. Unplug this device if you don’t need to use it for an extended period of time to avoid any risks of causing a fire. 6. Do not attempt to disassemble the scanner. There is danger of electric shock. Opening your scanner will void your warranty. 7. -
Page 8: Box Contents
ontents 1. Scanner 2. USB Cable 3. AC Adapter 4. Stacker 5. Quick Start Guide 6. Setup/Application CD-ROM 7. Calibration Sheet 8. Memo Label 9. Extended Paper Width Slider (2 pieces) 10. Padded Carry Bag (Not included with all scanner models) 11. -
Page 9: Scanner Features
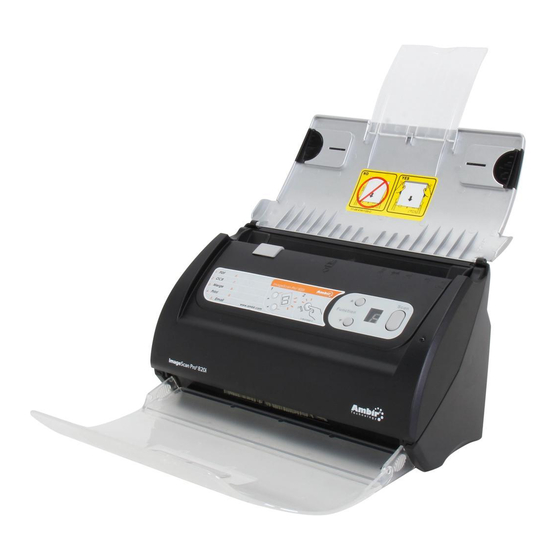
canner eatures 1. PAPER CHUTE COVER—Helps keep the paper in place. Open paper chute cover when using the scanner. 2. PAPER WIDTH SLIDER—Adjusts the paper width slider for the paper size you are using. 2. Extended Paper Width Slider (accessory in the box contents) –... - Page 10 8. UP BUTTON—Press to move forward the scanning task number indicated in the function number display. 9. DOWN BUTTON—Press to move backward the scanning task number indicated in the function number display. 10. FUNCTION NUMBER DISPLAY— Indicates the number of the predefined scanning task selected by the up or down button.
-
Page 11: Chapter I. Installing The Scanner
CHAPTER I. INSTALLING THE SCANNER Before installing your scanner, please verify that you have all of the proper components. A list of the package contents is provided in the ―Box Contents‖ section of this guide. oftware nstallation equirements Your scanner comes with the following software: ... -
Page 12: Scanner Installation And Set Up
Scanner Installation and Set Up Place your scanner on a smooth, level and solid surface before going through the installation process. Tilted or uneven surfaces may cause paper feeding errors, scanner damage or personal injury. Attention Avoid using the scanner in a dusty environment. -
Page 13: Step 2. Installing The Software
3. Plug the square end of the included USB cable into the USB port the rear of the scanner. 4. Plug the rectangular end of the USB cable into an available USB port on your computer. 5. If you plan to connect your scanner to a USB hub , make sure the hub is connected to the USB port in your computer. - Page 14 Security window then click Finish in the wizard window. Please skip to step 8. 4. For Windows Vista: a. Select ―Locate and install driver software (recommended)‖ when the ―Found New Hardware‖ window is displayed. b. Click the Continue button when the ―User Account Control‖ dialog pops up.
-
Page 15: Step 3. Installing The Extended Paper Width Slider
Step 3. Installing the Extended Paper Width Slider 1. Open the ADF cover by pulling the gray lever, and get the right and left extended paper width sliders ready. 2. Align and insert the left extended paper width slider onto the paper width slider on the left. Position and insert the right extended paper width slider onto the paper width slider on the right. - Page 16 Your scanner is TWAIN compliant and functions with virtually all available TWAIN compatible software. If you purchase additional software to use with your scanner, please make sure it conforms to the TWAIN standard.
-
Page 17: Chapter Ii. Scanning
CHAPTER II. SCANNING Your scanner needs to be driven by certain type of software program. Since all documents or images (whether text or pictures) that are acquired from the scanner are treated by your computer as images, most scanning will probably be done from an image-editing program where you can view, edit, save and output the scanned images. -
Page 18: Preparing Documents
reparing ocuments Proper document preparation prior to the scan can prevent paper feed errors and damage to the scanner. Checking Document Conditions Make sure the size and ream weight of your documents meet the requirements stated in Appendix A. Refer to ―Appendix A: Specifications‖ of this guide for more information. -
Page 19: Loosening Documents
Paper with an odd shape (non-rectangular) Tracing paper Carbon paper, pressure sensitive paper, carbonless paper Items other than paper (e.g. cloth, metal, foil) DO NOT use the ADF to scan photographic sheets or particularly valuable document originals;... -
Page 20: Loading Documents
Loading Documents 1. Load the documents, headfirst and face down, toward the center of the ADF paper chute and all the way into the ADF until touching the bottom. For single-sided scans, load the documents face down so that the side to be scanned faces towards the paper chute. -
Page 21: Loading Business Cards
DO NOT load more than 50 sheets of paper (18 lb./70 g/m2,) into the ADF. Paper fed into the ADF must be a minimum of 2‖ x 2‖ (5.08 x 5.08 cm, W x L). Make sure there are no gaps between the ... -
Page 22: Scanning Documents
For double-sided scans, load the card in the desired order. 2. Adjust the paper width slider to the card width. The paper width slider should be gently touching both sides of the card. Scanning Documents There are three different ways to operate the scanner: By acquiring images from the scanner through our TWAIN interface within any TWAIN-compliant application programs. - Page 23 If you have more than one scanner or other imaging devices installed on your computer, you need to set this scanner as the default scanning source before you acquire image data/scan using a TWAIN compliant program. For Presto! PageManager 7.1, From the File menu, click Select Source… In the window that opens, choose this scanner and then click the OK button to set this scanner as the default scanning source.
-
Page 24: Scanning From The Scanner's Front Panel
If you usually scan images with the same settings, you can define a scan profile to save the settings you have configured by entering a name or description for this new profile in the white area beside the word Profile and then click the Save button. Information Whenever you want to scan similar documents and apply the same settings,... -
Page 25: Configure Button Settings
Configure Button Settings Within the ―Button Configuration‖ window, you can find a row of icons running through the left side of the window. Each icon represents a scanning task, and the number underneath corresponds to the function number displayed on the scanner front panel. Nine frequently-used scanning tasks are pre-configured for your convenience. - Page 26 Check current button settings by viewing the memo sticker or the Button Configuration window. If needed, you may also modify settings to meet your current needs. Right-click the icon in the Windows system tray, and then choose Execute in the pop-up menu that opens. Click the desired button function item in the pop-up menu.
-
Page 27: Chapter Iii. Care And Maintenance
CHAPTER III. CARE AND MAINTENANCE Your scanner is designed to be maintenance-free. However, routine care and maintenance can keep your scanner working smoothly. Cleaning the Scanner Paper powder, dust, ink and toner from paper being scanned may make the inner document feeder dirty, which leads to poor image quality or document-feeding errors. -
Page 28: Cleaning The Adf
Cleaning the ADF Open the ADF cover by pulling the gray lever. Cover lever ADF cover Gently wipe the following areas with the cloth dampened with the cleaner. Be careful not to scratch their surfaces. Clean Feed Roller: Wipe the Feed Roller from side to side and then rotate it. Repeat until its entire surface is cleaned. - Page 29 Clean ADF Glass: Do not spray cleaner directly onto the scanner glass. Excess liquid residue may fog or damage the scanner. Attention Wait for cleaned areas to dry completely. Close the ADF cover by pushing it back down until it snaps back into place.
-
Page 30: Replacing Consumables
Replacing Consumables As a guideline, we recommend replacing the pad module every 20,000 scans. Replacing the Pad Module Open the ADF cover by pulling the cover lever. Cover lever ADF cover Remove the pad module by squeezing the black tabs on both sides of the pad module and pulling it out. -
Page 31: Calibrating The Scanner
Calibrating the Scanner Please uninstall the extended paper width sliders before you start the calibration. Attention Calibrate the scanner if colors appear in areas that should be white, or colors of the scanned image and the original vary a lot. This allows you to adjust and compensate for variations that can occur in the optical component over time. -
Page 32: Power Save
Click Next in the Calibration Wizard that pops up and then click Calibrate Now..Click the Start button to begin the calibration process. Calibration is complete when the scanner pulls the sheet all the way through. After the calibration is complete, click OK and then click Finish. Power Save To save power, the scanner light source always automatically turns itself off after the scanning process is finished. -
Page 33: Chapter Iv. Troubleshooting
CHAPTER IV. TROUBLESHOOTING If you encounter problems with your scanner, please review the installation and scanning instructions contained in this guide. Before you seek customer service or repair assistance, please refer to the information in this chapter and consult our FAQ (Frequently Asked Questions) for useful troubleshooting information. - Page 34 Do not try to pull jammed or half-scanned documents out of the ADF without first opening the ADF cover. Doing so may Attention permanently damage the ADF. Close the ADF cover by pushing it back down until it snaps back into place.
-
Page 35: Appendix A: Specifications
APPENDIX A: SPECIFICATIONS Ambir ImageScan Pro 820i Optical Resolution 600 dpi Max. Hardware 600 x 600 dpi Resolution Color: Input 48-bit; Output 24-bit Scan Modes Grayscale: Input 16-bit; Output 8-bit Black & White: 1-bit Technology Color Contact Image Sensor (CIS) 1. -
Page 36: Appendix B: Customer Service And Warranty
Technical Support by Telephone Support is available from 7:00 a.m. – 7:00 p.m. Central Time Monday-Friday by dialing (630) 530-5400 or (800) 915-9930, option 3. For all Ambir scanners you can speak directly to a technical support representative or leave a message for a call back. -
Page 37: Warranty For Products
*Contact your place of purchase for warranty service information Warranty for Products Ambir Technology warrants our products against defects in materials and workmanship to the original purchaser for a period of one (1) year from the date of the original purchase. This warranty is limited to repair or replacement of the product, and the remedy provided to the purchaser for warranty service is the sole discretion of Ambir Technology. -
Page 38: Fcc Radio Frequency Statement
FCC Radio Frequency Statement This equipment has been tested and found to comply with the limits for a Class B digital device, pursuant to part 15 of the FCC rules. These limits are designed to provide reasonable protection against harmful interference in a residential installation.
Need help?
Do you have a question about the ImageScan Pro 820i and is the answer not in the manual?
Questions and answers