Table of Contents
Advertisement
Advertisement
Table of Contents
Troubleshooting

Subscribe to Our Youtube Channel
Related Manuals for Xentaur XDT

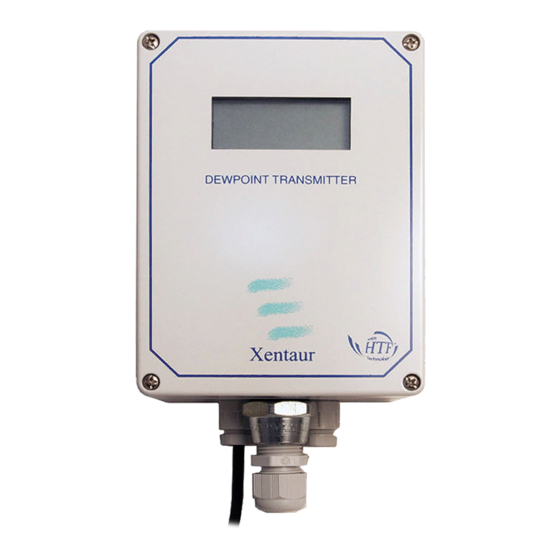
Summary of Contents for Xentaur XDT
- Page 1 yyyyyyyyy yyyyyyyyy yyyyyyyyy yyyyyyyyy yyyyyyyyy yyyyyyyyy...
- Page 2 Your Representative is: Except as may be provided by contract, this document and all specifica- tions and drawings contained are the property of Xentaur Corporation, are issued in strict confidence, and shall not be reproduced or copied or trans- mitted, in any form or by any means, or used as the basis for the manufac- ture or sale of apparatus, programs, or services without permission.
- Page 3 XDT User’s Manual Xentaur reserves the right to change or modify the product specification and / or appearance at any time without notice. Therefore, the information in this document is subject to change without notice and does not represent a commitment on the part of Xentaur Corporation.
- Page 4 XDT User’s Manual Examine the XDT package for damage or mishandling. If any damage is evident notify the carrier and request an inspection. Unpack the box, it should contain: The XDT, sensor in desiccant container, connec- torized cable, and this manual.
- Page 5 Fuses are specifically excluded from any liability. This warranty is effective from the date of delivery to the original purchaser. The equipment must be determined by Xentaur to have been defective for the warranty to be valid. This warranty applies as follows: •...
-
Page 6: Table Of Contents
XDT User’s Manual Table of Contents 1.0 Overview of the Dewpoint Transmitter model (DT) ............1 2. Sensor and Sampling Techniques ..................3 2.1 Precautions using the sensor ....................3 2.2 Sensor Technical Specifications ..................4 2.3 Sensor Installation & Sampling Techniques................4 2.3.1 In-situ Installation ......................5 2.3.2 Extractive Installation .......................6... - Page 7 XDT User’s Manual Appendix D: Optional Sensor Fittings..................41 Appendix E: DT Circuit Board Dimensions................42 Appendix F: Sensor/SpanCheck™ Theory of Operation ............45 Appendix G: Dewpoint Response time Analysis ..............46 Appendix H: Sample Gas Filter Considerations..............48 Appendix I: DT Grounding Considerations................49 Appendix J: Analog Output vs. Dewpoint................50 Appendix K: RS-232C Interface Protocol ................52...
-
Page 8: Overview Of The Dewpoint Transmitter Model (Dt)
The measurement is displayed on the instrument’s custom LCD, can be transmitted by optional analog and digital outputs, and can control optional programmable relays. Four front panel but- tons provide the user with a rich feature set. The XDT’s advanced design allows it to be housed in a variety of enclosures. - Page 9 XDT User’s Manual...
-
Page 10: Sensor And Sampling Techniques
Section 2: Sensor and Sampling Techniques 2. Sensor and Sampling Techniques 2.1 Precautions using the sensor The Xentaur HTF™ Al sensor is designed and field proven to be highly reliable, rugged and maintenance free. However the user should consider the following precautions: •... -
Page 11: Sensor Technical Specifications
XDT User’s Manual 2.2 Sensor Technical Specifications Type: ........Hyper Thin Film HTF™ high capacitance Al Dewpoint range:....XTR-100: -148°F to +68°F (-100°C to +20°C) XTR-65: -85°F to +68°F (-65°C to +20°C). Capacitance:.......15nF to 200nF. Accuracy: ......±5.5°F (±3°C) refer to appendix M for accuracy expressed in other units of measure. -
Page 12: In-Situ Installation
Section 2: Sensor and Sampling Techniques 2.3.1 In-situ Installation In-situ installation is recommended only for measurements where the gas pressure is expected to vary little, the gas is expected to be free of contaminants, the gas temperature is within the operat- ing specifications of the sensor, and there is no chance of liquids coalescing. -
Page 13: Extractive Installation
XDT User’s Manual 2.3.2 Extractive Installation For extractive installations we recommend our sample system ESS, which may be equipped with a variety of features, such as: isolation valve, coalescing or particulate filter, pressure regulator, calibration sample injection or extraction port, pressure gauge, flow meter, weatherproof enclo- sure. -
Page 14: Mechanical Installation
Section 2: Sensor and Sampling Techniques inside these materials. • Try to run pipes to the sensor upwards, so that contaminants tend to fall back into the main line. • Keep the length of the sample line to the sensor as short as possible. •... -
Page 15: Troubleshooting Unexpected Readings
XDT User’s Manual 2.5 Troubleshooting unexpected readings If erroneous readings are suspected on a newly acquired instrument, compare the serial number engraved on the sensor sintered filter, to the label on the instrument. The two should be the same; if they are not, the instrument may not be calibrated with the installed sensor. To troubleshoot other problems, identify the unexpected reading category in the following table, and consider the possible causes and appropriate diagnostic action and remedy. -
Page 16: Instrument
3.1.1 Electromagnetic Compatibility Considerations The XDT has been designed and verified by testing to meet the requirements of the EC Council EMC Directive 89/336/EEC, for Industrial, Scientific & Medical equipment. The sensor ground is isolated from the AC ground, logic ground, 4-20mA loop return, etc.;... -
Page 17: Instrument Technical Specifications
XDT-PM panel-mount, DIN 43700 dimensional standard, optional NEMA 12 type protection gasketing available Dimensions & Weight:..XDT-OEM: 4.25” x 5.15” x 2.25”, 0.6 lbs (fully optioned) without cables. XDT-NEMA: 4.73” x 6.3” x 3.55”, 2.1 lbs (fully optioned) w/cables. XDT-PM: 5.67” x 2.84” x 2.95” DIN 43700 standard, 1.3 lbs (fully optioned) w/cables. -
Page 18: Installation
To achieve a good environmental seal the XDT-PM must be mounted onto a rigid flat panel with a cutout according to the specified dimensions, using the provided panel gasket and all four provided mounting brackets. The instructions listed below should be followed. -
Page 19: Electrical Connections
The XDT is typically provided to be field wired to operate from AC Mains Power of 100 to 250VAC, 50/60Hz, 10VA, the instrument has an internal 0.5A, 250V fast acting fuse. However the XDT can also be optionally ordered to operate from 15 to 30 VDC 0.5A, with an internal 0.5A... -
Page 20: Ac Mains Electrical Power Connection
3.3.2.1.2 Low Voltage DC Powered Option - Electrical Power Connection When an XDT is configured with the low voltage DC power option, it can be powered by apply- ing 15 to 30 VDC 0.5A, to the PS+ (#12) and RET (#11) pluggable screw terminals. The positive supply must be connected to PS+, while the negative or ground to RET. -
Page 21: Interfacing To The Analog Output
XDT User’s Manual dent relays corresponding to the HI and LO alarms. The relay contacts are rated at 10A 250VAC or 30VDC, instruments for use in division 2 Hazardous Areas have hermetically sealed relays rated at 3A 125VAC. Use wiring appropriate for the voltage and current that will be switched by the relays. -
Page 22: Interfacing To The Rs-232 Option
To connect the instrument to a Personal Computer a 3 conductor cable is required; with wires to be placed in the screw terminals of the XDT at one end, and with either a DB9 or DB25 female connector at the other end:... -
Page 23: Display Conventions
MODE button on top. There is also a connector provided which allows the use of external switches. The XDT-NEMA makes use of the circuit board mounted push-button switches, to access them one must open the cover of the XDT-NEMA enclosure. -
Page 24: Operating State
• With a front plate containing four membrane switches connected to the circuit board, provid- ing the operator with a easy to use interface. XDT (C) 1999 XENTAUR CORP. DEWPOINT TRANSMITTER DEWPOINT TRANSMITTER MADE IN USA Remove front plate to access control buttons, consult the manual. - Page 25 XDT User’s Manual parts per million by volume computed at the sensor pressure (more about pressure later). The LBS and G/M are density measurements, pounds of water per million standard cubic feet and grams of water per standard cubic meters, respectively, both in Natural Gas, they are computed accord- ing to data derived by IGT Research Bulletin 8, taking into account sensor pressure.
-
Page 26: Alarms
XDT power loss, or in case of any other errors or failures which will cause the relays to de-energize. -
Page 27: Start Calibration
XDT User’s Manual **** 5. Push the MODE button. The display will show: ˚C DEWPOINT the ‘DEWPOINT’ indicator means that we are changing the alarm trigger dewpoint 6. Push the UP or DOWN buttons until the display shows: ˚C DEWPOINT 7. -
Page 28: Spancheck™ Mode
Section 3: Instrument 3.4.4.3.1 SpanCheck™ Mode The instrument is calibrated at the factory with the sensor it is shipped with and does not need to be re-calibrated prior to installation. Instrument calibration is recommended in approximately 12 month intervals, and the XTR65W sensor should be re-calibrated after prolonged exposure to liquid water. -
Page 29: Single Point Self Calibration, Manual Or Scheduled
XDT User’s Manual The instrument will retain the calibration even if the power is turned off. Under certain conditions, an over (super) saturated sensor may need to be completely dried out before a calibration is performed. Symptoms of these conditions are a sensor that will not go through the SpanCheck™... - Page 30 Section 3: Instrument point the waiting time may have to be increased - specially if the sensor was wet before the procedure is initiated. Consult with your representative to determine sufficient waiting time for your application. • Make sure the instrument is unlocked. Press the MODE button a few times until the display shows CAL.
- Page 31 XDT User’s Manual DEWPOINT legends will also appear. Use the UP and DOWN buttons to modify this dew- point to match the dewpoint of the reference gas. Press the MODE button, the display will alternately show 720 / HRS / INTR, indicating that •...
-
Page 32: Viewing Serial Number Mode
Section 3: Instrument • The instrument will display the measurement using the newly acquired calibration values. The instrument computes the dewpoint from the measured capacitance of the sensor. The sequence of computations is as follows: • The capacitance is converted to percent of full scale (-100°C to +20°C dp), using the low dB, low dew, and saturated dB when performing SpanCheck values. - Page 33 XDT User’s Manual CAUTION: 2), 3), 4) and 5) are set at the factory and need only be modified when a sensor is changed. 2. Selecting the sensor type: In this mode the user can select the software matching the type of XT1 : XTR-100 (-100°C to +20°C);...
- Page 34 Section 3: Instrument a. Go to the CAL/ADJ mode and press the UP button, the display will show the current value, in the range of -1.99 to +1.99 followed by blinking horizontal lines, ignore the alternately dis- played dewpoint. b. Use the UP or DOWN buttons to modify the cal-adjust value as necessary. c.
-
Page 35: Resetable Audio-Visual Alarm Option (Nfpa Compliant)
The compensation data will be retained even if power is turned off. 3.5 Resetable Audio-Visual Alarm Option (NFPA compliant) When the instrument is ordered with an Audio-Visual Alarm option, it is provided in the XDT- NEMA enclosure, outfitted with two front panel momentary push buttons in NEMA sealed rubber boots. -
Page 36: Troubleshooting The Instrument
Under these circumstances the unit display will be blank and the instrument will not draw any current when powered up. The user may replace the fuse with a comparable 0.5A, 250V fast acting fuse, to locate the fuse refer to the XDT mechanical drawing in Appendix... - Page 37 An XTR-65 sensor is measuring less than -70°C or -94°F D.P. check instrument flashing DEWPOINT upgrade to XTR-100 sensor number can not be displayed in 3½ digits Turn on message, Xentaur (Greek Ξ=X) display is dark No power to instrument check power to instrument, check fuse Legend: denotes a beeping accompaniment to the message.
-
Page 38: Maintenance
The XDT-PM and XDT-NEMA instrument enclosures may be cleaned when necessary using a damp (moist) cloth.The XDT-OEM bare circuit board may be cleaned by blowing air across the circuit board. The sensor should not be cleaned as it may be damaged. - Page 39 XDT User’s Manual...
-
Page 40: Glossary
Glossary Glossary 0/24 mA ....range of current for the current loop (0mA=minimum reading, 24mA=maximum reading) 4/20 mA ....range of current for the current loop (4mA=minimum reading, 20mA=maximum reading) - preferred because less than 4mA can indicate a fault or open circuit, also there is at least 4mA available to power equipment... - Page 41 XDT User’s Manual used for the circuit (see 4/20) dB ..... see - decibel DB25 ....a style and size of connector - in this case with 25 pins DB9 .
- Page 42 Glossary impedance ....the ratio of voltage to current at a specified frequency measured in Ohms, a resistor of the same value would act the same as the mea- sured circuit in-hand micro-climate.
- Page 43 XDT User’s Manual RG58 ....a type of coaxial cable - the letters/numbers refer to the electrical characteristic of the cable (resistance/capacitance per foot of length) RG6 .
-
Page 44: Appendix A: Flow Diagram Of Operating State User Interface
XDT User’s Manual Appendices Appendix A: Flow Diagram of Operating State User Interface Power ON initialization 30 seconds anywhere (other than appears when changing and sign on message "Calibration") without key press settings of locked unit Toggle Pressure Correction 1/2 sec HI/LO ˚C... - Page 45 XDT User’s Manual Appendices Flow Diagram Operating State User Interface (continued) Manual & Scheduled Self Calibration Flow diagram items not related to Self Calibration are shaded in gray. Power ON initialization 30 seconds anywhere (other than appears when changing and sign on message "Calibration") without key press...
-
Page 46: Appendix B: Flow Diagram Of Set-Up State User Interface
XDT User’s Manual Appendices Appendix B: Flow Diagram of Set-Up State User Interface Power-Up with go to Power ON initialization appears when changing 4 min anywhere without Operating MODE and sign on message settings of locked unit key press State key depressed Choose alternate units to show when displaying dewpoint. -
Page 47: Appendix C: Sensor Mechanical
XDT User’s Manual Appendices Appendix C: Sensor Mechanical ~1.45"... -
Page 48: Appendix D: Optional Sensor Fittings
XDT User’s Manual Appendices Appendix D: Optional Sensor Fittings... -
Page 49: Appendix E: Dt Circuit Board Dimensions
XDT User’s Manual Appendices Appendix E: XDT Circuit Board Dimensions 4.250" 3.875" 3.502" 2.125" Optional Key Pad TOP VIEW SIDE VIEW 0.146" Connector 0.44" 0.627" XDT (C) 1999 XENTAUR CORP. DEWPOINT TRANSMITTER 0.662" 0.740" 0.5" 2.140" MADE IN USA J.F.M.A.M.J.J.A.S.O.N.D... - Page 50 XDT User’s Manual Appendices Appendix E (continued): XDT-PM Enclosure Mounting Dimensions Standard mounting (with clip-on compression brackets) Environmentally sealed mounting (with gasket and clip-on screw clamp mounting brackets)
- Page 51 XDT User’s Manual Appendices Appendix E (continued): XDT-NEMA Enclosure Mounting Dimensions...
-
Page 52: Appendix F: Sensor/Spancheck™ Theory Of Operation
This is referred to as SpanCheck™.The advantages of this unique capability of Xentaur HTF™ sensors and instruments are obvious in time and cost savings for re-calibration, as well as ease of sensor... -
Page 53: Appendix G: Dewpoint Response Time Analysis
This last aspect can be extremely deceiving, consider the following example. At Xentaur we have performed a variety of tests to determine the response time of ours as well as the competitor’s sensors. For this discussion let’s consider a step change of -40°C to -60°C dew- point, in other words a challenging but typical dry-down. - Page 54 As can be seen from the graph the Xentaur sensor is appreciably faster than any competitors'. This is due to the Hyper Thin Film (HTF) technology, an explanation of the workings of the sensor is provided in theXentaur Hyper-Thin-Film (HTF) Aluminum Oxide Technology notes.
-
Page 55: Appendix H: Sample Gas Filter Considerations
XDT User’s Manual Appendices Appendix H: Sample Gas Filter Considerations Sample treatment with pre-filtering may be a necessity in many instances. However the filter housing and element may affect the dewpoint reading and/or the response time of the system. Below is a graph comparing measurements from the same calibrated sensor with and without a filter utilizing a polycarbonate bowl. -
Page 56: Appendix I: Dt Grounding Considerations
AC power ground connection to XDT logic ground may be removed but this may cause a EMI problem. Please consult with your representative for information on optional isolated analog and RS-232 outputs. -
Page 57: Appendix J: Analog Output Vs. Dewpoint
Appendix J: Analog Output vs. Dewpoint The current output of the XDT, varies with the measured dewpoint. To use the current to calcu- late the value of the dewpoint measurement, one must know the settings of the low and high ends of the analog output range, then: ×... - Page 58 XDT User’s Manual Appendices -100°C to +20°C settings, because the 4-20mA provides sufficient resolution to measure the out- put better than the specified accuracy of the sensor. Relationship of 4-20mA output and instrument reading in ppmV or LBS Instrument reading in ppmV...
-
Page 59: Appendix K: Rs-232C Interface Protocol
The characters sent or received are depicted in bold. Send refers to sending from the host com- puter to the XDT. Receive refers to receiving from the XDT into the host computer. The com- mands and arguments are shown in capital letters while place holders for choices are labeled with lowercase italic letters, with the allowed characters shown below, “nn”... - Page 60 XDT User’s Manual Appendices The mode argument is optional and may be specified only if an interval was specified. It may be “N” for numeric reporting or “G” for graphic reporting of the measurement. The mode argument defaults to numeric mode. The graphic mode may be chosen only for °C or °F, it will plot a graph of the measurement on printers which can respond to the Epson Graphic Commands, and have at least 80 character columns.
- Page 61 XDT User’s Manual Appendices The printer should have at least 80 character columns, and it is best to use continuous form paper. “?” command Requests a single report of the measurement in the currently selected format. send:? The unit will respond in the format selected with the Data command, for example: receive: -59.3degC...
-
Page 62: Appendix L: Procedure For Exchanging Dt Sensors
Through the following steps it is helpful to refer to Appendix A: Flow Diagram of XDT Set-Up State User Interface 1. Power up (or reset) the XDT while holding down the MODE key, in order to enter the Set-Up state. Make sure that the instrument in unlocked, refer to section 3.4.5.-10. -
Page 63: Appendix M: Uncertainty In Lbs & Ppmv Calculations
XDT User’s Manual Appendices Appendix M: Uncertainty in LBS & ppmV calculations Uncertainty of LBS & ppmV calculations due to +/-3°C measurement accuracy Calculated LBS H 2 O / mmscf Calculated ppmV... -
Page 64: Serial Number
In order to serve you better and protect our employees from any potentially hazardous contaminants Xentaur must return unopened at the senders expense all items that do not have a RAN. To obtain a RAN fill out this form and fax to (631) 345-5349. -
Page 66: Index
Index Symbols °C ............17 cable °F ............17 access ..........12 compensation ........28 grips ..........12 length ..........13 AC power voltage ........10 sensor ..........4 accuracy cabling °C,°F specification ......4 alarm relay contacts ......13 calculated lbs or ppmV ....56 analog output ........14 adjusting low sensor attenuation and power ..........12 dewpoint ......26 requirements ........10... - Page 67 Index copper tubing .........6 copyright ..........i G/M3 ........... 17 corrosive gases .........3, 20 gas pressure ......... 18 CSA ............13 gases cUL ............4 corrosive ..........3 current loop incompatible ........3 computations ........50 gasket ..........7, 11 linearity ..........50 glove boxes ........... 5 load ...........14 glycol ...........
- Page 68 Index NPL ............1 sensor cable compensation ......28 connection ........13 container ..........3 oil ............3 dimensions ........40 operating state ........17 exchange procedure ......55 operating state flow diagram ....37 pressure ..........18 optionally ordered features/capabilities .1 signal cable .........4 outdoor installation ........9 theory of operation ......45 outputs ..........10 types ..........26 overview ..........1...
- Page 69 Index voltage, mains supply ......10 warning labels ........iii warranty ..........iv water ............3 weather proofing ........9 weight ...........10 wiring .............9 alarm relay contacts ......13 analog output ........14 power ..........12 requirements ........10 RS-232C ...........15 sensor ..........13...
- Page 70 XENTAUR CORPORATION, 84F HORSEBLOCK ROAD, YAPHANK, NY 11980 U.S.A. TEL (631) 345-3434 FAX (631) 345-5349...
Need help?
Do you have a question about the XDT and is the answer not in the manual?
Questions and answers