Mahlkönig K30 Twin Operating Instructions Manual
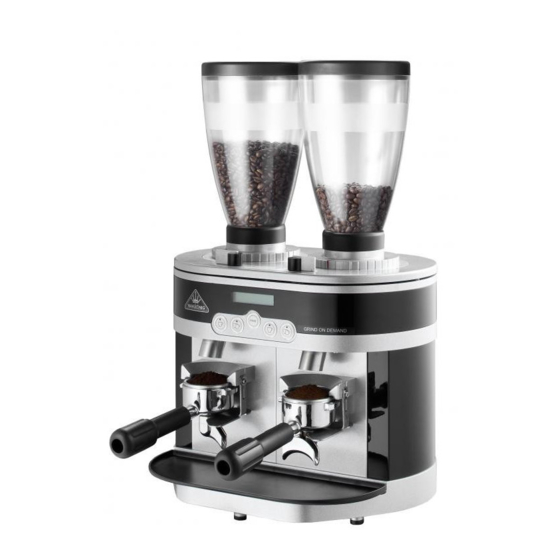
Mahlkönig k30 twin espresso grinder "grind-on-demand"
Hide thumbs
Also See for K30 Twin:
- Operating instructions manual (32 pages) ,
- Quick manual (7 pages) ,
- Operating instructions manual (29 pages)

Related Manuals for Mahlkönig K30 Twin


Summary of Contents for Mahlkönig K30 Twin
-
Page 1: Operating Instructions
H O R E C A G A S T R O G R I N D E R Operating Instructions K30 TWIN Espresso Grinder Grind-on-Demand“ ” The professional art of grinding since 1924... - Page 2 Espresso as the base of various coffee specialities requires a very precise grind. With the „K30 TWIN“ you can now grind two differ- ent kinds of espresso (like decaf and regular) simultaneously in one machine.
-
Page 3: Table Of Contents
H O R E C A G A S T R O G R I N D E R Table of Contents 6. Cleaning 1. Safety 6.1 Cleaning with GRINDZ Grinder Cleaner 1.1 Symbols 6.2 Cleaning the Drip Tray and the Hoppers 1.2 Safety Instructions 6.3 Cleaning the Grinder Placement Surface 1.3 Purpose of Use... -
Page 4: Safety
1.2 Safety Instructions ring from failure to observe these instructions. Only whole roasted coffee beans may be ground in the K30 TWIN! Children cannot recognize the dangers that can exist in the opera- tion of electrical grinders. For this reason never leave children unsu- When unpacking please inspect whether the power supply (volt- pervised with electronic appliances such as this grinder. -
Page 5: Purpose Of Use
2. Technical Data 1.3 Purpose of Use Type K30 TWIN Only whole roasted coffee beans may be ground in the K30 TWIN Voltage/Frequency 200-230V / 50/60Hz grinder. Pay attention to use only clean and unground coffee. Never 240V / 50Hz use the grinder to grind other products or objects. -
Page 6: Description
H O R E C A G A S T R O G R I N D E R 3. Description The main components and operating elements are pictured in the illustration. Pos. 1 Hopper with lid and fi nger protection Pos. -
Page 7: Set-Up And Initial Adjustments
H O R E C A G A S T R O G R I N D E R 4. Set-up and Initial Adjustments 4.3 Electrical Installation Prior to plugging in observe the following safety instructions: You have received your grinder in operating condition. Now you only Protect your device with separate pre-fuses (not need to place it in a safe place and connect it to the main power included in the scope of delivery) according to... -
Page 8: Adjustment Of The Cleaning Alarm
The software of the K30 TWIN has an integrated cleaning alarm which is activated at a pre-set amount of shots taken. This alarm should remind you of cleaning the grinder regularly in order to in- 5.2 Operating the grinder... -
Page 9: Interruption Of Grinding (Break-Function)
The LED shows which button is selected. 5.4 Software Menu Single espresso left grinder Single espresso right grinder The following overview shows the handling of the K30 TWIN’s soft- ware. Double espresso left grinder Double espresso right grinder 5.2.6 Push your espresso machine’s portafi... - Page 10 H O R E C A G A S T R O G R I N D E R Enter (go into a lower software menu level) PROG. go foreward in menu right go back in menu right decrease values in menu ( - button) left increase values in menu ( + button) left...
- Page 11 H O R E C A G A S T R O G R I N D E R Main Menu Sub Menu press press press press press press GRINDER N° 1 GRINDER N° 1 GRINDER N° 2 GRINDER N° 2 MAHLKOENIG 1) PROGRAM DOSE N°...
- Page 12 H O R E C A G A S T R O G R I N D E R Main Menu Sub Menu press press press press 4) LANGUAGE, REL 4-1) LANGUAGE 4-2) SW RELEASE 4-3) SERIAL N° SW, SERIAL N° ENGLISH 0.07 1234...
- Page 13 H O R E C A G A S T R O G R I N D E R Main Menu Sub Menu press press press press 6) SETUP 6-1) CLEANING AL. 6-2) CLEANING AL. 6-3) SERIAL N° only service menu PROG.
- Page 14 H O R E C A G A S T R O G R I N D E R Main Menu Sub Menu press press press press press 7) TEST 7-1) INPUT, DIP 7-2) TRIAK, RELAY 7-3) BUTTONS 7-4) DISPLAY only service menu PROG.
- Page 15 H O R E C A G A S T R O G R I N D E R Main Menu Sub Menu press press 8) CHANGE PASSWORD only service menu PASSWORD PROG. XXXXXX right the first X blinking left press left press...
-
Page 16: Describtion Of The Software Chapters
H O R E C A G A S T R O G R I N D E R Pressing the PROG-button once enters the user 5.5.3 Alarm Records menu (menu chapters 1-4 and 9). Alarms are saved in the order of appearance (the last one to appear fi... -
Page 17: Cleaning
H O R E C A G A S T R O G R I N D E R 5.5.9 Cleaning Counter Reset Remove all beans from the hopper or take the hopper slides from Set the cleaning counter to the appropriate amount of shots so under the drip tray and push them into the slots in the bayonet that the alarm reminds the user to clean the discs on a regular ba- adapter. -
Page 18: Cleaning The Drip Tray And The Hoppers
H O R E C A G A S T R O G R I N D E R 7. Maintenance and Repair Set the cleaning counter back to Zero, if the grinder was cleaned due to the cleaning alarm. (see chapter 5.5.9) Any required repairs may only be conducted by authorized specialist personnel. -
Page 19: Taking Off The Grinder Cover
H O R E C A G A S T R O G R I N D E R 7.1.6 Insert the adjusting handle (service tool) into the fi ller shaft. 7.1.14 Only remove the portafi lter once the grinding process has The adjusting handle must engage in the slot into fi... -
Page 20: Cleaning Of The Grinding Mechanism
Grinding disc replacement should only be carried out by autho- 8. Trouble Shooting For Operating Faults rised specialists or a customer service centre. The „Repair manual K30 TWIN grinding disc replacement and basic adjustment“ can be 8.1 Safety Devices of the Grinder downloaded for replacing grinding discs. -
Page 21: Operating Fault
H O R E C A G A S T R O G R I N D E R 8.2 Operating Fault The user has no infl uence whatsoever on this Defect Cause Remedy circuit breaker. If the circuit breaker trips re- peatedly an authorised service partner must be The grinder hums The spout is... -
Page 22: Alarm Signals Showing In The Display
H O R E C A G A S T R O G R I N D E R 8.3 Alarm Signals Showing in The Display Defect Cause Remedy Several sensors have been built into the grinder in order to control The grinder does The main plug is Insert the main plug into... - Page 23 H O R E C A G A S T R O G R I N D E R Alarm Record Cause Correction Alarm Record Cause Correction Service technician: GRINDER X • Fan runs • Check fan for foreign • Test exploring coil on FAN TOO SLOW with reduced objects.
-
Page 24: Spare Parts
H O R E C A G A S T R O G R I N D E R Alarm Record Cause Correction 9. Spare Parts COVER OPEN • Magnet switch • After closing the magnet open. switch press PROG-button. Spare parts are usually ordered from your customer service centre •... -
Page 25: Wiring Diagram
H O R E C A G A S T R O G R I N D E R 10. Wiring Diagram 100 - 115V 50/60Hz... -
Page 26: Wiring Diagram 230V 50Hz
H O R E C A G A S T R O G R I N D E R 10. Wiring Diagram 230V 50Hz... - Page 27 H O R E C A G A S T R O G R I N D E R 10. Wiring Diagram 240V 50Hz...
-
Page 28: Certifi Cate
: Coffee grinder installation, incorrect voltage, breakage, natural wear or for rea- machine typ : K30 TWIN sons beyond our sphere of infl uence. 5. In order to maintain the warranty, only original spare parts and is in compliance with the conditions of the Directive of Machines 98/37/EG accessory parts may be used. - Page 29 H O R E C A G A S T R O G R I N D E R MAHLKÖNIG GmbH & Co. KG Tilsiter Straße 142 D- 22047 Hamburg, Germany Tel.: 040 / 69 69 40-0 Fax: 040 / 69 39 721 offi...
Need help?
Do you have a question about the K30 Twin and is the answer not in the manual?
Questions and answers