Table of Contents
Advertisement
Advertisement
Table of Contents

Related Manuals for Arturia Microbrute


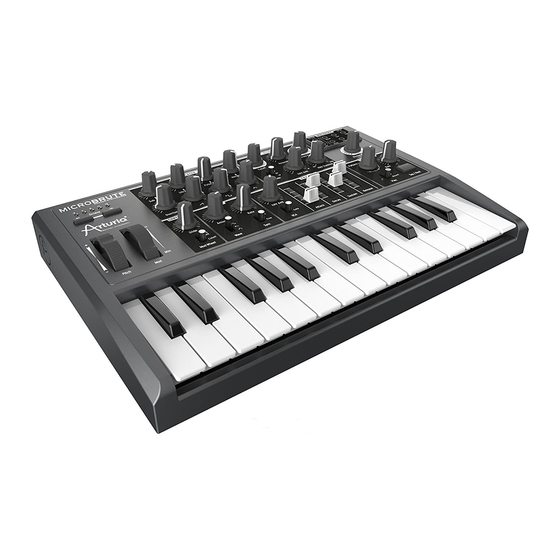
Summary of Contents for Arturia Microbrute
- Page 1 USER’S MANUAL Arturia Microbrute User’s Manual...
- Page 2 Information contained in this manual is subject to change without notice and does not represent a commitment on behalf of ARTURIA. The hardware unit and the software product described in this manual are provided under the terms of a license agreement or non-disclosure agreement. The license agreement specifies the terms and conditions for its lawful use.
-
Page 3: Table Of Contents
The Pulse Width Modulator ......................27 The Metalizer ..........................27 Filter..............................28 What is a filter?..........................28 Filter types on MicroBrute: Low-pass, Band-pass, and High-pass ......... 28 Resonance or emphasis....................... 29 Voltage Controller Amplifier......................30 Modulators ............................30 Low Frequency Oscillator (LFO)....................31 Envelope Generator........................ - Page 4 LFO ..............................38 Wave Select ........................... 39 Amount ............................39 Rate ..............................39 Sync ..............................39 LFO Settings via the MicroBrute Editor ..................39 Mod Wheel ............................40 Mod to Cutoff ..........................40 Mod to LFO Amt ..........................40 Glide ..............................40 Mod Matrix ............................41 Modulations Sources........................
-
Page 5: Introduction
Congratulations, and thank you for your purchase of the ARTURIA MicroBrute analog synthesizer. The MicroBrute is based on the award winning analog designs of its big brother, the MiniBrute. The MiniBrute became a modern classic by bringing excellent sound quality, user features and craftsmanship to the market with a price point that no others were able to match. - Page 6 Overview of some of ARTURIA’s software, hardware and hybrid instruments After recreating so many legendary analog synthesizers by translating these classic instruments into sophisticated DSP algorithms, the time was right for ARTURIA to introduce an analog synth of its own, the MiniBrute. But reproducing analog circuitry is not the same as designing great-sounding analog circuits, so we enlisted the aid of Yves USSON —...
- Page 7 Yves USSON and a couple of wired friends Combining ARTURIA’s acclaimed savoir-faire in designing innovative musical instruments, and Yves’ deep knowledge and experience, both the MiniBrute and MicroBrute analog synthesizers have their roots in the 1970s yet incorporates the best of the 21 century.
- Page 8 We built the MicroBrute with the idea that many people need an easy to use synth for live and studio purposes. But an easy to use synth must still retain excellent sound quality and enough features to keep a sound designer busy for years. It is true that...
-
Page 9: Installation
2 Installation Usage Precautions The MicroBrute uses an external power adapter. Do not use any power supply or adapter other than the one provided by Arturia and specified in this manual. ARTURIA accepts no responsibility for damage caused by use of an unauthorized power supply. - Page 10 • Do not use the instrument when there is a gas leak nearby. • ARTURIA is not responsible for any damage or data loss caused by improper • operations to the instrument. ARTURIA recommends the use of shielded and less than 3 meters long cables •...
-
Page 11: Register Your Instrument
If you do not have an account, create a new one. Once you have your account and are logged in, go to the section “My Registered Products”, and add the MicroBrute synthesizer by entering its serial number, as printed on the sticker located under the machine: Connecting the MicroBrute to the World Always power-off all audio gear before making any connections. - Page 12 Here is an overview of the MicroBrute synthesizer’s connectors: • Audio Input & Outputs..6.35 mm (1/4'') mono jacks • Headphone Output…………3.5 mm (1/8'') miniature stereo jack • CV/Gate.........3.5 mm (1/8'') miniature mono jacks • MIDI Input........Standard MIDI DIN-5 • USB...........Standard USB type B •...
-
Page 13: Warm-Up And General Tuning
Warm-Up and General Tuning As with all true analog synthesizers, after being powered-on the MicroBrute needs a warm-up period of approximately five to ten minutes. This allows the oscillator to reach a stable operating temperature, which insures accurate oscillator pitch. Warm-up time depends on the external temperature; a colder ambient temperature will require longer warm-up times, while a hotter ambiance will result in shorter times. -
Page 14: Quickstart
BASIC PATCH. Figure 1 Switch on your MicroBrute, there will be about a 5 – 10 second time with no sound. Once it is booted up, let it warm up to stabilize the pitch. You can of course use it before it is warmed up but the pitch WILL drift for the first few minutes. -
Page 15: Introducing The Oscillator
Introducing The Oscillator The oscillator is the tone-generating center of the MicroBrute. The basic patch has the Sawtooth Wave turned up fully. Try turning the Sawtooth Wave down to 0 and turning up the Square Wave as shown in Figure 2... -
Page 16: Introducing The Filter
This changes the filter to a High Pass Filter. Just as the name implies, it allows the HIGH frequencies to pass though. With the knob in the full counter clockwise position, the filter is allowing all frequencies above that setting to pass through it. Figure 4 Arturia Microbrute User’s Manual... -
Page 17: Band Pass Filtering
Once you have a good feel for the range of sounds you can get with this setting, change the MODE to HP and to BP and experiment with the CUTOFF and RESONANCE settings to see how varied the sounds become. Arturia Microbrute User’s Manual... -
Page 18: Filter As An Oscillator
You will find that the BRUTE FACTOR knob and the influence it has on the sound will vary greatly based on the settings of the CUTOFF and RESONANCE knobs as well as the MODE switch. Figure 9 Arturia Microbrute User’s Manual... -
Page 19: Introducing The Envelope
Press a key and listen to how it seems that the FILTER CUTOFF is being moved by itself. Reducing the DECAY slider will make the effect of the filter sweep go faster. If the DECAY is set too low, it is moving the CUTOFF so fast that you might just hear a click. Arturia Microbrute User’s Manual... -
Page 20: Envelope To Vca
By changing the ATTACK, DECAY and RELEASE parameters we can control how the sound fades in, sustains, and fades out. Set the SUSTAIN to the minimum setting, play with the ATTACK, DECAY and RELEASE settings, and listen to how they affect the sound. Figure 12 Figure 12 Arturia Microbrute User’s Manual... -
Page 21: Introducing The Lfo
LFO. Figure 14 Change the LFO waveforms to hear the effect on the sound. You can also change the AMOUNT and the RATE controls to hear the effects they create. Arturia Microbrute User’s Manual... -
Page 22: Introducing The Mod Matrix
The MOD MATRIX allows you to route the modulation sources (ENVELOPE, LFO, and KEYBOARD CV). You can route the different sources to the destinations with the 1/8” mono jack PATCH CORD’s that come with the MicroBrute. As we said in the LFO section, the LFO defaults to being patched to the PITCH control. -
Page 23: Introducing The Sequencer
Introducing The Sequencer The SEQUENCER is a fun and musical addition to the MicroBrute. It will allow you to program in phrases and patterns and play them back at different rates. Start off by setting up the BASIC PATCH. Recording A Basic Pattern Set the PLAY MODE switch to RECORD. -
Page 24: Moving On
Figure 17 There are a number of settings that can be accessed via the software editor. These features are described in detail in the separate MicroBrute Connection manual. Moving On If you have followed all the steps of this Quick Start you should be fairly familiar with how to make a sound and what some of the main features and functions do to modify the sound. -
Page 25: Synthesis Basics
4 Synthesis Basics Your MicroBrute is a true analog synthesizer, this means that all sounds are produced by analog electronic circuits. No digital computer circuitry is involved in the tone generation, and filtering of the sound. This gives MicroBrute a huge and warm sound. -
Page 26: Signal Modifiers
VOLTAGE CONTROL. A music synthesizer allows you to change the pitch of the oscillator by using a voltage. In the case of MicroBrute, the keyboard, LFO, Envelope or external voltage source can be voltage control sources that affect the pitch. -
Page 27: The Pulse Width Modulator
(50% to 90%) making it possible to create a wide variety of tones from hollow and rich to nasal and thin. Figure 21 On the MicroBrute, the pulse width control can be controlled by the LFO, ENVELOPE or KEYBOARD CV OUT by patching it in the MOD MATRIX Figure 21 The Metalizer takes the basic triangular waveform and “warps/folds”... -
Page 28: Filter
Filter types on MicroBrute: Low-pass, Band-pass, and High-pass A filter can operate in various ways or modes. In the MicroBrute the filter can operate either as a low-pass filter, a band-pass filter, or a high-pass filter. -
Page 29: Resonance Or Emphasis
This parameter can be increased up to a point where the filter no longer acts like a mere filter, but starts to oscillate on its own. Arturia Microbrute User’s Manual... -
Page 30: Voltage Controller Amplifier
The modulators in the MicroBrute are the LFO (low frequency oscillator), envelope generator, and even the keyboard can be considered as a modulator. Using the MicroBrute’s CV inputs and MOD MATRIX, modulators can also be provided by external sources that generate control voltage (CV) signals and gate signals that turn modulators or notes on and off. -
Page 31: Low Frequency Oscillator (Lfo)
An LFO is very much like a regular oscillator except that it typically runs at a much lower frequency. The MicroBrute low frequency oscillator can produce various waveforms at sub-audio frequencies (0.1Hz up to 200Hz). In general the waveform options are sine or triangle, sawtooth, and square, waves. -
Page 32: Human Interface
• Velocity corresponds to the dynamics of your playing and can modulate multiple parameters. The MicroBrute will send velocity as a USB controller. It does not have internal velocity routing and does not respond to velocity however. •... -
Page 33: Front Panel Features
PLL Overtone oscillator. The bottom row of knobs on the oscillator are the level controls for each waveform. The upper row of knobs are waveshaper controls for each of the waves. The MicroBrute allows you to blend and mix the different waveforms to create more complex sounds. -
Page 34: Triangle And Metalizer
5 up sounds. You can then modulate this control by patching the LFO or ENV to the SUB jack in the MOD MATRIX. This will greatly thicken up the sound even further. Arturia Microbrute User’s Manual... -
Page 35: The Filter
(LP, BP, HP). The cutoff can be controlled by the keyboard, the Envelope, the LFO (via the mod matrix) and the mod wheel. The MicroBrute filter is based on Nyle Steiner’s Sallen & Key architecture (designed in the 70s) and offers -12dB/octave slopes in LP and HP modes, and -6dB/octave slopes in BP mode. -
Page 36: Brute Factor
For low Brute Factor settings, the distortion is smooth and gentle but becomes harsher as you turn up the knob. When turned up above about 75% of the way, the MicroBrute can go berserk and produce barely controllable, crazy feedback sounds. -
Page 37: Kbd Tracking
The VCA GATE/Env switch allows you to select two options for controlling the output level of the MicroBrute. By selecting GATE, the VCA (Voltage control amplifier) will simply open and close based on the input from the keyboard, sequence or external gate source. -
Page 38: Attack Slide
The LFO is a low frequency oscillator. It is the primary modulation source for the MicroBrute’s other sections. The LFO is designed to operate from approximately .1 Hz up to 200Hz. It can be used to create subtle pitch vibrato or can be pushed to the maximum to get wildly changing sounds. -
Page 39: Wave Select
These sync’d rates are: 4 measures, 2 measures, 1 measure, ½ note, ¼ note, The Rate and the LFO sync can be set within the MicroBrute Editor. In the editor, you can set whether the LFO is Free-running or Reset on each note. -
Page 40: Mod Wheel
Turning this knob clockwise increases the portamento effect. At the maximum setting, it takes approximately 4s to glide from the lowest C of the MicroBrute keyboard to the highest C (two octaves above). Arturia Microbrute User’s Manual... -
Page 41: Mod Matrix
Rear panel. They all output a signal that can control external synthesizers or be patched to Modulation Destinations within the MicroBrute. Modulation Destinations The jacks under the CV In section are all inputs. These can also be called Modulation destinations. -
Page 42: General Controls
General Controls Keyboard The MicroBrute keyboard covers a two-octave range, which can be extended using the Octave Down/Up buttons. The keyboard can also be used as a fully polyphonic MIDI controller for other devices via the rear panel USB jack. -
Page 43: Master Volume
C is now C1 and the rightmost is C3. Pressing the Down button a second time shifts the keyboard down by one more octave. With the Down and Up buttons the MicroBrute can play notes from C0 (32.7 Hz) up to C6 (2093 Hz). -
Page 44: Pattern
BPM value. The Sync mode can be set using the MicroBrute Editor software. • External sync - The Rate knob acts differently if MicroBrute detects an external MIDI clock on the MIDI Input or USB connector: An external MIDI clock will turn the Rate control into a time division control, where it acts as a performance-oriented divider/multiplier. - Page 45 Tap Tempo – the Tap Tempo button will allow the user to manually set the rate of the sequencer by tapping the button in real time. The number of taps that get averaged to calculate the tempo can be set using the MicroBrute Editor software.
-
Page 46: Rear Panel
MIDI Keyboard, like our Arturia Keylab 49 or 61, if you want a wider playing range or if you just want full sized keys. If you are using MicroBrute as a sound module, use a MIDI cable to connect MicroBrute MIDI In connector to your external MIDI device’s MIDI Out connector. -
Page 47: Audio In
The MicroBrute also connects with other analog devices (analog synthesizer, analog step sequencer, etc.) through a CV/GATE interface where CV means Control Voltage. The Gate In 1/8” jack allows other analog devices to trigger the MicroBrute envelopes. The main MicroBrute functions (i.e., filter cutoff, and oscillator pitch) are controlled by the Cutoff and Pitch jacks in the Mod Matrix. -
Page 48: Get Microbrute Connection
The MicroBrute can also control other analog devices. The Pitch Out 1/8” jack provides the CV produced by the MicroBrute keyboard as well as by the Pitch wheel. The keyboard’s GATE signal is also available on the Gate Out 1/4” jack. -
Page 49: Legal Notes
DO NOT MODIFY THE UNIT! This product, when installed as indicated in the instructions contained in this manual, meets FCC requirements. Modifications not expressly approved by ARTURIA may void your authority, granted by the FCC, to use the product. IMPORTANT: When connecting this product to accessories and/or another product, use only high quality shielded cables. -
Page 50: Canada
• If these corrective measures do not bring any satisfied results, please contact the local retailer authorized to distribute this type of product. If you cannot locate the appropriate retailer, please contact ARTURIA. The above statements apply ONLY to those products distributed in the USA.
Need help?
Do you have a question about the Microbrute and is the answer not in the manual?
Questions and answers