
Related Manuals for Defender SN500-4CH


Summary of Contents for Defender SN500-4CH
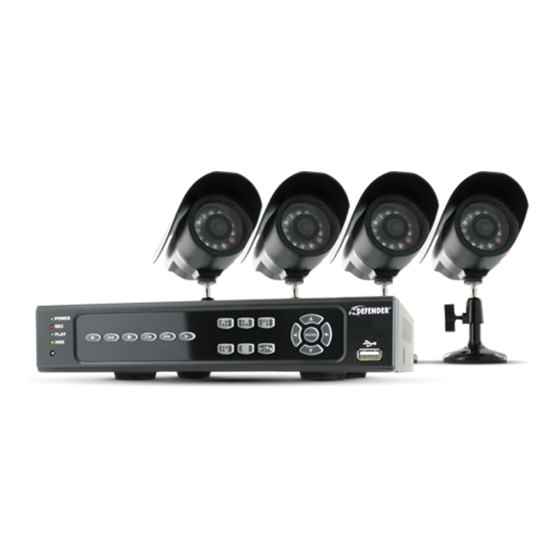
- Page 1 Web Ready 4 Channel H.264 DVR Security System w/ Smart Phone Access and 4 Hi-Res Indoor/Outdoor Night Vision Surveillance Cameras INSTRUCTION MANUAL V1.0 www.defender-usa.com SN500-4CH...
- Page 2 PLEASE DO NOT RETURN THIS PRODUCT TO THE STORE Please contact a DEFENDER customer support representative first regarding any additional information on product features, specifications or assistance with setup. You can contact us via one of the methods below: Email: Telephone: support@defender-usa.com...
-
Page 3: Product Warranty Information
Warranty Terms Defender products are guaranteed for a period of one year from the date of purchase against defects in workmanship and materials. This warranty is limited to the repair, replacement or refund of the purchase price at Defender’s option. -
Page 4: Table Of Contents
Dwell Time ......................19 TABLE OF CONTENTS...continued PTZ SETUP ..........................19 PTZ control ......................20 MOTION DETECTION ....................... 20 Setting Motion ......................21 Motion Detect ......................21 Buzzer ........................21 Sensitivity ......................21 Motion Area ......................21 RECORDING SETUP ........................ 22 SN500-4CH... - Page 5 Load Default ......................36 Load Backup USB ...................... 37 Daylight Savings Time ....................37 LIVE VIEWING ........................... 38 HDD and USB Information ..................38 Call Up USB Information ................... 38 Digital Zoom ......................38 Audio ........................38 PLAYBACK ............................39 SN500-4CH...
- Page 6 MOBILE VIEWING INSTALLATION GUIDE ....................59 Mobile Viewer Application ..................59 SONY ERICSON K608i VIEWING ......................60 iPHONE AND iTOUCH VIEWING ......................62 BLACKBERRY (BOLD) VIEWING ......................62 TROUBLESHOOTING GUIDE ......................... 65 SPECIFICATIONS ..........................67 CAMERA MANUAL ..........................70 SN500-4CH...
-
Page 7: Introduction
H.264 compression allows you to record and store more footage using less space, so you will never miss an important event. This manual was written to ensure that you get the most out of your SN500-4CH DVR. -
Page 8: Features
Cutting Edge H.264 Compression The SN500-4CH-002 utilizes H.264 compression—the latest and most advanced compression level available for a DVR system. You will see an amazing picture but save almost 50% on storage space! H.264 maximizes your hard drive space. You will see an amazing picture but save almost 50% on storage space versus DVRs with MPEG-4 compression! H.264 maximizes your hard drive space. - Page 9 Simply choose the desired date and time range, and the requested video clips will appear. Clips are also labeled by event, which makes it easy to find footage that was captured by motion detection. 1. To see which other smart phone devices are compatible, please visit our website: www.defender-usa.com. 2. Requires broadband router and broadband Internet connection–not included. Internet Explorer is required.
-
Page 10: Additional Accessories
13. Directional Arrows - Moves the cursor in each corresponding 5. Record – Manually starts recording direction 6. Rewind – Reverses the playback (1x, 2x, 4x, 8x) 14. USB port – To connect USB backup device 7. Stop – Stops the playback of recorded footage SN500-4CH... -
Page 11: Back Panel
6. USB port for mouse only 7. Audio Out 8. Audio In Remote Control 1. Channels 4. Rewind 10. Copy 2. Quad 5. Fast Forward 11. Directional keys 3. Record 6. Pause/Step 12. Enter 7. Stop 8. Play 9. Menu SN500-4CH... -
Page 12: Things To Consider Before Installation
60ft on the 60 ft video/ video/power wire. power wire. 4. Attach the BNC to 3. Plug the camera’s RCA connectors to power adapter into an one of the video AC outlet. inputs on the back of the DVR. SN500-4CH... -
Page 13: Connecting Additional Devices To The Dvr
CONNECTING ADDITIONAL DEVICES TO THE DVR This DVR has multiple connections which allow you to integrate additional DEFENDER or third party devices to the system. Please note that there are many makes and models of compatible devices and the instructions below may not be applicable to your device. Always refer to the device instruction manual for proper setup and operation. -
Page 14: Rca Monitor
Video 2 then press the TV/Video, Input, or Source button on the TV/Monitor to switch to Video 2. CONNECTING YOUR ALARM SYSTEM TO THE The SN500-4CH allows you to connect up to four external alarm devices simultaneously. Please see your alarm device manufacturer for further instructions on required connections and settings. -
Page 15: External Alarm
4. The DVR will turn on and display the main viewing area after a few moments of initializing. Note: We recommend using a surge protected power bar and/or Uninterrupted Power Supply (UPS) backup to prevent damage to your DVR system. SN500-4CH... -
Page 16: Getting Started
The DVR will automatically begin recording once it has been powered on and initialized. Initializing the DVR is the normal start up process and can take a few moments. Using the Mouse • The included USB mouse makes using the SN500-4CH simple and efficient. Make sure that the mouse is connected to the rear USB port before powering on the DVR. • All functions of the mouse are applicable to this DVR, including using the wheel and right and left clicking Screen Viewing By double clicking on one the 4 cameras the viewing mode will switch to full screen mode. -
Page 17: Main Menu
1. Press the Menu button the DVR front panel or on the remote control. Option 2: 1. Scroll the mouse to the bottom of the screen to reveal Pop Up Menu Bar. 2. Click the to call up the Main Menu. SN500-4CH... -
Page 18: Camera Setup
5. Click the X to exit or Press Menu. – Backspace ENTER – Confirms changes and exits keyboard SHIFT – Changes from lower case to upper case (allows you to pick between the "+" and the "-") SPACE BAR – Puts a space between characters SN500-4CH... -
Page 19: Display
This is a camera specific setting defined by the manufacturer. Please consult your PTZ camera manual or manufacturer for details on this setting. Protocol: This is a camera specific setting defined by the manufacturer. Please consult your PTZ camera manual or manufacturer for details on this setting. Supported protocols can be found in the specifications. SN500-4CH... -
Page 20: Ptz Control
The event log will be updated with the motion detection event. Note: Every time motion is detected an icon will appear, and the camera name from which motion is detected will change from white, to yellow. SN500-4CH... -
Page 21: Setting Motion
The squared off area shows 2. Clear: Used to mask off certain areas you the area with no detection do not want to trigger motion detection. (would be shaded green) 3. EXIT: Saves changes and exits the MOTION DETECTION SETUP MENU. SN500-4CH... -
Page 22: Recording Setup
5. Press ENTER or select to save settings and return to Record Setup Menu. 6. Exit the record setup Menu to save changes. 7. Exit the Main Menu . The DVR will take a few moments to load the settings. SN500-4CH... -
Page 23: Alarm Record
2. Use the mouse wheel or directional keys to change how long you want the DVR to record when an alarm is detected. 3. Press ENTER or Click to save changes. 4. Click to exit. 5. Exit Main Menu to save changes. DVR may take a few moments to load the settings. SN500-4CH... -
Page 24: Record Quality
4. Exit the Main Menu to save changes. The DVR may take a few moments to load the settings. Using the Pop Up Menu Bar you can mute the audio from playing through the connected speaker or TV and still record. SN500-4CH... -
Page 25: Schedule Setup
Main Menu and save your settings. The DVR may take a few moments to load the settings. This is a sample schedule. This schedule may work well for a small business, with different settings for weekday business hours, and with more security over the weekend. Note: To switch between schedules in this mode, simply scroll the wheel on the mouse, or click press the CH1-CH4, Quad view buttons. SN500-4CH... -
Page 26: Alarm Setup
Main Menu and save your settings. The DVR may take a few moments to load the setting Note: DEFENDER does not provide support for external alarm systems. Please contact the alarm manufacturer for instructions. ALARM DISPLAY MODE The DVR will allow you set configure your Alarm Display options. -
Page 27: Video Loss Detect
The options are OFF and 5 sec – 99 sec. The buzzer for Motion Detection can be set from 5 sec -99sec. To disable the motion detection buzzer, refer to the MOTION SETUP Menu). SN500-4CH... -
Page 28: Relay Time Setup
Relay time setup allows you to adjust the length of time the DVR will send an electrical signal through the connected relay device. An external power source is likely required. Please contact your alarm manufacturer for information and assistance with your alarm. Please note that DEFENDER does not provide support for external alarm systems. To Setup the Relay Time Setup: 1. -
Page 29: Overwrite Mode
Enabling HDD password protection is recommended, so that only the right people can erase any footage you have captured and stored. This password should be different from the password used to access the Menu of the DVR. This setting will prompt a user to enter a password before being able to enter the HDD Format Setup Menu. SN500-4CH... -
Page 30: Network Setup
This Menu holds the information you need about your DVR to set up on-line viewing. Note that for basic network setup, the values shown on the screen are the values you will be using, and that you will not need to set new values. The Next Page has a quick description of the network setup Menu items. SN500-4CH... -
Page 31: Terms
DDNS: (Dynamic Domain Name Service) This Menu option allows you to set up a common name for the DVR instead of an IP address. This feature is used if you have a Dynamic IP address from your ISP and the IP address is constantly changing. SN500-4CH... -
Page 32: Pppoe
• Video Quality: The quality of footage being streamed to mobile device Note: You only need to change these settings if your network or ISP is blocking the ports listed on this screen. SN500-4CH... -
Page 33: Backup Setup
1. Press ENTER or click to setup the USB backup recording settings. From this Menu you can choose the start and end time for the USB backup. This will transfer existing video footage in the backup time frame onto the USB drive. SN500-4CH... -
Page 34: System Setup
2. Highlight the area you wish to change. 3. Date Format allows you to choose the syntax to display the Year, Month and Date. This can be changed between YYYY/MM/DD, DD/MM/YYYY, and MM/DD/YYYY depending on what you are most comfortable with. SN500-4CH... -
Page 35: System Type
3. Use the mouse wheel or directional keys to enable CAMERA TITLE, DVR STATUS and DATE/TIME. By enabling these options, the camera title, the status of the DVR and the date/time will appear on the viewing screen. 4. Select the to save. 5. Exit the Main Menu . It may take a few moments to save the changes. SN500-4CH... -
Page 36: Language
The DVR checks for a connected USB device for a firmware update. Warning: Attempting to update the firmware with an invalid file could potentially render the DVR inoperable. Only complete the firmware upgrade if directed by a DEFENDER technical support representative. -
Page 37: Load Backup Usb
4. Press Menu or click on the Return button to save and return to the previous Menu. 5. Repeat steps 2-4 for the End Date. 6. Set the Delay time to accurately reflect the time change during the daylight savings months. Press Menu or click the Return button to save your settings and return to the previous Menu. SN500-4CH... -
Page 38: Live Viewing
Note: that the SN500-4CH does not include audio supported cameras, but it does support one audio input. If you have attached a microphone, or have a camera that supports audio, you can choose to turn the sound on and off by clicking this button. -
Page 39: Playback
PLAYBACK By clicking the Play button from the Pop Up Menu, front panel, or remote control a Play Search window will pop up. The SN500-4CH allows you to review your playback with two different search options: 1. Play Time Search – Allows you to view your recorded footage based on the day and time you wish to preview. -
Page 40: Time Search
MOTION When the DVR detects motion, it will record the date, time, and corresponding channel. The DVR will also display the icon on the channel where motion was detected. SN500-4CH... -
Page 41: Backup Video Playback
5. Navigate to the USB drive and select the *.264 file you wish to view. If you choose to rename the video clip make sure not to change the file extension .264. 6. Click "Open" on the file you wish to play. Follow the playback controls explained in Backup Player – Playback Control. SN500-4CH... -
Page 42: Buttons And Connections
4 – Quad Camera mode displays 4 channels. 9 – 9 channel mode displays 9 channels. 16 – 16 channel mode displays 16 channels. Play Audio – Will play audio through computer if it was recorded onto the backup footage. SN500-4CH... -
Page 43: Network Guide
DVR. This can be done by following either of the two methods below. Method 1 only affects websites that you specifically add to the trusted sites list. To change for all websites, use Method 2. SN500-4CH... -
Page 44: Method 1
DEFAULT LEVEL and change the security level of the zone to “Low”. This can be done by running the slider to the bottom. This will allow ActiveX controls from the DVR to be downloaded and the DVR to be viewed on the computer. 10. Click Apply. 11. Click OK. SN500-4CH... -
Page 45: Method 2
If the computer and the DVR are connected to the same router you can use the internal IP address to view the DVR. If the computer is not connected to the same router and is at a remote location you will need to use the external IP address for the DVR to view the DVR from that computer. SN500-4CH... -
Page 46: Login
“Install This Add-on for All Users on This Computer…”. Please be patient as the installation process can take 1-2 minutes. If your ActiveX settings are set correctly you will see the following dialogue box. Click Install. You should now see the web player and the connected cameras. SN500-4CH... -
Page 47: Viewing Your Dvr Outside Of Your Network
(over the Internet).There are hundreds of makes and brands of routers on the market, you can find step by step instructions on http:// www.portforward.com. *Easy to follow Networking Video Guides are available under the support section of the company website (http://defender-usa.com). Once on http://www.portforward.com: •... -
Page 48: Testing
• A DSL modem is preventing the connection because it is on a different sub-network. Contact your ISP to assist with bridging the modem and router together Note: DEFENDER technical support cannot troubleshoot modems, since changing these settings can potentially render your modem inoperable. Bridging or any other modifications to the modem will need to be completed by the ISP. SN500-4CH... -
Page 49: Able Of Conddns Configuration
The DVR has many DDNS Provider web addresses built into it. The following instructions are for DYNDNS.org and DDNS.CAMDDNS.COM. The sites are not owned nor operated by DEFENDER and therefore support for these services will be done through their website. -
Page 50: Ddns Account Setup
1. Open up your Internet browser and type in your DVR’s hostname that you created on your DYNDNS account. 2. You will be prompted for a Username and Password. Username: admin Password: admin 3. Click OK and the DVR software and footage will pop up. SN500-4CH... -
Page 51: Network Viewing And Playback
Use this to download backup footage onto your computer. Choose the Start and End Time. Press Save. Choose the location to save the backup footage. This will backup the footage in H.264 format to the desired location. Use the player to view the recorded footage. SN500-4CH... - Page 52 You can set up to 32 preset points. 11. PLAYBACK CONTROLS The playback controls are as follows from left to right: Rewind – Rewinds playback Stop – Stops playback Pause - Pauses Playback Play – Plays footage Fast Forward – Fast forwards playback SN500-4CH...
-
Page 53: Time Point Backup
6. Click stop to end the backup process. RECORD • To record the footage you are seeing click the record button • You will be prompted to choose a file name and a folder to save the footage • A small pop up screen will appear telling you that the footage is being recorded • When you are done recording, click Stop in the small pop up screen FULL SCREEN – Expands the viewing window to the full size of your monitor SCREEN FORMAT – Change from quad view to single channel viewing. SN500-4CH... -
Page 54: Dvr Configuration Options
Will remove the user account from the DVR web access. These usernames and passwords are not the same as what is used to access the DVR locally. See Password Setup for information regarding local system passwords. System Update Firmware Version: Displays the current version of firmware loaded onto the DVR. New Firmware (Browse): Browse to the location the firmware update is stored. Upgrade: Apply the new firmware version. SN500-4CH... -
Page 55: Network Options
DVR dials in it will acquire a new external IP address (Unless statically assigned by your ISP). The email will include the Subject: from the field below as well as information regarding the new connection. This will include the new IP address. SN500-4CH... - Page 56 Alarm: Enables or disables the DVR to send email notifications when an external alarm is detected. This requires alarm detection to be set up in the ALARM SETUP menu. The DVR will email based on the parameters below. SN500-4CH...
-
Page 57: Other Options
You can view an individual channel stream on your mobile device. • To view a live video feed from one of the cameras connected to your DVR you will need to enter a specific URL. The syntax for viewing channel 3 is rtsp://IPADDRESS/CH03 • Fill in the spot (above) called IPADDRESS with be the external IP address of your DVR network found on http://whatsmyip.org SN500-4CH... -
Page 58: Troubleshooting
Review the section “CONFIGURING YOUR ROUTER (PORT FORWARDING)” and http://www.portforward.com for setup instructions. 4. A pop-up blocker is preventing the ActiveX controls from prompting you to install. Disable all pop-up blockers in Internet Explorer and try to access the DVR again. SN500-4CH... -
Page 59: Mobile Viewing Installation Guide
• You may have to configure PPPoE settings to match the settings provided to you by your Internet Service Provider (ISP). Consult your ISP for more information on your PPPoE settings Note: DEFENDER technical support cannot troubleshoot modems, since changing these settings can potentially render your modem inoperable. Bridging or any other modifications to the modem will need to be completed by the ISP. -
Page 60: Sony Ericson K608I Viewing
• Disconnect your mobile device from the computer 2. On your mobile device: • Open up the Menu • Open up File Manager folder • Open up the folder containing the MobileViewer.jar file. and click Install • Press Yes to begin the installation process • You will be prompted with a security warning message, this is expected • Click Yes/Continue to continue the installation 3. Once successfully installed go back to File Manager. • Go to Applications • Select “ Mobile Viewer” to launch the software on your phone • Press Options • Select Site List • Click on Add SN500-4CH... - Page 61 You will return to the site list. 4. Highlight the desired site you wish to connect to. • Click Options • Click Select • You will return to the live viewer and the screen should display “Current Site: NAME, Disconnected • Click Options • Click on Connect • You should be prompted that the mobile device is trying to make a connection to the Ip address of the DVR • Click Ok or Allow to allow the connection If all your settings are correct you will view the channel of the DVR that you set in the site list settings. SN500-4CH...
-
Page 62: Iphone And Itouch Viewing
1. Connect the BlackBerry to the computer using a USB cable. • If prompted turn on Mass Storage Mode and enter the password • Open My Computer • You should see your mobile device listed as a removeable device • Open the removeable device. Copy the MobileViewer.jar file from the desktop onto the BlackBerry or one of the subfolders. (The folder needs to be accessible on the BlackBerry) • Disconnect the BlackBerry device from the computer SN500-4CH... - Page 63 You will be prompted with a security warning message. This is expected, Click Yes/Continue to continue the installation 4. Once successfully installed click on “downloads.” Mobile Viewer should be listed along with other downloaded programs. • Select “ Mobile Viewer” to launch the software on your phone. • If using a different model of BlackBerry, the Mobile Viewer may be listed with all of the other applications on your phone. Check the Main Menu for Mobile Viewer • Once the software has loaded: • Press Options • Select Site List • Click on Add SN500-4CH...
- Page 64 • Click Select • You will return to the live viewer and the screen should display: "Current -Site: 1NAME, Disconnected" • Click Options • Click on Connect You should be prompted that the mobile device is trying to make a connection to the IP address of the DVR. • Click Ok or Allow to allow the connection. Note: If all of your settings are correct you will view the channel of the DVR that you set in the Site List Settings. SN500-4CH...
-
Page 65: Troubleshooting Guide
Make sure the DVR is properly plugged into the router • Repeat the steps in the networking guide to make sure everything was properly set up • If none of the above steps try contacting your ISP to make sure they are not blocking port 80 SN500-4CH... -
Page 66: Camera Troubleshooting
• Power cycle the DVR by pressing the power switch to the off position. Leave for 10 seconds and power on again. If the cameras still display in black and white try replacing the power supply for the B/W camera with a properly working camera’s power supply SN500-4CH... - Page 67 264 (Includes Viewing Software Storage Capacity 500 GB (Maximum 1.5 Tb) on USB) Autostart Recording Play Search Mode Time/Date, Event list Auto Resume Recording Play Speed x2, x4, x8 HDD Type Internal SATA Pan/Tilt/Zoom Removable HDD Freeze Frame Video Format NTSC / PAL SN500-4CH...
-
Page 68: Specifications
Flash Drive Alarm Sensor Inputs Yes, 4 Alarm Relay Outputs Yes, 1 PTZ Protocols (RS-485) Pelco-D, Pelco-P, Hunt, Lilin, Dyna color , Eyeview, EP-Pelco-D, EP-Pelco-D Mac Compatible? 1 GHz or above 256MB or above Microsoft Windows 2000/ XP/Vista Monitor Resolution 1024x768 SN500-4CH... - Page 69 Night Vision Disclaimer: Number of IR LEDs and 12, up to 15ft The SN500-4CH has been designed to come equipped with Range SP301-C cameras, depending on the product "kit " you have purchased, your camera type or camera specifications may...
-
Page 70: Camera Manual
4. Plug the red adapter from the 60ft video/power wire (G) into one of the ports of the four port power supply (D) 5. Connect the RCA Video from the 60ft video/power wire (H) into the Channel/Camera inputs on your DVR or monitor. 6. Repeat for all cameras. SN500-4CH... - Page 71 THESE POSITIONS ......................Tear Here......................NETWORKING INFORMATION DVR IP ADDRESS: ________________________________________(example) 127.0.0.1 GATEWAY (ROUTER IP): ____________________________________(example) 127.0.0.1 DDNS SERVER:__________________________________________ (example) DDNS.DVRLINK.NET NET CLIENT PORT: ________________________________________(example) 6100 WEB SERVER PORT: _______________________________________(example) 80 MAC ADDRESS: __________________________________________(example) 00-12-3A-45-67-89 EXTERNAL IP ADDRESS: ____________________________________(example) 14.14.243.113 SN500-4CH...
- Page 72 NOTES SN500-4CH...
- Page 73 Disclaimer Defender does not endorse the use of any Defender products for illegal activities. Defender is not responsible or liable in any way shape or form for any damage, vandalism, theft or any other action that may occur while a Defender product is in use by the consumer.
Need help?
Do you have a question about the SN500-4CH and is the answer not in the manual?
Questions and answers