Table of Contents
Advertisement
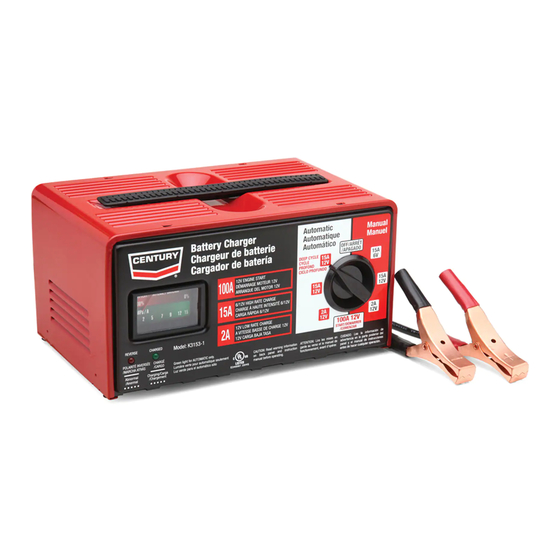
AUTOMATIC / MANUAL BATTERY CHARGERS
/ STARTERS HOUSEHOLD CHARGERS
For use with machines having Code Numbers:
Safety Depends on You
Century battery chargers and
Starters household chargers
equipment is designed and built
with safety in mind. However,
your overall safety can be
increased by proper installation
... and thoughtful operation on
your part. DO NOT INSTALL,
OPERATE OR REPAIR THIS
EQUIPMENT WITHOUT READ-
ING THIS MANUAL AND THE
SAFETY PRECAUTIONS CON-
TAINED THROUGHOUT. And,
most importantly, think before
you act and be careful.
11863, 11864
K3152-1 10/2/55 Automatic / Manual
OPERATORʼS MANUAL
Century Equipment
2345 Murphy Blvd. Gainesville, GA 30504
K3153-1 15/2/100 Automatic / Manual
IM10138
December, 2012
Advertisement
Table of Contents

Related Manuals for Century K3152-1


Summary of Contents for Century K3152-1
- Page 1 ... and thoughtful operation on your part. DO NOT INSTALL, OPERATE OR REPAIR THIS EQUIPMENT WITHOUT READ- K3152-1 10/2/55 Automatic / Manual ING THIS MANUAL AND THE SAFETY PRECAUTIONS CON- TAINED THROUGHOUT. And, most importantly, think before you act and be careful.
-
Page 2: Safety Information
SAFETY Congratulations on the purchase of your new battery charger. We wish 9. NEVER operate this battery charger if it has received a sharp blow, to acknowledge Underwriters Laboratories (U/L) for contributing the fol- been dropped, or similarly damaged, until after being inspected lowing important safety precautions. - Page 3 SAFETY 14. ALWAYS make sure the battery compartment is open and well ven- tilated before charging. BATTERY EXPLOSION HAZARDS FIRE HAZARDS 1. To reduce the risk of battery explosion, read, understand, and follow these instructions, those published by the battery manufacturer, and those of the manufacturer of any equipment you intend to use near 1.
-
Page 4: Table Of Contents
TABLE OF CONTENTS Page Installation........................Section A HOW BATTERIES CHARGE ....................A-1 SPARK PREVENTION, DEEPLY-DISCHARGED ...............A-1 LEAD-CALCIUM BATTERIES ..................A-1 CHARGER PREPARATION....................A-2 CHARGER PLACEMENT .....................A-2 PROVIDE REQUIRED POWER...................A-2 EXTENSION CORDS ....................A-2 BATTERY PREPARATION ....................A-2 Operation.........................Section B DESCRIPTION ........................B-1 CONTROLS AND INDICATORS ..................B-1, B-2 CONTROL SETTING INSTRUCTIONS ................B-3 CHARGE VOLTAGE AND RATE SELECTION ..............B-3 PRE-CHARGE BATTERY ACTIVATION ................B-3... -
Page 5: Installation
INSTALLATION DEEPLY-DISCHARGED LEAD-CALCIUM BAT- HOW BATTERIES CHARGE TERIES A charger DOES NOT FORCE current into a battery - it Some modern batteries can cause charging problems if they makes a limited amount of current available and the battery have been deeply discharged. The plates in these batteries draws as much of it as it needs, up to or slightly greater than began sulfating quickly, forming a barrier to accepting a the rated output current capability of the charger. -
Page 6: Charger Preparation
INSTALLATION CHARGER PREPARATION WARNING CHARGER PLACEMENT FIRE CAN KILL, INJURE, AND CAUSE Place the charger in a clean, dry, stable, well-ventilat- PROPERTY DAMAGE! ed spot as far away from the battery as the dc output cables permit. To reduce risk of electric shock and fire, never alter NEVER place the charger directly above the battery the ac power cord or power cord plug provided on the being charged;... -
Page 7: Operation
OPERATION • LEDʼS - reverse connection and abnormal battery DESCRIPTION red light, charging and charge complete green light. This battery charger is designed to handle the majority • SAW-TOOTH CLAMPS assure good connection to of your charging and starting needs. top or side-mount battery terminals. - Page 8 OPERATION CONTROLS AND INDICATORS (See figure B.2) FIGURE B.2 Model K3153‐1 Deep Cycle setting for a fully Manual Settings for charging charged deep cycle battery deeply discharged batteries that automatic chargers cannot charge Heavy Duty clamps for good connections 100 Amp Engine Start assist Red LED Status Light Green LED Status Light...
-
Page 9: Control Setting Instructions
OPERATION CONTROL SETTING INSTRUCTIONS 1. Make sure that the ac power cord is unplugged from the ac outlet and make sure the vehicle’s engine is turned off. CHARGE VOLTAGE AND RATE SELECTION 2. Position the ac power cord and dc output cables in Set the RATE SELECTOR to the same voltage and such a manner that they cannot be damaged by charge rate that is appropriate for the size and type of... -
Page 10: Connecting To Batteries Outside A Vehicle
OPERATION b. Positive ground vehicles (see Figure B.4) WARNING Positive to Chassis Ground BATTERY EXPLOSION CAN INJURE, AND CAUSE PROPERTY DAMAGE! To reduce the risk of battery explosion, NEVER CON- NECT BOTH BATTERY CHARGER CLAMPS DIRECTLY TO THE TWO POSTS OF A BATTERY. 4. -
Page 11: Reading An Ammeter
OPERATION READING AN AMMETER • SHORTED BATTERIES - When the battery being charged has a short circuit, the ammeter will peg at the high-amp end of the scale. If after 5 to 10 min- The ammeter indicates the charging current being utes of charging, the needle has not started to drawn from the charger by the battery. - Page 12 OPERATION CHARGING TIME INSTRUCTIONS NOTE: If the battery is rated in RESERVE CAPACI- TY, use the following formula to convert reserve capacity to amp‐hours. The following instructions will allow you to determine how long it will take to bring a specific battery to full Reserve Capacity charge in a MANUAL charge setting.
-
Page 13: Engine Starting
OPERATION ENGINE STARTING(12V ONLY) 2. Coil the input and output cables neatly after each use. This will help prevent damage to the cables This battery charger can provide a high-current output and the charger. to help start a vehicle with a weak battery. However, the onboard computer in some vehicles can be dam- 3. -
Page 14: Troubleshooting
TROUBLESHOOTING Observe all Safety Guidelines detailed throughout this manual POSSIBLE PROBLEMS (SYMPTOMS) SOLUTION 1. Make sure charger is plugged into No Ammeter Reading (Battery does not accept charge). live ac outlet. 2. After unplugging unit, check con- nection at battery. Make sure the clamps are making good contact with the battery terminal (or vehi- cle chassis). - Page 15 NOTES AUTOMATIC / MANUAL BATTERY CHARGERS / STARTERS HOUSEHOLD CHARGERS...
- Page 16 Century Equipment 2345 Murphy Blvd. Gainesville, GA 30504...
Need help?
Do you have a question about the K3152-1 and is the answer not in the manual?
Questions and answers