Invacare Leo Service Manual
Invacare leo scooter service manual
Hide thumbs
Also See for Leo:
- User manual (88 pages) ,
- Operating manual (67 pages) ,
- Service manual (37 pages)
Table of Contents
Advertisement
Quick Links
Advertisement
Table of Contents

Related Manuals for Invacare Leo


Summary of Contents for Invacare Leo
-
Page 1: Service Manual
Invacare ® SERVICE MANUAL Edition: 28.03.12... - Page 2 ® SERVICE MANUAL Invacare - Leo These instructions contain information about: Testing work Repair Instructions This manual is part of the instructions for use. Service addresses Invacare Austria GmbH +43 6232 5 53 50 Herzog Odilostrasse 101 Fax: +43 6232 5 53 54 A-5310 Mondsee info@invacare-austria.com...
- Page 3 +44 (0)1656 77 62 20 Pencoed Technology Park uk@invacare.com Pencoed WWW: www.invacare.co.uk Bridgend CF35 5HZ United Kingdom Invacare Mecc San s.r.l. +39 0445 38 00 59 Via dei Pini, 62 Fax: +39 0445 38 00 34 I - 36016 Thiene (VI) italia@invacare.com Italia WWW: www.invacare.it...
- Page 4 ® SERVICE MANUAL Invacare - Leo ( (Kundtjänst): +46 (0)8 761 70 90 Återförsäljare: Fax (Kundtjänst): +46 (0)8 761 81 08 Invacare® AB sweden@invacare.com Fagerstagatan 9 finland@invacare.com S-163 91 Spånga WWW: www.invacare.se Sverige MÖLNDAL Tillverkare: +46 (0)31 86 36 00 Invacare®...
-
Page 5: Table Of Contents
® Invacare - Leo SERVICE MANUAL Table of Contents Chapter Page INTRODUCTION General information Notes on transport Definition and representation of information and safety information in this manual Hazard symbols and symbols used Images in this manual SAFETY AND FITTING INSTRUCTIONS... - Page 6 ® SERVICE MANUAL Invacare - Leo Replacing the seat suspension / spring Replacing operating console 6.10 Replacing the potentiometer 6.11 Replacing the electronics 6.12 Updating the driving program...
-
Page 7: Introduction
· Alterations to the mobility aid which occur as a result of incorrectly or improperly executed maintenance or overhaul work lead to the exclusion of all liability on the side of INVACARE. · If you have any problems or questions please contact Invacare® Service. -
Page 8: Definition And Representation Of Information And Safety Information In This Manual
® SERVICE MANUAL Invacare - Leo Definition and representation of information and safety information in this manual Different types of information and signal words are used throughout this manual. HAZARD! The signal word "HAZARD!" refers to immediate hazards. · The following lines in italics refer to actions which serve to avoid such hazards. -
Page 9: Hazard Symbols And Symbols Used
® Invacare - Leo SERVICE MANUAL Hazard symbols and symbols used Different types of hazard symbols and symbols are used throughout this manual. General hazards This symbol warns you of general hazards! · Always follow the instructions to avoid injury to the user or damage to the product! -
Page 10: Images In This Manual
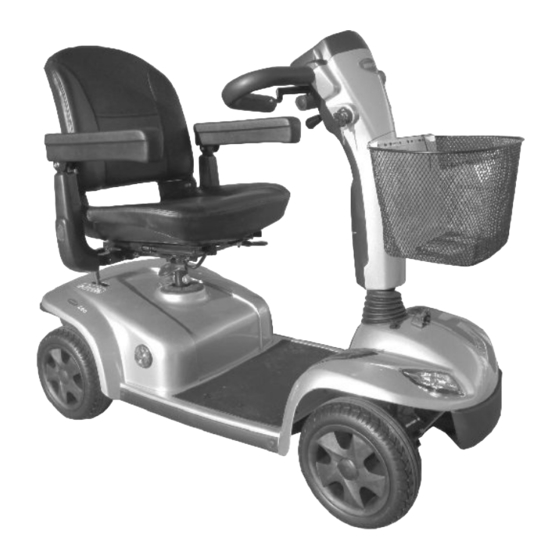
® SERVICE MANUAL Invacare - Leo Images in this manual The detailed images in this manual are given digits to identify various components. Component numbers in text and operational instructions always relate to the image directly above. -
Page 11: Safety And Fitting Instructions
® Invacare - Leo SERVICE MANUAL Safety and fitting instructions These safety instructions are intended to prevent accidents at work, and it is imperative that they are observed. Before any inspection or repair work · Read and observe this repair manual and the associated operating manual! ·... - Page 12 Any changes to the drive program can affect the driving characteristics and the tipping stability of the vehicle! · Changes to the drive program may only be carried out by trained Invacare® specialist dealers! · Invacare® supplies all mobility aids with a standard drive program ex-works. Invacare® can...
-
Page 13: Tightening Torques
® Invacare - Leo SERVICE MANUAL Tightening torques The tightening torques stated in the following list are based on the thread diameter for the nuts and bolts for which no specific values have been determined. All values assume dry and de-greased threads. -
Page 14: Service Plan (1X Annually)
® SERVICE MANUAL Invacare - Leo Service plan (1x annually) ü Component Check Remedy Notes · Welded seams, · Tighten screws, Seat: fixings and replace parts if upholstery damaged · Seat suspension · Grease the spring See "Replacing the generously,... - Page 15 ® Invacare - Leo SERVICE MANUAL ü Component Check Remedy Notes · Check drive · Update software Drive program electronics program version Newer version available?
-
Page 16: Operational Faults
® SERVICE MANUAL Invacare - Leo Operational Faults Operational faults Please proceed as follows if you have any problems: · First assess the possible cause of the problem using the following table. · Check the drive console status display. Evaluate the blink error code. -
Page 17: Error Codes And Diagnostic Codes
® Invacare - Leo SERVICE MANUAL · Replace Scooter None Drive motor See "Replacing the judders in motor(s) defective drive motor" on page drive mode · Replacing the Drive lever See "Replacing the potentiometer potentiometer potentiometer" on page defective · Replace... - Page 18 · There is a defect in the braking coil or in the cabling. Check the magnetic brake and cabling for open or short-circuited circuitry. Contact your Invacare® dealer. · No neutral position Stops driving Drive lever is not in neutral when the when switching keyswitch was turned.
-
Page 19: Repair Work
® Invacare - Leo SERVICE MANUAL Repair Work General warning information on installation work CAUTION! Risk of damage to the vehicle! Collisions can be caused if shim rings are removed from the drive wheels during installation work! Shim rings are frequently placed between the drive shaft and the wheel hub to compensate tolerances. - Page 20 ® SERVICE MANUAL Invacare - Leo Further tasks: · Place the chassis upright on its seat adapter (1). · Secure the chassis against falling over. Removing the wheel · Use the 13 mm spanner to loosen the nut (1). Use the 12 mm spanner to counter the axle bolt (2) and prevent it from turning.
-
Page 21: Assembling And Disassembling The Wheels (4-Wheel Version And Rear Wheels On The 3-Wheel Version)
® Invacare - Leo SERVICE MANUAL Assembling and disassembling the wheels (4-wheel version and rear wheels on the 3-wheel version) ATTENTION! Risk of accident. When parking the scooter on the scooters support wheels it is no longer slowed by the engine brake. -
Page 22: Replacing The Drive Motor
® SERVICE MANUAL Invacare - Leo Replacing the drive motor ATTENTION! Risk of accident. When parking the scooter on the scooters support wheels it is no longer slowed by the engine brake. The scooter can roll away out of control. - Page 23 ® Invacare - Leo SERVICE MANUAL · Remove motor cable plug (1) from electronic system. · Remove motor cable. · Fold the drive to the rear onto the enclosure and the antitipper. · Remove wheels (1). (see chapter 6.3) ·...
-
Page 24: Replacing Wheel Suspension
® SERVICE MANUAL Invacare - Leo Replacing wheel suspension CAUTION: Danger of accidents! Accidents may result from standing the chassis upright on its end! · Secure the chassis against falling over! WARNING! Danger of damage to the scooter! The plastic cover can be damaged if you attempt to lift the vehicle by its cover! ·... - Page 25 ® Invacare - Leo SERVICE MANUAL · Remove the screws (1) beneath the control console. · Remove screws (2). · Remove the control lever · Pull the control console up out of the front fixation (1). · Loosen and remove the screws (1) of the rear steering column cover.
- Page 26 ® SERVICE MANUAL Invacare - Leo · Disconnect cables (1, 2) from the cable loom. · Loosen and remove the screws (3) of the front steering column cover. · Remove the front steering column cover. · Slide the rubber sleeve upwards.
- Page 27 ® Invacare - Leo SERVICE MANUAL Removing the rubber mat from the foot space: · Press the 6 fixation clips in (in the middle of the clips) using a screwdriver · Remove the fixation clips · Remove the foot mat ·...
- Page 28 ® SERVICE MANUAL Invacare - Leo · Pull the fork out. This can require a lot of strength, as the fork (2) can be difficult to detach from the steering head holder (1). · Remove clamp (1). · Use the 32 mm spanner to loosen the fork bolt (2).
- Page 29 ® Invacare - Leo SERVICE MANUAL · Re-assembly is done in reverse order. · Check all functions (test drive)
-
Page 30: Replacing The Front Axle (4-Wheel Version)
® SERVICE MANUAL Invacare - Leo Replacing the front axle (4-wheel version) CAUTION: Danger of accidents! Accidents may result from standing the chassis upright on its end! · Secure the chassis against falling over! WARNING! Danger of damage to the scooter! The plastic cover can be damaged if you attempt to lift the vehicle by its cover! ·... - Page 31 ® Invacare - Leo SERVICE MANUAL · Counter the tie rod end with a spanner while removing the nut (1) so it cannot rotate. · Re-assembly of the axle is carried out in the reverse order. · Test all functions (test drive).
-
Page 32: Replacing The Crash Protection Bar
® SERVICE MANUAL Invacare - Leo Replacing the crash protection bar CAUTION: Danger of accidents! Accidents may result from standing the chassis upright on its end! · Secure the chassis against falling over! WARNING! Danger of damage to the scooter! The plastic cover can be damaged if you attempt to lift the vehicle by its cover! ·... - Page 33 ® Invacare - Leo SERVICE MANUAL · Loosen and remove the 6 fixation screws of the crash protection bar using a Phillips screwdriver · Pull the crash protection bar up and out. · Assembly of the crash protection bar is carried out in the reverse order.
-
Page 34: Replacing The Seat Suspension / Spring
® SERVICE MANUAL Invacare - Leo Replacing the seat suspension / spring ATTENTION! Risk of accident. Accidental rolling can lead to accidents. · Secure the scooter against rolling away. Note: When disassembling, note the position of small parts such as screws and washers. Put small parts down so that they can be reassembled in the right sequence. - Page 35 ® Invacare - Leo SERVICE MANUAL · Remove the bolt (7), nut and washers. · Remove the seat support tube (2) from the receptacle tube (1). · Remove the concertina type cover (3) including the spring (5) and the plastic end pieces (4 and 6).
-
Page 36: Replacing Operating Console
® SERVICE MANUAL Invacare - Leo Replacing operating console ATTENTION! Burn and scald hazard if power cable is short-circuited! · Turn off the power completely before removing any power supply components of the electric vehicle! Therefore take out the batteries. - Page 37 ® Invacare - Leo SERVICE MANUAL · Pull the operating console upwards out of the front fixing. · Remove all plugs (3) from operating console. · Replace operating console. · Reassembly takes place in the reverse order. · Complete reassembly of vehicle.
-
Page 38: Replacing The Potentiometer
® SERVICE MANUAL Invacare - Leo 6.10 Replacing the potentiometer ATTENTION! Burn and scald hazard if power cable is short-circuited! · Turn off the power completely before removing any power supply components of the electric vehicle! Therefore take out the batteries. - Page 39 ® Invacare - Leo SERVICE MANUAL · Remove screws (1) below operating console. · Pull the operating console upwards out of the front fixing (1). · Remove drive lever (1). · Remove potentiometer plug (2) from the operating console. ·...
-
Page 40: Replacing The Electronics
· Changes to the drive program may only be carried out by trained Invacare® specialist dealers! · Invacare® can only give a warranty for safe mobility aid driving behaviour - especially tipping stability - for unaltered standard drive programs! ATTENTION! Risk of accident. - Page 41 ® Invacare - Leo SERVICE MANUAL Further work: · Remove battery plug (1). · Remove cover (2) from electronics system. · Remove all plugs (1) from electronic system. · Remove screws (2) on both sides of the electronics system. ·...
-
Page 42: Updating The Driving Program
· Alterations to the drive program must only be carried out by trained Invacare®-dealers! · Invacare® can only assume a warranty for the safe vehicle handling of the wheelchair – in particular tipping stability - for unaltered standard drive programs! Pre-requisites: ·... -
Page 43: Installing The Windshield
® Invacare - Leo SERVICE MANUAL Accessories Installing the windshield Requirements: · 13 mm open-ended wrench · 14 mm open-ended wrench · · Remove the rear view mirror and the stoppers of the plastic cover on the handlebars. · Remove the threaded bolts of the rear view mirror holder. - Page 44 ® SERVICE MANUAL Invacare - Leo · Insert the threads of the windshield mounting brackets (3) through the bracket holders (1). · Secure the windshield mounting brackets with the self-locking nuts (2). · Adjust the windshield using the nuts (2) and (4) on both sides so that it is perpendicular to the direction of travel .
Need help?
Do you have a question about the Leo and is the answer not in the manual?
Questions and answers