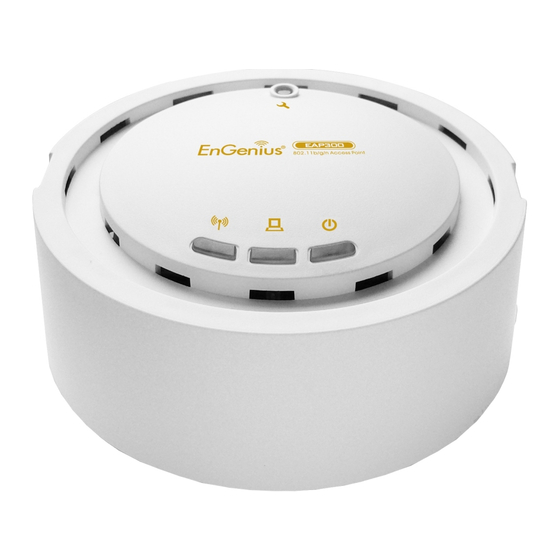
EnGenius EAP300 Manual
11n multi-function access point
Hide thumbs
Also See for EAP300:
- Quick installation manual (3 pages) ,
- Manual (64 pages) ,
- User manual (84 pages)
Table of Contents
Advertisement
Advertisement
Table of Contents

Related Manuals for EnGenius EAP300


Summary of Contents for EnGenius EAP300
- Page 1 11N Multi-Function Access Point EAP300 11N Multi-Function Access Point V1.0...
-
Page 2: Table Of Contents
Table of Contents Introduction ..................................4 Features and Benefits .....................................4 Package Contents ......................................5 System Requirements.....................................6 Applications ........................................6 Before you Begin ................................8 Considerations for Wireless Installation ..............................8 Computer Settings (Windows XP/Windows 7)............................9 Apple Mac X OS......................................12 Hardware Installation....................................13 Configuring Your Access Point ............................ - Page 3 Advanced ......................................... 31 Security ..........................................35 Filter ........................................... 41 WPS (Wi-Fi Protected Setup)..................................43 Client List.......................................... 45 VLAN..........................................46 Network.................................... 47 Status..........................................47 LAN............................................. 48 Spanning Tree ........................................ 50 Management..................................51 Admin..........................................51 SNMP..........................................52 Firmware Upgrade ......................................54 Configure ......................................... 57 Reset ..........................................
-
Page 4: Revision History
Revision History Version Date Notes 2011/06/24 First Release... -
Page 5: Introduction
11n product with 3 major multi-functions, is designed to operate in every working environment for enterprises. EAP300 is a Wireless Network device that delivers up to 6x faster speeds and 7x extended coverage than 802.11b/g devices. EAP300 supports home network with superior throughput, performance and unparalleled wireless range. -
Page 6: Package Contents
1.2 Package Contents The package contains the following items. In case of return, please keep the original box set, and the complete box set must be included for full refund. • EAP300 • 12V/1A 100V~240V Power Adapter • RJ-45 Ethernet LAN Cable •... -
Page 7: System Requirements
1.3 System Requirements The following are the minimum system requirements in order configure the device. • Computer with an Ethernet interface or Wireless Network function. • Windows, Mac OS or Linux based operating systems • Internet Explorer or Firefox or Safari Web-Browser Software 1.4 Applications The wireless LAN products are easy to install and highly efficient. - Page 8 e) Small Office and Home Office (SOHO) networks SOHO users need a cost-effective, easy and quick installation of a small network. f) Wireless extensions to Ethernet networks Network managers in dynamic environments can minimize the overhead caused by moves, extensions to networks, and other changes with wireless LANs.
-
Page 9: Before You Begin
Here are some key guidelines to ensure that you have the optimal wireless range. • Keep the number of walls and ceilings between the EnGenius access point and other network devices to a minimum. Each wall or ceiling can reduce the signal strength; the degradation depends on the building’s material. -
Page 10: Computer Settings (Windows Xp/Windows 7)
2.2 Computer Settings (Windows XP/Windows 7) This device can be configured as an Access Point, WDS AP or WDS Bridge. The default IP address of the device is 192.168.1.1 (In Access Point Mode as default). In order to log into this device, you must first configure the TCP/IP settings of your PC/Notebook. - Page 11 • Windows XP, click [Network Connection] • Windows 7, click [View Network Status and Tasks] then [Change adapter settings] • Right click on [Local Area Connection] and select [Properties].
- Page 12 • Select “Internet Protocol (TCP/IP)” and click [Properties] • Select “Use the following IP address” and enter IP address and subnet mask then click [OK]. Note: Ensure that the IP address and subnet mask are on the same subnet as the device.
-
Page 13: Apple Mac X Os
Apple Mac X OS • Go to System Preferences > Network • Under Network setting, select “Manually” and enter IP address and subnet mask. • Click Apply when done. -
Page 14: Hardware Installation
2.4 Hardware Installation 1. Place the unit in an appropriate location after conducting a site survey. 2. Plug one end of the Ethernet cable into the Ethernet port of the device and another end into your PC/Notebook. 3. Insert the DC-inlet of the power adapter into the port labeled “DC-IN” and the other end into the power socket on the wall. -
Page 15: Configuring Your Access Point
3 Configuring Your Access Point This section will show you how to configure the device using the web-based configuration interface. 3.1 Default Settings Please use your Ethernet port or wireless network adapter to connect the Access Point. Default Settings IP Address 192.168.1.1 Username / Password admin / admin... -
Page 16: Web Configuration
3.2 Web Configuration • Open a web browser (Internet Explorer/Firefox/Safari) and enter the IP Address http://192.168.1.1 Note: If you have changed the default LAN IP Address of the Access Point, ensure you enter the correct IP Address. • The default username and password are admin. Once you have entered the correct username and password, click the Login button to open the web-base configuration page. - Page 17 • You will see the following webpage if login successfully.
- Page 18 • The navigation drop-down menu on left is divided into seven main sections: System: This menu includes the operation mode, status, DHCP, schedule, event log, and monitor. Through this section, you can also change the device operating mode, such as Access Point, WDS AP or WDS Bridge. Wireless: This menu includes status, basic, advanced, security, filter, client list and VLAN.
-
Page 19: System
System 4.1 Operation Mode Each of the operating modes offers different features. In order to switch the operating mode, select it from the System >> Operation Mode. There are three operation modes: Access Point, WDS AP and WDS Bridge. A dialog box will appear to notify you that the system will restart in order for the change to take effect. Click on the OK button to continue. -
Page 20: Status
4.2 Status This page will display status of the device. System Operation Mode The device is currently in which mode. System Time The device’s system time. If this is incorrect, please set the time in the Tools / Time page. System Up Time The duration about the device has been operating without powering down or reboot. - Page 21 WLAN Settings Channel The wireless channel in use. ESSID The SSID (Network Name) of the wireless network. (up to 4 SSIDs are supported) Security Wireless encryption is enabled for this SSID. BSSID The MAC address of this SSID.
-
Page 22: Dhcp
4.3 DHCP This page shows the status of the DHCP server and also allows you to control how the IP addresses are allocated. Note: Only in Access Point mode. - Page 23 The DHCP Client Table shows the LAN clients that have been allocated an IP address from the DHCP Server. DHCP Client Table IP address The LAN IP address of the client. MAC address The MAC address of the client’s LAN interface. Expiration Time The time that the allocated IP address will expire.
- Page 24 You can also manually specify the IP address that will be allocated to a LAN client by associating the IP address with its MAC address. Type the IP address you would like to manually assign to a specific MAC address and click Add to add the condition to the Static DHCP Table.
-
Page 25: Schedule
4.4 Schedule This page allows you to setup the schedule times that the Wireless Active feature will be activated / deactivated. Click Add to create a Schedule entry. - Page 26 Schedule Schedule Description Assign a name to the schedule. Service The service provides for the schedule. Days Define the Days to activate or deactivate the schedule. Time of day Define the Time of day to activate or deactivated the schedule. Please use 24-hour clock format.
-
Page 27: Event Log
4.5 Event Log This page displays the system log of the device. When powered down or rebooted, the log will be cleared. Event Log Save Save the log to a file. Clear Clear the log. Refresh Update the log. -
Page 28: Monitor
4.6 Monitor This page shows a histogram of the Ethernet and Wireless LAN traffic. Click on [Detail] to get the detail information. -
Page 29: Wireless
5 Wireless 5.1 Status This page shows the current status of the device's Wireless settings. WLAN Settings Channel The wireless channel in use. ESSID The SSID (Network Name) of the wireless network. (up to 4 SSIDs are supported) Security Wireless encryption is enabled for this SSID. BSSID The MAC address of this SSID. -
Page 30: Basic
5.2 Basic This page shows the current status of the device's Wireless settings. Basic Radio Enable or Disable the device’s wireless signal. Mode Select between Access Point or Wireless Distribution System (WDS) modes. Band Select the types of wireless clients that the device will accept. - Page 31 Enable SSID# Select the number of SSID’s (Wireless Network names) you would like. You can create up to 4 separate wireless networks. SSID# Enter the name of your wireless network. You can use up to 32 characters. Auto Channel When enabled, the device will scan the wireless signals around your area and select the channel with the least interference.
-
Page 32: Advanced
5.3 Advanced This page allows you to configure wireless advance settings. It is recommended the default settings are used unless the user has experience with these functions. Advanced (Access Point / WDS AP mode) Fragment Threshold Specifies the size of the packet per fragment. This function can reduce the chance of packet collision. - Page 33 performance. RTS Threshold When the packet size is smaller than the RTS Threshold, then the packet will be sent without RTS/CTS handshake which may result in incorrect transmission. Beacon Interval The time interval that the device broadcasts a beacon. This beacon is used to synchronize all wireless clients on the network.
- Page 34 Advanced (WDS Bridge mode) Fragment Threshold Specifies the size of the packet per fragment. This function can reduce the chance of packet collision. However when this value is set too low, there will be increased overheads resulting in poor performance. RTS Threshold When the packet size is smaller than the RTS Threshold, then the packet will be sent without RTS/CTS handshake which may result in incorrect transmission.
- Page 35 Preamble Type A preamble is a message that helps access points synchronize with the client. Long Preamble is standard based so increases compatibility. Short Preamble is non-standard, so it decreases compatibility but increases performance. Tx Power Set the power output of the wireless signal.
-
Page 36: Security
5.4 Security This page allows you to set the wireless security settings. Note: Only in Access Point and WDS AP mode. Security (Access Point / WDS AP mode) SSID Selection Select the SSID that the security settings will apply to. Separate Tick the box in SSID or STA to Enable Separate feature. - Page 37 Wi-Fi Multi-Media is a Quality of Service protocol which prioritizes traffic in the order according to voice, video, best effort, and background. Note that in certain situations, WMM needs to be enabled to achieve 11n transfer speeds. Encryption The encryption method to be applied. You can choose from WEP, WPA pre-shared key or WPA RADIUS.
- Page 38 802.1x Authentication RADIUS Server IP The IP Address of the RADIUS Server Address RADIUS Server port The port number of the RADIUS Server. RADIUS Server The RADIUS Server’s password. password...
- Page 39 WEP Encryption: WEP Encryption Authentication Type Please ensure that your wireless clients use the same authentication type. Key type ASCII: regular text (recommended) HEX: for advanced users Key Length Select the desired option, and ensure the wireless clients use the same setting. •...
- Page 40 WPA Pre-Shared Key Encryption: WPA Pre-Shared Key Encryption Authentication Type Please ensure that your wireless clients use the same authentication type. WPA type Select the WPA encryption you would like. Please ensure that your wireless clients use the same settings. Pre-shared Key Type Select whether you would like to enter the Key in HEX or Passphrase format.
- Page 41 WPA RADIUS Encryption: WPA RADIUS Encryption WPA type Select the WPA encryption you would like. Please ensure that your wireless clients use the same settings. RADIUS Server IP Enter the IP address of the RADIUS Server address RADIUS Server Port Enter the port number used for connections to the RADIUS server.
-
Page 42: Filter
5.5 Filter This page allows you to create filters to control which wireless clients can connect to this device by only allowing the MAC addresses entered into the Filtering Table. Note: Only in Access Point and WDS AP mode. Wireless Filter (Access Point / WDS AP mode) Enable Wireless Access Tick the box to Enable Wireless Access Control. - Page 43 Description Enter a name or description for this entry. MAC address Enter the MAC address of the wireless client that you wish to allow connection. Click this button to add the entry. Reset Click this button if you have made a mistake and want to reset the MAC address and Description fields.
-
Page 44: Wps (Wi-Fi Protected Setup)
5.6 WPS (Wi-Fi Protected Setup) WPS feature is following the Wi-Fi Alliance WPS standard and it eases the set up of security-enabled Wi-Fi networks in the home and small office environment. It reduces the user steps required to configure a network and supports two methods that are familiar to most consumers to configure a network and enable security. - Page 45 SSID The SSID (wireless network name) used when connecting using WPS. Authentication Mode Shows the encryption method used by the WPS process. Passphrase Key This is the passphrase key that is randomly generated during the WPS process. It is required if wireless clients that do not support WPS attempts to connect to the wireless network.
-
Page 46: Client List
5.7 Client List This page shows the wireless clients that are connected to the device. Note: Only in Access Point and WDS AP mode. -
Page 47: Vlan
5.8 VLAN This page allows you to configure the VLAN Note: Only in Access Point and WDS AP mode. VLAN Virtual LAN Choose to Enable or Disable the VLAN feature. SSID# Tag Specify the VLAN tag for each SSID. LAN VLAN MGMT Choose to Enable or Disable the LAN VLAN MGMT feature. -
Page 48: Network
6 Network 6.1 Status This page shows the current status of the device’s LAN connection. -
Page 49: Lan
6.2 LAN This page allows you to modify the device's LAN settings. LAN IP Bridge Type Select Static IP or Dynamic IP from the drop-down list. If you select Static IP, you will be required to specify an IP address and subnet mask. If Dynamic IP is selected, then the IP address is received automatically from the external DHCP server. - Page 50 DHCP Server feature is only in Access Point mode. DHCP Server (Access Point mode) DHCP Server Enable or disable DHCP feature. The DHCP Server automatically allocates IP addresses to your LAN device. Disabled as default. Lease Time The duration of the DHCP server allocates each IP address to a LAN device. Start / End IP The range of IP addresses of the DHCP server will allocate to LAN device.
-
Page 51: Spanning Tree
6.3 Spanning Tree This page allows you to modify the Spanning Tree settings. Enabling Spanning Tree protocol will prevent network loops in your LAN network. -
Page 52: Management
7 Management 7.1 Admin This page allows you to change the system password and to configure remote management. By default, the password is: admin. Password can contain 0 to 12 alphanumeric characters and are case sensitive. Change Password Old Password Enter the current password. -
Page 53: Snmp
7.2 SNMP This page allows you to assign the contact details, location, community name and trap settings for SNMP. This is a networking management protocol used to monitor network-attached devices. SNMP allows messages (called protocol data units) to be sent to various parts of a network. Upon receiving these messages, SNMP-compatible devices (called agents) return data stored in their Management Information Bases. - Page 54 SNMP SNMP Active Enable or disable SNMP feature. SNMP Version You may select a specific version or select All from the drop-down list. Read Community Specify the password for access the SNMP community for read only access. Set Community Specify the password for access to the SNMP community with read/write access. System Location Specify the location of the device.
-
Page 55: Firmware Upgrade
7.3 Firmware Upgrade This page allows you to upgrade the device's firmware. To perform the Firmware Upgrade: 1. Click the [Browse] button and navigate to the location of the upgrade file. 2. Select the upgrade file. Its name will appear in the Upgrade File field. 3. - Page 56 Emergency Upgrade If you upgrade fail, you may enter Emergency Upgrade WEB page. 1. Enter IP address: 192.168.99.9 and enter Emergency Upgrade WEB page. Note: Refer to 2.2 to configure PC/Notebook IP address to 192.168.99.8. 2. Click the [Browse] button and navigate to the location of the upgrade file and then click [Upload]. 3.
- Page 57 4. You can access the device again.
-
Page 58: Configure
7.4 Configure This page allows you to save the current device configurations. When you save the configurations, you also can re-load the saved configurations into the device through the [Restore Settings]. If extreme problems occur you can use the [Restore to Factory Defaults] to set all configurations to its original default settings. Configure Restore to Factory Default Restores the device to factory default settings. -
Page 59: Reset
7.5 Reset In some circumstances it may be required to force the device to reboot. Click on [Apply] to reboot. -
Page 60: Tools
8 Tools 8.1 Time Setting This page allows you to set the system time. Time Time Setup Select the method you want to set the time. Time Zone Select the time zone for your current location. NTP Time Server Enter the address of the Network Time Protocol (NTP) Server to automatically synchronize with a server on the Internet. -
Page 61: Diagnosis
8.2 Diagnosis This page allows you to test your network. Type in the address for diagnosis. Diagnosis Address to Ping Enter the IP address you like to see if a successful connection can be made. Ping Frequency Select the frequency for Ping test. Ping Result The results of the Ping test. -
Page 62: Led Control
8.3 LED Control This page allows you to control LED on/off for Power, LAN interface and WLAN interface. -
Page 63: Logout
9 Logout Click on [Logout] button to logout. -
Page 64: Appendix A - Fcc Interference Statement
Appendix A – FCC Interference Statement Federal Communication Commission Interference Statement This equipment has been tested and found to comply with the limits for a Class B digital device, pursuant to Part 15 of the FCC Rules. These limits are designed to provide reasonable protection against harmful interference in a residential installation.
Need help?
Do you have a question about the EAP300 and is the answer not in the manual?
Questions and answers