Table of Contents
Advertisement
Advertisement
Table of Contents

Summary of Contents for Icecrypt S4000HDPVR
- Page 1 HD Satellite Recorder Digital Innovation Life User's Manual S4000HDPVR...
-
Page 3: Table Of Contents
INDEX INDEX ..............................3 Precautions ............................5 1. Important Safety Instructions ...................... 5 2. Notice ............................5 3. Copyright ............................ 6 4. Disclaimer ........................... 6 5. Trademarks ..........................6 Before You Begin ..........................7 1. Main Features ..........................7 2. Accessories ..........................8 Hardware Description ........................ - Page 4 PVR (Personal Video Recorder) Function ................. 25 1. Recording ..........................25 1.1 Recording methods ......................25 1.2 Recording Edit ........................27 1.3 Long Time recording ......................27 1.4 Pause during recording ....................... 27 2. Time Shifting ..........................29 3. Playback (Play List) ........................30 3.1 Recorded Files ........................
-
Page 5: Precautions
Precautions 1. Important Safety Instructions Read these instructions. Keep these instructions. Heed all warnings. Follow all instructions. Do not use this apparatus near water. Clean only with dry cloth. Do not block any ventilation openings. Install in accordance with the manufacturer’s instructions. ... -
Page 6: Copyright
To reduce the risk of electric shock, do not remove the cover (or back). No user serviceable parts are inside. Refer servicing to qualified service personnel. The Lightning Flash with arrowhead symbol The exclamation point within an within an equilateral triangle, is intended to equilateral triangle is intended to alert alert the user to the presence of un-insulated the user to the presence of important... -
Page 7: Before You Begin
Before You Begin 1. Main Features Twin Tuner HDTV PVR Receiver ( H.264/ MPEG4 HD ) Supports MPEG4 /MPEG2 - HD/SD, DVB-S2 /DVB-S Embedded Linux OS & Ethernet port Time Shifting, Recording & Playback with Internal HDD (SATA) / External HDD (USB 2.0) ... -
Page 8: Accessories
2. Accessories User's Manual Remote Control AAA size Batteries X2 HDMI Cable Loop through Cable NOTE : If any accessories listed above are missing, contact the sales representative where you purchased this unit. -
Page 9: Hardware Description
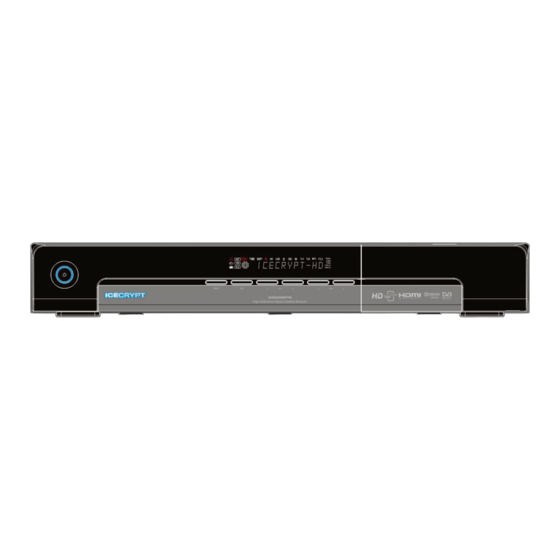
Hardware Description 1. Front Panel Configuration POWER BUTTON : Press to switch between STANDBY and POWER ON modes. LED indication : The LED lights up in running mode and standby mode. You can adjust LED Lighting Time and LED Brightness. (Main Menu >Configuration>Display Setting) Remote Sensor : Receives signal from remote controller. -
Page 10: Vfd(Vacuum Fluorescent Display)
2. VFD(Vacuum Fluorescent Display) 1. Remote Indication LED : The LED lights up when a key on the Remote Controller is pressed. 2. Radio icon : The icon lights up when you change the radio service. 3. TV icon : The icon lights up when you change the TV service. 4. -
Page 11: Rear Panel Configuration
3. Rear Panel Configuration 1. LNB IN_1 Satellite broadcasting signal input socket for the first tuner. Connects a satellite antenna LNB cable. 2. LNB OUT_1 Satellite broadcasting signal output socket through the first tuner. Connects to a second tuner for loop-through. -
Page 12: Remote Control Unit
4. Remote Control Unit 1. POWER : Turns the STB On/Off. 2. MUTE : Turns the sound On/Off. 3. Universal Buttons a. Universal TV : Change the TV Remote Controller. b. STB : Change the STB Remote Controller. c. Universal DVD : Change the DVD Remote Controller. 4. - Page 13 6. Color Buttons a. RED : Used for special function in menu. RED key is used to sort lists in service list or go to previous day search in EPG or make/delete the current position as a bookmark. b. GREEN : Used for special function in menu. GREEN key is used to set favorites setting in service list or go to the next bookmark position.
- Page 14 15. Volume Up & Down : To change the Volume. 16. Channel Up & Down: To change the TV or Radio service channel. 17. EPG(Electronic Program Guide) : Show the TV/Radio program guide. 18. Play List : To show the file list in the SATA HDD or USB Storage Device. 19.
-
Page 15: Multi-Brand Ir Remote Controller Setting
5. Multi-Brand IR Remote Controller Setting NOTE : When there is no input during about 10 seconds from set mode, set mode is canceled. 1. Direct Code Entry Step 1 : Turn on the DEVICE what you want to set up(TV / DVD / VCR) Step 2 : Press DEVICE and OK button during about 2 seconds at the same time. -
Page 16: Connections Diagram
Connections Diagram 1. Receiver to TV with Digital A/V Output Connect the satellite antenna cable to LNB IN. Connect the HDMI Cable to the HDMI Connector of the TV. Connect SPDIF to Digital audio input of the equipment(Digital Audio) NOTE : Depending on the A/V equipment you own, there are various ways you can connect the STB. -
Page 17: Receiver To Tv With Analog A/V Output
2. Receiver to TV With Analog A/V Output Connect the satellite antenna cable to LNB IN. Connect the TV SCART to the SCART input of the TV. Connect the VCR SCART to the SCART input of the VCR. ... -
Page 18: Receiver To Tv And Vcr
3. Receiver to TV and VCR Connect the satellite antenna cable to LNB IN. Connect the TV SCART to the SCART input of the TV. Connect the VCR SCART to the SCART input of the VCR. 4. Connecting to Dish Connecting one dish to both tuners by Loop through... -
Page 19: Connecting Each Dish To Each Tuner
4.2 Connecting each Dish to each Tuner 4.3 Connecting Antenna cable to each Tuner using DiSEqC SW (Recommend) -
Page 20: Guide Of Functions
Guide of Functions 1. Selecting a Service To select the desired service (channel), please refer to the instructions below. 1.1 Using CH UP/DOWN buttons You can navigate between services by pressing CH UP/DOWN buttons. Whenever you press the CH UP(DOWN) button, current service will be changed to next/previous service. Please press CH UP or CH DOWN button until you find the service you want to watch. -
Page 21: Using Recent Service List
1.4 Using Recent Service List To return to the previous service that you were watching, press RECALL button. To display recent service list, press the RECALL button and hold for a few seconds. To chose the service from the recent service list, use the ARROW button to select, then press the OK button. -
Page 22: Favorite Group
Press the EPG button, then the EPG menu will be displayed. Use the ARROW buttons to move to other services or to see previous/next guide. Press the EPG button once to view full EPG with multi service list, and press it twice to view the additional EPG information of a specific channel service. -
Page 23: Audio Track
The subtitle will be displayed in the selected language at the bottom of the screen. To turn OFF the subtitle from the screen, Select ‘Off’ from the subtitle language list. NOTE : When program does not provide subtitle information, SUBTITLE button is not active. 9. - Page 24 In the PIP mode, you can change primary and sub with the PIP SWAP button. If you press the PAGE UP/DOWN button, the location of the sub picture is changed. If you press the PIP SERVICE LIST button, you can see the list of services of sub picture.
-
Page 25: Pvr (Personal Video Recorder) Function
PVR (Personal Video Recorder) Function 1. Recording You can select a recording storage device with the following sequence : Menu > Configuration > Recording Option > Record Device. Default is set to ‘Hard Disk’. 1.1 Recording methods There are 3 type recording methods. (Instant Recording / Time Scheduled Recording / Event Scheduled Recording). - Page 26 Event Scheduled Recording via EPG : In the EPG menu screen, you can choose the event you wish to schedule or record. - While watching the LIVE TV screen, press the EPG button to access the EPG menu screen. - Go to the event which you wish to view at the time indicated on the EPG schedule, then press OK.
-
Page 27: Recording Edit
1.2 Recording Edit Press the REC button while recording to see the recording message window. Pause : Select Pause Recording then press OK to pause the current recording process. Duration : Set recording duration. Press LEFT/RIGHT ARROW button to change recording duration. ... - Page 28 During recording, press the PLAY/TIMESHIFT button to show the Play bar screen. While the Play bar is shown on your screen, you may use the LEFT/RIGHT ARROW button to move (forward & backward) freely within recorded time. If you press the STOP button, it will go to LIVE and you may press PREV FILE button to view the recorded file from the beginning.
-
Page 29: Time Shifting
2. Time Shifting You can select a storage device for a temporary file of the Time shifting with the following sequence: Menu > Configuration > Recording Option > TimeShift Device. Default storage device is set to ‘Hard Disk(SATA)’ If pressing the PAUSE button during Time shift, the live video is paused but the temporary recording for time shift is continued at the selected storage device. -
Page 30: Playback (Play List)
3. Playback (Play List) You can playback many files with the Playlist which you access by the PLAYLIST button. In the Playlist, you can check and playback recorded files, multimedia movie files, MP3 music files, and image files. With the LEFT/RIGHT ARROW button, go to the Recorded Files, Imported Files, Music and Photo category and check &... -
Page 31: Imported Files
3.2 Imported Files If you press RIGHT ARROW button in Recorded Files, you can go to Imported File menu. Locate the file(s) you wish to play with the UP/DOWN button and press the OK button to enjoy the movie. ... -
Page 32: Trick Mode
When the play bar is on, user can move / jump between the bookmarks by pressing the GREEN button. If you wish to delete any Bookmarks, go to that bookmark by pressing the GREEN button, then press the RED button to delete the current bookmarks. -
Page 33: Menu Map
Menu Map Main Menu 1. Storage Manager 2. Timer Settings 3. Service List Manager 4. Data Transfer System Tools 1. Recording Option 2. Parental Control 3. Display Setting 4. Time Setting 5. Language Setting Configuration 6. A/V Output Setting 1. Dish Setting 2. -
Page 34: Main Menu Of Guide
Main Menu of Guide To display the menu, press the MENU button at any time. You can select the sub menus by using the ARROW buttons. The selected sub menu becomes highlighted. After selecting (highlighting) the sub menu you want to access, press the OK button. -
Page 35: Service List Manager
1.3 Service List Manager Service List Manager menu will appear when you press the OK button. You can select Edit Mode by pressing the YELLOW button. Lock Services : All service lists will be shown on the left side of the window, the middle will show the list of service to be locked. -
Page 36: Data Transfer
Set Favorite Services : Use the ARROW and OK buttons to select your desired favorite group. Once, favorite group is chosen, the left side window will show all service lists and the middle window will only show the selected services of the favorite group selected. -
Page 37: Configuration
2. Configuration Recording Option Confirmation message when ‘stopping’ your Recording process : - Set 'On' : When you press the STOP button while recording, then a confirmation window is displayed. - Set 'Off' : When you press the STOP button while recording, the STB will stop the recording process immediately / instantly with no extra confirmation message. -
Page 38: Display Setting
2.3 Display Setting Info Box position : Set a position of the information window. Info Box Display Time : Set the time duration of the information window being displayed on the screen after changing services. Volume Bar Display Time : Set the time duration of the volume bar being displayed on the screen after changing audio volumes. -
Page 39: A/V Output Setting
Audio Language : Select the default language for the audio when changing services. If no other language is provided, then the default language of current will be automatically selected. Subtitle Language : Select the default language for subtitle when changing service. -
Page 40: Installation
3. Installation Dish Setting Select the satellite/antenna and LNB settings for service search. The values that are set in this menu will be available for selection in other service searching menus. Satellite : Select the satellite which you want to do a search for. -
Page 41: Positioner Setting
3.2 Positioner Setting Satellite : Select the satellite which you want to search for the Service. - Press the LEFT/RIGHT ARROW button to select the satellite. - If you press the OK button, a complete satellite list will be displayed. - Page 42 Manual Search Mode : - Satellite : Press the OK button to select the target satellite for search. - Tuner : Select the tuner which you want to use (Tuner 1/ ‘Loop-Through’ Tuner menu(Installation-Dish Setting-Tuner Connection), this menu(Tuner) will be automatically disabled. - Frequency : Select the frequency from the list to search.
-
Page 43: Network Setting
3.4 Network Setting To use a Network connected to the STB Ethernet port, you have to prepare the STB Network settings. When the STB and a PC are connected via a network, you can access the files of the STB storage device such as the SATA Hard Disk Drive (HDD) or USB storage device. -
Page 44: Utilities
4. Utilities Calculator To use the calculator, highlight the calculator and press the OK button. 4.2 Calendar To display the calendar, highlight the calendar and press the OK button. Utilize the ARROW buttons to choose the date. If you press PAGE UP/DOWN button, you can see the past/next month of the calendar. -
Page 45: Troubleshooting
Troubleshooting Problem Solution Check the main power cable and check that it is plugged into a Does not display any message suitable power outlet. on the front panel. Check the STB main power switch ‘ON’ at the rear of the STB. ... -
Page 46: Specifications
Specifications Tuner & Channel Decoder Input Connector F-type, IEC 169-24, Female Loop through out F-type, IEC 169-24, Female Frequency Range 950MHz ~ 2150MHz Input Impedance 75Ω, unbalanced Signal Level -65 to -25dBm LNB Power 13/18VDC, max.400mA 22KHz Tone (22±2)KHz, (0.6±0.2)V DiSEqC Control V1.0/1.2/USALS Compatible Demodulation... - Page 47 Audio / Video & Data IN/OUT TV SCART RGB, Y/C, CVBS Video, Audio L, R Output VCR SCART CVBS Video, Audio L, R Output RGB Video input, CVBS Video, Audio L, R Input CVBS Video Output, Audio L, R Output Component YPbPr Video Output HDMI...
-
Page 48: Code Table For Universal Remote Control Unit
Code Table for Universal Remote Control Unit 1. Key Table KEY NAME V.Format SLEEP TV/RAD, Source Resolution INFO RECALL MENU EXIT... - Page 49 KEY NAME VOL + VOL - CH + CH - REV1 REV2 REV3 REV4 REV5 REV6...
-
Page 50: Tv Brands
2. TV Brands Refer to ‘5.Multi-Brand IR Remote Controller Setting’ in the 15 page of this manual TV Brands Code ADMIRAL AKAI ALBA ALBIRAL ALCATEL AMSTRAD ANAM ARC EN CIEL ARISTONA ARTHUR MARTIN ATLANTIC AUDIOSONIC AUSIND AUTOVOX BAIRD BASICLINE BAUR BEKO BLAUPUNKT BRANDT... - Page 51 TV Brands Code DAEWOO DECCA DEGRAAF DIXI DRYNATRON DUAL DUAL-TEC DUMONT ELBE ELBIT ELCIT ELMAN ELTA EMERSON ERRES EUROPHON FERGUSON FIDELITY FINLUX FISHER FORGESTONE FORMENTI FORTRESS FRABA FRONTECH FUJITSU FUNAI GELOSO GOLDSTAR GOODMANS GORENJE GREATZ...
- Page 52 TV Brands Code GRANADA GRUNDIG HANSEATIC HANTAREX HEMMERMANN HIFIVOX HINARI HITACHI HYPER IMPERIAL INGELEN INKEL INNO HIT INTERFUNK IRRADIO KAISUI KARCHER KENDO KENNEDY KORTING KRIESLER LENOIR LOEWE OPTA LOGIK...
- Page 53 TV Brands Code LUMA LUXOR McMICHAEL MEMOREX MAGNAFON MARANTZ MATSUI MAGNADYNE METZ MINERVA MISTRAL MITSUBISHI MIVAR MULTITECH MURPHY MAONIS NATIONAL NECKERMANN NIKKAI NOBLEX NOBLIKO NOGAMATIC NOKIA NORDMENDE OCEANIC ONCEAS OPTONICA ORION OSAKI OSIO...
- Page 54 TV Brands Code OSUME OTTO VERSAND P.T ACTTRON PAEL PANASONIC PATHE CINEMA PERDIO PHILCO PHILIPS PHOENIX PHONOLA PIONEER PRANDONI-PRINCE PREMIER PRINCE PROTECH QUASAR QUELLE RADIOLA RADIOMARELLI RANK REDIFFUSION ROBOTRON SABA...
- Page 55 TV Brands Code SAISHO SALORA SAMBERS SAMPO SAMSUNG SANYO SCHAUB LORENZ SCHNEIDER SELECO SHARP SIAREM SICATEL SIEMENS SIERA SILVER SINGER SINUDYNE SONOKO SONY STERN TANDBERG TANDY TASHIKO...
- Page 56 TV Brands Code TATUNG TELEAVIA TELEFUNKEN TELETECH TELEVIDEON TENSAI TOSHIBA TRANS CONTINENTS THOMSON THORN-FERGUSON TOCOM TRIUMPH UHER ULTRA VOX UNIVERSUM UNIVOX VEGAVOX VOXSON WATSON WATT RADIO WEGA WHITE WESTINGHOUSE YOKO ZANUSSI ZOPPAS...
-
Page 57: Vcr Brands
3. VCR Brands VCR Brands Code AKAI ALBA AMSTRAD ANITSCH ARC EN CIEL ARISTONA AWIA BAIRD BAUER. BOSCH BRIONVEGA BUSH BLAUPUNKT BRANDT ELECTRONIQUE C.EDISON CANON CAPEHART CONTINENTAL EDISON CRAIG CURTIS MATHES DAEWOO DAYTRON DECCA DEGRAAF DUAL DUMONT DYNATECH EMERSON FERGUSON FIDELITY FINLANDIA FINLUX... - Page 58 VCR Brands Code FUNAI GENERAL GOLDSTAR GOODMANS GRAETZ GRANADA GRUNDIG HANSEATIC HARMAN-KARDON HIFIVOX HINARI HITACHI IMPERIAL INGELEN INGERSOL JENSEN KENWOOD KRIESLER KUBA LLOYD LOEWE OPTA LOGIK LUXOR MAGNADYNE MAGNASONIC MAGNAVOX MARANTZ MATUI MEMOREX METZ...
- Page 59 VCR Brands Code MINERVA MINOLTA MITSUBISHI MULTITECH MURPHY NAONIS NATIONAL NECKERMANN NOGAMATIC NOKIA NORDMENDE OPTONICA ORION OSAKI OTTO VERAND P. CINEMA PALLADIUM PANASONIC PATHE MARCONI PENTAX PERDIO PHILIPS PHONOLA PIONEER PORTLAND PROLINE QUARTZ QUELLE RADIOLA RADIOMARELLI...
- Page 60 VCR Brands Code REALISTIC SABA SAISHO SALORA SAMSUNG SANSUI SANYO SCHAUB LORENZ SCHNEIDER SEI-SINUDYNE SELECO SENTRA SHARP 1105 SHINTOM SIEMENS SIERA SINUDYNE SONY STERN SUNKAI SYLVANIA SYMPHONIC TASHIKO TATUNG TEAC TEKNIKA TELEAVIA TELEFUNKEN TENOSAL THOMSON...
- Page 61 VCR Brands Code THORN-FERGUSON TOSHIBA TOTELEVISION UHER ULTRA VOX UNITECH UNIVERSUM URANYA VECTOR VICTOR VIDITAL WESTING HOUSE WARDS YAMAHA ZANUSSI ZENDER ZOPPAS...
-
Page 62: Dvd Brands
4. DVD Brands DVD Brands Code AIWA AKAI ALBA ANAM ANSONIC AMES APEX AUDIOSONIC A-TREMD BROKSONIC BULE SKY BUSH CLASSIC CELESTIAL CENTREX CINEULTRA CONIA COMBRIDGE AUDIO CROWN CYBERCOM CYBERRHOME DAEWOO DAEWOO INTERNATIONAL DENON DENVER DENZEL DIGITREX DK DIGITAL DRAGON DUAL ELTA ENZER EMERSON... - Page 63 DVD Brands Code GRADIENTE HARMAN/KARDON HITEKER HOHER HITACHI INTEGRA JEKEN KENWOOD KENDO KISS KONKA KOSS LASONIC LECSON LENCO LENOXX NEXIA LIFETEC LUXMAN MAGNAVOX MARANTZ MEDION MEMOREX MICROSOFT MICROSTAR MINTEK MITAUBISHI MONYKA MUSTEK NAKAMICHI NORDMENDE NEUFUNK ONKYO OMNI OPTIMUS ORITRON PALSONIC PANASONIC...
- Page 64 DVD Brands Code PACIFIC PHILIPS PHONOTREND PIONEER PROLINE PROSCAN PROSONIC RADIOSHACK RAITE REOC REVOY ROADSTAR ROTEL SAMSUNG SAMPO SANSUI SANYO SCOTT SILVASCHNEIDER SHARP SHANGHAI SHERWOOD SHINCO SINGER SM ELECTRONIC SONY SOUNDWORKS SYLVANIA SYLMPHONIC TEAC TECHNICS TEASAI TEVION THETA DIGITAL TOSHIBA TOKAI UMAX UNITED...
- Page 65 DVD Brands Code WESDER WHARFEDALE WINDY SAM YAMAHA YAMAKAWA ZENITH...
- Page 66 Memo...
- Page 68 High Definition Digital Satellite Receiver F4000HDPVR Technical Support 08712 003 191 Website www.icecrypt.com V.09091e ICECRYPT® IS A REGISTERED TRADEMARK OF TURBOSAT INTERNATIONAL LTD...
Need help?
Do you have a question about the S4000HDPVR and is the answer not in the manual?
Questions and answers