Table of Contents
Advertisement
Advertisement
Table of Contents

Summary of Contents for ICON QCon
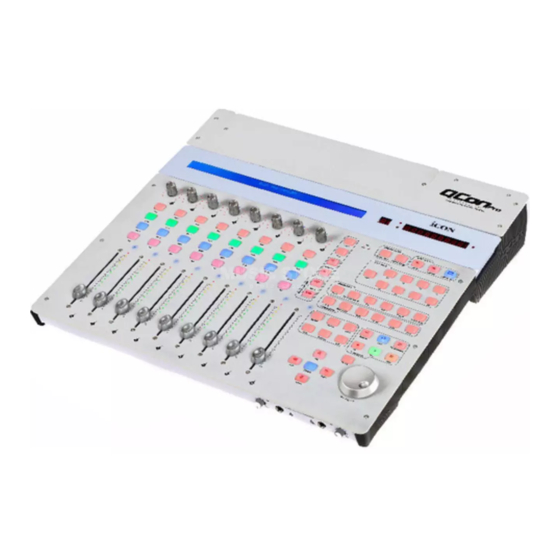
- Page 1 MIDI/Audio control surface with motorized faders for production N1630...
-
Page 2: Important Safety Instructions
Important Safety Instructions 1. Read this manual thoroughly before using this unit. 2. Keep this manual for future reference. 3. Take notice of and comply with all warnings included in the user's manual or indicated on the appliance. 4. Follow all instructions included in this manual. 5. -
Page 3: Table Of Contents
What's in the package Features Top Panel Layout Front Panel Layout Rear Panel Layout Getting Started Connecting Your Qcon Pro Controller iMap Software for Mac OS X 9-10 Installing iMap Software for Windows iMap Qcon Pro software panel Firmware upgrade... -
Page 4: Introduction
In these pages, you'll find a detailed description of the features of the Qcon Pro, as well as a guided tour through its front and side panels, step-by-step instructions for its setup and use, and full specifications. -
Page 5: Features
Illuminated zoom key with 4 direction keys 9 illuminated assignable MIDI function buttons Expandable to 32-channels control surface with 3units of Qcon EX. Expansion slot for ICON's “Umix” series USB audio interface card User A & User B RCA connectors for connecting with pedals Class-compliant with Windows XP, Vista (32-bit), Windows 7 (32-bit &... -
Page 6: Top Panel Layout
Top Panel Layout Note: Function operates slightly difference between DAWs. Please refer to your DAW manual for each function and overlap the provided labeling template according to your current using DAW. The following description is based on the functions that operate in Apple Logic . -
Page 7: Time Display
Channel level metering The 12-led showing the associated channel level. Dual function encoders The dual functioned encoder acting as a push-button and a rotary control. When an encoder is pressed, it may be used to change modes of operation or to change what appears in the display above the channel strips. - Page 8 The name of the DAW will display on the LCD. DAW button - Press to enter the DAW selection. To change your Qcon Pro DAW mode, turn off and on the power switch to enter the DAW selection mode. Select your desired DAW from the list with the...
- Page 9 Tips: DAW button could not be activated if a DAW software is running. (Note: We will update Qcon Pro firmware from time to time to support additional DAW apart from the current existing list. Please check our official website to download and upgrade your Qcon Pro firmware).
-
Page 10: Front Panel Layout
Connect your Qcon Pro to your Mac/PC via this USB port. 12V/5A power adaptor Connect the provided power adaptor here. (Note: Qcon Pro is not able to work without the provided power adaptor connected. The USB bus power is not able to provide sufficient power supply for Qcon Pro.) -
Page 11: Getting Started Connecting Your Qcon Pro Controller
Press <</>> to scroll through the DAW list after pressed the “DAW” button to make the selection. Tips: Qcon Pro will memorise your last selected DAW mode and re-enter the same mode a few seconds after it has been switched on. (i.e. DAW mode selection is not needed if e is being used.) -
Page 12: Imap Software For Mac Os X
Please follow the procedures below step-by-step to launch your iMap software to Mac OS X Insert the Utility CD in your CD-Rom and double click “Qcon Pro iMap” icon. iMap Tips: By “drag and drop” the “Qcon Pro iMap” icon into the “Applications” folder, you could create a “iMap”... - Page 13 Then click "Next" Diagram 4 Create a shortcut on your desktop Please untick the box if you do not want to place a shortcut icon on your desktop for iMap , otherwise click "Next" Diagram 5 iMap started to install The iMap installation has now started, wait for it to finish.
-
Page 14: Imap Qcon Pro Software Panel
Qcon Pro software panel “Firmware Upgrade” button Click this button to enter into the firmware upgrade window for Qcon Pro. Please refer to P.11 for the firmware upgrade procedure. Firmware upgrade Step 1: Connect the ICON product using a USB connection. Press the “MIDI Device”... -
Page 15: Qcon Pro Connections
Qcon Pro Connections Monitors Computer(MAC or PC) USB Interface USB 2 CapsLook Shift Ctrl AltGr Ctrl USB 1 COMP DIRECT Microphone Headphones Guitar User A User B... -
Page 16: Qcon Pro Connections (Umix 1008 Satellite Installed)
Qcon Pro Connections (Umix 1008 Satellite installed) User B Computer(MAC or PC) Microphone Guitar User A CapsLook Shift Ctrl AltGr Ctrl Monitors Power Adaptor Headphones... -
Page 17: Specifications
USB connector (standard type) Power supply: 12V/6A DC Current consumption: Qcon Pro only 3A or less Qcon Pro with Umix Satellite audio interface 6A or less Weight: 7.0kg (15.4lb) Dimensions: 510(L) X 475(W) X 82(H) 20.1”(L) x 18.7”(W) x 3.2”(H) -
Page 18: Services
3. Pack the unit in its original packaging including end card and box. This is very important. If you have lost the packaging, please make sure you have packed the unit properly. ICON is not responsible for any damage that occurs due to non-factory packing. - Page 19 QCONP PD3V100-E...


Need help?
Do you have a question about the QCon and is the answer not in the manual?
Questions and answers