Icom IC-9100 Service Manual
Hf/vhf/uhf transceiver
Hide thumbs
Also See for IC-9100:
- Instruction manual (212 pages) ,
- Overview (16 pages) ,
- Reference manual (13 pages)
Table of Contents
Advertisement
Advertisement
Table of Contents

Related Manuals for Icom IC-9100


Summary of Contents for Icom IC-9100
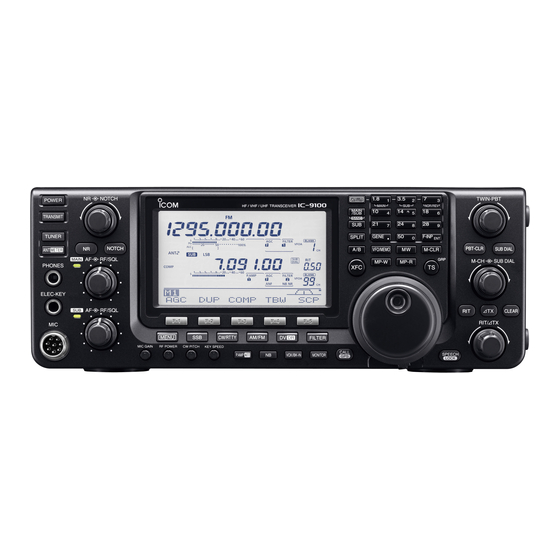
- Page 1 HF/VHF/UHF TRANSCEIVER S-14721XZ-C1 Jun. 2011...
- Page 2 8. READ the instructions of the test equipment throughly before connecting it to the transceiver. Icom, Icom Inc. and the Icom logo are registered trademarks of Icom Incorporated (Japan) in Japan, the United States, the United Kingdom, Germany, France, Spain, Russia and/or other countries.
-
Page 3: Table Of Contents
TABLE OF CONTENTS SECTION SPECIFICATIONS SECTION INSIDE VIEWS SECTION CIRCUIT DESCRIPITON RECEIVER CIRCUITS............3-1 TRANSMITTER CIRCUITS . -
Page 4: Specifications
SECTION 1. SPECIFICATIONS ■ General ■ Transmitter • Frequency coverage : (unit: MHz) • Output power (continuously adjustable) Receive Frequency band Output power 0.030–60.000* 136.000–174.000* HF/50 MHz 2 to 100 W (AM: 2 to 30 W)* 420.000–480.000* 144 MHz 2 to 100 W †... -
Page 5: Antenna Tuner
■ Receiver ″) • Receive system • PHONES connector : 3-conductor 6.35 (d) mm ( ⁄ HF/50/144/430 MHz band : Double superheterodyne system • External SP connector : 2-conductor 3.5 (d) mm ″)/8 Ω 1200 MHz band † : Triple superheterodyne system ⁄... -
Page 6: Section 2 Inside Views
SECTION 2. INSIDE VIEWS • THE VIEW FROM THE TOP OF CHASSIS RF-B UNIT PA-A UNIT PA-B UNIT • THE VIEW FROM THE BOTTOM OF CHASSIS PLL UNIT CONNECT UNIT BPF UNIT VARIABLE CAPACITORS NETWORK UNIT 2 - 1... - Page 7 • MAIN UNIT (TOP VIEW) DC-DC CONVERTER (IC2001) UT-121 (Optional product) (IC3453) (IC4402) BUFFER (IC4482) BUFFER BUFFER (IC4401) (IC4483) CODEC (IC4403) (IC4461) (IC4404) BUFFER (IC4481) CMOS BUFFER (IC6101) BUFFER (IC4405) (IC4001) EEPROM CPLD (IC4202) (IC1261) 2 - 2...
- Page 8 • MAIN UNIT (BOTTOM VIEW) (IC1201) EEPROM (IC1081) CMOS SW (IC1161) CMOS SW (IC5001) (IC1162) CMOSS BUFFER (IC6103) CODEC (IC4651) BUFFER (IC1163) CODEC CODEC (IC5451) (IC5452) BUFFER (IC4661) (IC5405) (IC4603) BUFFER BUFFER (IC5482) (IC4601) BUFFER CMOS BUFFER (IC4602) (IC6102) ANALOG SW (IC6001) ANALOG SW ANALOG SW...
- Page 9 • RF-B UNIT 1ST RX IF MIXER (VHF BAND) RF AMP (VHF BAND) (IC2651) 2ND RX IF MIXER (VHF BAND) (D251, D255) 1ST RX IF AMP (VHF BAND) (Q1021) 1ST RX IF FILTER (VHF BAND) (FI331A/B) 1ST RX IF FILTER (UHF BAND) (FI731) 1ST RX IF AMP (UHF BAND) TX POWER SUPPLY LINE SW...
- Page 10 • PLL UNIT PROGRAMMABLE CLOCK GENERATOR (IC662) DDS-A (IC702) DDS-B (IC1502) 32 MHz REFERENCE FREQUENCY SERIAL-PARALLEL OSCILLATOR CONVERTER (X151) (IC1402) PLL IC SERIAL-PARALLEL (IC201) CONVERTER (IC103) SERIAL-PARALLEL CONVERTER (IC104) LEVEL CONVERTOR SERIAL-PARALLEL (IC1054) CONVERTER LEVEL CONVERTOR (IC1401) (IC1053) 1ST TX/RX LO FILTER DDS B (FI401) (IC1051)
- Page 11 • PA-A UNIT S/P CONVERTER (IC432) POWER AMP (Q242) POWER AMP (Q241) BIAS CONTROLLER (IC301) DC-DC CONVERTER DRIVE AMP (IC131) (Q222) DRIVE AMP (Q221) PRE-DRIVE AMP DC AMP (Q201) (IC371) D/A CONVERTER (IC431) 2 - 6...
- Page 12 • PA-B UNIT +12 V REGULATOR (IC841) POWER AMP (VHF BAND) (Q701) POWER AMP (VHF BAND) (Q702) POWER AMP (UHF BAND) (Q402) POWER AMP (UHF BAND) (Q401) DRIVE AMP (Q251) D/A CONVERTER (IC931) YGR AMP POWER AMP (UHF BAND) (Q171) BIAS CONTROLLER (IC552) PRE-DRIVE AMP...
- Page 13 • CTRL UNIT ANTENNA SW (RL501) PHASE DETECTOR (IC111) DC AMP (IC41) TUNER CPU DC AMP (IC701) (IC131) +5 V REGULATOR (IC801) 2 - 8...
- Page 14 • CONNECT UNIT USB BRIDGE LEVEL CONVERTER (IC903) (IC821) MULTIPLEXER (IC1211) COOLING FAN DRIVER (Q151) AF AMP/DC AMP (IC401) BUFFER (IC501) USB BRIDGE (IC901) AF AMP (IC502) SERIAL-PARALLEL MULTIPLEXER CONVERTER (IC541) (IC21) USB CODEC SERIAL-PARALLEL (IC551) CONVERTER (IC22) D/A CONVERTER (IC151) AF LPF/TONE FILTER (IC281)
- Page 15 • BPF UNIT PRE-AMP (Q532) PRE-AMP (Q511, Q512) YGR AMP (HF BAND) (IC201) 2 - 10...
-
Page 16: Circuit Descripiton
SECTION 3. CIRCUIT DESCRIPTION 3-1 RECEIVER CIRCUITS BPF CIRCUITS (BPF UNIT) HF RF CIRCUITS The RX signal from the attenuator circuits is passed ANTENNA SWITCHING CIRCUITS (CTRL UNIT) through an LPF or one of BPFs, depending on the operating RX signal from the antenna connector [ANT1] (J1) or [ANT2] frequency, to remove unwanted out-of-band signals. - Page 17 VHF RF CIRCUITS (RF-B UNIT) UHF RF CIRCUITS (RF-B UNIT) VHF band RX signal from the antenna connector [144MHz UHF band RX signal from the antenna connector [430MHz ANT] (CHASSIS; J1) is passed through the SWR detecter ANT] (CHASSIS; J2) is passed through the SWR detecter (PA-B;...
- Page 18 VHF 1ST RX IF CIRCUITS (RF-B UNIT) VHF 2ND RX IF CIRCUITS (RF-B UNIT) The RX signal from the RF circuits is applied to the 1st RX IF The 1st RX IF signal from the 1st RX IF circuits is divided mixer (Q1051–Q1054) to be mixed with the 1st RX LO signal into two paths, and then each signal is applied to the 2nd (125.15–163.15 MHz) from the PLL UNIT, resulting in the...
- Page 19 DEMODULATOR CIRCUITS (MAIN UNIT) • SUB BAND The 2nd RX IF signal is passed through the AF SW (HF The 2nd RX IF signal from the 2nd RX IF circuits is passed band; IC3509, VHF band; IC3513, UHF band; IC3517), RX through the MAIN/SUB BAND SW (HF band;...
-
Page 20: Transmitter Circuits
3-2 TRANSMITTER CIRCUITS 3RD TX IF AND 2ND TX IF CIRCUITS (MAIN UNIT) TX AF CIRCUITS (MAIN UNIT) The 3rd TX IF signal from the modulation circuits is passed The audio signal from the microphone (MIC signal) is through the LPF (IC3601), and then applied to the 3rd TX applied to the MAIN UNIT, through the MICROPHONE mixer (IC3621) to be mixed with the 3rd TX LO signal from CONNECTOR (MIC BOARD;... -
Page 21: Bpf Unit
1ST TX IF CIRCUITS • HF BAND (RF-A UNIT) The converted TX signal is passed through the LPF, and The 1st TX IF signal from the 2nd TX IF circuits is passed amplifi ed by the AMP (IC601), and then applied to the BPF UNIT. through the 1st TX IF filter (FI911) to remove unwanted signals. - Page 22 HF TX AMPLIFIER CIRCUITS (PA-A UNIT) The amplifi ed signal is applied to IC131, through the buffer (IC121) The TX signal from the BPF UNIT is sequentially amplifi ed for phase comparison. The resulting signal of phase comparison by the pre-drive AMP (Q201), drive AMP (Q221, Q222), and is rectifi...
- Page 23 3-3 FREQUENCY SYNTHESIZER (PLL UNIT) REFERENCE FREQUENCY OSCILLATOR CIRCUIT • UHF BAND The 32 MHz reference signal from the crystal oscillator The cr ystal oscillator (X151) generates the 32 MHz (X151) is doubled by the doubler (Q551, L551, L552), reference frequency signal. This reference signal is applied resulting in the 64 MHz reference clock signal.
-
Page 24: Frequency Synthesizer Circuits
• VHF BAND The 1st RX/TX LO signal is passed through the BPF The 1st RX/TX LO signal is passed through the LO SW (RF-B UNIT; D2582, D2583, L2582, L2583, C2583, (IC1454) and BPF (L1101–L1105, C1103–C1113), and C2584, C2587, C2607, C2608), and amplified by the then applied to the LO AMP (IC1171). -
Page 25: Port Allocations
3-4 VOLTAGE BLOCK DIAGRAM Line Description Name H3.3V “PWRK ” DC-IN H3.3V FRONT FRONT DOTK Ele-key input. (Dot) 13.8V POWER SW DSHK Ele-key input. (Dash) “PWRS” Headphones connection detect. PHNK H=Connected. H14V SPCHK [SPEECH/LOCK] input. (Pull-up) PBCLK [PBT-CLK] input. (Pull-up) RITCLK [CLEAR] input. - Page 26 • MAIN CPU (MAIN UNIT: IC1201) Line Line Description Description Name Name DSPCK DSP clock. VBUS connection detect for USB HUB. VBUS H=USB connection detected. DSPR DSP data. MIC signal detect. UDRXD USB data input. DAVOX H=Input detect. [EXT-SP] (MAIN BAND) connection detect. MSPK CTFL CW TX status.
-
Page 27: Adjustment Procedures
SECTION 4. ADJUSTMENT PROCEDURE 4-1 PREPARATION ¤ REQUIRED EQUIPMENTS EQUIPMENT GRADE AND RANGE EQUIPMENT GRADE AND RANGE Modifi ed 3.5 mm (1/8’’) monoral plug Audio generator Frequency range : 300–3000 Hz Short plug (AG) Output level : 1–500 mV (Short) RF voltmeter Measuring range : 20–200 mV... -
Page 28: Adjustments On The Pll Unit
4-2 ADJUSTMENTS ON THE PLL UNIT TRANSCEIVER'S MEASURE ADJUST ADJUSTMENT ITEM OPERATION VALUE CONDITION POINT POINT REFERENCE 1 • Frequency: 14.10000 MHz • Connect a frequency counter to J571 (Verify) 64.000000 MHz FREQUENCY • Mode: USB J571. (±300 Hz) SIGNAL •... - Page 29 4-2 ADJUSTMENTS ON THE PLL UNIT (continued) TRANSCEIVER'S MEASURE ADJUST ADJUSTMENT ITEM OPERATION VALUE CONDITION POINT POINT 1ST LO LEVEL 1 • Frequency: 420.000 MHz • Connect an RF voltmeter to the J1281 (Verify) –3.0 dBm (UHF band) (430.000 MHz*) J1281.
- Page 30 • THE LOCATION OF ADJUST/CHECK POINTS ON THE PLL UNIT CODEC CLOCK LEVEL Check point 3RD TX LO LEVEL Check point J601 To MAIN CODEC L951 L952 R982 R853 C981 L853 R857 J851 R805 C810 C856 R809 T3Lo C855 L801 To MAIN C850 C805...
-
Page 31: Adjustment On The Main Unit
4-3 ADJUSTMENT ON THE MAIN UNIT TRANSCEIVER'S MEASURE ADJUST ADJUSTMENT ITEM OPERATION VALUE CONDITION POINT POINT PRESET • Receiving – – L3652 Screw the core all the way inside the coil. • THE LOCATION OF PRESET POINT ON THE MAIN UNIT Preset point J3204 J3204... -
Page 32: Adjustments On The Rf-A Unit
4-5 ADJUSTMENTS ON THE RF-A UNIT TRANSCEIVER'S MEASURE ADJUST ADJUSTMENT ITEM OPERATION VALUE CONDITION POINT POINT TX ADJUSTMENT • Frequency: 14.100 MHz 1) Connect an RF power meter to [ANT1] L612 Max. TX power (TX power) • Mode: USB [ANT1]. •... - Page 33 • THE LOCATION OF ADJUST/CHECK POINTS ON THE RF-A UNIT R1276 IMAGE REJECTION Adjust point IMAGE REJECTION Adjust point C1121 MP1201 RX SENSITIVITY Adjust point MP1101 EP913 EP911 MP651 TX POWER Adjust point J501 TO BPF MIXER BALANCE/ RX SENSITIVITY RX SUPRIOUS Adjust point L723...
-
Page 34: Adjustments On The Rf-B Unit
4-6 ADJUSTMENTS ON THE RF-B UNIT TRANSCEIVER'S MEASURE ADJUST ADJUSTMENT ITEM OPERATION VALUE CONDITION POINT POINT • S e t t h e a d j u s t m e n t va l u e i n [Tuned BPF 1-2] [MAIN DIAL] "8A"... - Page 35 • THE LOCATION OF ADJUST/CHECK POINTS ON THE RF-B UNIT EP81 Q2581 C2592 C2588 Q2433 L2585 C2590 L2583 C2609 C2607 R2590 C2594 C2608 R601 L2582 R2591 C604 J501 C2364 D2585 R603 L2586 R2592 R2582 C527 C2610 MP2582 IC611 L2210 C2471 L2452 C2210 C2455...
-
Page 36: Adjustment On The Ctrl Unit
4-7 ADJUSTMENT ON THE CTRL UNIT TRANSCEIVER'S MEASURE ADJUST ADJUSTMENT ITEM OPERATION VALUE CONDITION POINT POINT Ω TUNER REFERENCE 1 • Frequency: 3.55 MHz CP31 Min. voltage 1) Connect a 50 dummy load to • [TUNER]: Through [ANT1]. • TX power: Max. 2) Connect a voltmeter to CP31. -
Page 37: Adjustments On The Function Display
4-8 ADJUSTMENTS ON THE FUNCTION DISPLAY 1) Connect the short plug (Page 4-1) to [REMOTE], and while holding down [MENU] and [SSB], turn ON the power. 2) The main adjustment menu appears. NOTE: If the optional UX-9100 is installed, remove it before the adjustment. ¤... - Page 38 ¤ ID ADJUSTMENTS (continued) TRANSCEIVER'S MEASURE ADJUST ADJUSTMENT ITEM OPERATION VALUE CONDITION POINT POINT Ω ID ADJUSTMENT 6 • Display: "ID SET HF" Power – Push [F-5]. 1) Connect a 50 dummy load to (HF band) • Transmitting supply line (Meaure the [ANT1].
-
Page 39: Transmit Adjustments
¤ TRANSMIT ADJUSTMENTS • Transmit adjustment menu. V H F U H F Stores the value and move to the next item. Reterns to the previous screen. MENU Starts the transmit adjustments (HF band). Starts the transmit adjustments (UHF). (See below) (Page 4-16) Starts the transmit adjustments (VHF).(Page 4-14) •... - Page 40 • TRANSMIT ADJUSTMENTS (VHF band) TRANSCEIVER'S MEASURE ADJUST ADJUSTMENT ITEM OPERATION VALUE CONDITION POINT POINT PREPARATION • Connect an AG and millivoltmeter – – – to [MIC], and then set it as; Frequency : 1.5 kHz – Level : 1 mV •...
- Page 41 • TRANSMIT ADJUSTMENTS (VHF band) (continued) TRANSCEIVER'S MEASURE ADJUST ADJUSTMENT ITEM OPERATION VALUE CONDITION POINT POINT TX POWER 20 • Display: "POWER 1.2G" • Push [F-5]. (Automatically starts "FORV" [MAIN DIAL] 2.600 V (1.2 GHz BAND) • Receiving to transmit.) on the Push [F-5].
- Page 42 • TRANSMIT ADJUSTMENTS (UHF band) TRANSCEIVER'S MEASURE ADJUST ADJUSTMENT ITEM OPERATION VALUE CONDITION POINT POINT PREPARATION • Connect an AG and millivoltmeter – – – to [MIC], and then set it as; Frequency : 1.5 kHz – Level : 1 mV •...
- Page 43 ¤ REFERENCE ADJUSTMENTS • Reference adjustment menu. R E F A P C V C C Stores the value and move to the next item. Reterns to the previous screen. MENU Select the APC reference adjustment. Select the reference frequency adjustment. •...
-
Page 44: Receive Adjustments
¤ RECEIVE ADJUSTMENTS • Receive adjustment menu. V H F U H F Stores the value and move to the next item. Reterns to the previous screen. MENU Starts the receive adjustments (HF band). Starts the transmit adjustments (UHF). (See below) (Page 4-20) Starts the receive adjustments (VHF). - Page 45 • RECEIVE ADJUSTMENTS (VHF band) TRANSCEIVER'S MEASURE ADJUST ADJUSTMENT ITEM OPERATION VALUE CONDITION POINT POINT TUNED BPF NOTE: DO NOT change the output level of the SSG until the beeps sound. 1 • Display: "Tuned BPF 1-1 VHF" • Connect an SSG to [144MHz –...
- Page 46 • RECEIVE ADJUSTMENTS (UHF band) TRANSCEIVER'S MEASURE ADJUST ADJUSTMENT ITEM OPERATION VALUE CONDITION POINT POINT TUNED BPF NOTE: DO NOT change the output level of the SSG until the beeps sound. 1 • Display: "Tuned BPF 1-1 UHF" • Connect an SSG to [430MHz –...
-
Page 47: Section 5 Parts List
SECTION 5. PARTS LIST [MAIN UNIT] [MAIN UNIT] PARTS PARTS DESCRIPTION DESCRIPTION LOCATION LOCATION IC1001 1130010111 S.IC TC7WH04FU(TE12LF) 195.6/32.9 Q2102 1550000160 S.FET CPH3313-TL-E 108.9/14.8 IC1041 1130012600 S.IC SN74AHC1G04DCKR 186.8/33.0 Q2201 1550000160 S.FET CPH3313-TL-E 74.7/6.0 IC1081 1130015080 S.IC R1EX24512ASAS0A 234.1/5.7 Q2202 1590003680 S.TRA KRC402 RTK/P 69.1/6.2... - Page 48 [MAIN UNIT] [MAIN UNIT] PARTS PARTS DESCRIPTION DESCRIPTION LOCATION LOCATION D1516 1750002020 S.DIO DA2S10100L [EUR] T 231.9/21.6 L3691 6200001981 S.COI NLV25T-1R0J 67.4/59.1 1750002020 S.DIO DA2S10100L [TPE] L3692 6200010670 S.COI C2520C-R18G-A (0.18U) 64.3/57.6 1750002020 S.DIO DA2S10100L [CHN] L3693 6200011410 S.COI C2520C-82NG-A 60.8/60.8 1750002020 S.DIO DA2S10100L...
- Page 49 [MAIN UNIT] [MAIN UNIT] PARTS PARTS DESCRIPTION DESCRIPTION LOCATION LOCATION R266 7030004990 S.RES ERJ2GEJ 221 X (220) 200.8/10.0 R1283 7030005080 S.RES ERJ2GEJ 823 X (82K) 234.3/14.5 R267 7030004990 S.RES ERJ2GEJ 221 X (220) 201.8/10.0 R1284 7030005240 S.RES ERJ2GEJ 473 X (47K) 234.9/11.7 R268 7030004990 S.RES ERJ2GEJ 221 X (220)
- Page 50 [MAIN UNIT] [MAIN UNIT] PARTS PARTS DESCRIPTION DESCRIPTION LOCATION LOCATION R3229 7030004980 S.RES ERJ2GEJ 101 X (100) 45.1/54.5 R3461 7030005090 S.RES ERJ2GEJ 104 X (100K) 127.8/53.8 R3230 7030004980 S.RES ERJ2GEJ 101 X (100) 45.1/55.5 R3462 7030008290 S.RES ERJ2GEJ 183 X (18K) 126.6/55.2 R3231 7030004980 S.RES ERJ2GEJ 101 X (100)
- Page 51 [MAIN UNIT] [MAIN UNIT] PARTS PARTS DESCRIPTION DESCRIPTION LOCATION LOCATION R3639 7030005050 S.RES ERJ2GEJ 103 X (10K) 73.5/29.2 R4446 7030008250 S.RES RR0510P-562-D (5.6K) 157.9/19.2 R3641 7030005030 S.RES ERJ2GEJ 152 X (1.5K) 80.6/39.6 R4447 7030006010 S.RES RR0510P-472-D (4.7K) 147.9/29.0 R3651 7030003420 S.RES ERJ3GEYJ 681 V (680) 83.7/48.8 R4448 7030005770 S.RES RR0510P-101-D (100)
- Page 52 [MAIN UNIT] [MAIN UNIT] PARTS PARTS DESCRIPTION DESCRIPTION LOCATION LOCATION R4667 7030005050 S.RES ERJ2GEJ 103 X (10K) 182.8/54.8 R5497 7030005780 S.RES RR0510P-221-D (220) 173.5/28.4 R4668 7030005050 S.RES ERJ2GEJ 103 X (10K) 182.8/55.7 R5498 7030005780 S.RES RR0510P-221-D (220) 174.0/29.7 R4669 7030007300 S.RES ERJ2GEJ 332 X (3.3K) 182.8/56.6 R5499 7030005780 S.RES RR0510P-221-D (220)
- Page 53 [MAIN UNIT] [MAIN UNIT] PARTS PARTS DESCRIPTION DESCRIPTION LOCATION LOCATION C154 4030017460 S.CER C1005 JB 1H 102K-T 183.6/66.1 C1261 4030016930 S.CER C1005 JB 1A 104K-T 238.7/26.8 C155 4030017460 S.CER C1005 JB 1H 102K-T 190.5/63.8 C1262 4030016930 S.CER C1005 JB 1A 104K-T 245.2/11.0 C156 4030017460 S.CER C1005 JB 1H 102K-T...
- Page 54 [MAIN UNIT] [MAIN UNIT] PARTS PARTS DESCRIPTION DESCRIPTION LOCATION LOCATION C3485 4030016930 S.CER C1005 JB 1A 104K-T 86.9/71.9 C4003 4030019460 S.CER C1608 JB 0J 106M-T 206.7/28.0 C3486 4030016930 S.CER C1005 JB 1A 104K-T 81.6/64.2 C4004 4030019460 S.CER C1608 JB 0J 106M-T 210.2/63.1 C3487 4030016930 S.CER C1005 JB 1A 104K-T...
- Page 55 [MAIN UNIT] [MAIN UNIT] PARTS PARTS DESCRIPTION DESCRIPTION LOCATION LOCATION C4451 4030018620 S.CER C1608 CH 1H 222J-T 148.9/30.1 C5023 4030016930 S.CER C1005 JB 1A 104K-T 233.9/72.0 C4461 4550006780 S.TAN TEESVB2 0J 476M8R 158.3/27.7 C5024 4030016930 S.CER C1005 JB 1A 104K-T 206.1/68.6 C4462 4030016930 S.CER C1005 JB 1A 104K-T...
- Page 56 [MAIN UNIT] [MAIN UNIT] PARTS PARTS DESCRIPTION DESCRIPTION LOCATION LOCATION C5487 4550006780 S.TAN TEESVB2 0J 476M8R 166.9/15.1 EP4461 6910014690 S.BEA MPZ1608S221A-T 154.1/33.1 C5488 4550006780 S.TAN TEESVB2 0J 476M8R 180.8/35.1 EP4462 6910014690 S.BEA MPZ1608S221A-T 156.2/49.1 C5489 4550006780 S.TAN TEESVB2 0J 476M8R 180.8/38.4 EP4601 6910014690 S.BEA MPZ1608S221A-T...
-
Page 57: Connect Unit
[CONNECT UNIT] [CONNECT UNIT] PARTS PARTS DESCRIPTION DESCRIPTION LOCATION LOCATION IC21 1130011760 S.IC CD4094BPWR 70.8/6.6 L1102 6200002041 S.COI NLV25T-101J 100.8/39.0 IC22 1130011760 S.IC CD4094BPWR 79.5/6.6 L1103 6200002041 S.COI NLV25T-101J 109.3/32.9 IC151 1110004310 S.IC M62352GP 75EC 88.5/6.9 L1106 6200002041 S.COI NLV25T-101J 114.3/45.2 IC201 1140013200 S.IC... - Page 58 [CONNECT UNIT] [CONNECT UNIT] PARTS PARTS DESCRIPTION DESCRIPTION LOCATION LOCATION R343 7030003320 S.RES ERJ3GEYJ 101 V (100) 176.0/36.6 R912 7030003250 S.RES ERJ3GEYJ 270 V (27) 137.4/41.9 R344 7030003400 S.RES ERJ3GEYJ 471 V (470) 172.7/28.5 R913 7030003250 S.RES ERJ3GEYJ 270 V (27) 131.8/29.8 R345 7030003400 S.RES ERJ3GEYJ 471 V (470)
- Page 59 [CONNECT UNIT] [CONNECT UNIT] PARTS PARTS DESCRIPTION DESCRIPTION LOCATION LOCATION C292 4030006880 S.CER C1608 JB 1H 472K-T 102.4/21.0 C907 4030007060 S.CER C1608 CH 1H 270J-T 148.7/38.0 C293 4030007080 S.CER C1608 CH 1H 390J-T 102.0/26.2 C908 4030011600 S.CER C1608 JB 1E 104K-T 143.2/36.8 C301 4550000460 S.TAN...
- Page 60 [CONNECT UNIT] [PLL UNIT] PARTS PARTS DESCRIPTION DESCRIPTION LOCATION LOCATION RL1431 6330001860 REL UA2-12NU IC103 1130011760 S.IC CD4094BPWR 23.9/58.6 IC104 1130011760 S.IC CD4094BPWR 22.9/47.8 IC121 1180001072 S.IC TA7805F(TE16L1NQ) 6.3/98.3 J101 6510023720 CON LGY6501-0600C IC122 1180002020 S.REG BA033FP-E2 8.3/83.0 J102 6510023720 CON LGY6501-0600C IC201 1130013270 S.IC...
- Page 61 [PLL UNIT] [PLL UNIT] PARTS PARTS DESCRIPTION DESCRIPTION LOCATION LOCATION D851 1750001310 S.DIO KDS114 RTK/PA 50.3/103.1 L1172 6200010910 S.COI LQW18AN56NG00D 37.5/9.5 D951 1750000431 S.DIO HSB88WSTR-E 29.0/115.0 L1173 6200010910 S.COI LQW18AN56NG00D 37.5/7.1 D1171 1790001621 S.DIO 1SV308(TPL3F) 33.0/8.3 L1174 6200011670 S.COI LQW18AN82NG00D 37.5/3.5 D1172 1790001621 S.DIO...
- Page 62 [PLL UNIT] [PLL UNIT] PARTS PARTS DESCRIPTION DESCRIPTION LOCATION LOCATION R121 7030010660 S.RES ERJ1TYJ 6R8U (6.8) 5.8/68.7 R713 7030007230 S.RES ERA3YED 102V (1K) 52.0/90.0 R122 7030010660 S.RES ERJ1TYJ 6R8U (6.8) 2.1/66.8 R714 7030007220 S.RES ERA3YED 202V (2K) 54.8/88.9 R151 7030003670 S.RES ERJ3GEYJ 823 V (82K) 112.9/66.4 R715 7030007230 S.RES ERA3YED 102V (1K)
- Page 63 [PLL UNIT] [PLL UNIT] PARTS PARTS DESCRIPTION DESCRIPTION LOCATION LOCATION R1458 7030003500 S.RES ERJ3GEYJ 332 V (3.3K) 73.5/21.4 R2015 7030007230 S.RES ERA3YED 102V (1K) 96.4/98.5 R1459 7030003540 S.RES ERJ3GEYJ 682 V (6.8K) 74.5/24.6 R2016 7030007220 S.RES ERA3YED 202V (2K) 95.2/95.7 R1460 7030003500 S.RES ERJ3GEYJ 332 V (3.3K) 73.2/23.9...
- Page 64 [PLL UNIT] [PLL UNIT] PARTS PARTS DESCRIPTION DESCRIPTION LOCATION LOCATION C202 4030006900 S.CER C1608 JB 1H 103K-T 103.4/61.1 C553 4030006860 S.CER C1608 JB 1H 102K-T 91.0/72.6 C203 4030006860 S.CER C1608 JB 1H 102K-T 99.9/59.6 C554 4030007030 S.CER C1608 CH 1H 150J-T 82.6/77.5 C204 4030006860 S.CER C1608 JB 1H 102K-T...
- Page 65 [PLL UNIT] [PLL UNIT] PARTS PARTS DESCRIPTION DESCRIPTION LOCATION LOCATION C1109 4030009530 S.CER C1608 CH 1H 030B-T 54.0/7.2 C1705 4030009490 S.CER C1608 JB 1H 821K-T 32.2/103.6 C1110 4030007070 S.CER C1608 CH 1H 330J-T 53.3/4.1 C1707 4030011330 S.CER C1608 CH 1H 391J-T 31.2/100.9 C1111 4030009920 S.CER C1608 CH 1H 050B-T...
-
Page 66: Rf-A Unit
[RF-A UNIT] [RF-A UNIT] PARTS PARTS DESCRIPTION DESCRIPTION LOCATION LOCATION IC303 1130011530 S.IC CD74HC4094M96 66.7/21.2 L704 6200010860 S.COI C2520C-R10G-A (0.1U) 35.2/16.3 IC305 1130011530 S.IC CD74HC4094M96 77.1/21.2 L721 6140004680 S.COI LR-528 4KBL 30.2/23.9 IC601 1110006420 S.IC UPC2708TB-E3-A 44.9/14.3 L722 6200009060 S.COI LQH32CN101K23L 36.2/49.6 IC1121... - Page 67 [RF-A UNIT] [RF-A UNIT] PARTS PARTS DESCRIPTION DESCRIPTION LOCATION LOCATION R606 7030003200 S.RES ERJ3GEYJ 100 V (10) 41.1/16.2 R1224 7030009891 S.RES ERA3YED 151V (150) 123.0/42.4 R611 7030003540 S.RES ERJ3GEYJ 682 V (6.8K) 44.1/53.3 R1225 7030005321 S.RES ERA3YED 103V (10K) 110.4/35.4 R612 7030003450 S.RES ERJ3GEYJ 122 V (1.2K) 39.0/56.1...
- Page 68 [RF-A UNIT] [RF-A UNIT] PARTS PARTS DESCRIPTION DESCRIPTION LOCATION LOCATION C726 4030007030 S.CER C1608 CH 1H 150J-T 31.9/42.3 C1225 4030007160 S.CER C1608 CH 1H 181J-T 115.4/36.0 C727 4030011600 S.CER C1608 JB 1E 104K-T 30.1/42.2 C1226 4030009350 S.CER C1608 CH 1H 3R5B-T 113.6/35.4 C741 4030017810 S.CER C1608 CH 1H 102J-T...
-
Page 69: Rf-B Unit
[RF-B UNIT] [RF-B UNIT] PARTS PARTS DESCRIPTION DESCRIPTION LOCATION LOCATION 1110004310 S.IC M62352GP 75EC 26.9/5.6 D1011 1790001621 S.DIO 1SV308(TPL3F) 88.3/60.2 IC71 1110006350 S.IC LM2902PWR 26.8/13.6 D1081 1790001621 S.DIO 1SV308(TPL3F) 117.0/66.4 IC101 1110006190 S.IC NJM074M-TE1-#ZZZB 130.4/24.7 D1101 1790001621 S.DIO 1SV308(TPL3F) 141.7/53.8 IC121 1110005450 S.IC TS522IDT... - Page 70 [RF-B UNIT] [RF-B UNIT] PARTS PARTS DESCRIPTION DESCRIPTION LOCATION LOCATION L656 6140002810 S.COI LR-317 37.3/26.0 L2521 6200005180 S.COI MLF1608D R39K-T 65.5/45.7 L701 6200005521 S.COI NLV25T-470J 58.9/23.0 L2522 6150004280 COI LS-484B (C-14927) L702 6190001621 COI #E544EN-100028 L2523 6200003281 S.COI NLV25T-2R2J 73.3/57.7 L711 6140003930 COI LR-492...
- Page 71 [RF-B UNIT] [RF-B UNIT] PARTS PARTS DESCRIPTION DESCRIPTION LOCATION LOCATION 7030003680 S.RES ERJ3GEYJ 104 V (100K) 44.0/17.2 R535 7310004590 S.TRI EVM-2WSX80 B13 (102) 24.7/39.3 7030003640 S.RES ERJ3GEYJ 473 V (47K) 44.1/17.2 R541 7030003240 S.RES ERJ3GEYJ 220 V (22) 42.1/29.4 7030003680 S.RES ERJ3GEYJ 104 V (100K) 47.7/17.2 R542 7030010980 S.RES ERA3YHD 470V (47)
- Page 72 [RF-B UNIT] [RF-B UNIT] PARTS PARTS DESCRIPTION DESCRIPTION LOCATION LOCATION R1526 7030003320 S.RES ERJ3GEYJ 101 V (100) 92.4/66.0 R2581 7030003320 S.RES ERJ3GEYJ 101 V (100) 40.8/61.9 R1527 7030003470 S.RES ERJ3GEYJ 182 V (1.8K) 91.7/70.4 R2582 7030003680 S.RES ERJ3GEYJ 104 V (100K) 17.7/71.4 R1528 7510001561 S.THE...
- Page 73 [RF-B UNIT] [RF-B UNIT] PARTS PARTS DESCRIPTION DESCRIPTION LOCATION LOCATION C118 4510009920 S.ELE 16 CE 100 LH 129.2/18.7 C615 4030006880 S.CER C1608 JB 1H 472K-T 45.2/42.1 C121 4030007170 S.CER C1608 CH 1H 221J-T 115.0/16.2 C617 4030006880 S.CER C1608 JB 1H 472K-T 35.8/40.8 C125 4510009920 S.ELE...
- Page 74 [RF-B UNIT] [RF-B UNIT] PARTS PARTS DESCRIPTION DESCRIPTION LOCATION LOCATION C1475 4030006860 S.CER C1608 JB 1H 102K-T 114.6/62.7 C2413 4030006990 S.CER C1608 CH 1H 080D-T 34.7/60.5 C1491 4030007070 S.CER C1608 CH 1H 330J-T 105.5/63.9 C2414 4030011530 S.CER C1608 CH 1H 110J-T 34.2/58.5 C1492 4030007140 S.CER C1608 CH 1H 121J-T...
-
Page 75: Pa-A Unit
RF-B UNIT] [PA-A UNIT] PARTS PARTS DESCRIPTION DESCRIPTION LOCATION LOCATION C2802 4030006880 S.CER C1608 JB 1H 472K-T 83.5/77.9 IC121 1180001072 S.IC TA7805F(TE16L1NQ) 51.4/99.4 C2803 4030011340 S.CER C1608 CH 1H 471J-T 84.7/77.9 IC301 1110003800 S.IC NJM2904V-TE1-#FMZB 64.0/11.0 C2804 4030009920 S.CER C1608 CH 1H 050B-T 85.7/82.2 IC371 1110003800 S.IC... - Page 76 [PA-A UNIT] [PA-A UNIT] PARTS PARTS DESCRIPTION DESCRIPTION LOCATION LOCATION R224 7030010480 S.RES ERJ1TYJ 181U (180) 39.5/6.6 4510009250 S.ELE EEEFK1C471P [USA] T 127.0/107.0 R225 7030003480 S.RES ERJ3GEYJ 222 V (2.2K) 31.3/43.1 4510009250 S.ELE EEEFK1C471P [TPE] R226 7030003480 S.RES ERJ3GEYJ 222 V (2.2K) 31.3/6.2 4510009250 S.ELE EEEFK1C471P...
- Page 77 [PA-A UNIT] [PA-A UNIT] PARTS PARTS DESCRIPTION DESCRIPTION LOCATION LOCATION C413 4030006900 S.CER C1608 JB 1H 103K-T 13.4/67.1 C625 4030012480 S.CER GRM31M2C2H121JV01L C414 4030018960 S.CER C3216 JB 1C 106MT-N 13.8/69.1 (GRM42-6 CH) 226.5/89.4 C415 4030006900 S.CER C1608 JB 1H 103K-T 13.4/75.1 C626 4030011740 S.CER GRM32N2C2H201JV01L...
- Page 78 [PA-A UNIT] [PA-A UNIT] PARTS PARTS DESCRIPTION DESCRIPTION LOCATION LOCATION C1101 4030011730 S.CER GRM31M2C2H101JV01L EP423 6910014640 S.BEA MPZ2012S221A-T 17.1/101.7 (GRM42-6 CH) 199.4/5.0 EP451 6910018930 S.BEA MPZ2012S601A 29.5/116.2 C1102 4030011210 S.CER GRM31M2C2H330JV01L EP452 6910018930 S.BEA MPZ2012S601A 27.2/116.2 (GRM42-6 CH) 199.4/2.9 EP461 6910018930 S.BEA MPZ2012S601A 172.2/75.1...
-
Page 79: Pa-B Unit
[PA-B UNIT] [PA-B UNIT] PARTS PARTS DESCRIPTION DESCRIPTION LOCATION LOCATION IC551 1110003800 S.IC NJM2904V-TE1-#FMZB 58.7/17.8 R104 7030003370 S.RES ERJ3GEYJ 271 V (270) 132.3/5.3 IC552 1110003780 S.IC NJM2902V-TE1-#ZZZB 58.7/10.0 R105 7030003230 S.RES ERJ3GEYJ 180 V (18) 131.5/7.4 IC841 1180001111 S.IC PQ20VZ51J00H S 19.4/128.7 R106 7030003370 S.RES ERJ3GEYJ 271 V (270) - Page 80 [PA-B UNIT] [PA-B UNIT] PARTS PARTS DESCRIPTION DESCRIPTION LOCATION LOCATION R822 7030003480 S.RES ERJ3GEYJ 222 V (2.2K) 143.8/141.1 C264 4030006880 S.CER C1608 JB 1H 472K-T 111.1/57.8 R831 7030003660 S.RES ERJ3GEYJ 683 V (68K) 144.7/145.6 C265 4510009880 S.ELE EEEHBC471UAP 136.8/38.2 R832 7030009950 S.RES ERJ8GEYJ 681V (680) 147.8/143.0 C266...
- Page 81 [PA-B UNIT] [PA-B UNIT] PARTS PARTS DESCRIPTION DESCRIPTION LOCATION LOCATION C513 4030006860 S.CER C1608 JB 1H 102K-T 11.6/144.6 C811 4030007130 S.CER C1608 CH 1H 101J-T B 140.0/148.3 C514 4030007170 S.CER C1608 CH 1H 221J-T 13.5/151.9 C812 4030006970 S.CER C1608 CH 1H 060D-T B 137.3/147.2 C515 4030006860 S.CER C1608 JB 1H 102K-T...
- Page 82 [PA-B UNIT] [CTRL UNIT] PARTS PARTS DESCRIPTION DESCRIPTION LOCATION LOCATION EP831 6910014730 S.BEA MPZ2012S331A-T 147.6/147.4 IC31 1110000960 S.IC NJM4558M-TE1-#FMZB 14.0/51.3 EP912 6910014730 S.BEA MPZ2012S331A-T 12.7/10.8 IC41 1110003800 S.IC NJM2904V-TE1-#FMZB 12.9/40.0 EP913 6910019900 S.BEA MPZ1608S601AT 27.5/19.1 IC111 1120002301 S.IC TC74AC04F(F) S 29.3/50.7 EP914 6910019900 S.BEA...
-
Page 83: Ctrl Unit
[CTRL UNIT] [CTRL UNIT] PARTS PARTS DESCRIPTION DESCRIPTION LOCATION LOCATION 7030003720 S.RES ERJ3GEYJ 224 V (220K) 8.3/49.1 R711 7030003860 S.RES ERJ3GE JPW V 55.2/39.6 7030003720 S.RES ERJ3GEYJ 224 V (220K) 19.5/50.3 R712 7030003860 S.RES ERJ3GE JPW V 55.2/38.4 7030003670 S.RES ERJ3GEYJ 823 V (82K) 8.3/45.8 R713 7030003520 S.RES ERJ3GEYJ 472 V (4.7K) - Page 84 [CTRL UNIT] [CTRL UNIT] PARTS PARTS DESCRIPTION DESCRIPTION LOCATION LOCATION C256 4030018790 S.CER C3225 JB 2E 104K-T 58.2/94.3 J1001 6510022031 S.CON B10B-ZR-SM4-TF(LF)(SN) 22.6/5.7 C257 4030006860 S.CER C1608 JB 1H 102K-T 69.7/68.7 J1101 6510021722 S.CON 30FLT-SM2-TB(LF)(SN)(M) 86.6/25.7 C258 4030006860 S.CER C1608 JB 1H 102K-T 66.7/92.8 J1201 6510018971 S.CON B4B-PH-SM4-TB(LF)(SN)
-
Page 85: Network Unit
[NETWORK UNIT] [NETWORK UNIT] PARTS PARTS DESCRIPTION DESCRIPTION LOCATION LOCATION 1590003680 S.TRA KRC402 RTK/P 139.5/62.0 C125 4030006900 S.CER C1608 JB 1H 103K-T 100.9/61.0 1590003680 S.TRA KRC402 RTK/P 148.2/73.1 C126 4030006900 S.CER C1608 JB 1H 103K-T 103.0/62.8 1590003680 S.TRA KRC402 RTK/P 144.3/67.4 C135 4030006900 S.CER C1608 JB 1H 103K-T... -
Page 86: Display Unit
[FRONT UNIT] [DISPLAY UNIT] PARTS PARTS DESCRIPTION DESCRIPTION LOCATION LOCATION 0880002780 UNI EX-3210 #01 1180001541 S.IC TA78L08F(TE12LF) 75.4/97.6 6910015650 E.O S-G2218-3#01 (MOUNT PLATE) IC111 1130012620 S.IC SN74AHCT1G86DCKR 238.8/90.8 6910015650 E.O S-G2218-3#01 (MOUNT PLATE) IC151 1110000960 S.IC NJM4558M-TE1-#FMZB 130.1/77.4 IC152 1110000960 S.IC NJM4558M-TE1-#FMZB 130.1/84.2 IC271... - Page 87 [DISPLAY UNIT] [DISPLAY UNIT] PARTS PARTS DESCRIPTION DESCRIPTION LOCATION LOCATION R188 7030003560 S.RES ERJ3GEYJ 103 V (10K) 39.0/84.0 R425 7030003640 S.RES ERJ3GEYJ 473 V (47K) 71.2/67.3 R189 7030003560 S.RES ERJ3GEYJ 103 V (10K) 246.1/97.0 R426 7030003640 S.RES ERJ3GEYJ 473 V (47K) 69.8/64.7 R190 7030003640 S.RES ERJ3GEYJ 473 V (47K)
- Page 88 [DISPLAY UNIT] [DISPLAY UNIT] PARTS PARTS DESCRIPTION DESCRIPTION LOCATION LOCATION C403 4030011600 S.CER C1608 JB 1E 104K-T 149.2/12.0 T113 5910001150 S.TRA 6373-T170 (CEPH145B) 234.2/55.0 C404 4030007050 S.CER C1608 CH 1H 220J-T 35.9/32.9 C405 4030011600 S.CER C1608 JB 1E 104K-T 41.0/32.9 C451 4030019560 S.CER GRM21BB31C106KE15L 86.8/69.9...
- Page 89 [VR-A UNIT] [VR-B UNIT] PARTS PARTS DESCRIPTION DESCRIPTION LOCATION LOCATION 7030003860 S.RES ERJ3GE JPW V 8.6/8.6 7210002970 VAR RV-314(RK0972210 10KB/10KB) 7030003860 S.RES ERJ3GE JPW V 8.6/13.2 7030003520 S.RES ERJ3GEYJ 472 V (4.7K) 18.1/7.7 7030003520 S.RES ERJ3GEYJ 472 V (4.7K) 19.3/7.7 7210002970 VAR RV-314(RK0972210 10KB/10KB) 6510027290 S.CON 52808-0671...
- Page 90 [PBT UNIT] [M-CH UNIT] PARTS PARTS DESCRIPTION DESCRIPTION LOCATION LOCATION 6510027290 S.CON 52808-0671 16.4/5.3 7030003860 S.RES ERJ3GE JPW V 11.2/8.0 7030003860 S.RES ERJ3GE JPW V 10.9/3.0 2250000410 ENC TP90D96E20-30F-2178-1 6510027290 S.CON 52808-0671 18.6/13.8 2250000410 ENC TP90D96E20-30F-2178-1 M.=Mounted side (T: Mounted on the Top side, B: Mounted on the Bottom side) S.=Surface mount 5 - 44...
- Page 91 [RIT UNIT] [JACK UNIT] PARTS PARTS DESCRIPTION DESCRIPTION LOCATION LOCATION 6510027290 S.CON 52808-0671 9.2/9.8 7030006240 S.RES ERJ12YJ181U (180) 30.3/4.9 7030006240 S.RES ERJ12YJ181U (180) 34.0/4.9 2250000650 ENC EVEGC2F2524B 4030006900 S.CER C1608 JB 1H 103K-T 15.5/16.2 4030006900 S.CER C1608 JB 1H 103K-T 7.2/8.6 C101 4030006900 S.CER C1608 JB 1H 103K-T...
-
Page 92: Mic Unit
[MIC UNIT] [BPF UNIT] PARTS PARTS DESCRIPTION DESCRIPTION LOCATION LOCATION 4030006900 S.CER C1608 JB 1H 103K-T 15.0/17.1 IC201 1110007400 S.IC BGA616 25.5/57.3 4030006900 S.CER C1608 JB 1H 103K-T 12.6/8.0 4030006900 S.CER C1608 JB 1H 103K-T 7.2/13.2 4030007130 S.CER C1608 CH 1H 101J-T 8.2/3.7 Q131 1590003680 S.TRA... - Page 93 [BPF UNIT] [BPF UNIT] PARTS PARTS DESCRIPTION DESCRIPTION LOCATION LOCATION L202 6200002181 S.COI NLV25T-R12J 18.3/56.5 R518 7030003320 S.RES ERJ3GEYJ 101 V (100) 15.1/26.8 L203 6200005041 S.COI NLV25T-220J 25.9/54.7 R519 7030003220 S.RES ERJ3GEYJ 150 V (15) 29.5/13.7 L301 6200005491 S.COI NLV32T-331J 14.6/12.8 R520 7030003220 S.RES ERJ3GEYJ 150 V (15)
- Page 94 [BPF UNIT] [DC-DC UNIT] PARTS PARTS DESCRIPTION DESCRIPTION LOCATION LOCATION C142 4030006900 S.CER C1608 JB 1H 103K-T 89.6/57.2 IC201 1190002450 S.IC BD9851EFV-E2 56.9/27.4 C143 4030011600 S.CER C1608 JB 1E 104K-T 53.7/57.1 IC301 1190002450 S.IC BD9851EFV-E2 29.1/27.4 C161 4030011600 S.CER C1608 JB 1E 104K-T 47.1/65.1 C170 4030011600 S.CER C1608 JB 1E 104K-T...
- Page 95 [DC-DC UNIT] PARTS DESCRIPTION LOCATION 6910018930 S.BEA MPZ2012S601A 15.1/10.9 6910018930 S.BEA MPZ2012S601A 13.3/9.8 6910018930 S.BEA MPZ2012S601A 11.5/8.7 6910018930 S.BEA MPZ2012S601A 15.2/37.6 6910018930 S.BEA MPZ2012S601A 13.3/36.6 6910018930 S.BEA MPZ2012S601A 10.2/36.4 EP201 6910018930 S.BEA MPZ2012S601A 56.0/9.1 EP202 6910018930 S.BEA MPZ2012S601A 60.5/8.2 EP203 6910018930 S.BEA MPZ2012S601A 49.1/37.1...
- Page 96 SECTION 6. MECHANICAL PARTS [CHASSIS PARTS] [CHASSIS PARTS] ORDER ORDER DESCRIPTION QTY. DESCRIPTION QTY. MP35 8810008661 PHBT M3 X 8 NI-ZC3 6510000370 MR-DS-01 <SSC> 6510000370 MR-DS-01 <SSC> MP36 8810008661 PHBT M3 X 8 NI-ZC3 MP37 8810003361 SETSCREWC M3 X 6 ZC3 6510000370 MR-DS-01 <SSC>...
-
Page 97: Pll Unit
[PLL UNIT] [MAIN UNIT] ORDER ORDER DESCRIPTION QTY. DESCRIPTION QTY. MP661* 8510019800 3183 FILTER CASE Y1191 6510027480 S12B-ZR-SM4A-TF (LF) (SN) MP671* 8930065741 2590 D-EARTH SPRING-1 6510027490 S11B-ZR-SM4A-TF (LF) (SN) MP701* 8510013140 2241 DC-A CASE 6510020081 52808-2071 (2090) MP702* 8510005351 637 VCO SHIELD PLATE-1 6510022472 40FLT-SM2-TB (LF) (SN) (M) MP703* 8930078840 SHIELD SPONGE (CM) 6510025270 S6B-PH-SM4-TB (LF) (SN) - Page 98 [RF-B UNIT] [PA-B UNIT] ORDER ORDER DESCRIPTION QTY. DESCRIPTION QTY. MP252* 8930065741 2590 D-EARTH SPRING-1 [USA] J101* 6510028210 SJ050010 (TMP-J01X-V6) 8930065741 2590 D-EARTH SPRING-1 [TPE] J471* 6510028210 SJ050010 (TMP-J01X-V6) 8930065741 2590 D-EARTH SPRING-1 [KOR] J761* 6510028210 SJ050010 (TMP-J01X-V6) 8930065741 2590 D-EARTH SPRING-1 [CHN] J901* 6510019981 52808-1671 (1690)
- Page 99 [FRONT UNIT] [DISPLAY UNIT] ORDER ORDER DESCRIPTION QTY. DESCRIPTION QTY. W1** 8900019300 OPC-2032 (P1N6L50) S642* 2260002740 LS8J2M-T W2** 8900018000 OPC-1344A (P1N10L70) S643* 2260002740 LS8J2M-T W3** 8900018000 OPC-1344A (P1N10L70) S644* 2260002740 LS8J2M-T W4** 8900018000 OPC-1344A (P1N10L70) S651* 2260002740 LS8J2M-T W5** 8900019300 OPC-2032 (P1N6L50) S652* 2260002740 LS8J2M-T W6**...
- Page 100 [JACK UNIT] [ACCESSORIES] ORDER ORDER DESCRIPTION QTY. DESCRIPTION QTY. 6510020711 52793-1070 (1090) 5610000410 AP-319 6510027890 01J0370-00 J102 6510023900 LGR4619-7000 5210000840 ATC-30 5210000940 1205 (Optional) HM-36 [MIC UNIT] 8900013980 OPC-1457 [USA] ORDER 8900013980 OPC-1457 [TPE] DESCRIPTION QTY. 8900013980 OPC-1457 [KOR] 8900013980 OPC-1457 [CHN] 6510000191 FM214-8SS (P)-1 8900013980 OPC-1457...
- Page 101 • FRONT UNIT MP65(C)×4 MP66(C) MAIN UNIT MP41(C)×9 JACK UNIT EP2(F) MP34(F)×10 EP3(F) J1(MIC) MIC UNIT MP32(F)×17 MP43(F) MP2(F) DISPLAY UNIT MP454(DI) MP453(DI) MP455(DI) DS451(DI) DS111(DI) MP37(F) MP451(DI) MP38(F) MP452(DI) VR-B UNIT MP456(DI)×4 VR-B UNIT MP9(F) MP6(F) MP40(F) MP17(F)×2 MP10(F) MP12(F) UNIT ABBREVIATIONS MP11(F)
- Page 102 • CHASSIS MP57(C)×4 MP54(C)×2 MP63(C) MP26(C) MP55(C)×4 MP47(C)×9 MP257(RB) MP52(C)×17 MP256(RB) MP50(C)×4 MP31(C)×6 MP106(C) MP25(C) MP255 MP251 MP51(C)×2 Q241(PA) MP2(C) RF-B UNIT MP1052 Q242(PA) MP59(C) PA-B UNIT MP49(C)×2 W1131(C) MP124(C) Q222(PA) MP48(C)×13 MP27(C)×2 MP126(C) Q221(PA) MP10(C) MP108(C) MP5(C) MP107(C) W4(C) MP91(C) BPF UNIT MP109(C)
- Page 103 SECTION 7. BOARD LAYOUTS The combination of this page and next page shows the top side and bottom side of actual P.C. board. • DISPLAY UNIT J451 J452 (TOP VIEW) R262 R611 R634 R622 R612 R633 C375 R632 R623 R613 C374 C379 R264...
- Page 104 The combination of this page and next page shows the top side and bottom side of actual P.C. board. • DISPLAY UNIT (BOTTOM VIEW) POWER SATELITE S601 S611 S621 S631 S731 MAIN S602 S612 S622 S632 /SUB TRANSMIT S732 S603 S613 S623 S633...
- Page 105 The combination of this page and next page shows the top side and bottom side of actual P.C. board. • PLL UNIT J601 To MAIN C2152 CODEC MP661 (TOP VIEW) L952 L951 R982 R853 C678 Q2151 C981 L853 R857 C2182 D2121 J851 R805...
- Page 106 The combination of this page and next page shows the top side and bottom side of actual P.C. board. • PLL UNIT R2177 (BOTTOM VIEW) C901 R903 R2173 R902 C2171 R2174 R2171 C902 R2176 R904 C904 C2153 R909 R678 R905 L1531 L901 MP671...
- Page 107 The combination of this page and next page shows the top side and bottom side of actual P.C. board. • MAIN UNIT (TOP VIEW) J3204 R3903 X3901 R3904 R3901 J3203 J6002 C3901 C3905 C3902 R5015 EP5003 R3902 R3486 TO CTRL J3204 J3203 CP1242...
- Page 108 The combination of this page and next page shows the top side and bottom side of actual P.C. board. • MAIN UNIT (BOTTOM VIEW) MP5001 C4601 C5002 R4613 L4681 C5007 EP4605 C3497 C5205 C3491 R4626 C5018 C5023 C5017 C5022 C5016 C5021 C5015 C5014...
- Page 109 The combination of this page and next page shows the top side and bottom side of actual P.C. board. • CONNECT UNIT [ALC] [SEND] (TOP VIEW) [DATA1] [KEY] [REMOTE] [EXT-SP (MAIN)] [EXT-SP (SUB)] [USB] [DATA2] [ACC] R611 R616 C105 J851 Q102 J1401 C1432...
- Page 110 The combination of this page and next page shows the top side and bottom side of actual P.C. board. • CONNECT UNIT (BOTTOM VIEW) [EXT-SP (SUB)] [EXT-SP (MAIN)] [REMOTE] [EXT-SP (MAIN)] [SEND] [ALC] [KEY] C611 EP602 R614 R615 EP851 R103 EP852 C1111 R617...
- Page 111 The combination of this page and next page shows the top side and bottom side of actual P.C. board. • PA-A UNIT (TOP VIEW) C1253 C1258 C1252 Q1255 Q1257 Q1253 Q1263 Q1251 Q1259 Q1261 IC432 Q1256 Q1258 Q1254 Q1264 Q1252 Q1260 Q1262 C505...
- Page 112 The combination of this page and next page shows the top side and bottom side of actual P.C. board. • PA-A UNIT (BOTTOM VIEW) C510 C519 C520 C521 C551 C612 C607 C604 R344 C608 R752 R346 C603 R751 C714 C463 R363 R364 C415...
- Page 113 The combination of this page and next page shows • PA-B UNIT the top side and bottom side of actual P.C. board. (TOP VIEW) C824 L451 C455 J471 W801 TO RF-B L452 C457 R821 R485 C823 C456 L773 C483 L472 C521 C821 L471...
- Page 114 The combination of this page and next page shows • PA-B UNIT the top side and bottom side of actual P.C. board. (BOTTOM VIEW) R512 C815 C512 R804 R995 R511 R513 R812 D811 R802 C814 R514 C812 C802 R994 C513 C777 MP803 R996...
- Page 115 The combination of this page and next page shows the top side and bottom side of actual P.C. board. • NETWORK UNIT J201 (TOP VIEW) TUIN J201 RL45 R201 R202 R211 R212 C218 RL35 C217 C216 RL15 B7159C RL25 J201TO CTRL NETWORK C176 RL165...
- Page 116 The combination of this page and next page shows the top side and bottom side of actual P.C. board. • NETWORK UNIT (BOTTOM VIEW) 7 - 14...
- Page 117 The combination of this page and next page shows the top side and bottom side of actual P.C. board. • CTRL UNIT (TOP VIEW) V100 V105 V110 V115 V120 V125 V130 V135 V140 V145 V150 V155 V160 V165 V170 IC41 C1001 R1008 C1002...
- Page 118 The combination of this page and next page shows the top side and bottom side of actual P.C. board. • CTRL UNIT (BOTTOM VIEW) V170 V165 V160 V155 V150 V145 V140 V135 V130 V125 V120 V115 V110 V105 V100 IC31 C121 C101 D101...
- Page 119 The combination of this page and next page shows the top side and bottom side of actual P.C. board. • BPF UNIT (TOP VIEW) J141 • JACK UNIT (TOP VIEW) C140 J201 R201 L134 L141 C201 Q132 L133 C131 R203 R141 C203 C139...
- Page 120 J102 The combination of this page and next page shows the top side and bottom side of actual P.C. board. • BPF UNIT (BOTTOM VIEW) D134 • JACK UNIT C132 R133 C161 (BOTTOM VIEW) R162 L135 C141 R161 R163 L535 L531 R538 R303...
- Page 121 The combination of this page and next page shows the top side and bottom side of actual P.C. board. • RF-A UNIT (TOP VIEW) C1011 R1022 J1011 MAIN L912 R1077 FI911 C1051 L915 L1051 Q741 R1078 L1032 C916 C1078 C613 MP1071 C1032 RF-A...
- Page 122 The combination of this page and next page shows the top side and bottom side of actual P.C. board. • RF-A UNIT (BOTTOM VIEW) R1011 C781 R763 R761 R781 R762 D781 C1072 D601 C1012 R742 C601 MP911 C1001 Q1072 C1077 D911 R601 Q1071...
- Page 123 The combination of this page and next page shows the top side and bottom side of actual P.C. board. • RF-B UNIT (TOP VIEW) MP2701 J1751 MP2496 L2681 L1352 J1351 C1358 C1356 C1355 C2682 R1674 MP1671 L2705 C2654 C2655 R2703 L1353 C2359 C2363...
- Page 124 The combination of this page and next page shows the top side and bottom side of actual P.C. board. • RF-B UNIT (BOTTOM VIEW) D2702 R1357 C1354 C2713 R2705 R2701 L2802 C2705 C2702 R2781 R2633 C2358 C2805 C2714 R2631 R2632 R1362 R1358 L2352...
- Page 125 SECTION 8. WIRING DIAGRAM W133 8970024401 1.5DCOAXIAL360MM-1 C31/C31 W135 8970024201 1.5DCOAXIAL300MM-1 C31/C31 W143 To [UT-121] 8970025210 1.5DCOAXIAL250MM 8900019230 W145 OPC-2025 (P1N20L80) 8970025200 1.5D 300MM J931 J951 H1Lo H1Lo W123 J801 8970025180 J501 1.5D 150MM HR2Lo HR2Lo W125 J1141 8970024291 J852 1.5DCOAXIAL150MM-1 C31/C31 MK R W127...
- Page 126 DC 4A W1131 8900019320 OPC-2034 W1101 8600037380 SX3183 J1101*P1102CH VUGND VUGND VUGND VUGND VUGND VUGND EXT-TUNER START VUGND VUGND ESTA OT-047 O T-047 VUHV VUHV EKEY VUHV VUHV J462 J6106 J6106 VUHV VUHV PGND VUHV VUHV W1121 J931 J6003 J6113 J351 600037390 SX3183 P1121CH...
-
Page 127: Front Unit
FRONT UNIT To CONNECT UNIT To MAIN UNIT CHASSIS UNIT W1069-W1072 CHASSIS UNIT 8900019900 OPC-2135 VR-A BOARD NRBK NRBK NRAK NRAK BOARD NOTBK NOTBK NOTAK NOTAK PBT1BK PBT1BK PBT1AK PBT1AK PBT2BK PBT2BK PBT2AK PBT2AK JACK BOARD M-CH PHEM PHEM PHOS PHOS BOARD PHOM... - Page 128 SECTION 9. BLOCK DIAGRAM VHF ANT RF-B VTHL RL751 D801/D811 Q701/Q702 EC2-4.5NU MA2S7280 RD70HVFx2 TX/RX PA-B UNIT VFORL D916 IC552 MA2S7280 NJM2902 VREFL VID1V BIAS D918 Q831/Q832 Q151 Q171 Q201 Q251 VID2V MA2S7280 2SK2854 2SK3074 RD15HVF RD70HVF KRC402/2SB1132 PREAMP DRIVE VUYGR VUFORL D917...
- Page 129 IC211 FI331 TC74LCX00FT FL-211 Q1251 Q1021 10.85 MHz Q1051/1052/1053/1054 NE3509M04 BUFF 2SC3357 2SK1740x4 XTAL 136~174 MHz AM P Q201 IC211 IC211 KTC4080 TC74LCX00FT PA-B TC74LCX00FT 10.814 MHz VR2Lo BUFF 90deg BUFF VBANDS VT2V VT1V VATTS AM P Q1521 Q1551/1552 I C1651 VRXS VT2V 3SK264...
- Page 130 10.85~10.95 MHz IC3401 NJM2172 IC3452 IC3452 VUTIF NJM2058 NJM2058 IC3422 IC3601 Q3631 FI3641 Q3651 RF-B CD4053B IC3451 TS522ID IC3621 3SK264 CFWS455D 3SK264 D3671 KIC7W53FK TA4107 HSB88WS DTIF AM P VUHFS CERAMIC DTAF V1R2S FRONT AM P 64.455~71.25 MHz 455 kHz(BW=20k) 491 kHz MIGV PIFS...
- Page 131 RX IF(36kHz) MDRIF MDRIF IC4603 TS522ID IC4651 AK4620BVFP IC4604 IC4603 IC4602 KIC7W53FK TS522ID TS522ID MUT E BUFF MADS IC4601 IC3951:SN74AHC1G08DCK3 NJM4558 IC3952:S-80811CNNB-B9P MAGC_DET BUFF RESET DRESD IC4661 TS522ID DTIF BUFF IC5451 AK4620BVFP IC4661 IC5403 TS522ID TS522ID AGC OUT MAGC BUFF IC5404 IC5403 MADS...
- Page 132 STON IC221 IC301 NJM2058M Q231 Q352 IC281 Q321 NJM2172 2SJ144 2SD1801 N JM2058V RSR025N03 IC201 IC701 CD4053B MDRAF MAIN RIPPLE MDRAF GATE NJU7772F33 AM P IC351 I C251 RL361 Q343 EXT-SP LA4600 LM2904PWR +3.3 UA2-12NU KTC4075 3.3V UPWS BUFF MSQL S IC281 MSPK BUFF...
- Page 133 PDAT5/PCK5/PSTP IC501 IC1451 IC1453 X151 Q151 Q271 Q301 IC351 64.455 MHz 64.485-86.455 MHz UPC2709TB Q201 I C201 Q251 ADG904BRU ADG919BRM CR-893(32 MHz) KTC4075 KTC4075 ADF4116 2SK508 KTC3770U KTC3770U AD9951YSVZ 390 MHz HF1Lo MCLK AM P REFV BUFF BUFF BUFF RF-A FI401 REF=500kHz FL-423...
- Page 134 SECTION 10. VOLTAGE DIAGRAM • DISPLAY BOARD (DISPLAY BOARD-1) [POWER SW] PWRK DISPLAY-2 PWRK S731 3R3V 3R3V 3R3V D201 MUDL RB751V DOTK_ DOTK_ C405 MUDL LS8J2M DSHK_ DSHK_ R202 R201 DOTK_ PHNK DSHK_ R411 R211 PHNK _ R412 [TRANSMIT SW] TRAK R212 TRAK_...
- Page 135 DISPLAY BOARD • DISPLAY BOARD (DISPLAY BOARD-1) • DISPLAY BOARD (DISPLAY BOARD-2) R112 L111 3R3V LCD CONTRAST LCD CONTRAST 11.45 MP111 RITCLK CD54NP LEVEL(%) LEVEL(%) Q112 3183 S662 S663 S664 2SB1201 -2.84 -1.29 L112 -3.71 -2.14 Q111 100% -4.57 100% -2.98 LS8J2M LS8J2M...
- Page 136 • CONNECT UNIT (CONNECT-1) IC1101 TA78L08F TO MAIN UNIT 3.25 4.99 -11.58 J1001 3R3V MPZ2012S221A EP1001 2.96 BAND5 V -12V MPZ2012S221A EP1002 SSPK R1001 R1002 M SPK [ACC] 0.01 EP1101 BEE P MMZ1608Y102BT EP1003 EP1004 MMZ1608Y102BT STON -12V -12V SPEECH MMZ1608Y102BT EP1005 R1003 AVOXL...
- Page 137 • CONNECT UNIT (CONNECT-2) -12V -12V CONNECT-3 STLS_5V STLS_5V Q151 KRC402 UDRES KRC402 UDRES 2SD1623 R151 UA2-12NU KRA302E KRA302E CONNECT-1 MCK5 MCK5 IC281 MDAT5 KRC402 NJM2058V MDAT5 CCSTB5 CCSTB5 CASTB5 CASTB5 Q372 SPEECH RL372 KRC402 KRC402 SPEECH KRA302E MDRAF IC21 MDRAF SDRAF CCSTB5...
- Page 138 • CONNECT UNIT (CONNECT-3) UDRE S CONNECT-1 UDRXD U D RXD UDRXD UDTXD UDTXD UDTXD R703 3.3V 3.3V UPWS UPWS R702 UPWS -12V -12V BUS-POWERED 3.27 BUS-POWERED 3.25 Not connected IC811 0.00 R813 3.3V VOUT Not connected 0.00 R811 CTRL 166ns NJU7772F33 UMSQS...
- Page 139 • MAIN UNIT (MAIN-1) TO SHEET 2 3R3V 7.90 R3412 R3413 L3411 C3453 -12V 0.0022 R3409 1000U IC3452 NJM2058V C3454 MICI _ R3408 IC3452 0.001 R3401 R3411 R3457 UMOD IC3401 R3452 NJM2058V C3441 R3441 OP+INA OP+INB Q3303 220k OP-INA OP-INB 2SA1586 MAIN-5 R3307...
- Page 140 • MAIN UNIT (MAIN-2) 3R3V MAIN-5 -12V MDRIF MDRIF MAGC_DET MAGC -12V MAIN-1 MAIN-5 KTC4075 R3801 Q3801 IC3601 TS522ID 8.00 R3805 R3804 3.3k 0.00 R3802 3.3k 3.3k R3803 Q3802 KTC4075 J3621 D RIV DRIV R3621 V1R2S V1R2S 8.00 VUHFS 0.00 VUHFS 1R2S 1R2S...
- Page 141 • MAIN UNIT (MAIN-3) R4036 R4001 R4002 3R3V D1R2V 3R3V MAIN-5 IC4401 R4404 -12V DTAF IC3951 I C4401 AVOXL R4005 SN74AHC1G08DCK3 IC3952 R4447 SPEECH / HOLD R4423 MDRAF DRESD R4008 R4403 C4437 4.7k MFMTL TS522ID R4009 100k MAIN-5 S-80811CNNB TS522ID R4010 680P R4511...
- Page 142 • MAIN UNIT (MAIN-4) R5001 R5002 MAIN-5 3R3V MAIN-5 D1R2V 3R3V R5009 -12V R5010 SFMTL R5012 40.7ns SDRAF R5013 R5005 R5401 1.6Vp-p SAGC_DET SDRI F IC5401 SDRI F NJM4558M SDRAF SAGC R5402 R5483 40.7ns MAIN-1 S1R2V IC5481 TS522ID R5416 40.7ns 40.7ns R5403 R5484...
- Page 143 • MAIN UNIT (MAIN-5) ISET R191 ISET IKEY# R192 IKEY ISTA R193 ISTA DRESL5 R194 DRESL THRI_ R195 THRI R197 REFV R198 FORV ANTS R199 ANTS TGMSK DV_MOD HRXS R200 HRXS M RGMSK HTXS R201 HTXS 3R3V MDV_AF MAIN-3 I C6001 EP204 -12V -12V...
- Page 144 • MAIN UNIT (MAIN-6) 3R3V 3R3V MAIN-5 MC K M DAT M DAT MP1Y3 R1161 M STB for PLL CP1161 MSTB for CONNECT MP2X3 R1162 ASTB CP1162 ASTB 3R3V H3R3V MP2Y3 R1163 RASTB C1161 CP1163 RASTB for RF-A RBSTB 0. 1 RBSTB for RF-B 3R3V...
- Page 145 • RF-A UNIT (RF-A-1) +10V L1221 R1204 1000U RF-A-2 -12V 6.8k C1224 220P HRIF R1285 R1223 R1224 R1228 36 KHz To MAIN 3.9K I C1221 I C1222 R1225 R1229 TS522ID NJM074M C1202 Q1201 R1303 C1301 HRIF R1201 1 MSVA C1221 R1222 C1225 KTC3770U...
- Page 146 • RF-A UNIT (RF-A-2) Freq. [MHz] VOLTAGE 0.030000~1.599999 B0: 4.65 1.600000~1.999999 B1: 4.65 2.000000~3.999999 B2: 4.65 4.000000~7.999999 B3: 4.65 8.000000~10.999999 B4: 4.65 11.000000~14.999999 B5: 4.65 15.000000~21.999999 B6: 4.65 22.000000~29.999999 B7: 4.65 30.000000~49.999999 B8W: 4.65 54.000001~60.000000 50.000000~54.000000 B8: 4.65 DRES_ HPR2S R351 _HPR2S I C303...
- Page 147 • RF-B UNIT (RF-B-1) MP2051 MIX SHIELD CASE(SX-155) UT1V EP2261 MMZ1608B301CT R2262 Except UHF RX 0.00 L2022 Q2051 R2263 UHF 3.61 KTC3770U C2063 C2207 C2305 220P 1SV308 From PA-B 220P 220P D2351 Q2021 L2052 R2251 1SV308 R2352 R2355 C2209 C2203 C2251 C2303 C2304...
- Page 148 • RF-B UNIT (RF-B-2) To MAIN 3.25 13.60 -11.55 9.80 4.79 7.78 0.001 0.001 0.001 0.001 0.001 0.001 0.001 0.001 0.001 0.001 0.001 0.001 0.001 0.001 0.001 UHF 7.59 0.001 0.001 Except UHF TX 0.00 2SD1619 VT1V +14V VT1V_ 3.3K IC71 3.3K LM2902PWR...
- Page 149 • RF-B UNIT (RF-B-3) C121 V+10V L141 1000U V+8V R145 220P V-12V 6.8k +3.3V EP201 R124 R126 R105 R107 R104 MMZ1608Y102BT 3.9K R101 C105 Q141 3.5P R141 C142 KTC3770U C145 R122 C106 R102 I C121 180P I C101 I C101 R144 0.022 R142...
- Page 150 • RF-B UNIT (RF-B-4) VT2V +14V VT1V Over VHF136M 4.69 Q1056 0.02 KRC402 Except Over VHF136M MP1201 Q1104 1691 KRC402 Q1055 Except VHF RX KRA302E MP1051 MP1052 0.00 1691 3183 Q1103 VHF 3.56 KRA302E EP1261 MMZ1608B301CT R1262 Q1051 L1101 2SK1740 C1053 R1263 Q1101...
- Page 151 CTIN • BPF UNIT • PA-A UNIT (PA-A-1) To CTRL CTIN +14V LR-149 LR-138 L501 L502 To RF-A HPAO C521 HPAO J302 120P D133 D131 C520 R332 R551 HPOFS 120P C519 R333 HPR1S C510 1SV307 4.7U 4.7U 1SV307 1SV307 C505 120P R334 HPR2S...
- Page 152 R248 • PA-A UNIT (PA-A-2) C246 R249 R223 0.0068 R281 HPAO PA-A-1 HPAO C222 R242 C244 R246 Q221 RD15HVF1 Q241 0.01 0.0068 R244 RD100HHF1C R206 C206 3.9k L242 D244 L241 0.047 L221 R204 DA2S10100L C201 LR-274 L202 100P D245 HYGR R202 C204 LR-270...
- Page 153 • PA-B UNIT (PA-B-1) D341 L321 C321 M PZ2012S331A MP401 PA-B-2 VDRVO VDRVO D441 EP441 R443 3183 L709CE AS080440 L342 KDS4148U R447 J101 0.001 1812CS R105 C151 VUYGR KRC402 Q341 R342 Q401 C355 RD60HUF1C L709CE L709CE C351 C352 C353 D351 D352 C401 0.001...
- Page 154 J761 • PA-B UNIT (PA-B-2) C767 To RF-B 0.001 L763 C761 VRX C811 R812 0.001 MP701 100P 3183 D762 C812 C732 1SV308 2355 2590 MP772 3183 MP731 MP771 C733 RD25T0R0 L701 W801 Q701 C756 RD70HVF1C LA-262 C755 C707 C709 VDRVO L771 L772 L773...
- Page 155 • CTRL UNIT (CTRL-1) +14V +14V +5V_ +5V_ +3R3V -12V +14V CTRL-2 +5V_ +3R3V -12V HTXS_ THRU HTXS_ ANT1 select TUNER ON 13.58 ANTS 0.09 ANTS ANT2 select 0.09 THRU TUNER OFF 3.60 FORV THRU Q353 REFV KRC402 Q503 ANTI Q203 D301 KDS4148U...
- Page 156 • CTRL UNIT (CTRL-2) • DC-DC UNIT To PA-A 3.26 -11.62 13.66 4.79 J901 4.87 12.75 0.00 L1001 EP901 M PZ1608S221A +14V 14 V 100 U EP907 M PZ1608S221A IC801 Q822 Q821 TA7805F KRC402 KRA302E EP904 M PZ1608S221A D802 EP902 KDS4148U M PZ1608S221A EP903...
- Page 157 From CTRL • NETWORK UNIT TUIN RL15 D1 5 NY-12W KDS122 KRC402 RL45 RL25 RL35 MF 2 NY-12W MP24ZA NY-12W NY-12W T14V KDS122 KDS122 KDS122 KRC402 KRC402 KRC402 L101 L111 L121 L131 L141 L151 L161 L171 LA-555 LA-554 LA-489 LA-490 LA-489 LA-490 LR-511...
- Page 158 • PLL UNIT (PLL-1) 7.20 L1532 SUB:HFband selected 7.64 100U L1531 Q1602 KRC402 R1526 PSTD KRA302E Q1601 R1527 PDAT5 2DB1S 330U R1528 PCK5 R1606 Q1501 L1521 R1532 C1512 R1530 DRESL5 KTC4075 MMZ1608Y102BT 2.2K 0.001 L1501 EP1501 C1514 D1601 Q1701 KDS114 Q1702 KRA302 KRC402...
- Page 159 • PLL UNIT (PLL-2) R275 Q252 KTC4075 7.67 L152 L201 R256 EP151 R295 R255 3.32 CASE-BM7H C295 4.83 R254 6.27 Q251 IC201 2SK508 5.74 KTC4075 DVDD R208 R222 L251 C251 C253 X151 Q151 Q 271 Q291 5.72 R153 R154 R202 CPGND MUXOUT C153...
- Page 160 • PLL UNIT (PLL-3) L661 KRA302 KRC402 R575 Q573 Q572 T21S R552 R555 R662 KTC3880S I C661 IC662 Q571 C555 Q551 J571 R551 R661 CLKC FS/SUSPEND/OE/SHUTDOWN R571 C551 C661 C571 KTC3880S REF64M 0.5P R664 0.01 0.001 XTALIN CLKA 2.2K 0.001 R578 C574 T2Lo...
- Page 161 • PLL UNIT (PLL-4) 6.32 R1005 L1055 L1053 10 MSVA I C1052 0.33U 0.33U PCK5 I C1053 1.78 Q1193 Q1191 KRA302E KRA302E DRESH UPD120N18TA R1055 Q1001 R1056 PDAT5 L1052 R1057 KTC3770U R1058 HD74LV2GT34AUS R1004 0.33U C1001 C1004 L1051 R1059 C1070 0.001 0.001 0.33U...
- Page 162 Highway 17 Delta, B.C., V4K 5B8, Canada : http://www.icomspain.com Phone : +1 (604) 952-4266 Fax : +1 (604) 952-0090 E-mail : icom@icomspain.com : http://www.icomcanada.com E-mail : info@icomcanada.com Blacksole House, The Boulevard, Altira Business Park, Herne Bay, CT6 6GZ, UK Phone : +44 (01227) 741741...
- Page 163 S-14721XZ-C1 1-1-32, Kamiminami, Hirano-ku, Osaka 547-0003, Japan © 2011 Icom Inc.
Need help?
Do you have a question about the IC-9100 and is the answer not in the manual?
Questions and answers
I need to know how to increase the tone output of the transmitter CTCSS X-mit level