Table of Contents
Advertisement
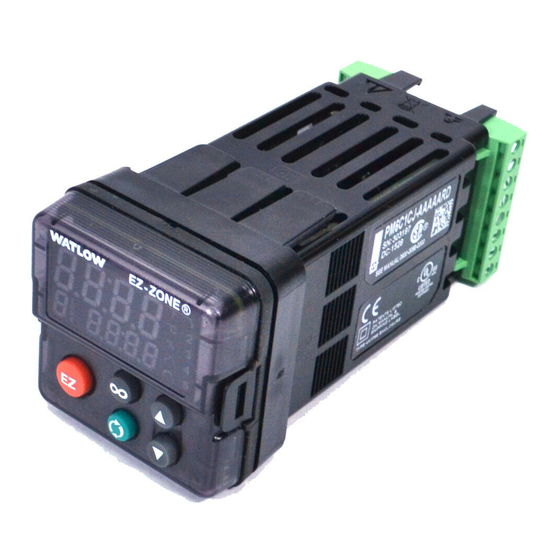
EZ-ZONE
PM
®
User's Guide
Integrated Controller Models
TOTAL
CUSTOMER
SATISFACTION
3 Y ear Warranty
ISO 9001
Registered Company
1241 Bundy Boulevard., Winona, Minnesota USA 55987
Winona, Minnesota USA
Phone: +1 (507) 454-5300, Fax: +1 (507) 452-4507 http://www.watlow.com
0600-0059-0000 Rev. M
Made in the U.S.A.
April 2013
Advertisement
Chapters
Table of Contents

Related Manuals for Watlow Electric EZ-ZONE PM


Summary of Contents for Watlow Electric EZ-ZONE PM
- Page 1 EZ-ZONE ® User’s Guide Integrated Controller Models TOTAL CUSTOMER SATISFACTION 3 Y ear Warranty ISO 9001 Registered Company 1241 Bundy Boulevard., Winona, Minnesota USA 55987 Winona, Minnesota USA Phone: +1 (507) 454-5300, Fax: +1 (507) 452-4507 http://www.watlow.com 0600-0059-0000 Rev. M Made in the U.S.A.
- Page 2 Safety Information Unit is a Listed device per Un- derwriters Laboratories®. It has We use note, caution and warning symbols through- been evaluated to United States out this book to draw your attention to important and Canadian requirements for operational and safety information. Hazardous Locations Class 1 Division II Groups A, B, C and A “NOTE”...
- Page 3 7. Watlow reserves the right to charge for no trouble found (NTF) returns. The EZ-ZONE PM User's Guide is copyrighted by Watlow Electric, Inc., © April 2013 with all rights reserved. EZ-ZONE PM is covered by U.S. Patent Numbers: 6005577;...
-
Page 4: Table Of Contents
Table of Contents Chapter 1: Overview . . . . . . . . . . . . . . . . . . . . . . . . . . . . . . . . . . . . .4 Standard Features and Benefits . - Page 5 Table of Contents (cont .) Chapter 6: Setup Page . . . . . . . . . . . . . . . . . . . . . . . . . . . . . . . . . . . 67 Analog Input Menu .
- Page 6 Table of Contents (cont .) Current Sensing . . . . . . . . . . . . . . . . . . . . . . . . . . . . . . . . . . . . . . . . . 138 Open Loop Detection .
-
Page 7: Chapter 1: Overview
Watlow’s EZ-ZONE PM controllers offer options to reduce system complexity and the cost of control-loop ownership. You can order the EZ-ZONE PM as a PID controller or an over-under limit controller, or you can combine both functions in the PM Integrated Limit Controller. You now have the option to integrate a high- amperage power controller output, an over-under limit controller and a high-performance PID controller all in space-saving, panel-mount packages. -
Page 8: Optional Features And Benefits
Heat-Cool Operation • Provides application flexibility with accurate temperature and process control Optional Features and Benefits High-amperage Power Control Output • Drives 15 amp resistive loads directly • Reduces component count • Saves panel space and simplifies wiring • Reduces the cost of ownership Integrated PID and Limit Controller • Reduces wiring time and termination complexity compared to connecting discrete products • Decreases required panel space... -
Page 9: A Conceptual View Of The Pm
A Conceptual View of the PM The flexibility of the PM’s software and hardware allows a large range of configurations. Acquiring a better understanding of the controller’s overall functionality and capabilities while at the same time planning out how the controller can be used will deliver maximum effectiveness in your application. It is useful to think of the controller in terms of functions;... -
Page 10: Getting Started Quickly
The output cycle time will have a bearing on the life of mechanical relay outputs and can be different based on the type of output ordered. The output cycle time can be changed in the Setup Page under the Output Menu. EZ-ZONE PM Default Configuration Input Output... -
Page 11: Current Monitoring
EZ-ZONE PM Integrated Model 1/16 DIN System Diagram ® With a Current Transformer, Without Communications Card (Slot B) Output Input Functions Functions Output 1 Controller off, heat, cool none, switched dc/open collector, 5A alarm, retransmit, mechanical relay (form C), process duplex, event Analog Input 1 (V, mA), or 0.5A SSR (form A) - Page 12 EZ-ZONE PM Integrated Model 1/16 DIN System Diagram ® With Auxillary Input, Without Communications Card (Slot B) Output Input Functions Functions Output 1 Controller off, heat, cool none, switched dc/open collector, 5A alarm, retransmit, mechanical relay (form C), process duplex, event Analog Input 1 (V, mA), or 0.5A SSR (form A) (Optional -...
- Page 13 EZ-ZONE PM Integrated Model 1/16 DIN With Limit, System Diagram ® Without Communications Card (Slot B) Output Input Functions Functions Output 1 Controller off, heat, cool none, switched dc/open collector, 5A alarm, retransmit, mechanical relay (form C), process duplex, event Analog Input 1 (V, mA), or 0.5A SSR (form A) none, Thermocouple, RTD (100Ω,...
- Page 14 EZ-ZONE PM Integrated Model 1/16 DIN System Diagram ® with Expanded Communications (Slot B) Output Input Functions Functions Output 1 Controller off, heat, cool none, switched dc/open collector, 5A alarm, retransmit, mechanical relay (form C), process duplex, event Analog Input 1 (V, mA), or 0.5A SSR (form A) (Optional - none, CT, Thermocouple, RTD (100...
- Page 15 EZ-ZONE PM Integrated Model 1/8 and 1/4 DIN System Diagram ® Without 6 Digital I/O (slot D), Without Communications (slot E) EZ-ZONE PM Integrated 8 DIN System Diagram Without 6-digital I/O (slot D), Without Comms Card (slot E) Input Output...
- Page 16 EZ-ZONE PM Integrated Model 1/8 and 1/4 DIN System Diagram ® With 6 Digital I/O (slot D), Without Communications (slot E) EZ-ZONE PM Integrated 8 DIN System Diagram With 6-digital I/O (slot D), Without Comms Card (slot E) Input Output...
- Page 17 PM Integrated Model 1/8 and 1/4 DIN with CT System Diagram ® Without 6 Digital I/O (slot D), Without Communications (slot E) EZ-ZONE PM Integrated 8 DIN with CT System Diagram Without 6-digital I/O (slot D), Without Comms Card (slot E)
- Page 18 EZ-ZONE PM Integrated Model 1/8 and 1/4 DIN System Diagram ® Without 6 Digital I/O (slot D), With Communications (slot E) EZ-ZONE PM Integrated 8 DIN System Diagram Without 6-digital I/O (slot D), With Comms Card (slot E) Input Output...
-
Page 19: Chapter 2: Install And Wire
Chapter 2: Install and Wire Dimensions 1/16 DIN (PM6) 15.8 mm (0.62 in) 101.6 mm 53.3 mm (4.00 in) (2.10 in) 53.3 mm (2.10 in) Side Front 51.2 mm (2.02 in) Back 1/16 DIN (PM6) Recommended Panel Spacing 44.96 to 45.47 mm (1.77 to 1.79 inches) Recommended panel spacing 44.96 to 45.47 mm... - Page 20 1/8 DIN (PM8) Vertical Dimensions 15.75 mm (0.62 in) 1.52 mm (0.06 in) 53.34 mm (2.10 in) 100.33 mm (3.95 in) 54.8 mm 10.16 mm (2.16 in) (0.40 in) 30.73 mm (1.21 in) 101.60 mm (4.00 in) 1/8 DIN (PM8) Vertical Recommended Panel Spacing 44.96 to 45.60 mm (1.77 to 1.79 inches) 92.00 to 92.80 mm...
- Page 21 1/8 DIN (PM9) Horizontal Dimensions 15.75 mm (0.62 in) 1.52 mm 100.33 mm (0.06 in) (3.95 in) 53.8 mm (2.16 in) 53.34 mm (2.10 in) 10.16 mm (0.40 in) 30.73 mm (1.21 in) 101.60 mm (4.00 in) 1/8 DIN (PM9) Horizontal Recommended Panel Spacing 92.00 to 92.80 mm (3.62 to 3.65 inches) 44.96 to 45.60 mm...
- Page 22 1/4 DIN (PM4) Dimensions 15.75 mm (0.62 in) 1.52 mm 100.33 mm (0.06 in) (3.95 in) 100.33 mm (3.95 in) 12.70 mm (0.50 in) 30.73 mm (1.21 in) 100.84 mm (3.97 in) 1/4 DIN (PM4) Recommended Panel Spacing 92.0 to 93.0 mm (3.62 to 3.65 inches) 92.0 to 93.0 mm (3.62 to 3.65 inches)
-
Page 23: Installation
Installation 1. Make the panel cutout using the mounting template dimen- sions in this chapter. Insert the case assembly into the panel cutout. 2. While pressing the case assembly firmly against the panel, slide the mounting collar over the back of the controller. If the installation does not require a NEMA 4X seal, simply slide together until the gasket is compressed. - Page 24 Removing the Mounted Controller from Its Case 1. From the controller's face, pull out the tabs on each side until you hear it click. Pull out the tab on each side until you hear it click . Grab the unit above and below the face and pull forward .
-
Page 25: Wiring
Wiring Slot A Slot B Slot D Slot E Inputs Terminal Function Configuration 7 - 12 S2 (RTD) or current + Universal / Thermistor Input S3 (RTD), thermocouple -, current - or volts input 1: all configurations -, potentiometer wiper, thermistor input 2: PM _ _ _ _ _ - _ [R,L] _ _ _ _ _ S1 (RTD), thermocouple + or volts +, thermistor, potentiometer... -
Page 26: Back View
Communications Terminal Function Configuration Modbus RTU EIA-485 T+/R+ Modbus RTU 232/485 Communications Slot B: PM6 _ _ _ _ - [ 2] A A A _ _ _ Modbus RTU EIA-485 T-/R- Modbus RTU EIA-485 common Slot E: PM[4,8,9] _ _ _ _ - [ 2] _ _ _ _ _ _ Modbus RTU EIA-485 T+/R+ Modbus RTU EIA-485 T-/R- Modbus RTU EIA-232 common... - Page 27 Back View Back View Slot Orientation Slot Orientation 1/4 DIN Horizontal PM4 1/16 DIN PM6 Note: Slot B above can also be configured with a communications card. PM Integrated Isolation Block Digital Inputs & Outputs No Isolation 5-12 Controller Power Supply 12 to 40VÎ...
- Page 28 Low Power Óç Warning: Use National Electric (NEC) or other Slot C country-specific standard wiring and power safety practices when wiring and fuse power • Minimum/Maximum Ratings connecting this controller to a power source and to electrical sensors or • 12 to 40VÎ (dc) peripheral devices.
- Page 29 Digital Input 7 - 12 Óç Voltage Input Warning: Slot E Use National Electric (NEC) or other Common common country-specific standard wiring and DC Input safety practices when wiring and Digital Input Event Conditions connecting this controller to a power DC Input • Dry Contact source and to electrical sensors or...
- Page 30 Input 1, 2 Process Óç Warning: Slot A, B Slot A, B Use National Electric (NEC) or other country-specific standard wiring and safety practices when wiring and • 0 to 20 mA @ 100 Ω input impedance connecting this controller to a power • 0 to 10VÎ (dc) @ 20 kΩ input impedance source and to electrical sensors or • 0 to 50 mVÎ (dc) @ 20 kΩ input impedance peripheral devices.
- Page 31 Example: Using a Current Transformer Óç Warning: T/R = 50mA Use National Electric (NEC) or other CSC = I = 50mA(R)/T p(full scale) country-specific standard wiring and CSI = Output N safety practices when wiring and = Current in secondary of current transformer connecting this controller to a power = Current in primary of current transformer source and to electrical sensors or...
- Page 32 Switched DC Wiring Example Using DO 5-6 Óç Warning: switched dc outputs Use National Electric (NEC) or other country-specific standard wiring and safety practices when wiring and connecting this controller to a power Htr 1 source and to electrical sensors or peripheral devices.
- Page 33 Note: Óç As a switched DC output; this output is a constant current output delivering Warning: 750 mW, current limited to 400 mA. The internal supply does have a maxi- Use National Electric (NEC) or other mum open circuit voltage of 22 VDC and minimum open circuit voltage of country-specific standard wiring and 19 VDC.
- Page 34 Output 1, 3 Switched DC/Open Collector Óç Warning: Switched DC Switched DC Slot A, B Use National Electric (NEC) or other common • 30 mA dc maximum supply cur- country-specific standard wiring and rent dc - (open collector) common safety practices when wiring and • Short circuit limited to <50 mA dc + connecting this controller to a power dc -...
- Page 35 Output 1, 3 Solid-State Relay, Form A Óç Warning: Slot A, B • 0.5 A at 20 to 264VÅ (ac) maxi- Use National Electric (NEC) or other normally open mum resistive load country-specific standard wiring and • 20 VA 120/240VÅ (ac) pilot duty safety practices when wiring and common • opto-isolated, without contact connecting this controller to a power...
- Page 36 Output 2, 4 NO-ARC Relay, Form A Óç Warning: • 15 A at 85 to 264VÅ (ac) resis- Slot A, B Use National Electric (NEC) or other tive load only country-specific standard wiring and • 2,000,000 cycle rating for NO- safety practices when wiring and ARC circuit connecting this controller to a power • 100 mA minimum load source and to electrical sensors or • 2 mA maximum off state leakage...
- Page 37 To prevent damage to the control- devices in a network. ler, do not connect wires to unused • Do not connect more than 16 terminals. EZ-ZONE PM controllers on a Note: network. Maintain electrical isolation between analog input 1, digital input-outputs, switched dc/open collector outputs...
- Page 38 • Wire T-/R- to the A termi- • Do not connect more than Use National Electric (NEC) or other Slot B, E nal of the EIA-485 port. one EZ-ZONE PM control- 485 T+/R+ country-specific standard wiring and ler on an EIA-232 network. • Wire T+/R+ to the B termi- safety practices when wiring and 485 T-/R- nal of the EIA-485 port.
-
Page 39: Network Status
Note: Óç When using Modbus TCP, the Network Status and Module Status LEDs are Warning: not used. Use National Electric (NEC) or other country-specific standard wiring and safety practices when wiring and connecting this controller to a power source and to electrical sensors or peripheral devices. - Page 40 Module Status (cont .) Óç Warning: Indicator State Summary Requirement Use National Electric (NEC) or other If the device has detected a non-recoverable country-specific standard wiring and Steady Red Major fault major fault, the module status indicator shall safety practices when wiring and be steady red.
-
Page 41: Network Status
Óç Warning: DeviceNet LED Indicators Use National Electric (NEC) or other Viewing the control from the front and then looking on top two LEDs can be country-specific standard wiring and seen aligned vertically front to back. The LED closest to the front is identi- safety practices when wiring and connecting this controller to a power fied as the network (Net) LED where the one next to it would be identified as... - Page 42 Maximum wire size termination and • Do not connect more than with power wires. Connect 485 T+/R+ torque rating: 32 EZ-ZONE PM control- network wires in daisy- • 0.0507 to 3.30 mm (30 to 12 lers on any given segment. chain fashion when con-...
- Page 43 Note: Adjacent terminals may be labeled differently, depending on the model number. power Note: EZ-ZONE PM To prevent damage to the control- ler, do not connect wires to unused terminals. Note: RUI/Gateway Maintain electrical isolation between EZKB-_ A _ _- _ _ _ _...
- Page 44 Connecting a Computer to PM Controls Using B&B 485 to USB Converter Óç Warning: Address 2 Address 1 Use National Electric (NEC) or other country-specific standard wiring and safety practices when wiring and connecting this controller to a power source and to electrical sensors or peripheral devices.
-
Page 45: Chapter 3: Keys And Displays
Chapter 3: Keys and Displays 1/8 DIN (PM9) Horizontal Temperature Units: Upper Display: Indicates whether the temperature In the Home Page, displays the process ® is displayed in Fahrenheit or Cel- value, otherwise displays the value of sius. the parameter in the lower display. Percent Units: Zone Display: Lights when the controller is dis-... -
Page 46: Attention Codes
Responding to a Displayed Message Attention Codes An active message (see Home Page for listing) will cause the display to toggle between the normal settings and the active message in the upper display and Attention [Attn] in the lower display. Your response will depend on the message and the controller settings. - Page 47 Navigating the EZ-ZONE PM Integrated Controller ® ® [``70] [``Ai] [`Set] [``72] Home Page from anywhere: Press the Infinity Key for two seconds to return to the Home Page. ˆ ® ® [``70] [``Ai] [oper] [``72] Operations Page from Home Page: Press both the Up and Down keys for three seconds.
-
Page 48: Chapter 4: Home Page
Chapter 4: Home Page Default Home Page Parameters Watlow’s patented user-defined menu system improves operational efficiency. The user-defined Home Page provides you with a shortcut to monitor or change the parameter values that you use most often. The default Home Page is shown on the following page. When a parameter normally located in the Setup Page or Opera- tions Page is placed in the Home Page, it is accessible through both. - Page 49 Modifying the Home Page 1. Push and hold the Advance key and the Infinity ˆ key for approximately six seconds. Upon entering the Factory Page the first menu will be the Custom Menu [Cust] . 2. Push the Advance key where the lower display will show [Cust] and the upper display will show [1] . 3.
- Page 50 Custom Menu Parameter Options Description Prompt * If 4 digit of part number is B, E, R or N Profile Start [ p ; s t1] Profile Action Request [ p ; a C1] Guarnteed Soak Deviation 1 [gsd1] If 9 digit of part number is T Current Read [CU;...
- Page 51 Possible Home Page Home Page Defaults Parameter Page and Menu Display (Dependent on Part Number) If 9 digit of part number is equal to: PM _ _ _ _ _ - _ [A, C, J, R, P, T] _ _ _ _ _ Active Process Value (2) Operations Page, Monitor Menu [pu;...
- Page 52 Communication Protocols When using a communications protocol in conjunction with the EZ-ZONE PM there are two possible ports (instances) used. Port 1 or instance 1 is always dedicated to Standard Bus communications. This same in- stance can also be used for Modbus RTU if ordered. Depending on the controller part number port 2 (in- stance 2) can be used with Modbus, CIP and Profibus.
- Page 53 Modbus Introduction to the Modbus Protocol (cont.) All Modbus registers are 16-bits and as displayed in this User's Guide are relative addresses (actual). Some legacy software packages limit available Modbus registers to 40000 to 49999 (5 digits). Many applica- tions today require access to all available Modbus registers which range from 400000 to 465535 (6 digits). For parameters listed as float, notice that only one (low order) of the two registers is listed;...
- Page 54 Profibus DP To accommodate for Profibus DP addressing the following menus contain a column identified as Profibus In- dex. Data types used in conjunction with Profibus DP can be found in the table below. The Profibus communications instance will always be instance 2. real = Float, IEEE 754 32-bit = Signed 16-bit integer...
-
Page 55: Chapter 5: Operations Page
Chapter 5: Operations Page Navigating the Operations Page To navigate to the Operations Page, follow the steps below: 1. From the Home Page, press both the Up ¿ and Down ¯ keys for three seconds. [``Ai] will appear in the upper display and [oPEr] will appear in the lower display. - Page 56 [`SoF] [oPEr] Special Output Function [`Su; A ] Source Value 1 [`Su; b ] Source Value 2 [`ou; 1 ] Output Value 1 [`ou; 2 ] Output Value 2 P; S tA] [oPEr] Profile Status Menu [P; S tr] Profile Start [PACr] Profile Action Request [`StP] Current Step [S;...
-
Page 57: Analog Input Menu
Operations Page Data Modbus Class Dis- Parameter name Profibus Param- Type Range Default Relative Ad- Instance play Description Index eter ID & Read/ dress Attribute Write hex (dec) [``Ai] [oPEr] Analog Input Menu Analog Input (1 to 2) -1,999.000 to 9,999.000°F Instance 1 0x68 (104) 4001... -
Page 58: Process Value Menu
Operations Page Data Modbus Class Dis- Parameter name Profibus Param- Type Range Default Relative Ad- Instance play Description Index eter ID & Read/ dress Attribute Write hex (dec) Linearization (1 to 2) -1,999.000 to 9,999.000°F Instance 1 0x86 (134) - - - - 34007 float [``o;... -
Page 59: Digital Input/Output Menu
Operations Page Data Modbus Class Dis- Parameter name Profibus Param- Type Range Default Relative Ad- Instance play Description Index eter ID & Read/ dress Attribute Write hex (dec) Process Value (1 to 2) -1,999.000 to 9,999.000°F Instance 1 0x7E (126) - - - - 26022 float... -
Page 60: Limit Menu
Operations Page Data Modbus Class Dis- Parameter name Profibus Param- Type Range Default Relative Ad- Instance play Description Index eter ID & Read/ dress Attribute Write hex (dec) [LiM] [oPEr] Limit Menu Limit (1) -1,999.000 to 9,999.000°F 0.0°F or Instance 1 0x70 (112) 12003 float... -
Page 61: Control Loop Menu
Operations Page Data Modbus Class Dis- Parameter name Profibus Param- Type Range Default Relative Ad- Instance play Description Index eter ID & Read/ dress Attribute Write hex (dec) Monitor (1 to 2) -1,999.000 to 9,999.000°F Instance 1 0x68 (104) - - - - 8031 float [`Pu;... - Page 62 Operations Page Data Modbus Class Dis- Parameter name Profibus Param- Type Range Default Relative Ad- Instance play Description Index eter ID & Read/ dress Attribute Write hex (dec) Control Loop (1 to 2) 50.0 to 200.0% 90.0 Instance 1 0x97 (151) - - - - 8025 float...
- Page 63 Operations Page Data Modbus Class Dis- Parameter name Profibus Param- Type Range Default Relative Ad- Instance play Description Index eter ID & Read/ dress Attribute Write hex (dec) Control Loop (1 to 2) 0.001 to 9,999.000°F or 3.0°F or Instance 1 0x97 (151) 8013 float...
-
Page 64: Alarm Menu
Operations Page Data Modbus Class Dis- Parameter name Profibus Param- Type Range Default Relative Ad- Instance play Description Index eter ID & Read/ dress Attribute Write hex (dec) Control Loop (1 to 2) -100.0 to 100.0 - - - - float Instance 1 0x97 (151) -
Page 65: Current Menu
Operations Page Data Modbus Class Dis- Parameter name Profibus Param- Type Range Default Relative Ad- Instance play Description Index eter ID & Read/ dress Attribute Write hex (dec) Alarm (1 to 4) [`sil] Silence Alarm Instance 1 0x6D - - - - 9014 uint [a;... -
Page 66: Math Menu
Operations Page Data Modbus Class Dis- Parameter name Profibus Param- Type Range Default Relative Ad- Instance play Description Index eter ID & Read/ dress Attribute Write hex (dec) Current (1) -1,999.000 to 9,999.000 Instance 1 0x73 (115) - - - - 15009 float [`C;... -
Page 67: Special Output Function Menu
Operations Page Data Modbus Class Dis- Parameter name Profibus Param- Type Range Default Relative Ad- Instance play Description Index eter ID & Read/ dress Attribute Write hex (dec) Instance 1 Math (1) [none] None (61) - - - - 0x7D - - - - 25029 uint... -
Page 68: Profile Status Menu
Operations Page Data Modbus Class Dis- Parameter name Profibus Param- Type Range Default Relative Ad- Instance play Description Index eter ID & Read/ dress Attribute Write hex (dec) Special Output Func- - - - - Instance 1 0x87 (135) - - - - 35013 uint [none] None (61) - Page 69 Operations Page Data Modbus Class Dis- Parameter name Profibus Param- Type Range Default Relative Ad- Instance play Description Index eter ID & Read/ dress Attribute Write hex (dec) Instance 1 Profile Status -1,999.000 to 9,999.000°F 0.0°F 0x7A (122) - - - - 22048 float [t;...
-
Page 70: Chapter 6: Setup Page
Chapter 6: Setup Page Navigating the Setup Page To navigate to the Setup Page, follow the steps below: 1. From the Home Page, press both the Up ¿ and Down ¯ keys for six seconds. [``Ai] will appear in the upper display and [`Set] will appear in the lower display. - Page 71 [`o; h o] Output High Power Scale [LiM] [gLbL] [`Set] Limit Menu [`o; C A] Calibration Offset [`Set] Global Menu [`L; S D] Limit Sides [`C_F] Display Units [ALM] [`L; h y] Limit Hysteresis [AC; L F] AC Line Frequency [`Set] Alarm Menu [SP;...
-
Page 72: Analog Input Menu
Setup Page Data Modbus Rela- Class Pro- Type Dis- Parameter Name Param- Range Default tive Instance fibus & play Description eter ID Address Attribute Index Read/ hex (dec) Write [``Ai] [`Set] Analog Input Menu Instance 1 Analog Input (1 to 2) [`oFF] Off (62) 0x68 (104) 4005... - Page 73 Setup Page Data Modbus Rela- Class Pro- Type Dis- Parameter Name Param- Range Default tive Instance fibus & play Description eter ID Address Attribute Index Read/ hex (dec) Write Analog Input (1 to 2) -1,999.000 to 9,999.000 9,999 Instance 1 0x68 (104) 4018 float...
-
Page 74: Linearization Menu
Setup Page Data Modbus Rela- Class Pro- Type Dis- Parameter Name Param- Range Default tive Instance fibus & play Description eter ID Address Attribute Index Read/ hex (dec) Write Instance 1 Analog Input (1 to 2) -1,999.000 to 9,999.000°F or 0x68 (104) 4012 float... - Page 75 Setup Page Data Modbus Rela- Class Pro- Type Dis- Parameter Name Param- Range Default tive Instance fibus & play Description eter ID Address Attribute Index Read/ hex (dec) Write Instance 1 Linearization (1 to 2) -1,999.000 to 9,999.000 0x86 (134) 34008 float [`iP;...
- Page 76 Setup Page Data Modbus Rela- Class Pro- Type Dis- Parameter Name Param- Range Default tive Instance fibus & play Description eter ID Address Attribute Index Read/ hex (dec) Write Linearization (1 to 2) -1,999.000 to 9,999.000 Instance 1 0x86 (134) 34022 float [`oP;...
-
Page 77: Process Value Menu
Setup Page Data Modbus Rela- Class Pro- Type Dis- Parameter Name Param- Range Default tive Instance fibus & play Description eter ID Address Attribute Index Read/ hex (dec) Write Linearization (1 to 2) -1,999.000 to 9,999.000 Instance 1 0x86 (134) 34017 float [iP;... -
Page 78: Digital Input / Output Menu
Setup Page Data Modbus Rela- Class Pro- Type Dis- Parameter Name Param- Range Default tive Instance fibus & play Description eter ID Address Attribute Index Read/ hex (dec) Write [`dio] [`Set] Digital Input / Output Menu Instance 5 Digital Input/Output (5 [OtPt] Output (68) Output 0x6A (106) - Page 79 Setup Page Data Modbus Rela- Class Pro- Type Dis- Parameter Name Param- Range Default tive Instance fibus & play Description eter ID Address Attribute Index Read/ hex (dec) Write Instance 5 Digital Output (5 to 12) 0.0 to 100.0 0x6A (106) 6009 float [`o;...
- Page 80 Setup Page Data Modbus Rela- Class Pro- Type Dis- Parameter Name Param- Range Default tive Instance fibus & play Description eter ID Address Attribute Index Read/ hex (dec) Write Instance 5 Digital Input (5 to 6) [none] None (61) None 0x6E (110) 10003 uint...
- Page 81 Setup Page Data Modbus Rela- Class Pro- Type Dis- Parameter Name Param- Range Default tive Instance fibus & play Description eter ID Address Attribute Index Read/ hex (dec) Write Digital Input (7 to 12) [none] None (61) None Instance 7 0x6E (110) 10003 uint...
-
Page 82: Limit Menu
Setup Page Data Modbus Rela- Class Pro- Type Dis- Parameter Name Param- Range Default tive Instance fibus & play Description eter ID Address Attribute Index Read/ hex (dec) Write [Lim] [`Set] Limit Menu Limit (1) [both] Both (13) Both Instance 1 0x70 (112) 12005 uint... -
Page 83: Control Loop Menu
Setup Page Data Modbus Rela- Class Pro- Type Dis- Parameter Name Param- Range Default tive Instance fibus & play Description eter ID Address Attribute Index Read/ hex (dec) Write Limit (1) [fail] Fail (32) - - - - Instance 1 0x70 (112) - - - - 12013... - Page 84 Setup Page Data Modbus Rela- Class Pro- Type Dis- Parameter Name Param- Range Default tive Instance fibus & play Description eter ID Address Attribute Index Read/ hex (dec) Write Instance 1 Control Loop (1 to 2) 0.001 to 9,999.000°F or units 25.0°F or 0x97 8012...
- Page 85 Setup Page Data Modbus Rela- Class Pro- Type Dis- Parameter Name Param- Range Default tive Instance fibus & play Description eter ID Address Attribute Index Read/ hex (dec) Write Control Loop (1 to 2) 0 to 100 Instance 1 0x97 (151) - - - - 8034 uint...
- Page 86 Setup Page Data Modbus Rela- Class Pro- Type Dis- Parameter Name Param- Range Default tive Instance fibus & play Description eter ID Address Attribute Index Read/ hex (dec) Write Instance 1 Control Loop (1 to 2) [`oFF] Off, sets output power User 0x6B (107) - - - -...
- Page 87 Setup Page Data Modbus Rela- Class Pro- Type Dis- Parameter Name Param- Range Default tive Instance fibus & play Description eter ID Address Attribute Index Read/ hex (dec) Write Instance 1 Control Loop (1 to 2) [`oFF] Off (62) 0x6B (107) 7014 uint [``rP]...
-
Page 88: Output Menu
Setup Page Data Modbus Rela- Class Pro- Type Dis- Parameter Name Param- Range Default tive Instance fibus & play Description eter ID Address Attribute Index Read/ hex (dec) Write Instance 1 Control Loop (1 to 4) -100 to 100% 0x6B (107) 7006 float [SP;... - Page 89 Setup Page Data Modbus Rela- Class Pro- Type Dis- Parameter Name Param- Range Default tive Instance fibus & play Description eter ID Address Attribute Index Read/ hex (dec) Write Instance 1 Output Digital (1 to 4) [`Ftb] Fixed Time Base (34) Fixed 0x6A (106) 6002...
- Page 90 Setup Page Data Modbus Rela- Class Pro- Type Dis- Parameter Name Param- Range Default tive Instance fibus & play Description eter ID Address Attribute Index Read/ hex (dec) Write Output Process (1 or 3) [``Ai] Analog Input (142) Analog Instance 1 0x76 (118) 18003 uint...
-
Page 91: Alarm Menu
Setup Page Data Modbus Rela- Class Pro- Type Dis- Parameter Name Param- Range Default tive Instance fibus & play Description eter ID Address Attribute Index Read/ hex (dec) Write Instance 1 Output Process (1 or 3) 0.0 to 100% 0.0% 0x76 (118) 18013 float... - Page 92 Setup Page Data Modbus Rela- Class Pro- Type Dis- Parameter Name Param- Range Default tive Instance fibus & play Description eter ID Address Attribute Index Read/ hex (dec) Write 1 to 2 Instance 1 0x6D (109) 9023 uint Alarm (1 to 4) [loop] Control Loop [LooP]...
- Page 93 Setup Page Data Modbus Rela- Class Pro- Type Dis- Parameter Name Param- Range Default tive Instance fibus & play Description eter ID Address Attribute Index Read/ hex (dec) Write Instance 1 Alarm (1 to 4) -1,999.000 to 9,999.000°F or 300.0°F 0x6D 9001 float...
-
Page 94: Current Menu
Setup Page Data Modbus Rela- Class Pro- Type Dis- Parameter Name Param- Range Default tive Instance fibus & play Description eter ID Address Attribute Index Read/ hex (dec) Write Instance 1 Alarm (1 to 4) [`Clr] Clear (0) - - - - 0x6D - - - - 9013... -
Page 95: Math Menu
Setup Page Data Modbus Rela- Class Pro- Type Dis- Parameter Name Param- Range Default tive Instance fibus & play Description eter ID Address Attribute Index Read/ hex (dec) Write Instance 1 Current (1) -9,999.000 to 9,999.000 0x73 (115) 15011 float [C;... -
Page 96: Special Output Function Menu
Setup Page Data Modbus Rela- Class Pro- Type Dis- Parameter Name Param- Range Default tive Instance fibus & play Description eter ID Address Attribute Index Read/ hex (dec) Write Math (1) 0.0 to 60.0 seconds Instance 1 0x7D (125) - - - - 25028 float [`FiL]... -
Page 97: Function Key
Setup Page Data Modbus Rela- Class Pro- Type Dis- Parameter Name Param- Range Default tive Instance fibus & play Description eter ID Address Attribute Index Read/ hex (dec) Write Special Output (1) 0 to 9,999 seconds Instance 1 0x87 (135) 35023 uint [`oF;... -
Page 98: Global Menu
Setup Page Data Modbus Rela- Class Pro- Type Dis- Parameter Name Param- Range Default tive Instance fibus & play Description eter ID Address Attribute Index Read/ hex (dec) Write Instance 1 Function Key (1 to 2) [none] None (61) None 0x6E (110) 10003 uint... - Page 99 Setup Page Data Modbus Rela- Class Pro- Type Dis- Parameter Name Param- Range Default tive Instance fibus & play Description eter ID Address Attribute Index Read/ hex (dec) Write Global [``50] 50 Hz (3) 60 Hz Instance 1 0x6A (106) 1034 uint [AC;...
- Page 100 Setup Page Data Modbus Rela- Class Pro- Type Dis- Parameter Name Param- Range Default tive Instance fibus & play Description eter ID Address Attribute Index Read/ hex (dec) Write Global 0 to 9999 seconds Instance 1 7A (122) - - - - 22073 uint [poti]...
-
Page 101: Communications Menu
Setup Page Data Modbus Rela- Class Pro- Type Dis- Parameter Name Param- Range Default tive Instance fibus & play Description eter ID Address Attribute Index Read/ hex (dec) Write [CoM] [`SEt] Communications Menu Communications 1 [`Std] Standard Bus (1286) Modbus Instance 1 0x96 (150) - - - -... - Page 102 Setup Page Data Modbus Rela- Class Pro- Type Dis- Parameter Name Param- Range Default tive Instance fibus & play Description eter ID Address Attribute Index Read/ hex (dec) Write Communications (1) 1 to 2 1 if 9 - - - - - - - - - - - - 17059...
-
Page 103: Setup Page
Setup Page Data Modbus Rela- Class Pro- Type Dis- Parameter Name Param- Range Default tive Instance fibus & play Description eter ID Address Attribute Index Read/ hex (dec) Write Communications (2) 0 to 255 - - - - - - - - - - - - 17015 - - - -... - Page 104 Setup Page Data Modbus Rela- Class Pro- Type Dis- Parameter Name Param- Range Default tive Instance fibus & play Description eter ID Address Attribute Index Read/ hex (dec) Write Communications (2) 0 to 255 - - - - - - - - - - - - 17025 - - - -...
-
Page 105: Real Time Clock Menu
Setup Page Data Modbus Rela- Class Pro- Type Dis- Parameter Name Param- Range Default tive Instance fibus & play Description eter ID Address Attribute Index Read/ hex (dec) Write Communications (2) 1 to 20 - - - - - - - - - - - - 24010 - - - -... -
Page 106: Chapter 7: Profiling Page
Chapter 7: Profiling Page Navigating the Profiling Page Note: Some of these menus and parameters may not appear, depending on the controller's options. See model number information in the Appendix for more information. If there is only one instance of a menu, no sub- menus will appear. -
Page 107: Starting A Profile
2. Press the Up ¿ or Down ¯ key to change to another profile (1 to 4). 3. Press the Advance Key to move to the selected profiles first step. 4. Press the Up ¿ or Down ¯ keys to move through and select the step type. 5. - Page 108 Configuring a Digital Input to Start and Stop a Profile 1. Navigate to the Setup Page and then the Digital I/O menu. From the Home Page, press and hold the ¿ or Down ¯ key for approximately six seconds where the upper display will show [``ai] and the lower dis- play will show [`set] .
- Page 109 Ending a Profile from the Operations Page 1. Navigate to the Operations Page and then the Profile Status menu. From the Home Page, press and hold the ¿ or Down ¯ key for approximately three seconds where the upper display will show [``ai] and the lower display will show [oper] .
-
Page 110: Profiling Menu
Profiling Page Data Modbus Class Type Dis- Parameter Name Param- Range Default Relative Ad- Instance & play Description eter ID dress Attribute Read/ hex (dec) Write [``P1] [prof] Profiling Menu Profile [1 to 4] Step 1 to 10 [profile 1] - - - - - - - - - - - -... - Page 111 Profiling Page Data Modbus Class Type Dis- Parameter Name Param- Range Default Relative Ad- Instance & play Description eter ID dress Attribute Read/ hex (dec) Write 0 to 59 Step Type Parameters Instance 1 0x79 (121) 21005 uint [~SEC] [ SEC] Seconds Map 1 Map 2...
- Page 112 Profiling Page Data Modbus Class Type Dis- Parameter Name Param- Range Default Relative Ad- Instance & play Description eter ID dress Attribute Read/ hex (dec) Write Step Type Parameters [`oFF] Off (62) Instance 1 0x79 (121) 21010 uint [WE; 2 ] [WE.2] Wait Event 2 [``on] On (63)
- Page 113 Profiling Page Data Modbus Class Type Dis- Parameter Name Param- Range Default Relative Ad- Instance & play Description eter ID dress Attribute Read/ hex (dec) Write [`oFF] Off (62) Instance 1 Step Type Parameters 0x79 (121) 21007 uint Ent1] Event 1 [``on] On (63) [Ent1] Map 1...
- Page 114 Display Step Type Parameters in Step Type Description Step Types - - - - [UStP] Unused Step [UStP] This is an empty step that can be used to plan for future steps to be inserted or temporarily deactivate a step in a profile.
- Page 115 Display Step Type Parameters in Step Type Description Step Types [`End] End Type [`End] [ End] [Ent1] Event 1 An End Step will end the profile and set the control modes [Ent2] Event 2 and set points to match the End Type. The state of up to 2 event outputs may be set or maintained.
-
Page 116: Chapter 8: Factory Page
Chapter 8: Factory Page Navigating the Factory Page To go to the Factory Page from the Home Page, press the Up ¿ or Down ¯ key to select and then press and hold both the Advance and Infinity ˆ press the Advance Key to enter. -
Page 117: Custom
Factory Page Data Modbus Class Pro- Type Dis- Parameter Name Param- Range Default Relative Ad- Instance fibus & play Description eter ID dress Attribute Index Read/ hex (dec) Write [Cust] [fcty] Custom Custom [nonE] None See: - - - - - - - - - - - - 14005... - Page 118 Factory Page Data Modbus Class Pro- Type Dis- Parameter Name Param- Range Default Relative Ad- Instance fibus & play Description eter ID dress Attribute Index Read/ hex (dec) Write Security Setting 1 to 5 Instance 1 0x67 (103) - - - - 3010 uint [rLoC]...
-
Page 119: Unlock Menu
Factory Page Data Modbus Class Pro- Type Dis- Parameter Name Param- Range Default Relative Ad- Instance fibus & play Description eter ID dress Attribute Index Read/ hex (dec) Write [ULoC] [FCty] Unlock Menu Security Setting Customer Specific uint - - - - - - - - - - - - 3020... - Page 120 Factory Page Data Modbus Class Pro- Type Dis- Parameter Name Param- Range Default Relative Ad- Instance fibus & play Description eter ID dress Attribute Index Read/ hex (dec) Write Diagnostics 0 to 255 - - - - - - - - - - - - 17014 [iP;...
-
Page 121: Calibration Menu
Factory Page Data Modbus Class Pro- Type Dis- Parameter Name Param- Range Default Relative Ad- Instance fibus & play Description eter ID dress Attribute Index Read/ hex (dec) Write Diagnostics 0 to 255 - - - - - - - - - - - - 17019 [iP;... -
Page 122: Chapter 9: Features
Chapter 9: Features Changing PM Integrated Model Number to PM Express . . . . . . . . . . . 121 How to Change the Control Model Number to a PM Express . . . . . . . 122 How to Restore Original PM Model Number . - Page 123 Chapter 9: Features (cont .) Using Lockout and Password Security . . . . . . . . . . . . . . . . . . . . . . . 139 Modbus - Using Programmable Memory Blocks .
-
Page 124: Changing Pm Integrated Model Number To Pm Express
Changing PM Integrated Model Number to PM Express EZ-ZONE PM firmware revisions of 13 and above allow the user to switch between a PM Integrated control to a PM Express. Switching to a PM Express eliminates the complexity of the advanced PM Integrated con- trol by allowing the user to operate with a simplified menu structure. -
Page 125: How To Change The Control Model Number To A Pm Express
How to Change the Control Model Number to a PM Express 1. Enter Factory Page [FCty ] , Calibration Menu [`CAL] via front panel or using EZ-ZONE Configurator Software. 2. Once there, using the green advance button navigate to the Part Number [``Pn] prompt (lower display). The upper display will show factory [ fCtY] indicating the factory model number as shown on the side of the control is currently in effect. -
Page 126: Tuning The Pid Parameters
When restoring factory defaults, I/O assemblies for Modbus, DeviceNet, Profibus and Ethernet along with the zone address will be overwritten when restoring factory defaults. Tuning the PID Parameters Autotuning ® When an autotune is performed on the EZ-ZONE PM, the set point is used to calculate the tuning set point. For example, if the active set point is 200°... -
Page 127: Autotuning With Tru-Tune
Manual Tuning (cont.) 5. Start with an Integral value of 6,000 and allow 10 minutes for the process temperature to reach the set point. If it has not, reduce the setting by half and wait another 10 minutes. Continue reducing the setting by half every 10 minutes until the process value equals the set point. -
Page 128: Inputs
ç WARNING! During autotuning, the controller sets the output to 100 percent and attempts to drive the Process Value toward the set point . Enter a set point and heat and cool power limits that are within the safe operating limits of your system . Inputs Calibration Offset Calibration offset allows a device to compensate for an inaccurate sensor, lead resistance or other factors that... -
Page 129: Filter Time Constant
Note: The user may only calibrate one sensor type. If the calibrator interferences with open thermocouple detec- tion, set Sensor Type [`SEn] in Setup Page [`SEt], Analog Input Menu [``Ai] to millivolt [`Mu] instead of Thermocouple [``tC] to avoid interference between the calibrator and open thermocouple detect circuit for the duration of the calibration process. -
Page 130: Sensor Selection
Sensor backup maintains closed-loop control after an input failure by switching control to input 2. The sensor backup feature is only available in an EZ-ZONE PM Integrated Limit or Remote Set Point controller. Turn sensor backup on or off with Sensor Backup Enable [`S; b A] (Setup Page, Analog Input 1). -
Page 131: Outputs
12 to 4mA (0 to -100 percent). In some cases this type of output is required by the device that the EZ-ZONE PM controls, such as a three-way valve that opens one way with a 12 to 20mA signal and opens the other way with a 4 to 12mA sig- nal. -
Page 132: No-Arc Relay
NO-ARC Relay A NO-ARC relay provides a significant improvement in the life of the output relay over conventional relays. Conventional mechanical relays have an expected life of 100,000 cycles at the rated full-load current. The shorter life for conventional relays is due to the fact that when contacts open while current is flowing metal degradation occurs. -
Page 133: Resetting A Tripped Limit
Cool Output Curve A nonlinear output curve may improve performance when the response of the output device is nonlinear. If a cool output uses one of the nonlinear curves a PID calculation yields a lower actual output level than a linear output would provide. -
Page 134: Control Methods
Control Methods Output Configuration Each controller output can be configured as a heat output, a cool output, an alarm output or deactivated. No dependency limitations have been placed on the available combinations. The outputs can be configured in any combination. For instance, all three could be set to cool. Heat and cool outputs use the set point and Operations parameters to determine the output value. -
Page 135: On-Off Control
Auto (closed loop) and Manual (open loop) Control (cont.) You can easily switch between modes if the Control Mode [`C; M ] parameter is selected to appear in the Home Page. To transfer to manual mode from auto mode, press the Advance Key until [`C;... -
Page 136: Proportional And Integral (Pi) Control
Proportional and (P) Control (cont.) than the set point, and the cooling parameter takes effect when the process temperature is higher than the set point. Adjust the proportional band with Heat Proportional Band [`h; P b] or Cool Proportional Band [`C; P b] (Op- erations Page, Loop Menu). -
Page 137: Variable Time Base
Dead Band (cont.) When the dead band value is zero, the heating output activates when the temperature drops below the set point, and the cooling output switches on when the temperature exceeds the set point. When the dead band value is a negative value, both heating and cooling outputs are active when the tem- perature is near the set point. -
Page 138: Single Set Point Ramping
Variable Time Base (cont .) Variable time base should be used with solid-state power controllers, such as a solid-state relay (SSR) or silicon controlled rectifier (SCR) power controller. Do not use a variable time base output for controlling elec- tromechanical relays, mercury displacement relays, inductive loads or heaters with unusual resistance char- acteristics. -
Page 139: Alarms
Differential Control The PM can be configured for Differential Control with enhanced firmware. After configuring the appropri- ate inputs and their associated internal functions Differential Control allows the PM to drive an output based on the difference between those analog inputs. See Chapter 10 for application examples. -
Page 140: Alarm Hysteresis
If the EZ-ZONE PM has an output that is functioning as a deviation alarm, the alarm is blocked when the set point is changed, until the process value re-enters the normal operating range. Turn alarm blocking on or off with Blocking [`A;... -
Page 141: Current Sensing
Current Sensing When utilizing the Current Sensing capabilities of this control it is important to know that the measure- ments taken utilize the AC Line Frequency [AC; l f] setting found in the Global Menu of the Setup Page. If this setting does not represent the incoming line frequency of this control the readings will be in error and may appear to be frozen. -
Page 142: Using Lockout And Password Security
Using Lockout and Password Security If unintentional changes to parameter settings might raise safety concerns or lead to downtime, you can use the lockout feature to make them more secure. There are two methods of lockout that can be deployed, both of which are accessible from the Factory Page. -
Page 143: Using Lockout Method 2 (Password Enable)
Although the Factory Page is always visible, some menus within it can be restricted. Lockout Security [SLoC] & [rloC] Factory Page Menus Security Level Menus Custom Menu Lockout Menu* Diagnostic Menu** Calibration Menu * Using lockout Method 1 with [SLoC] set to 0, all writable parameters within the control will be inhibited (not writable) with two exceptions, [sloC] and [rloC] . - Page 144 The Administrator can either change the User and or the Administrator password or leave them in the de- fault state. Once Password Security is enabled they will no longer be visible to anyone other than the Ad- ministrator. In other words the Lock Menu [`loC] is not available to a User. As can be seen in the formula that follows either the User or Administrator will need to know what those passwords are to acquire a high- er level of access to the control.
-
Page 145: Modbus - Using Programmable Memory Blocks
Modbus - Using Programmable Memory Blocks When using the Modbus RTU or Modbus TCP protocols, the PM control features a block of addresses that can be configured by the user to provide direct access to a list of 40 user configured parameters. This allows the user easy access to this customized list by reading from or writing to a contiguous block of registers. -
Page 146: Cip Implicit Assemblies
O (Target to Originator) and the O to T (Originator to Target) assemblies where the Target is always the EZ-ZONE PM controller and the Originator is the PLC or master on the network. The size of the O to T as- sembly is initially set to 20 (32-bit) members where the T to O assembly consists of 21 (32-bit) members. -
Page 147: Profibus Dp - (Decentralized Peripherals)
Profibus DP - (Decentralized Peripherals) This protocol is typically used to operate sensors and actuators via a centralized controller within industrial- ized production topologies. Data rates up to 12 Mbit/s on twisted pair cables and/or fiber optics are possible. This protocol is available in three functionally graded version; DP-V0, DP-V1 and DP-V2. It should be noted that Watlow products utilizing this protocol support DP-V0 and DP-V1 only. -
Page 148: Searching Network For Devices
If the PC is already physically connected to the EZ-ZONE PM control click the next button to go on-line. Note: When establishing communications from PC to the EZ-ZONE PM control an interface converter will be re- quired. The Standard Bus network uses EIA-485 as the interface. Most PCs today would require a USB to EIA-485 converter. - Page 149 The PM8 is shown highlighted to bring greater clarity to the control in focus. Any EZ-ZONE device on the network will appear in this window and would be available for the purpose of configuration or monitoring; simply click on the control of choice. After doing so, the screen below will appear. In the screen shot below no- tice that the device part number is clearly displayed at the top of the page (yellow highlight added for empha- sis).
- Page 150 Although the PM control now contains the configuration (because the previous discussion focused on doing the configuration on-line) it is suggested that after the configuration process is completed that the user save this file on the PC for future use. If for some reason someone inadvertently changed a setting without understanding the impact, it would be easy and perhaps faster to download a saved configuration back to the control versus trying to figure out what was changed.
-
Page 151: Chapter 10: Applications
Chapter 10: Applications Example 1: Single Loop Control Requirements: One input is required and at least one output adjusts the controlled part of the process. Overview: Controls one process value to a user entered Closed Loop Set Point based on an control algorithm. Control loop 1 will control Analog Input 1 to Closed Loop Set Point 1. -
Page 152: Example 3: Square Root
Example 3: Square Root Requirements: One analog input and the enhanced software option are required and at least one output adjusts the controlled part of the process. Overview: Calculates the square root value of the sensor connected to Analog Input 1. When function is set for Square Root, the PV Function output equals square root value of Source A. -
Page 153: Example 5: Differential
Example 5: Differential Requirements: Two analog inputs and the enhanced software option are required and at least one output adjusts the controlled part of the process. Overview: Differential control maintains one process at a difference to another process. When function is set for Differential, the PV Function output equals Source A minus Source B. - Page 154 The graph below illustrates a system with a long lag time and the advantages in using cascade control. Curve A represents a single-control system with PID parameters that allow a maximum heat-up rate. Too much energy is introduced and the set point is overshot. In most long-lag-time systems the process value may never settle out to an acceptable error.
-
Page 155: Example 7: Wet Bulb / Dry Bulb
Example 7: Wet Bulb / Dry Bulb Requirements: Two analog inputs and at least one output are required to adjust the controlled part of the processes. Overview: Wet Bulb/Dry Bulb Wet Bulb/Dry Bulb is a configuration where a dry bulb connected to Analog Input 1 measures tem- perature on Analog Input 1. -
Page 156: Example 9: Motorized Valve Control
Example 9: Motorized Valve Control A typical scenario where a motorized valve is used is to regulate the flow of fluid which in turn impacts the loop process value. A valve is opened or closed by closing contacts to drive the value in the intended direction. Motor- ized Valves come in a number of configurations. -
Page 157: Chapter 11: Appendix
Chapter 11: Appendix Troubleshooting Alarms, Errors and Control Issues Indication Description Possible Cause(s) Corrective Action Alarm won’t clear or Alarm will not clear or reset • Alarm latching is active • Reset alarm when process is within reset with keypad or digital input range or disable latching • Alarm set to incorrect output • Set output to correct alarm source instance • Alarm is set to incorrect source • Set alarm source to correct input in- stance... - Page 158 Indication Description Possible Cause(s) Corrective Action Open Loop Detect is active • Setting of Open Loop Detect Time • Set correct Open Loop Detect Time for [LP; o 1] and the process value did incorrect application LP; o 2] Loop Open Error not deviate by a user-select- • Setting of Open Loop Detect Devia- • Set correct Open Loop Deviation value ed value in a user specified tion incorrect for application period with PID power at...
- Page 159 Indication Description Possible Cause(s) Corrective Action Temperature runway Process value continues to • Controller output incorrectly pro- • Verify output function is correct (heat increase or decrease past set grammed or cool) point. • Thermocouple reverse wired • Correct sensor wiring (red wire nega- tive) • Controller output wired incorrectly • Verify and correct wiring • Short in heater • Replace heater • Power controller connection to con- • Replace or repair power controller troller defective • Controller output defective • Replace or repair controller [`100] Device Error Controller displays internal • Controller defective • Replace or repair controller malfunction message at...
- Page 160 Detection of and Rules Around Abnormal Sensor Conditions Detection of Abnormal Conditions Inputs Thermocouple Shorted No direct detection, Open loop firmware detection. Open Yes, Parasitic pull-up Reversed Yes, firmware detection Current Source Shorted Range limiting only Open Range limiting only Reversed Range limiting only Voltage Source...
-
Page 161: Modbus - Programmable Memory Blocks
Modbus - Programmable Memory Blocks Assembly Definition Addresses and Assembly Working Addresses Assembly Definition Assembly Working Assembly Definition Assembly Working Addresses Addresses Addresses Addresses 40 & 41 200 & 201 80 & 81 240 & 241 42 & 43 202 & 203 82 &... - Page 162 Modbus Default Assembly Structure 80-119 Assembly Definition Assembly Definition Registers Assembly Working Addresses Assembly Working Registers Default Pointers Default Pointers Addresses Registers 100 & 101 Registers 260 & 261 Registers 80 & 81 Registers 240 & 241 Pointer 21 = 360 & 361 Pointer 31 = 1882 &...
-
Page 163: Cip Implicit Assembly Structures
CIP Implicit Assembly Structures CIP Implicit O to T (Originator to Target) Assembly Structure CIP Implicit Assembly Originator (Master) to Target (PM) PM Assembly Parameter Assembly Class, Instance, Parameter Class, Instance, Members Data Type Data Type Attritbute Attritbute 0x77, 0x01, 0x01 DINT Loop Control Mode 0x97, 0x01, 0x01... -
Page 164: Compact Class Assembly Structure
As can be seen on the previous page the PM Implicit Assembly defaults (factory settings) to a populated as- sembly structure. If it is desired to modify any of the given assembly members there are many software tools available to do so. It is outside of the scope of this document to describe how to use those. What can be found in this document is the process to build the assembly structure. - Page 165 Compact Class 1 A through 7 A Instance i Class, Assembly Instance, Attribute C = 0x71 (113) Analog Input I = 1 to 4 Filtered Analog Input Value Read A = 1 Bits 16 to 31, Signed 16 bits with implied tenths precision (-32768.8 to 3276.7) Instance i Class, Assembly...
- Page 166 Compact Class 1 B through 7 B Instance i Assembly Input Loop Actual Tune Control Loop Output Power Error Error Control Status Status Status Mode Bits 0 to 10, Signed 10 bits with implied tenths precision (-100.0 to 100.0) Bit 11, Loop Tuning Status (0 = Off, 1 = Anything Else) Bits 12 and 13, Actual Control Mode (00 = Off, 01 = Manual, 10 = Auto) Bit 14, Loop Error Status (0 = None, 1 = Error) Bit 15, Analog Input Error (0 = None, 1 = Error)
- Page 167 Compact Class 8 A through 13 A Instance i + 8 Instance i + 15 Instance i + 14 Instance i + 13 Instance i + 12 Instance i + 11 Instance i + 10 Instance i + 9 Class, Assembly Instance, Attribute C = 0x71 (113)
- Page 168 Compact Class 8 B through 13 B Instance i + 7 Instance i + 6 Instance i + 5 Instance i + 4 Instance i + 3 Instance i + 1 Instance i Instance i + 2 Assembly Limit State Limit State Limit State Limit State...
- Page 169 Compact Class 14 A through 19 A Instance i Class, Assembly Instance, Attribute C = 0x71 (113) 14 A Alarm I = 1 to 4 Alarm Set Point High Alarm Clear A = 0x0E (14) Read/Write Bits 16 to 30, Signed 15 bits with implied tenths precision (-1638.4 to 1638.3) Bit 31, Alarm Clear (0 = Ignore, 1 = Clear) Instance i + 1 Class,...
- Page 170 Compact Class 14 B through 17 B Instance i Assembly Alarm 14 B Alarm Set Point Low Silence Bits 0 to 14, Signed 15 bits with implied tenths precision (-1638.4 to 1638.3) Bit 15, Alarm Silence (0 = Ignore, 1 = Silence) Instance i Assembly Input...
-
Page 171: Specifications
Specifications DIN curve (0.00385Ω/Ω/°C) • Process, 0-20mA @ 100Ω ,or 0-10V Î(dc) @ 20kΩ input imped- LineVoltage/Power (Minimum/Maximum Ratings) ance Voltage Input Ranges • 85 to 264V~ (ac), 47 to 63Hz - Accuracy ±10mV ±1 LSD at standard conditions • 20 to 28VÅ (ac), 47 to 63Hz - Temperature stability ±100 PPM/°C maximum • 12 to 40VÎ (dc) • 14VA maximum power consumption (PM4, 8 & 9) Milliamp Input Ranges • 10VAmaximum power consumption (PM6) - Accuracy ±20µA ±1 LSD at standard conditions • Data retention upon power failure via non-volatile memory - Temperature stability ±100 PPM/°C maximum • Compliant with SEMIF47-0200,FigureR1-1 voltage sag require-... -
Page 172: Operator Interface
• Switched DC Operating Range (cont.) - Switched DC 24-32 V, 80 mA max, SELV, Limited Energy - Max. supply current source 40mA at 20VÎ (dc) and 80mA @12VÎ (dc) Volts - Max.lowstate2V mAdc •Open Collector mAac - Max. switched voltage is 32VÎ (dc) - Max. switched current per output is 1.5A Potentiometer, 1K 1200 - Max. - Page 173 Dimensions Size Behind Width Height Display Character Panel Height (max.) top: 11.4 mm (0.450 101.6 mm 54.8 mm 100.3 mm middle: 9.53 mm (4.00 in) (2.16 in) (3.95 in) (0.375 in) bottom: 7.62 mm (0.300 in) Weight 1/4 DIN (PM4) 1/8 DIN (PM8&9) • Controller: 331 g (11.7 oz.) • Controller: 284 g (10 oz.)
-
Page 174: Ordering Information For Pm Integrated Controller Models
Ordering Information for PM Integrated Controller Models Controller P M __ __ __ __ __ - __ __ __ __ __ __ __ ® EZ-ZONE Integrated Controller Models ® TRU-TUNE+ Adaptive Tune, red-green 7-segment displays Package Size Panel Mount 1/4 DIN Panel Mount 1⁄16 DIN Panel Mount 1⁄8 DIN Vertical Panel Mount 1⁄8 DIN Horizontal... -
Page 175: Index
Index [`A; b L] Alarm Blocking 90, 137 [`C; S P] Closed Loop Set Point 59, [`i; E r] Input Error Latching 70 [AC; L F] AC Line Frequency 96 [`i; E r] Input Error Status 54, 71 [`A; d L] Alarm Delay 90 [`C;... - Page 176 [`L; S d] Limit Sides 79 [rLoC] Read Lockout Security 115 [t; t Un] TRU-TUNE+™ Enable 81, [MAn] Manual Power 83 [roll] Rolling Password 115 [MAt] Math Menu 63, 92 [``rP] Ramp Action 84, 135 [``t; t ] Valve Travel Time 94 [Mb;...
- Page 177 Linearization Menu 54 Electrical Output Slope 118 Loop Menu 58 End 112 Barometric Pressure 67 Math Menu 63 End Set Point Value 109 Baud Rate 98 Monitor Menu 57 EtherNet/IP™ 35 Blocking 90, 137 Process Value Menu 55 Ethernet/IP™ Enable 101 bumpless transfer 131 Profile Status Menu 65 Event Output (1 and 2) 110, 111, 112...
- Page 178 inputs 6 Blocks 50, 158 Power Off Level A 68 Input Sensor Type 124 Modbus Register Mapping 68 Power On Level A 68 installation 20 Modbus TCP 35 Power Out Time 68, 97 Instance 95 Modbus TCP Enable 101 Pressure Units 67 Integrate 80 Modbus - Using Programmable process alarms 136...
- Page 179 set point low limit 127 EIA-232/485 Modbus RTU communications 35 Set Point Low Limit Open Loop 84 high power 25 Setup Page 67 input 1 process 27 Sides input 1 RTD 26 Alarm 89 input 1 thermocouple 26 Limit 79 input 2 current transformer 27 Silencing 90, 137 input 2 thermocouple 27...
-
Page 180: Declaration Of Conformity
June 2009 Title of Authorized Representative Date of Issue Signature of Authorized Representative CE DOC EZ-ZONE PM-06-09 ® Watlow E Z-Z ON E PM I nte gr a t e d C ont r ol l e r 17 7 App e n di x •... - Page 181 Tel: +60 3 8076 8745 Fax: +60 3 8076 7186 Email: vlee@watlow.com Website: www.watlow.com Watlow Electric Manufacturing Company (Shanghai) Co. Ltd. Room 501, Building 10, KIC Plaza 瓦特龍電機股份有限公司 290 Songhu Road, Yangpu District 80143 高雄市前金區七賢二路189號 10樓之一 Shanghai, China 200433 電話: 07-2885168...
Need help?
Do you have a question about the EZ-ZONE PM and is the answer not in the manual?
Questions and answers