Yamaha V50 Authorized Product Manual
Yamaha v50 digital synthesizer operating manual
Hide thumbs
Also See for V50:
- Owner's manual (109 pages) ,
- Operating manual (82 pages) ,
- Use manual (78 pages)
Table of Contents
Advertisement
Quick Links
Advertisement
Table of Contents

Related Manuals for Yamaha V50


Summary of Contents for Yamaha V50
- Page 1 YAMAHA ® AUTHORIZED PRODUCT MANUAL DIGITAL SYNTHESIZER...
- Page 2 DIGITAL SYNTHESIZER Operating Manual YAMAHA...
- Page 3 This information on safety is provided to comply with U.S.A. laws, but should be observed by users in all countries. Yamaha Digital Musical Instrument Products will have either a label similar to the graphic shown below or a molded/stamped facsimile of the graphic on its enclosure. The explanation of these graphics appears on this page. Please observe all cautions indicated.
- Page 4 DIGITAL SYNTHESIZER...
- Page 5 V50 features a built-in sequencer and rhythm machine, and can act as an all-in- one music production system. In order to make full use of the V50’s capabilities and enjoy long and trouble-free use, please read this manual carefully before use.
-
Page 6: Table Of Contents
Playing the internal demo ....... 14 Playing the disk demo ........14 The basics of FM tone generation ......36 Basic concepts of the V50 ........15 Operators ............Internal structure of the V50 ......15 Combinations of operators......36 Four play modes .......... - Page 7 Songs ............78 Aftertouch (pitch, amplitude, pitch bias, Sequencer Data............79 EG bias) ............53 The sequencer and the synthesizer....79 Reverb ............54 Synthesizer preparations ........80 Voice name ............54 Rhythm machine preparations ....... 81 Effect select, effect balance ....... 54 Realtime recording procedure ........
- Page 8 MIDI data format ..........About the disk ..........105 MIDI Implementation Chart ......... 145 Save ..............105 Performance data blank chart ........ 148 Load ............... 105 Voice data blank chart ........... 149 Delete ............106 Rename ............107 IMPORTANT SAFETY AND INSTALLATION MDR ..............
-
Page 9: Precautions
PRECAUTIONS The V50 is a precision electronic instrument. To ensure long and trouble-free use, please read the following precautions. Location Electromagnetic fields Avoid placing the V50 in direct sunlight, or in locations Computer circuitry is also sensitive to electromagnetic where it will be subjected to temperature extremes, radiation. -
Page 10: How To Use This Manual
This manual is divided into chapters 1—6 and an appendix. If you are using the V50 for the first time, we suggest you read chapter 1. This will give you a basic understanding of all operations. You can refer to the remaining chapters as necessary, when you want to take full advantage of the V50’s functions. -
Page 11: Chapter 1 Lntroducing Thev50
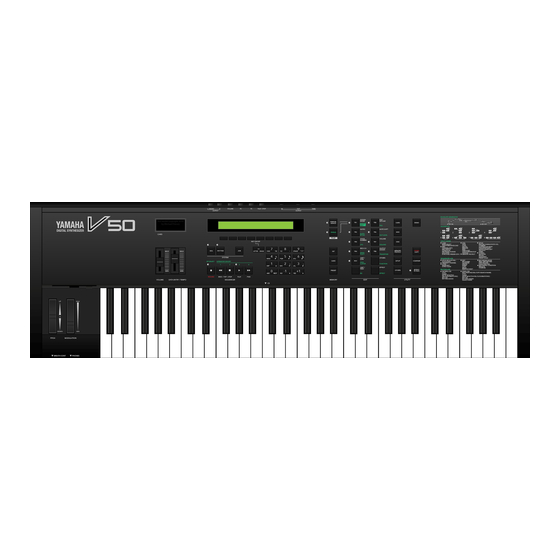
FRONT AND REAR PANELS We begin by explaining the various parts of the V50. The use of each section will be explained in chapter 2 and later chapters. Here we will give simple explanations of what each part does. - Page 12 The keys are also used when replying to prompts in the display. Introducing the V50...
- Page 13 V50. These keys select between “Preset”, “Card”, or “Internal” voices, performances, and rhythm pat- Demo key terns. (However, there are no “Card” rhythm pat- Use this key to play the preset V50 demo. terns.) Introducing the V50...
-
Page 14: Rear Panel
The connector is a standard stereo headphone output to the force of your breath. jack, and corresponds to the rear panel L and R output jacks. (Use headphones of 8 – 150 ohms impedance.) Introducing the V50... -
Page 15: Connections
Note: Be sure to turn the power of both units off before connecting the V50 to the amp. Failing to do so can damage the amp. -
Page 16: Making Sound
(1) Is the power of the V50 and the amp turned (2) The round button on the right side of the rear panel is the power switch. Press it in to turn the V50 power (2) Are the V50 and the amp correctly connected? -
Page 17: Try Out The Sounds
TRY OUT THE SOUNDS When you purchase the V50, the following 200 sounds are available for you to play. (1) 100 preset performances (2) 100 preset voices For now, just try playing Later, we will explain what a “voice” and “performance” is. - Page 18 This function allows you to transmit a “Program Change” message from MIDI OUT. This function is meaningless when using the V50 by itself. For details, see page 103. Note: Since voice and performance memories are numbered from 00 to 99, selecting a memory usually requires you to enter a two-digit number.
-
Page 19: Demonstration Playback
DEMONSTRATION PLAYBACK Playing interesting sounds is not all you can do with the V50. Next we will explain how to hear a demo playback that uses the V50 sequencer and rhythm machine, which should give you an idea of the possibilities of the V50. -
Page 20: Basic Concepts Of The V50
Internal structure of the V50 Four play modes The V50 contains three devices; a synthesizer, rhythm Just as the internal structure of the V50 can be divided machine, and sequencer. In general, you may think of into synthesizer, rhythm machine, and sequencer, the them as being independent of each other. -
Page 21: Basic Operation Of The V50
BASIC OPERATION OF THE V50 First we will explain basic operations when playing or editing voices, performances, the sequencer, or rhythm machine. Operations can be broadly divided into the fol- lowing. Switching modes Using the function keys to select an operation... -
Page 22: Setting Numerical Values
"c". The (LETTER) key switches between uppercase and lowercase letters. When inputting lowercase letters the display will be “name”. When inputting upper- case letters the display will be “NAME”. The key enters a space. Introducing the V50... -
Page 23: Voices And Performances
(This is called “last-note priority”.) Another way to describe an instrument that can play a In the V50, the word “voice” is used to mean “a certain chord of up to 16 notes is to say that the instrument sound”. -
Page 24: Performances
“performance play mode”. Note: The preset sounds of the V50 are designed to be most effective when played in a performance. Except when editing a voice, we suggest that you usually play the V50 in performance play mode. -
Page 25: Performance Play Mode Display
Note: Turning an instrument on/off is temporary, and se- lecting another performance will turn the instruments back on. If you turn all the instruments in a performance off, there will be no sound. Introducing the V50... -
Page 26: Effects
EFFECTS The V50 has a built-in digital effects unit. This effect unit contains the following functions. These effects can be used on the synthesizer (perform- Effect Number ance, voice) and also on the rhythm machine. Each voice O f f... -
Page 27: Changing The Power-On Display
CHANGING THE POWER-ON DISPLAY When you purchased the V50, the following message will appear for about 2 seconds each time the power is turned on. You can modify the lower line of this display to whatever (2) Input your message of up to 40 characters into the message you like, for example your name or the name lower line of the display. -
Page 28: Chapter 2 Performance Edit
CHAPTER PERFORMANCE EDIT This chapter explains how to create and edit performances. ABOUT PERFORMANCE EDITING While editing a performance, the “Compare” function Here we will explain the procedure for editing a per- allows you to compare the sound you are now working formance. -
Page 29: Performance Edit
0 – 16 (total of all instruments must not be greater instrument will be determined automatically as than 16) needed. When using a sequencer to play the V50 it Explanation is usually a good idea to set the assign mode to DVA. -
Page 30: Voice Number
Normally, the V50 keyboard transmits on channel Voice number 1. When creating a performance to be played from the V50 keyboard (not from the sequencer or an ex- Press (VOICE NUMBER). The upper line of the ternal keyboard), be sure to set the receive channel display will show the receive channel and voice of the of all instruments to 1 or “omn”... -
Page 31: Note Limit (High)
Note: Explanation A note limit cannot be set for instruments whose Each instrument will play notes over the range spe- maximum note setting is 0 (or when DVA is used, cified by this note limit (low) and the next note limit whose reserved note setting is “off”). -
Page 32: Note Shift
Explanation Note shift 0 is a volume of 0, and 99 is maximum volume. (The vertical bar at the right of each number graphically Press (NOTE SHIFT). The upper line of the indicates the volume for each instrument.) This setting display will show the keyboard transmit channel, and determines the volume balance of the instruments in the voice of the instrument where the cursor is located. -
Page 33: Lfo Select
Explanation Explanation The V50 has two LFOs and eight vibrato generators. Each instrument can be assigned to use a selected Here you select which of these will be used by each micro tuning. (Use the next function to select a micro instrument. -
Page 34: Micro Tuning Select
(This means that other intervals will be correspondingly out of tune.) You need to specify the key (C-B) you will be playing in. Since the V50 allows you to memorize a micro tuning for each performance, you can store identical performances with micro tunings of different keys, and transpose at the touch of a button. -
Page 35: Performance Effect Select
(four different settings) for each type of effect. I.e., Note: the V50 remembers a total of 12 different performance Effect on/off cannot be set for instruments whose effects. (To set each effect memory, see page 111.) -
Page 36: Effect Output Level, Stereo Mix
28: Dly L/R & Tone1 6: Stereo Echo Combination of delay L/R and tone control 1 Echo spread left/right 7: Distortion Rev. Tone Control 2 Combination of distortion and reverb Tone control using low pass filter and high pass filter Echo Distortion Delay &... -
Page 37: Effect Parameters
Settings 0% – 100% Explanation This determines the combined volume of the un- Function processed sound and the effect explained in the pre- Make individual adjustments for each effect. vious function. 100% is maximum, and at 0% there will be no sound. Settings Each type of effect has different settings (see following Note:... - Page 38 Settings for 5: Delay L/R, 6: Stereo Echo Settings for 9: Gate Reverb, 10: Reverse Gate, 11: Early Ref Parameter Settings Comment Settings C o m m e n t Parameter Lch Dly 0 ms–300 ms Specify the size of a hypothetical Specify the delay time for the left 0.5–3.2 S i z e...
- Page 39 bf ft10m Settings for 14:DelayL/R & Rev. Settings for 23: Doubler 2 Comment Parameter Settings Parameter Settings Comment RevTime 0.3 sec.–10.0 sec Lch Dly 0.1 ms–50 ms Specify the time it takes for the Specify the delay time for the left reverb to decay.
- Page 40 Settings for 29: Tone Control 2 Comment Parameter Settings Specify the high pass filter set- 160Hz– ting. Frequencies below the 1000Hz, thru specified frequency will be cut. –12dB–+12dB Mid range control. + is boost, - Middle is cut. (This is a presence-type band pass filter with the fre- quency fixed at 1260Hz.) 1.25KHz–12.0KHz Specify the cutoff frequency for...
-
Page 41: Chapter 3 Voice Edit
This chapter explains how to create and modify voices. You will learn to use FM tone generation to make your own original sounds. THE BASICS OF FM TONE GENERATION Here we will briefly explain the FM tone generator system used in the V50 and in most Yamaha synthesizers. (2) Two operators arranged vertically Operators The heart of FM synthesis is the “operator”. -
Page 42: Algorithm
When arranged horizontally, both operators act as Modulator carriers. (They both produce sound.) The V50 has four operators. When these four operators are arranged in Carrier various ways, each operator acts either as a carrier or as a modulator as shown in the following diagram. -
Page 43: About Voice Editing
ABOUT VOICE EDITlNG Broadly speaking, there are two ways to edit voices. Note: After editing a voice, do not forget to store it (see (1) Partially modify an existing voice to create a new page 119). If after editing a voice, you select another voice. -
Page 44: Voice Editing
VOICE EDITING Note: About quick edit When you use this quick edit function, the envelope generator AR and D1R of all operators will be “Quick edit” is not one of the settings within a voice. changed. It is a function which allows you to make several settings at the same time. -
Page 45: Quick Edit (Brilliance)
Quick edit (brilliance) Algorithm 2: As with algorithm 1, this algorithm is suit- able for creating sounds with complex Press (QUICK EDIT) four times harmonics. In addition to being suitable for struck strings or pianos, the feedback of operator 4 can be used to create a unique brass sound. -
Page 46: Lfo (Wave, Speed, Delay, Key Sync, Pmd, Amd)
(2) Feedback saw up Function Set the feedback level. triangle Settings 0 – 7 Explanation Square Feedback is a function that allows the output of operator 4 to modulate operator 4 itself. Raising the feedback level has an effect similar to connecting two S/Hold operators as carrier and modulator, and will increase the brightness of the sound. - Page 47 Ways to add vibrato (4) Key sync PMD setting PMS setting *setting Type of vibrato Function Make the LFO start from the same position for each Always present raised raised note. raise raise Add using a controller Settings * indicates When using the foot controller off, on (FUNCTION) FC Pitch setting...
-
Page 48: Sensitivity (Pms, Ams, Ame, Ebs, Kvs)
* indicates Note: When using the foot controller If operator output levels are set extremely low, this (FUNCTION) FC Amplitude setting AMS setting will not have very much effect. When using the modulation wheel (FUNCTION) MW Amplitude setting (3) AME (amplitude modulation enable) When using the breath controller (FUNCTION) BC Amplitude setting When using aftertouch... -
Page 49: Oscillator (Mode, Coarse, Fine, Wave, Detune, Shift, Range)
When this value is raised for a carrier operator, Oscillator aftertouch or breath control can affect the volume. (mode, coarse, fine, wave, detune, shift, range) When this value is raised for a modulator operator, aftertouch or breath controller can affect the tone. Press (OSCILLATOR). -
Page 50: Envelope Generator (Ar, D1R, D2L, D2R, Rr, Shift)
Coarse detune setting of -3 results in a pitch change of -2.6 cents, and a setting of +3 results in a pitch change Function of +2.6 cents. (1 cent is 1/100 of a half step.) Set the approximate frequency (pitch) By setting slight differences in the pitch of oper- Settings ators, you can create chorusing effects to broaden the... - Page 51 (A similar diagram is printed Higher settings create a greater feeling of attack, and on the right side of the V50 front panel.) lower settings create a slower decay. It is possible to copy the settings of an envelope Note: generator to another operator (see page 120).
-
Page 52: Pitch Envelope Generator (Pr1, Pl1, Pr2, Pl2, Pr3, Pl3)
PL2 ..Pitch level maintained while key remains Explanation pressed. This EG shift setting selects the level difference be- PL3 ..Pitch level moved toward when key is relased. tween maximum and minimum levels. off ..The minimum level of the EG is 96dB below (1) PR1, PR2, PR3 the maximum level. -
Page 53: Output Level
When low notes are played, the envelope changes gra- Output level dually, and when high notes are played, the envelope changes rapidly. Press (OUT LEVEL) If keyboard rate scaling is applied to carrier oper- ators, low notes will have a gradual attack and a long release, and high notes will have a sharp attack and short release. -
Page 54: Transpose
“PBetc” in the display. An on/off foot switch (similar to the pedal of a piano) can be connected to the V50 rear panel FS jack, and can function in one of two ways. (Use a foot switch such as the FC-4 or FC-5, sold separately.) -
Page 55: Portamento (Mode, Time)
Note: Portamento (mode, time) When you don’t want to use portamento, set the portamento time to 0. If a foot switch is connected After pressing (FUNCTION), press the to the rear panel FS jack, and if the foot switch is below “Port”... -
Page 56: Modulation Wheel (Pitch, Amplitude)
(2) Pitch Modulation wheel (pitch, amplitude) Function After pressing (FUNCTION), press the Set the amount of vibrato depth regulated by the foot below “MW” in the display. controller. Setting: 0 – 99 Explanation This allows you to regulate vibrato depth using the foot controller. -
Page 57: Breath Controller (Pitch, Amplitude, Pitch Bias, Eg Bias)
Note: Setting Unless the sensitivity AMS setting is raised, and the 0 – 99 AME of the appropriate operators is on, raising this Explanation setting will have no effect (see page 43). This allows you to regulate tremolo or wah using the If you do not want to control tremolo or wah breath controller. -
Page 58: (4) Eg Bias
(2) Amplitude You will need to raise the sensitivity EBS setting (see page 43) for the operators that you want the breath Function controller to affect. If you raise the EBS setting for Set the amount of tremolo or wah regulated by aft- carrier operators, the breath controller will affect vol- ertouch. -
Page 59: Reverb
Select the type of DSP effect to use with this voice. This effect has no connection with the reverb produced by the V50 DSP effect unit. When the output level Settings of operator 1 drops below a certain level (– 18dB), off, or one of the following types of effect this “reverb”... -
Page 60: Effect Output Level, Stereo Mix
5: Delay L/R 26: Feed Back E/R Early reflections with feedback Delayed sound spread to left/right 27: Delay & Tone1 6: Stereo Echo Echo spread left/right Combination of delay and tone control 1 28: Dly L/R & Tone1 7: Distortion Rev. Combination of delay L/R and tone control 1 Combination of distortion and reverb 8: Distortion Echo... -
Page 61: Effect Parameters
Explanation Function The combined volume of the effect and the un- Make detailed settings for the effect. processed sound is adjusted by this setting. 100% Settings is maximum, and at 0% there will be no sound. Each type of effect has different settings. Note: Explanation At a setting of 0%, neither the unprocessed nor the... -
Page 62: Chapter 4 Using The Rhythm Machine
CHAPTER 4. USING THE RHYTHM MACHINE This chapter will explain how to use the V50 rhythm machine. ABOUT THE RHYTHM MACHINE The rhythm machine tone generator The tone generator of the rhythm machine uses the following 61 rhythm instruments. BD 1 GateSD F.Tom4... -
Page 63: Rhythm Patterns
Note: Rhythm patterns The internal patterns and rhythm songs you create will not remain in memory after the power is turned A rhythm pattern is a phrase 1 to 4 measures long. There off. If you want to keep the data you create, save it are two types of rhythm patterns;... - Page 64 Change keyboard mode Move the cursor to “ > KBD” and change the setting to select whether the keyboard will play rhythm sounds or synthesizer sounds. This setting is effective only when in rhythm mode. Whether the keyboard plays rhythm sounds or (4) Move the cursor to “...
-
Page 65: Creating Rhythm Patterns
CREATING RHYTHM PATTERNS (1) Recording a rhythm pattern from scratch. Realtime recording and step recording You can record into a rhythm pattern that contains no data. If a pattern contains no data, a "w" will There are two ways to create rhythm patterns. not be shown in the display. -
Page 66: Realtime Recording
REALTIME RECORDING To record a pattern in realtime, use the following pro- allowing you to use different quan- cedure. tization settings when recording each sound. (1) Press to enter pattern play mode. (There is no need to do this if you are already in About quantization pattern play mode.) If you enter song play mode These examples show how quantization would correct... -
Page 67: Step Recording
newly selected quantization value will blink until it When you press the pattern you just recorded will play. actually becomes effective.) For patterns that are two or more measures If you want to modify or correct the pattern, (bars) long, check the “Bar” display while recording. repeat steps (2) –... -
Page 68: Using The Bar Graph
If you have been recording using a preset pat- explained in detail in the next section.) Repeat this tern, you will get the following display. procedure to record each sound. (6) Press to end step recording. You will return to pattern play mode for the pattern you just re- corded. - Page 69 Press to move the cursor in steps of a 32nd note. Here is an example of using step recording to create a pattern. We will be creating the following 4/4 pattern of one measure. Each “ – ” or “ + ” indicates a 32nd note. This bar graph will display only a single instrument at a time.
- Page 70 Press the under the seven times. The Play the note A2 (HHclos) on the keyboard. The cursor (_) will move to the third beat. instrument will change to hi-hat, and a hi-hat will be entered in the first beat. If at this time the cursor is at the position of the instrument name, the graph display wil change to show that instrument.
-
Page 71: Pattern Job Functions
Note: In this example we have entered the entire pattern without changing the quantize setting, but it is also possible to change the quantize setting while recording a pattern. If quantize is changed, it will become ef- fective from the next measure, and will blink until it becomes effective. -
Page 72: Clear
Clear Setup Press the below “ > SETUP”. Press the below “ > CLR”. These settings are shared with the settings of the setup (1) Pattern clear job in song play mode. They affect various overall op- eration of the rhythm machine, and will remain mem- Function orized even when the power is turned off. -
Page 73: Inst Settings
Determine whether or not the rhythm machine uses MIDI... MIDI clock signals will determine the tempo. velocity data. Select this setting when you want to control Settings the tempo of the V50 rhythm machine from off, on an external rhythm machine. Explanation Note:... -
Page 74: Rhythm Assign
It has no connection with the in- power is turned off. strument selected in (1). The V50 has three “instrument layouts” in permanent Use this setting to adjust the volume balance of memory; PRESET 1 – 3. (These cannot be modified.) the rhythm machine and the synthesizer. - Page 75 RX series assigns to keys outside of the 61-note range of the V50 have been assigned within the V50 key range. PRESET 2 has a basic drum set assigned to the third octave (the octave begining with C3). The white keys...
-
Page 76: Playing Rhythm Songs
PLAYING RHYTHM SONGS The keyboard will play the rhythm sounds This section explains how to play a rhythm song..assigned to each key. Note: SYN ..The keyboard will play the performance When the power is turned on, the rhythm song me- or voice selected before mory is empty. -
Page 77: Creating Rhythm Songs
CREATING RHYTHM SONGS First we will explain some important points to remember when creating rhythm songs. The following is an example of how repeat marks can Parts and patterns be used. A rhythm song is created by inputting rhythm pattern Part 001 = numbers into “parts”. - Page 78 (3) Tempo change Note: Any character can be used as a mark, and you can This specifies a change in rhythm tempo during a song. set as many as you like. However, only the first seven Specify a tempo change as follows. marks in the song can be searched for.
-
Page 79: Creating A Rhythm Song
CREATING A RHYTHM SONG To create a rhythm song, use the rhythm edit functions When entering repeat, volume change, tempo in the following procedure. change, or mark data instead of a pattern, press the keys below the right while the “=Pattern ***”... -
Page 80: Editing A Rhythm Song
EDITING A RHYTHM SONG While editing a rhythm song as explained in the previous Delete section, several editing jobs can be performed. While editing a rhythm song, the display will be as follows. Press the below “ > Del”. Press the below “... -
Page 81: Song Name
Explanation Song name This jumps directly to a part you specified using a mark. Marks will be displayed in the lower line. Press Press the below “ > Name”. below the mark to which you want to jump. The display will immediately show the part that contains the mark. -
Page 82: Song Clear
Rhythm assign Song clear Press the below “ > Asgn". Press the below “ > Clr”. Settings in this job are shared with the settings in the pattern job “Rhythm assign”. For details see page 69. (1) Song clear Search Function Clear the contents of the specified song. -
Page 83: Chapter 5 Using The Sequencer
CHAPTER 5. USING THE SEQUENCER This chapter explains how to use the V50 sequencer. You will learn how to record and edit your own original songs. ABOUT THE SEQUENCER Note: What is a sequencer? Since a track can contain program change data to... -
Page 84: Sequencer Data
When replaying a sequencer recording using Sequencer data the synthesizer The eight songs in V50 memory will not remain in me- There are three basic situations. mory when the power is turned off. (1) Using performance mode to replay each track with After recording a song, remember to save it to disk before its own voice. -
Page 85: Synthesizer Preparations
To set the sequencer When sending program change messages from the V50 sequencer to external devices, set the MIDI transmit channel, see page 90. To set the performance function “Program change” setting to “TransFilter”... -
Page 86: Rhythm Machine Preparations
RHYTHM MACHINE PREPARATIONS When recording and playing back with the sequencer, the rhythm song selected by the rhythm machine will also play back. According to the situation, you will need to use one of the following procedures. If the sequencer song you are going to record uses a rhythm song which already exists Select the song in the rhythm song play mode of the rhythm machine mode. -
Page 87: Realtime Recording Procedure
REALTIME RECORDING PROCEDURE Here we will explain the procedure for realtime recording. The procedure can be il- lustrated as follows. Begin sequencer operations. Select the song you want to record. Select realtime recording. Select the track to be recorded, the voices and time signature, tempo, etc. -
Page 88: Set Recording Conditions
(5) Move the cursor to “ > Time” and set the time sig- Set recording conditions nature. Select from l/4 - 4/4, l/8 - 8/8, and l/16 - 16/16. This is where you select the song and tracks to be re- corded, and set time signature, tempo, rhythm backing, (6) Move the cursor to “... -
Page 89: Step Recording Procedure
STEP RECORDING PROCEDURE The procedure for step recording is as follows. Begin sequencer operations. Select the song you want to record. Select step recording. Select the track to be recorded, the voices and time signature, tempo, etc. Start and end step recording. (2) Press the below “... -
Page 90: Start And Stop Recording
This is known as the “bar graph” display. In step recording, use this bar graph to specify the length and timing of each note. This bar graph shows the data for one measure. The number of the measure currently displayed is shown at the left side. The (2) Press to select the track to be re- “... - Page 91 To delete a note you entered the second note. This will add the two selected note values. If you input a wrong note, move the cursor to the position For example, to tie and , press of the note and press (ERASE).
-
Page 92: Playing A Song
PLAYING A SONG Track mute To play back a song, use the following procedure. Normally when playing back the sequencer, the LEDs (1) Press (If you are already in sequencer mode, will light green, and when at the left of there is no need to do so.) The display will appear you press all tracks will be played back. -
Page 93: Punch-In Recording
..Record incoming MIDI messages of any to the previous display. channel. (1) Receive channel Note: Unless this “receive channel” is set to “kbd”, your Function playing on the V50 keyboard will not be recorded. Set the receive channel of the sequencer. 88 Using the sequencer... - Page 94 If your playing uses aftertouch, it ..tempo. Select this setting when you want will be played back just as it was recorded. to control the tempo of the V50 sequencer Velocity from an external device. Function Note: When “MIDI”...
-
Page 95: Setting Transmit Channels
This sets the MIDI channel that each track of the sequencer will transmit. If a synthesizer Voice is selected (single mode). In single mode (single play mode), the V50 will play only the track data that is transmitted on a channel that matches the tone generator “Rch =”... -
Page 96: Edit Functions
EDIT FUNCTIONS Here you can do various editing operations on each track Quantize of a song. Press the below “Qntz”. In sequencer play mode, select the song to edit, and press to get the following display. Function below “ > Edit” to get the following Press the Correct each note to the nearest specified timing. -
Page 97: Delete
Delete Press the below “> Del”. Function Delete the specified range of measures. Explanation If you specify measures “from 002 to 003 Ins to 006” The specified range of measures will be deleted from as shown in the upper diagram, the song will change the entire song (all tracks). -
Page 98: Erase
If you specify “Tr1 002 - 003 to Tr1 006” as shown Remove in the upper diagram, the song will change as shown in the lower diagram. (The measures will be renum- Press the below “ > Remov”. bered as “1, 2, 3,...”) After specifying the track, and beginning and end measures of the source, and the track and measure of the destination, press the... -
Page 99: Setting Recording Conditions
SETTING RECORDING CONDITIONS Settings This is where you make various setting related to se- realtime, step, punch quencer recording. Explanation In sequencer mode, press to get the following Select one of the following three recording modes. display. Realtime ... Realtime recording (see page 82). Step. -
Page 100: Chapter 6 Utility Functions
5 years. When the backup battery (2) Select the bank to format. When using an MCD32, in a card nears the end of its lifespan, the V50 display select 1. When using an MCD64, select 1 or 2. -
Page 101: Data Saved And Loaded From Card
(5) Press and the selected bank will be formatted. (4) Press a to specify one of the following two formats. Data saved and loaded from card V50SYN... In this format, the card can be used to store voice data, performance data, or synthesizer setup data. -
Page 102: Save
Rhythm machine data Contents Data type Abbreviation Rhythm pattern data (100 patterns) Rhythm all data Rhythm song data (8 songs) Rhythm setup data Rhythm pattern data (100 patterns) Rhythm sequence data R.SEQ Rhythm song data (8 songs) Rhythm setup data Rhythm setup data SETUP Note:... -
Page 103: Load
Load chart on page 96-97 explains the contents of each type. You will get a message of “Are you sure?” Load allows you to load data from the card into V50 memory. (6) Press and the data will be loaded from card to V50 internal memory. -
Page 104: Midi Functions
When using the internal sequencer or an external keyboard is connected to the tone generator. When device to play the V50 in single play mode, set this this is set “off”, the keyboard is disconnected from to match the transmit channel of the MIDI device, the tone generator, and playing the keyboard in single or select “omni”... -
Page 105: Switch (Midi Control Change, Midi Aftertouch, Midi Pitch Bend)
About global channel Switch (MIDI control change, MIDI aftertouch, MIDI pitch bend) Global channel is when, in addition to the Normally, different instruments are set to receive a different MIDI channel, and be controlled separately by incoming Press then press the below “... -
Page 106: Condition (Note On/Off, Data Entry Assign)
Connect the MIDI THRU of the transmitting V50 below “ > Cond” to Press , then press the to the MIDI IN of the V50 being used as a tone get the following display. generator. Set one V50 to play even notes, and the other V50 to play odd notes. -
Page 107: Program Change Table Initialize
The program change table is explained in the following section. When this function is set to “off”, the V50 will not transmit program change messages. Also, if the device number is at any setting other than “off’, the V50 will transmit system exclusive data whenever a program is changed, and will not transmit a program change message. -
Page 108: Program Change Table Edit
1 – 16 Exclusive messages will be transmitted on the The program change number is displayed on the left channel specified here. (The next section ex- of the “ = ” , and on the right side, the V50 voice or plains the actual transmission.) performance number is displayed. - Page 109 Press the below “ > EXIT” to return to the previous display. Function Transmit exclusive messages. Settings VOICE, PFM, SETUP, SEQ, R.SEQ Explanation The selected type of exclusive message will be trans- mitted. Select one of the following five. VOICE Transmit voice data.
-
Page 110: Disk Functions
CARD..Save all data from the specified bank of data. the currently inserted card to disk. The V50 uses 3.5" 2DD disks. (It cannot use 3.5" 2D or 2HD disks.) Be sure to use the correct type You will then get the following display. (The "ALL"... -
Page 111: Delete
(6) Press the below “ > GO” and you will get a message of "Are you sure?". (7) Press and the specified data file will be loaded from disk into the V50’s memory. 106 Utility functions... -
Page 112: Rename
Rename The first steps of MDR operation are the same as when saving (In) and loading (Out) other V50 data. (However there is no selection of the type of data.) MDR disk files This changes the name of a disk file. The procedure is can also be deleted or renamed. -
Page 113: Directory
“ > Dir” to get the following (1) Read the original disk (source). display. (2) Store the data in V50 internal memory. (3) Write the data to the duplicate disk (copy). As you can see from step (2), the backup function... -
Page 114: Status
The upper line of the display will show the (3) Press the below “ > Job” to get the following percentage of the total disk that has been copied. display. Repeat steps (5) - (8) until backup is completed. When backup is completed, you will get the message “Backup completed !”... -
Page 115: Setup Functions
98.4 cents (approximately one half step up). “on” is the usual setting, when function data is This function allows you to tune the V50 to in- not disconnected. When set to “off”, function data struments that are not tuned to A3 = 440Hz. -
Page 116: Performance Effect (Delay)
This sets the delay performance effect. The delay effect adds additional, delayed notes of the same (or different) pitch as the originally played note. The V50 has memory for four independent settings of the performance delay effect; Delay1, Delay2, Delay3, and Delay4. -
Page 117: Performance Effect (Pan)
(2) Pitch shift to move between the left and right outputs. (You can also hear this effect through headphones.) Function The V50 has memory for four independent settings Set the pitch shift. of the performance pan effect; pan1, pan2, pan3, and Settings pan4. -
Page 118: Performance Effect (Chord)
Move the sound left or right depending on effect allows you to sound up to four notes by playing the note pitch. a single key. The V50 has memory for four independent settings (2) Direction of the performance chord effect; chord1, chord2, chord3, and chord4. -
Page 119: About Microtuning
Set the pitch for each note C-2 – G8 in the MIDI note shows the notes that will be played when you press the range. (This is a broader range than the V50 61- note specified key. For example, in the next example if you keyboard covers.) -
Page 120: Microtuning (Full Keyboard Edit)
Press press the below “ > Micro”, then press the below “OCT. Init” to get the following display. Select the micro tuning to initialize to. (If necessary, specify the tonic.) Then press the below “yes”. Press and the user octave tuning will be intialized. Select the micro tuning to initialize to. -
Page 121: Damp (Eg Forced Damp, Volume Damp)
A setting of “fast” takes the shortest time to turn off Damp (EG forced damp, voice damp) the oldest note, and a setting of “veryslow” takes the longest time. Press then press the below “ > Damp” As you can see from the diagram, EG forced damp to get the following display. -
Page 122: Other Functions
OTHER FUNCTIONS SEQ4 Setting for playing four instruments from Voice initialize the sequencer From single play mode or voice edit mode, press Setting for playing eight instruments from SEQ8 to get the following display. the sequencer Page 125 shows the initial settings for each of these. Press a below the desired initialization setting, and you will be asked “Are you sure?”. -
Page 123: Preset Load
Preset load Voice edit From performance play mode or performance edit, From single play mode, performance play mode, or voice press to get the following display. or performance edit, press The following example shows the voice display.) Function Press the below “... -
Page 124: Store Functions
STORE FUNCTIONS to select internal or card memory. When Voice store you have input the store destination, release You will be asked “OK?”, and when From single play mode, press to get the you press the performance will be stored. following display. -
Page 125: Copy Functions
COPY FUNCTIONS While continuing to press specify Effect copy then release the copy destination, You will be asked “OK?”, and when While setting voice or performance (EFFECT) you press the performance effect settings will data, press to get the following display. be copied to the specified performance effect. -
Page 126: Compare Functions
C O M P A R E F U N C T I O N S Performance compare Voice compare While editing a voice, press While editing a voice, press Function Function Compare the edited and original versions of a per- Compare the edited and original versions of a voice. -
Page 127: Appendix
APPENDIX TROUBLESHOOTING The V50 has a very large number of functions. Each one is closely related to the others, and one function can sometimes have an unexpected effect on another function. Another possibility is that the amp or mixer system is not operating correctly. This chapter will explain some difficulties you may encounter, and give possible reasons for them. - Page 128 Problem Possible reason Page reference Keys play the wrong pitch Is note shift set to a non-zero value? Is detune set to a non-zero value? Are micro tuning settings correct? Unsteady pitch Are you using detuned instruments in alternate assign? Can’t play chords Are the maximum note settings correct? Are you using a voice that is set to mono mode?
-
Page 129: Preset Voices
Possible reason Page reference Problem Is the rhythm machine volume raised? Rhythm machine does not make sound Preset performances Preset voices The V50’s preset memory contains the following per- The V50’s preset memory contains the following voices. formances. 124 Appendix... -
Page 130: Initialized Performance Settings
Initialized performance settings SNGL 4LYR DUAL 8LYR Appendix 125... -
Page 131: Initialized Voice Settings
SPLT SEQ8 SEQ4 Initialized voice settings 126 Appendix... -
Page 132: Specifications
SPECIFICATIONS Synthesizer section 61-note (C1 - C6), Keyboard: velocity and pressure sensitive 4-operator 8-algorithm FM, 8 selectable waveforms Tone generators: 16 notes maximum simultaneous, last note priority, 8-voice multi-timbral Polyphony: 100 internal voices Internal memory: 100 preset voices 100 internal performances 100 preset performances 12 (3 types x 4 each) performance effects (delay, pan, chord) micro tuning (octave, full) -
Page 133: Midi Data Format
MIDI DATA FORMAT SYNTHESIZER SECTION MIDI reception/ transmission block diagram 1. MIDI reception conditions... - Page 134 Transmitted when voice/performance is selected in SYNTH mode. However, program changes transmitted from the internal sequencer for data created on the V50 consist of bytes, and are transmitted as follows. See the reception section for the meaning of mode (IND/SGL/PFM).
- Page 135 G1 – G16). by the program change table. If the selected table entry contains a Contents are the same as for control changes. PFM number (PF00-99), it will cause the V50 to move from single to performance mode. 3.2.6 Channel mode messages...
- Page 136 PCED2 messages change data one parameter at a time. For kkkkkkk 4. System exclusive messages (parameter number) and ddddddd (data), see table 1. Performance mode is automatically entered when this message is re- 4.1 Parameter changes ceived. This unit transmits and receives the following 13 types of parameter change.
- Page 137 VMEM (voice memory) bulk data is the combination of VCED, ACED, ACED2, and ACED3. These messages change the setup data for rhythm and sequencer, one (twenty-five V50 voices) + (eight INIT VOICE voices) = 32 voices parameter at a time. Some of these parameters are not received while playing.
- Page 138 4.4 SYNTH system setup data bulk dump 5. System common messages (for SEQ/RHYTHM) This transmits and receives the system setup data of the V50. For 5.1 Status F2 (song position pointer) transmission, this is divided into four types of bulk data. (EF is divided into EFG1 –...
- Page 139 Table 1 Parameters in the table surrounded by "%%%" are parameters which have been added to or modified from TX81Z parameters. Parameters in the table surrounded by "###" are parameters which have been added to or modified from DX11 parameters.
- Page 141 < Table 2 >...
- Page 142 < Table 3 >...
- Page 145 < Table 4 >...
- Page 146 < Table 5 > Channel messages: Received only during RECORD. Transmitted only during PLAY and during overdub. For transmission/reception conditions, see the re- ception flow diagram and the transmission flow diagram. Mode messages: Neither received nor transmitted. System common messages: Only $F2 (song position pointer) is received.
- Page 147 SEQ SONG DATA FORMAT 1-2 System information (1) System realtime messages Song data consists of tempo, beat (time signature), and song name. It has the following format. (2) System exclusive messages (2.1) SEQUENCE DUMP (2.2) UNIVERSAL BULK DUMP (Seq song data) (Table 1) 1.
- Page 148 (Table 1) 1. Transmission data RHYTHM SECTION 1-1 Channel information (1) Channel voice messages Reception flow diagram 1-2 System information (1) System realtime messages Note: sw1: Reception channel in SETUP sw2: When in RECORD, the SETUP velocity on/off sw3: When in PLAY, this is "on" when the SETUP sync is set to "MIDI"...
- Page 149 (Table 2) 2. Reception data 2-1 Channel information Same as for reception 2-2 System information (1) System common messages (1.1) SONG POSITION POINTER STATUS 11110010 (F2) (2) System realtime messages Same as for reception (3) System exclusive messages (3.1) RHYTHM SEQUENCE DUMP Same as for transmission...
-
Page 150: Midi Implementation Chart
YAMAHA [ Digital Synthesizer——synthesizer part ] Date :12/28, 1988 Model MIDI Implementation Chart Version : 1 . 0 Remarks Transmitted Recognized Function . . . Basic Default 1 - 1 6 1 - 1 6 memorized Channel Changed 1 - 1 6... - Page 151 YAMAHA [ Digital synthesizer---sequencer part ] Date :12/28, 1988 Model V50 MIDI Implementation Chart Version : 1 . 0 Recognized Transmitted Remarks Function . . . Basic Default memorized 1-16 1 - 1 6 Channel Changed 1-16 1 - 1 6...
- Page 152 YAMAHA [ Digital Synthesizer---rhythm part ] Date :12/28, 1988 Model V50 MIDI Implementation Chart Version : 1 . 0 Remarks Transmitted Recognized Function . . . Basic Default 1 - 1 6 1 - 1 6 memorized Channel Changed 1 - 1 6...
-
Page 153: Performance Data Blank Chart
Performance data blank chart You may copy the following chart as a memo sheet for your performance settings. -
Page 154: Voice Data Blank Chart
Voice data blank chart You may copy the following chart as a memo sheet for your voice settings. -
Page 155: Important Safety And Installation Instructions
14. When not in use, always turn your Yamaha Digital Mu- 6. WARNING — Do NOT place objects on the power cord sical Instrument equipment "OFF". The power supply... -
Page 156: Special Message Section
SPECIFICATIONS SUBJECT TO CHANGE: The information situation. contained in this manual is believed to be correct at the time of printing. Yamaha reserves the right to change or modify Model specifications at any time without notice or obligation to update existing units. -
Page 157: Index
Effects 21 Backup 108 Envelope generator (AR, D1R, D2L, D2R, Bar graph 63 RR, shift) 45 Basic concepts of the V50 15 Envelope generator copy 120 Basic operation of the V50 16 Erase 93 Basics of FM tone generation 36... - Page 158 LFO (wave, speed, delay, key sync, PMD, Performance play mode display 20 AMD) 41 Performance play mode LEDs 20 Performance recall 117 Performance store 119 Performance Edit 23, 24 Making sound 11 Performances 19 Master tuning, synthesizer volume 110 Pitch envelope generator (PR1, PL1, PR2, PL2, PR3, Memory card 95 PL3) 47 Memory protect (internal, card) 109...
- Page 159 Switch (MIDI control change, MIDI aftertouch, MIDI pitch bend) 100 Save 97, 105 Switching instruments on/off 20 Search 75, 77 Switching modes 16 Select a song to record 82, 84 Synthesizer preparations 80 Select realtime recording 82 Select step recording 84 Select the sequencer function 82, 84 Sensitivity (PMS, AMS, AME, EBS, KVS) 43 Track mixdown 91...
- Page 160 YAMAHA V G 8 7 0 9 0 YAMAHA CORPORATION P.O.Box 1, Hamamatsu, Japan 89 01 1.5 CR R1 Printed in Japan...
- Page 161 YAMAHA V50 OM Yamaha Corporation of America 6600 Orangethorpe Avenue, P.O. Box 6600, Buena Park CA 90622-6600 9/20/98 198001...