Table of Contents
Advertisement
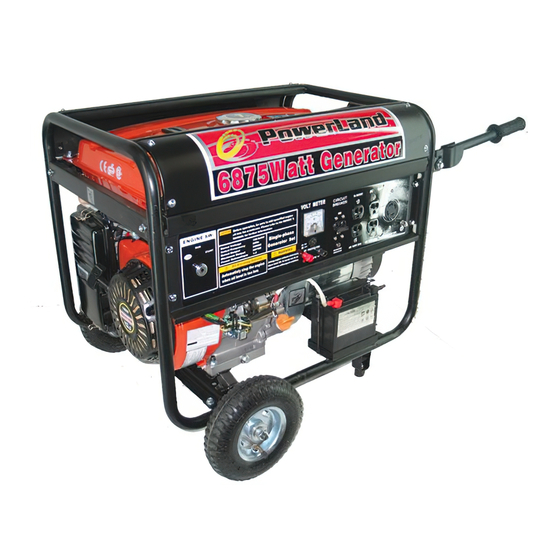
Owner's Manual
6875 WATT GASOLINE 13HP
This manual provides information regarding the operation and maintenance of these
products. We have made every effort to ensure the accuracy of the information in this manual.
We reserve the right to change this product at any time without prior notice.
Please keep this manual available to all users during the entire life of the generator.
Advertisement
Table of Contents

Related Manuals for PowerLand Generator


Summary of Contents for PowerLand Generator
- Page 1 We have made every effort to ensure the accuracy of the information in this manual. We reserve the right to change this product at any time without prior notice. Please keep this manual available to all users during the entire life of the generator.
- Page 2 FEATURES · Powerful Enough to Run Essential Appliances · During Power Outages · 120 and 240 Volt AC Outputs · 12V DC Output for Automotive Battery Charging · Low Oil Automatic Shutoff · Circuit Breaker for Overload Protection · Max Fuel Tank Capacity ·...
-
Page 3: Table Of Contents
TABLE OF CONTENTS GENERAL SAFETY PROCEDURES………………………………………………………………1 PACKAGE CONTENTS…………………………………………………………………………….4 GENERATOR COMPONENTS……………………………………………………………………..5 PREPARING THE GENERATOR FOR USE..…....………………………………………6 Using the Generator for the First Time........…………………………...6 Step 1-Add Oil.………………………………….…………………………………..6 Step 2- Add Gasoline.…………………………………………………....7 Step 3- Ground the Generator....……………………………………….7 Subsequent Use of the Generator.....…………………………………………..8 Step 1- Check the Oil......……………………………………………..8 Step 2-- Check the Gas Level......……………………………………...8... -
Page 4: General Safety Procedures
·Use outdoors ONLY in non-confined areas. ·Keep several feet of clearance on all sides to allow proper ventilation of the generator. WARNING: The exhaust from this product contains chemicals known to the State of California to cause cancer, birth defects, or other reproductive harm. - Page 5 ·Allow generator to run for several minutes before connecting electrical devices. ·Shut off and disconnect any malfunctioning devices from generator. · Do not exceed the Wattage capacity of the generator by plugging in more electrical devices than the unit can handle (see "PRECAUTIONS-OVERLOADING THE GENERATOR").
- Page 6 In addition to the above safety notices, please familiarize yourself with the safety and hazard markings on the generator.
-
Page 7: Package Contents
PACKAGE CONTENTS Your generator comes with the items listed below. Please check to see that all of the following items may be included with your generator, depending on your generator model. Screw driver Spanner Spark plug wrench... -
Page 8: Generator Components
(3) Fuel Gauge- Indicates the amount of fuel in the tank. (4) Fuel Cap- Access to the fuel tank for adding fuel. (5) Circuit Breaker- Reset switch that protects the generator from electrical overload. (6) 120/ 240 Volt AC Receptacle- Use to connect electrical devices that run 120 and/or 240 Volt, 60Hz, single phase, AC current (NEMA L14-30). -
Page 9: Preparing The Generator For Use
(19) Muffler- Reduces engine noise. PREPARING THE GENERATOR FOR USE Using the Generator for the First Time If you are using the generator for the first time, there are a few steps you must take to prepare it for operation. Step 1- Add oil The generator requires engine oil to operate properly. -
Page 10: Step 2- Add Gasoline
3. Slowly add unleaded gasoline to the fuel tank. Be careful not to overfill. Please refer to the chart in figure 4 to find the gas capacity of your generator model. The fuel gauge on the top of the generator indicates how much gasoline is in the generator gas tank. -
Page 11: Subsequent Use Of The Generator
Figure 5 – Attaching the Grounding Wire to the Generator Subsequent Use of the Generator If this is not your first time using the generator there are still steps you should take to prepare it for operation. IMPORTANT: At this point you should be familiar with the procedures described in the first portion of this section entitled "Using the Generator for the First Time."... -
Page 12: Step 3- Ground The Generator
WARNING: Failure to properly ground the generator can result in electrocution. Ground the generator by tightening the grounding nut against a grounding wire (see J figure 5). A generally acceptable grounding wire is a No. 12 AWG (American Wire Gauge) stranded copper wire. -
Page 13: Using The Generator
AC Usage You may connect electrical devices running on AC current according to their wattage requirements. The chart in figure 9 shows the rated and surge wattage of your generator according to its model number. The rated wattage corresponds to the maximum wattage the generator can output on a continuous basis. - Page 14 Once you have found the rated wattage requirement of each electrical device, add these numbers to find the total rated wattage you wish to draw from the generator. If this number exceeds the rated wattage of the generator, DO NOT connect all these device, Select a combination of electrical devices, which has a total rated wattage lower than or equal to the rated wattage of the generator.
- Page 15 Figure 11- Receptacles available on the generator SOME NOTES ABOUT POWER CORDS Long or thin cords can drain the power provided to an electrical device by the generator. When using such cords, allow for a slightly higher rated wattage requirement by the electrical device.
-
Page 16: Dc Usage
☆ If battery acid is swallowed, drink large quantities of milk and call a physician immediately. If the generator you buy is electric start one, once beginning to work, it will charge the battery on the generator automatically. At this time, you can see the indicator light is shining, after the battery is full, the light will be extinct. -
Page 17: Maintenance /Care
Figure 13- Recommended maintenance schedule Cleaning the Generator Always try to use your generator in a cool dry place. However, in the event your generator becomes dirty you may clean the exterior with one or more of the following: - A damp clothe... -
Page 18: Changing/Adding Oil
Figure 15- Engine Oil Capacity. It is only necessary to drain the oil from the crankcase if it has become contaminated with water or dirt. In this case, you can drain the oil from the generator according to the following steps: 1. -
Page 19: Air Cleaner Maintenance
NOTE: Never dispose of used motor oil in the trash or down a drain. Please call your local recycling center or auto garage to arrange oil disposal. Air Cleaner Maintenance Routine maintenance of the air cleaner helps maintain proper airflow to the carburetor. Occasionally check that the air cleaner is free of excessive dirt. -
Page 20: Spark Plug Maintenance
5. If you are re-using the spark plug, use a wire brush to clean any dirt from around the spark plug base and then re-gap the spark plug. 6. Screw the spark plug back into its place on the generator using the spark plug wrench. Replace the spark plug cap. -
Page 21: Storage/Transport Procedures
2. Remove the fuel filter cup (see "Removing the Fuel Filter Cup" earlier in this section. 3. Empty the fuel filter cup of any fuel. 4. With a receptacle underneath the generator to catch the gas, turn the fuel valve to the "on" position. Drain all the gas from the generator. -
Page 22: Specifications
Change the gas on the engine. contaminated or old gas Spark plug is dirty. Clean spark plug. Spark plug is broken. Replace spark plug. Move generator to a level surface to Generator is not on level prevent shutdown from surface. -
Page 23: Generator Assembly And Mounting
Clean or replace air cleaner. GENERATOR ASSEMBLY AND MOUNTING Generator is supplied with a wheel kit. If you want to install the wheel kit on your unit, please follow the instructions below. If you will not be using the wheel kit, skip this section. - Page 24 Figure 25 Figure 26 Figure 27 Figure 28 CHANGE THE CARBON-BRUSH...
- Page 25 CHANGE THE AVR...
-
Page 26: Wiring Diagram
WIRING DIAGRAM... -
Page 27: Exploded View And Parts List
EXPLODED VIEW AND PARTS LIST... - Page 28 11101 DC output post 11060 Wire harness Assy. 21000 Wheel Assy. GB5787-86 Flange bolt M5×12 21050 Pin. Washer φ20 16004 Generator end cover GB97.1-85 GB5789-86 Flange bolt M6×175 21040 Wheel comp 16003 Support stand 21020 Bracket Bolt M10×1.25×265 GB5789-86 21010...
- Page 30 Item Part Description Item Part Description 21100 Starter comp, recoil 11219 Casket, cylinder head GB5787-86 Flange bolt M6×8 11218 Bolt head, 8×10⁶ 12310 Fan, cover comp 23008 Packing, air cleaner GB5787-86 Flange bolt M6×12 22000 Stay assy. Manual choke 19003 Shroud comp 12012 Grommet fender...
- Page 31 13200 Pipe comp EX. 13202 Casket (B) EX. Pipe 11215 Plate, push rod guide 11214 Bolt, pivot 11205 Arm, valve rocker 11204 Nut, Arm, valve rocker 11206 Nut, pivot adjusting Flange bolt M8×40 GB5789-86 12100 Crankcase cover GB5789-86 Flange bolt M5×10 12301 Fan cover 121102...
Need help?
Do you have a question about the Generator and is the answer not in the manual?
Questions and answers
I HAVE A PDU6500E DIESEL GENERATOR AND HAVE NEVER HAD ANY PROBLEMS WITH IT. RECENTLY I CHANGED THE OIL AND NOW IT RUNS 10 SECONDS AND CUTS OFF.