Advertisement
Quick Links
Advertisement

Summary of Contents for Huawei EC1260
- Page 1 Huawei EC1260...
-
Page 2: Table Of Contents
Table of Contents Product Features ............................. 3 System Requirements ..........................3 Functional Features ..........................4 Know Your Device ........................... 5 Installation Procedure ........................... 6 Software Upgrade Procedure ........................12 Expanding Memory With Micro-SD Card ..................13 Compatibility List With OS And Laptops ..................14... -
Page 3: Product Features
Also, Agent can Demo the product on prospect’s computer without having to install a dialer, saving valuable time and effort. Works across India in Roaming at the same rates as at home. To use EC1260, the PC must meet the following requirements: Standard USB interface. Supporting OS o Windows 2000 SP4, Windows XP SP2, Windows Vista, Windows 7 o Mac OS X 10.4 and 10.5 with latest upgrades... -
Page 4: Functional Features
Supporting 800 MHz frequency band Supporting the CDMA2000 1x standard Supporting the CDMA2000 1xEV-DO Rev. A standard Supporting auto installing Supporting high-rate packet data services Supporting easy installation and uninstall of the driver on Windows 2000(SP4), Windows XP, Windows Vista, Mac (10.6), Windows 7 Functions Specifications... -
Page 5: Know Your Device
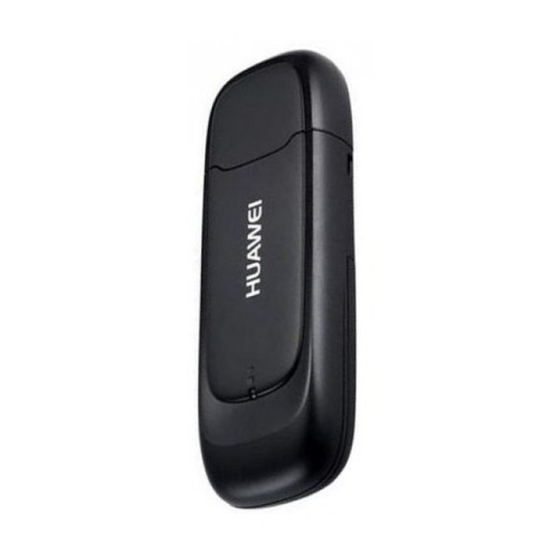
1. Cap 2. USB Port - It connects EC1260 to a USB port on a Desktop / Laptop) 3. LED Indicator – Indicates the status of the device On: EC1260 is powered on. Blinking once every 2s: EC1260 is searching for network or the network is not ... -
Page 6: Installation Procedure
Connecting Photon Plus Device to your PC: 1. Power on your PC before connecting Photon Plus with the PC. 2. Plug Photon Plus to the USB interface of the PC. (as shown below for Laptops and Desktops) Installing the Program: 1. - Page 7 8. Please input OTA password as (0000) and press Verify 9. Listen and follow the instructions. 10. Choose the language of your choice. Dial 1 for English, 2 for Hindi, 3 for Telegu, 4 for Marathi, 5 for Tamil, 6 for Kannada, 7 for Gujarati. 11.
- Page 8 12. Gently scratch the silver strip on the “Activation Card” you have received with the kit, to reveal your 14-digit PIN. Enter your 14-digit PIN mentioned on the Activation Card when requested. Prepaid Activation 1. To use the HSIA pre-paid connection, the correct username and password need to be configured on the dialer.
- Page 9 3. Click on the “Network Settings” option from the left hand panel. The Network Settings page opens up 4. Click on the “New” button to create a new profile. The New Profile page opens up.
- Page 10 5. Enter the following values: • Profile Name: Photon+ Pre-Paid • Access Number: #777 (Already filled in) • User Name: Photon+ No.@photon.ttsl.in (Your Photon Number is the 10 digit number starting with the digits 92 printed on your starter kit. For instance, if your Photon Plus No.
- Page 11 7. Ensure that the “Photon+ Pre-Paid” profile is selected, and click on the “Set as Default” button. 8. The profile gets selected as the default profile, and the word “Default” starts appearing in the Profile name along with Photon+ Pre-Paid. 9.
-
Page 12: Software Upgrade Procedure
Uninstalling the Program: 1. Choose Start > Control Panel. 2. Find the management program, and click Add/Remove program to uninstall the management program. Note: It is recommended to restart the PC after the uninstallation to ensure that the management program is completely uninstalled. 1. -
Page 13: Expanding Memory With Micro-Sd Card
4. The following window appears when the upgrade process is completed... -
Page 14: Compatibility List With Os And Laptops
1. Slide out and Remove Back Cover of the Device 2. Insert External Micro SD Card, make sure the card is properly placed as shown above 3. Slide Back the Back Cover in Position Points to Remember: • Micro SD card is an optional accessory; users will have to buy it separately from the market. •... - Page 15 GATEWAY Brand Model Compatibility Remark Vista Home Gateway MT6452 Premium SP1 32 bit HAIER Brand Model Compatibility remark Haier XP Home Edition SP3 32 bit Brand Model Compatibility remark Compaq 2133 mini Vista Home Basic SP1 32 bit Compaq 6510b Vista Business SP1 32 bit Vista Home Premium...
- Page 16 Brand Model Compatibility remark Vista Home E500 Premium SP1 32 bit SONY Brand Model Compatibility remark Vista Home SONY VGN-FW17_B Premium SP1 32 bit Vista Home Basic SONY 32 bit VGN-C51HA Vista Home Basic SONY 32 bit VGN-NR23H Vista Home SONY VGN-Z15_B Premium SP1...


