IRiver T10 Instruction Manual
Iriver portable player instruction manual t10
Hide thumbs
Also See for T10:
- Quick start manual (2 pages) ,
- Instruction manual (35 pages) ,
- User manual (3 pages)

Related Manuals for IRiver T10


Summary of Contents for IRiver T10
-
Page 1: Instruction Manual
Instruction Manual Thank you for your purchase. Please read this manual carefully before using your new player. http://www.iriver.com... -
Page 2: Table Of Contents
Contents Some features might not be available in every region. Before using the product Welcome ... 03 Homepage ... 03 Copyrights/Certification/Trademarks/Limited Liability ... 04 Safety Instructions ... 05 Chapter 1 I Getting started Components ... 09 Location of Controls ... 10 Connection/Installation ... -
Page 3: Before Using The Product
Thank you for your iriver purchase Thank you for your iriver purchase. The T10 comes complete with a long list of advanced features. It is important that you read the manual to ensure that you get the most out of your new player. -
Page 4: Safety Instructions
Before using the product Safety Instructions For your safety, please read before use. Product Do not drop or subject the device to impact. Keep away from harsh environments including humid, dusty, and smoky areas. Do not disassemble or modify. Keep out of direct sunlight and extreme heat and cold. -
Page 5: Getting Started
Chapter Components ... 09 Locating the controls ... 10 Product ... 10 LCD Screen display ... 11 Connection/Installation ... 12 Connecting to the PC ... 12 Connecting the earphones ... 13 Replacing the battery ... 13 WMP 10 installation ... 14... -
Page 6: Components
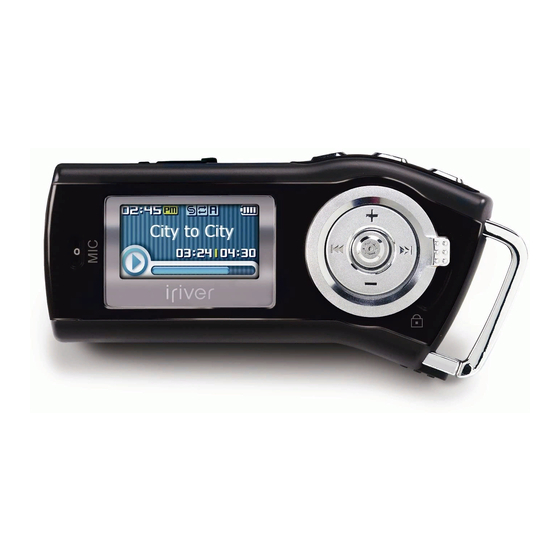
Getting started Components Accessories subject to change without notice and may vary from image shown. Earphone USB cable User Manual/ Warranty Battery(AA Type, 1EA) card/Quick Start Guide Getting started Locating the controls BROWSER Product Installation CD MUSIC RECORDING Neck strap for carrying FM RADIO FM RADIO Your player may differ sightly from that shown in the illustrations. -
Page 7: Connection/Installation
Stereo indicator Frequency Preset indicator Channel Number Frequency Range Frequency Bar USB port on the T10 USB cable USB port on the PC 3. Once installed, open Windows Explorer and an additional drive should be listed called “iriver T10”. -
Page 8: Connecting The Earphones
Getting started Connection/Installation Connecting the earphones 1. Connect the earphones jack to the earphone socket on the player. Replacing the battery 1. Open the battery cover. 2. Insert the battery. (AA 1.5V type x 1ea) Be sure to match the + and - ends of the battery with the diagram inside the battery compartment. - Page 9 Quick start Chapter Basic Usage ... 17 Turning on/off the player ... 17 Playing a music file ... 17 www.iriver.com Adjusting the volume ... 18 Selecting the function mode ... 18...
-
Page 10: Adjusting The Volume
Quick start Basic Usage Turning on/off the player Turning on the player Press the button to turn on the player. Previous function mode will be displayed. Note If the player does not power ON, please replace your battery. Turning off the player Press and hold the button. - Page 11 * Only for models including FM Radio function MUSIC ... 21 Playing a music file ... 21 Changing playback mode ... 23 Chapter A-B Repeat ... 24 Changing the sound EQ ... 24 Download Music & Playlists ... 25 Deleting a file or folder on the player ...
-
Page 12: Music
Basic operation MUSIC Playing a music file Release HOLD switch, then press turn on the player. Previous function mode will display. Press and hold button to display the function mode screen. Press button to select [MUSIC] mode, then press button to enter. Use the buttons to select a music file. -
Page 13: Changing Playback Mode
Basic operation MUSIC Changing playback mode While playing a music file, press the button to display the playback mode select screen. Press the button to select desired playback mode. The playback mode is changed to the selected mode. Note The following the icons displayed to indicate playback mode. Play all files in the player, then stop. -
Page 14: Download Music & Playlists
Repeat for all the songs or playlists you would like to add to your player. 4. Click the "Sync" menu button. On the right side the Sync screen choose the T10 from the download list. 5. Click Start Sync to transfer the songs or playlists on to the T10 player. -
Page 15: Browser/Image Viewer
Basic operation MUSIC Deleting a file or folder on the player While in stop mode, press the display music list screen. Select a file or folder to delete by using the button. : to go the upper folder : to go the sub folder : to select a file Click the button. -
Page 16: Image Viewer
3. Locate your image files(BMP), usually 4. Open a second My Computer window. found in "My Documents" then "My Double click on the iriver T10 device. Pictures", keep this folder open. 5. To get images on the player, drag and 6. -
Page 17: Fm Radio
Basic operation *FM RADIO * Only for models including FM Radio function Listening to FM radio Press and hold button to display the function mode Screen. Press the button to select [FM RADIO], then press the button to confirm. The previous station is displayed. Press the button to select your desired station. -
Page 18: Selecting Preset Memory
Basic operation *FM RADIO * Only for models including FM Radio function Saving an FM Radio frequency - Manually If PRESET is displayed, first press the PRESET mode. Press the button to select your desired station. Press the button to display Save Channel screen. -
Page 19: Recording
Basic operation *FM RADIO * Only for models including FM Radio function Deleting a channel If PRESET is not displayed, first press the button to enter PRESET mode. Press the button to display Delete Channel screen. Select the channel to delete by using the button. -
Page 20: Recording Voice
Basic operation RECORDING Recording voice Press and hold the button to display function mode screen. Select the [RECORDING] by using the button, then press button. The recording standby screen is displayed. Press the button to begin recording. Press button to pause the recording process. Press button again to restart recording. -
Page 21: Menu Operation
Chapter Menu configuration ... 41 Menu operation ... 42 Enter Settings Menu ... 42 Enter Sub Menu ... 42 Set the menu functions ... 43 Exit sub menu ... 43 Customizing the function settings ... 44 Sound ... 44 Display ... -
Page 22: Menu Configuration
Useful features Menu configuration Functions are subject to change with different firmware versions. Users can configure their own settings. * Only for models including FM Radio function Useful features Menu operation SRS Setting Enter Settings Menu User EQ Backlight Timer Screen Saver Scroll Speed Tag Info. -
Page 23: Customizing The Function Settings
Useful features Menu operation Set the menu functions Press the button to select sub menu. Press the button to enter Sub Menu setting screen. You can set, cancel or change sub menu by pressing the Exit sub menu Press the button to exit sub menu. -
Page 24: Customizing The Function Settings
The TIME can be set to : <OFF>, <10 SEC>, <30 SEC>, <1 MIN>, or <3 MIN> . The TYPE can be set to : <IRIVER>, <SPECTRUM> or <WAVEFORM>. Useful features Customizing the function settings (Menu) Display 3. -
Page 25: Display
Useful features Customizing the function settings (Menu) Display 5. Language Select the language to display the file name and ID3 tag information. Support 40 languages. 6. Battery Select Select the current battery. You can set <RECHARGEABLE> or <ALKALINE>. The player will manage the battery indicator icon to better match the usage level. -
Page 26: Recording
Useful features Customizing the function settings (Menu) Display 8. LCD Contrast Adjust the LCD screen contrast. The LCD contrast can be adjust from <-10> to <+10>. Useful features Customizing the function settings (Menu) Recording 1. *FM Setting You can set recording quality (<HIGH>, <MIDDLE> or <LOW>) when recording FM. -
Page 27: Timer
Useful features Customizing the function settings (Menu) Recording 3. Voice Detect The voice recording mode will automatically pause during silence. This is useful for recording over a long period of time to save memory. LEVEL : Set the relative level of sound needed to activate the recorder. - Page 28 Useful features Customizing the function settings (Menu) Timer 3. Date & Time Set the current date and time. 4. Alarm/*FM Rec. OFF : The Alarm and FM Record functions are disabled and the player will not power on at either indicated time. ALARM : At the time indicated in the "Set Alarm"...
-
Page 29: Advanced
Useful features Customizing the function settings (Menu) Advanced 1. Resume ON : Playback will resume from the previous location in a song when the player is stopped or powered off. OFF : Playback begins from the first track after the player is stopped or powered off. - Page 30 Refer to 61 page “Firmware Upgrade” for details. Note : What is Firmware? It is the operating system that works in the T10. iriver provides you with the latest and best features through firmware upgrade. Visit www.iriver.com to upgrade your firmware.
-
Page 31: Safety Information
Customer Support Chapter Chapter Firmware Upgrade ... 61 Troubleshooting ... 62 Specification ... 63 www.iriver.com Safety Information ... 64 FCC Certification ... 65... -
Page 32: Firmware Upgrade
Poor *FM Reception. Failed download of The title saved in T10 * Only for models including FM Radio function Should any problem persist after you have checked these symptoms, consult your iriver dealer or contact support at www.iriver.com. Solution Trouble... -
Page 33: Specification
Customer Support Specifications Memory Capacity 256 MB* Model No. T10 256MB Category Item Frequency range 20 Hz ~ 20 KHz Audio Headphone Output (L)15 mW + (R)15 mW (16 Ohm) max. Volume S/N ratio 90 dB(MP3) FM Frequency range 87.5 MHz ~ 108 MHz... -
Page 34: Fcc Certification
FCC Certification THIS DEVICE COMPLIES WITH PART 15 OF THE FCC RULES. OPERATION IS SUBJECT TO THE FOLLOWING TWO CONDITIONS: (1) THIS DEVICE MAY NOT CAUSE HARMFUL INTERFERENCE, AND (2) THIS DEVICE MUST ACCEPT ANY INTERFERENCE, RECEIVED, INCLUDING INTERFERENCE THAT MAY CAUSE UNDESIRED OPERATION. Note : This equipment has been tested and found to comply with the limits for a Class B digital device, pursuant to part 15 of the FCC Rules. - Page 35 Memo Memo...
Need help?
Do you have a question about the T10 and is the answer not in the manual?
Questions and answers