Table of Contents
Advertisement
Advertisement
Table of Contents

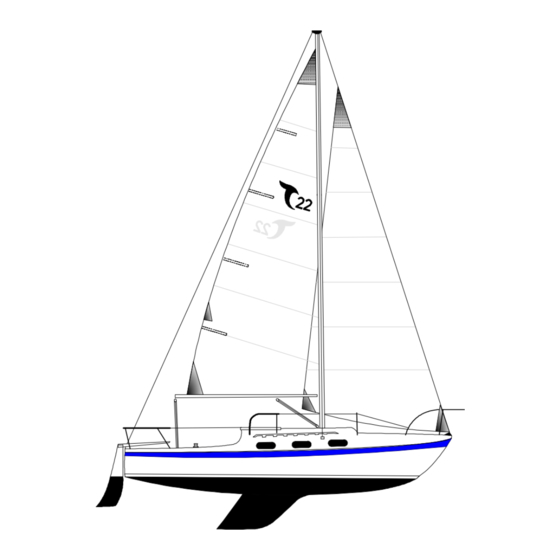
Summary of Contents for Tanzer 22
- Page 1 Tanzer 22 Owner's Guide...
-
Page 3: Table Of Contents
TABLE OF CONTENTS TABLE OF CONTENTS ...................... i LAUNCHING AND RIGGING ..................1 RUDDER AND TILLER....................1 OUTBOARD MOTOR AND BRACKET................2 CRANE LAUNCH ......................2 TRAILER LAUNCH......................3 RIGGING KIT ....................... 4 RIGGING AND STEPPING THE MAST................5 BOOM VANG......................13 MAINSAIL........................ - Page 4 ADJUSTABLE CLEW OUTHAUL ................. 38 MAINSHEET TRAVELLER.................... 38 GENOA GEAR......................39 SPINNAKER GEAR ....................40 SNUBBING WINCHES....................41 BOW PULPIT, LIFELINES & STERN RAIL ..............41 SCREENS........................42 SPECIFICATIONS ......................43...
-
Page 5: Launching And Rigging
LAUNCHING AND RIGGING RUDDER AND TILLER The tiller should be bolted to the rudder with the bolt and lock nut provided as shown in Figure 1. The lock nut should be tightened so that the friction between the fibreglass rudder head and the aluminium cheeks of the tiller is sufficient to retain the tiller at any angle in the vertical plane. -
Page 6: Outboard Motor And Bracket
OUTBOARD MOTOR AND BRACKET A 6 H.P. long shaft outboard motor will provide adequate power for most conditions. A more powerful 7.5 or 9.9 H.P., long shaft motor should only be considered if the boat is to be manoeuvred under power regularly and often in a very swift tidal stream or current where the possibility of encountering a strong headwind at the same time is likely. -
Page 7: Trailer Launch
You will require about 3'6" of water to launch your Tanzer 22 keel/centerboard model; this will vary with the height of the trailer bed. If it appears that this depth of water will not be available, or that the wheels of the trailer will run off the end of the ramp before the boat floats, do not attempt launching. -
Page 8: Rigging Kit
Main sheet blocks. There are two; one is a fiddle block fitted (12) with a beaked swivel and a cam action jamb cleat (11) and the other is a fiddle block (12) with a shackle. If your Tanzer 22 is... -
Page 9: Rigging And Stepping The Mast
Ref. Figure Description fitted with a traveller, different blocks are supplied, and these are described in the section dealing with the mainsheet traveller. Two aluminum spreaders. Jib tack shackle. (22A) Jib Halyard winch handle. Roller-Reefing handle. Low profile ventilator insert. RIGGING AND STEPPING THE MAST 1. - Page 10 2. Select one of the rope tails and secure one end to the thimble (19) at the end of the main halyard (9) (the thinner wire) with a bowline knot or eye space. Fasten the quick release shackle (18) to the large horizontal eye (20) on the foreside of the mast, take up the slack and make up rope tail on the cleat (21) on the starboard side of the mast (see Figure 2c).
- Page 11 (20) and make up rope tail on the other mast cleat (21) after taking two or three clockwise turns around the winch (22) mounted above the cleat. (see Figure 2c) 4. Select forestay (1), backstay (2) and topping lift (5). The swaged eyes on...
- Page 12 spreader as shown in Figure 2b, using the brass wire provided. The outer ends of the spreaders and the wire should also be covered with adhesive tape. Remove mast hinge bolt (27) taking care not to lose it or the lock nut (28) (Figure 2d).
- Page 13 10. The mast is now ready for stepping with the help of another person, place the heel of the mast on the mast step (16). Fasten the mast hinge (16A) to the mast step as shown in Figure 2d. Make sure that the self locking nut (28) is tightened.
- Page 14 Have a problem with leaking chainplates? Like 700 lbs of tension on the shrouds? Hmm. This information was missing from the original copy, so I’ve included an excerpt from Paul Coppin’s Tuning Guide on the Tanzer 22 Class Association website.
- Page 15 Fore and back stay tension is typically set at 15% of breaking strength of the wire, or 495 pounds, to start. Sailing tests can result in this increasing, but in no case should it ever exceed 825 lbs. or 47 on the Loos, and for most boats a maximum of 600 lbs.
- Page 16 Take up slack and secure in swivel jamb cleat. 17. On later models of the Tanzer 22, a small stainless steel eye strop is installed below each halyard cleat. The ends of the main and jib halyard rope tails should be inserted in these straps and then knotted with a figure of eight knot.
-
Page 17: Boom Vang
BOOM VANG A boom vang (82) may be installed on the Tanzer 22 as shown in Figure 9. If you have a boom vang plate (83), then the double block of the boom vang assembly is fitted with a small stainless steel key (84) and this should be inserted in the boom vang plate. -
Page 18: Outhaul
OUTHAUL The outhaul should be secured to the strap (41) on the port side of the boom. The other end should be passed through the cringle in the clew of the mainsail (42) and then made up on the cleat (43) (see Figure 6). An adjustable clew outhaul permits adjustment of the tension in the foot of the mainsail while sailing. -
Page 19: Cunningham
CUNNINGHAM Most Tanzer22 mainsails are fitted with a cringle (86) in the luff a few inches above the tack . This cringle allows the installation of a mainsail cunningham if desired as shown in Figure 10. The cunningham tackle (86A), should be secured to the upper hole in the aluminum plate (85) protruding from the sail groove at the base of the mast. -
Page 20: Mainsheet Traveller
MAINSHEET TRAVELLER A full cockpit-width mainsheet traveller may be fitted to the Tanzer 22 as illustrated in Figure 3a and Figure 16. If the mainsheet traveller is already installed on your boat, the mainsheet must be rove as shown and not as illustrated earlier for the standard mainsheet arrangement. -
Page 21: Spinnaker Gear
SPINNAKER GEAR If your boat is rigged for a spinnaker, the lines comprising the spinnaker halyard (64), topping lift (65) fore guy (66) , after guy (67) , and sheet (68) should be rove through the fittings provided as shown in Figs. 18, 19 & 19A. - Page 22 The spinnaker halyard block (69) must be secured to the crane (70) provided on the foreside of the masthead fitting, (see Figure 2a) and the spinnaker halyard (64) and the topping lift (65) should be rove through the respective blocks, before stepping the most.
-
Page 23: Bow Pulpit, Lifelines & Stern Rail
When not in use, the spinnaker pole (71) is stowed vertically on the foreside of the mast in the stowage ring (72) provided. Clip one end of the pole to the slide (73) on the spinnaker track (74), attach topping lift (65) and foreguy (66) release the slide and guide the pole into the ring or clip it to it. -
Page 24: Anchor Well Hatch
This covers the self draining anchor well in the foredeck. It serves to extend the working deck area and also prevents debris from accumulating in the well and blocking the drain. If this hatch is not already fitted to your Tanzer 22, it maybe purchased separately for owner installation as follows 1. -
Page 25: Hoisting Sail
HOISTING SAIL Unless the wind is light, sails should not be hoisted until the boot can be maneuvered head to wind. MAINSAIL The quick release shackle in the main halyard (18) should be secured to the cringle in the head of the mainsail. Before hoisting the sail, release the main sheet from its jamb cleat and check that it is free to run. - Page 26 The quick release shackle (18A) is fastened to the cringle (47) at the head of the sail (Figure 7A). Hoist the sail by pulling on the jib halyard. When fully hoisted, three to four clockwise turns of the rope tail should then be taken around the jib halyard winch (Figure 2c).
-
Page 27: Genoa
The tension in the luff of the jib (or genoa) should be considerably more than that given to the luff of the mainsail; that is why a winch is supplied as standard equipment. Nevertheless tension should be appropriate to the wind strength - very tight for strong winds and less tight for light airs. -
Page 28: Spinnaker
clockwise around the winch (92) to the cleat (93) . The position of the genoa sheet blocks will require adjustment to suit either the No. 1 or No. 2 genoas. These blocks provide the means with which to adjust the tension in the foot and leech of the genoas. -
Page 29: Reefing
REEFING ROLLER REEFING Your Tanzer 22 may be equipped with a geared roller reefing gooseneck (81) (see Figure 4). In order to rotate the boom, the roller reefing handle should be inserted in one of the square holes in either side of the mechanism and turned. -
Page 30: Accessories
ACCESSORIES FOREHATCH VENTILATOR The forehatch of your Tanzer 22 may be fitted with a circular watertight opaque deck light with a screened opening. This deck light may be removed by inserting a screwdriver in the slot provided. A low profile ventilator may then be inserted. -
Page 31: Cockpit Awning
COCKPIT AWNING Figure 13 illustrates the optional Tanzer 22 cockpit awning. No additional deck fittings are required in order to install this awning: 1. Unroll and place over boom; battens should be on the underside and the small flaps should be aft. -
Page 32: Portable Toilets
ICE BOX Your Tanzer 22 is fitted with a self draining 23/2 cu. ft. ice box as standard equipment. The ice box drains into a one gallon container below the starboard quarter berth. Prior to use make sure that the drain hose is fitted to the nipple on the bottom of the icetray, and that the hose is inserted in the container. -
Page 33: Electrical System
ELECTRICAL SYSTEM The standard Tanzer 22 electrical system is a 12 volt D.C. system powered by a 40 amp./hr. wet cell battery. The circuit diagram and location of the battery, switch and fuse panel, conduit, wiring and electrical fixtures are shown in Figure 15. - Page 34 The terminals should be connected to the battery with the thumbscrews provided. The circuits in the electrical system are labeled on the switch panel as follows: • Running Lights: This switch operates the 10 point (112M2 degrees) port (red) and starboard (green) navigation lights; and the white 12 point (135 degree) stern light.
- Page 35 of the bow light and spreader lights, check that the deck plugs are properly connected. The conduit and battery box shown in Figure 15 are installed in all boots as a standard feature, irrespective of whether the electrical system has been fitted. This conduit allows the installation of electrical wiring after the boat is built.
-
Page 36: Maintenance
However, attention should be given to the following: ANTI-FOULING Anti-fouling paint should be applied to the bottom of your Tanzer 22 if it is to be moored in either fresh or salt water for any length of time. There are many brands available. -
Page 37: Gelcoat Repairs
The interior, including all lockers, ice box, and the bilge, should be washed with warm water and a mild detergent . The bilge in particular should be kept free of dust, fluff and other debris that accumulates there. GELCOAT REPAIRS Gelcoat is the pigmented layer of polyester resin that forms the outer skin of all molded fiberglass components of your boat. -
Page 38: Teak
TEAK All external teak woodwork should be well oiled at frequent intervals; say twice a month during the sailing season. Use one of the proprietary teak oils that are available for teak furniture. If teak is not oiled regularly, it will, after exposure to sun and rain, weather to a gray colour. -
Page 39: Care Of Sails
CARE OF SAILS The sails supplied with your boat by the factory are made of synthetic fibres; all except the spinnaker are of polyester fibre called Dacron in North America, and Terylene in England. The spinnaker is make of nylon. Contrary to cotton sails, they do not require careful stretching and breaking in when new. -
Page 40: Centerboard Assembly
(3/8" dia.) The pin may be driven out by hammering a suitable sized punch in the small hole. With the approval of the Tanzer 22 Class Association, the design of the centreboard in the keel centreboard model was modified with hull no. 291. This resulted in a change in the position and diameter of the centreboard pin. - Page 41 At least once every year all winches should be completely dismantled, cleaned and re-lubricated throughout. When not in use, it is recommended that all winches be covered.
-
Page 42: Additions
ADDITIONS ADJUSTABLE CLEW OUTHAUL An adjustable clew outhaul may be installed as follows: 1. The aluminum cleat and stainless steel deck strap for the standard clew line should be removed, and the holes plugged with rivets. 2. Nicropress eye and thimble (58) in wire. Secure to boom with rivet. 3. -
Page 43: Genoa Gear
track stops (52) should be secured to the cockpit seats (P/S) after the travelIer track has been installed. Those portions of the track outboard of the fibreglass support should be bolted directly to the cockpit seats (P/S). GENOA GEAR The genoa gear as shown in Figure 14 may be installed as follows: 1. -
Page 44: Spinnaker Gear
4. Cheek block (P/S) (91). Install with open end of block forward using bolts. Holes should be caulked. 5. Genoa winch (P/S) (92). Disassemble winches by removing the top retaining screw that is at the bottom of the handle socket. The drum and socket casting may then be fitted together and removed from the base. -
Page 45: Snubbing Winches
19" as shown in Figure 19.. If not already fitted to your Tanzer 22, they may be installed as follows 1. Remove the camb action jamb cleats or clam cleats presently installed. - Page 46 N.B. Early models of the Tanzer 22 were not fitted with teak trim around the forehatch and main companionway. Owners of such models wishing to install...
-
Page 47: Specifications
SPECIFICATIONS L 0.A 22' 6" SAIL AREAS L W.L 19' 9" Main Beam 7' 10" Working jib Draft No. 1 genoa Fin keel 3' 5" No. 2 genoa 162. Keel-c/b up 2 ' 0" Spinnaker (approx) 375. Keel-c/b down 4 ' 0"... - Page 48 Item Dia. Length Forestay with turnbuckle 2/3 open + 5/32" X lxl9 28'6 3/8" toggle Backstay with turnbuckle 1/3 open + 5/32" X lxl9 30'7 1/4" toggle Upperstays with turnbuckle 2/3 open 5/32" X lxl9 27"1 7/8" + toggle Lowerstays with turnbuckle 1/2 open 5/32"...
- Page 49 All cordage should be pre-stressed Dacron, either three strand or braided with braided preferred for all sheets.
Need help?
Do you have a question about the 22 and is the answer not in the manual?
Questions and answers