Table of Contents
Advertisement
Quick Links
Advertisement
Table of Contents

Related Manuals for IOGear GPSU21


Summary of Contents for IOGear GPSU21
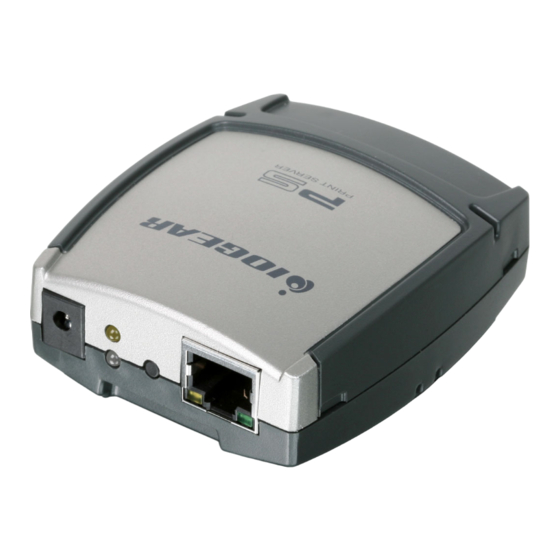
- Page 1 1-port USB 2.0 Print Server Manual (GPSU21)
- Page 2 All information furnished here is for informational purposes only and is subject to change without notice. IOGEAR, Inc. assumes no responsibility for any inaccuracies or errors that may appear in this document.
- Page 3 This eliminates the need to place the printer right next to the computer. Print jobs can be sent to a printer in another country just as easily as to a printer in the same office. Why bother sending a degraded fax image while you can print an original at the destination? We hope that you will enjoy using your Print Server and find it to be a useful solution.
-
Page 4: Table Of Contents
Table of Contents Package Contents ...5 Features ...6 System Requirements ...7 Hardware Installation...8 Software Installation - Windows...9 Software Installation - Mac ...16 Software Installation – IPP ...18 Technical Support...21 Warranty ...22... -
Page 5: Package Contents
This package should contain: • USB 2.0 Print Server • CAT5 Patch Cable • Power Adapter • Installation CD • User Manual • Warranty/Registration Card If any items are damaged or missing, please contact your dealer. Package Contents... -
Page 6: Features
Features • Easily connects your USB printer to a network • Allows multiple computers to share one USB printer on the network • Print from any computer on your network or from across the Internet • Supports DHCP Client and multiple network protocols •... -
Page 7: System Requirements
This USB 2.0 print server supports: • Windows 98SE/ME/2000/XP/2003 • Mac OS 9.22 or later • Unix/Linux • Printer with a USB connection System Requirements... -
Page 8: Hardware Installation
Hardware Installation Connect a USB cable from the printer to the USB port on the print server. Connect one end of the ethernet patch cable to the ethernet port on the print server. Connect the other end of the ethernet cable to the network. -
Page 9: Software Installation - Windows
Software Installation - Windows Insert the Setup CD into your computer. The setup utility should launch automatically. If it does not, browse to your CD drive and launch the autorun.exe file from the CD. Click the Setup Wizard option from the main menu. Software Installation - Windows A wizard will step you through the entire process on Windows computers. - Page 10 Software Installation - Windows The wizard will scan your network for the print server and display the results in a list. If no server is found, disable all firewall software and any extra network cards (such as a wireless adapter) on your computer except the one the print server is on and click Refresh to search again.
- Page 11 Software Installation - Windows Changing the network settings of the print server to a fixed IP address is not necessary but will provide more stability in the event of a power outage, and can be useful if you are setting up IPP to print over the internet.
- Page 12 Software Installation - Windows Here you can specify the network settings the print server will use. If you will be printing from the internet, it is important that the Gateway IP Address is set to the IP of your router. Click Next to continue. Review the settings you have entered carefully and click Next to confirm that they are correct and save them to the print...
- Page 13 Next to continue. If the printer you are setting up does not show up in the list, click Add New Printer and install your printer’s drivers as needed. If asked which port to use, choose LPT1 but do NOT print a test page yet.
- Page 14 DHCP to set them automatically if the print server is connected to a router. A summary screen will show the name of the printer to be modified and the IP of the print server which will be used. If this information is correct click Next.
- Page 15 Software Installation - Windows Setup of your print server is now complete. Click Finish to close the wizard.
-
Page 16: Software Installation - Mac
No software from the Setup CD is needed on Macintosh systems. Simply open the Print and Fax settings from your System Preferences window. Click the plus (+) button to setup a new printer. At the top of the Printer Browser, click the icon for IP printer. - Page 17 Select the LPD protocol, then type in the IP address of the print server. Type “lp1” with lowercase letters for the name of the Queue. Name the new printer and select the model below. Click Add when you are finished, and you are ready to print.
-
Page 18: Software Installation - Ipp
Then simply set up IPP using the address http://(print-server-ip):631/lp1 as shown here on an example Windows XP system. Click Add a printer from your printers and faxes window to begin. Click Next when the Add Printer Wizard appears. - Page 19 Select the option for a network printer, then click Next. Software Installation – IPP Select the option to connect to a printer on the internet, and type in the full IPP address as shown. You must use the external, or WAN, IP address of your router if the print server is behind one.
- Page 20 Software Installation – IPP The wizard will ask you to choose the model of your printer. Click OK when you have chosen the appropriate driver. Click Finish to complete the wizard and begin printing to your home or office printer...
-
Page 21: Technical Support
Technical Support If you need technical support, please check out our IOGEAR Tech Info Library (TIL) at http:// www.iogear.com/support for the latest tips, tricks, and troubleshooting. The TIL is designed to provide you with the latest technical information about our products. Most of the answers to your questions can be found here, so please try it out before contacting technical support. -
Page 22: Warranty
Warranty IN NO EVENT SHALL THE DIRECT VENDOR’S LIABILITY FOR DIRECT, INDIRECT, SPECIAL, INCIDENTAL OR CONSEQUENTIAL DAMAGES RESULTING FROM THE USE OF THE PRODUCT, DISK, OR ITS DOCUMENTATION EXCEED THE PRICE PAID FOR THE PRODUCT. The direct vendor makes no warranty or representation, expressed, implied, or statutory with respect to the contents or use of this documentation, and especially disclaims its quality, performance, merchantability, or fitness for any particular purpose. - Page 23 Contact us 23 Hubble • Irvine, CA 92618 • (P) 949.453.8782 • (F) 949.453.8785 • www.iogear.com...
Need help?
Do you have a question about the GPSU21 and is the answer not in the manual?
Questions and answers