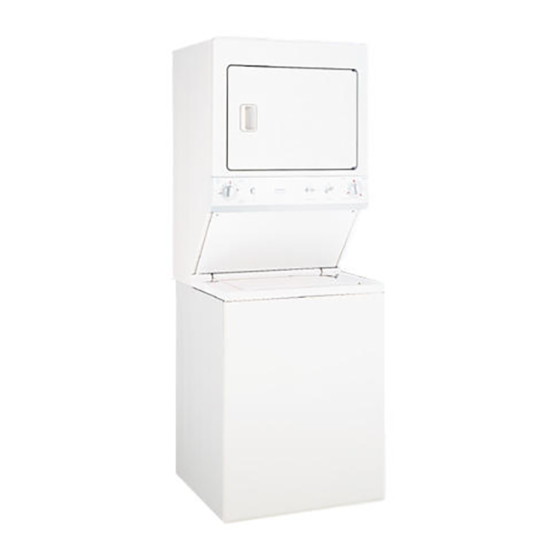
GE Spacemaker WSM2780 Installation Instructions Manual
Gas
Hide thumbs
Also See for Spacemaker WSM2780:
- Use and care manual (24 pages) ,
- Installation instructions manual (8 pages) ,
- Use and care manual (25 pages)
Table of Contents
Advertisement
Quick Links
Download this manual
See also:
Use and Care Manual
WARNING –
• To reduce the risk of severe injury or death, follow all installation instructions.
• Clothes dryer installation must be performed by a qualified installer.
• Install the clothes dryer according to these instructions and in accordance with local codes.
• This dryer must be exhausted to the outdoors.
• Use only 4" rigid metal ducting for exhausting the clothes dryer to the outdoors.
• DO NOT install a clothes dryer with flexible plastic ducting materials. If flexible metal (semi-rigid or foil-type) duct is installed,
it must be UL-listed and installed in accordance with the instructions found in "Connecting the Dryer to House Vent" on page
6 of this manual. Flexible ducting materials are known to collapse, be easily crushed, and trap lint. These conditions will
obstruct dryer airflow and increase the risk of fire.
• Do not install or store this appliance in any location where it could be exposed to water and/or weather.
• Save these instructions. (Installers: Be sure to leave these instructions with the customer.)
• This appliance must be properly grounded and installed as described in these instructions.
CALIFORNIA SAFE DRINKING WATER AND TOXIC ENFORCEMENT ACT
This act requires the governor of California to publish a list of substances known to the state to cause cancer, birth defects or other
reproductive harm and requires businesses to warn customers of potential exposure to such substances. Gas appliances can cause minor
exposure to four of these substances, namely benzene, carbon monoxide, formaldehyde and soot, caused primarily by the incomplete
combustion of natural gas or LP fuels. Properly adjusted dryers will minimize incomplete combustion. Exposure to these substances can be
minimized further by properly venting the dryer to the outdoors.
IMPORTANT
• Exhausting the dryer to the outside
is required to prevent large
amounts of moisture, lint and other
products of combustion from being
blown into the room.
• Service information and a wiring
diagram are located in the dryer
access panel.
TOOLS NEEDED
Slip-joint pliers
Phillips-head and flat-blade screwdrivers
Ratchet with 3/8" socket
Carpenter's level
Adjustable wrenches
Pipe thread sealer
49-90382
05-09 JR
Installation instructions
for your new
Before you begin – Read these instructions completely and carefully.
IMPORTANT – OBSERVE ALL GOVERNING CODES AND ORDINANCES.
Note to Installer – Be sure to leave these instructions with the Consumer.
Note to Consumer – Keep these instructions with your Owner's Manual for future reference.
POTENTIAL FIRE AND SHOCK HAZARD
"
73
1
⁄
2
54
5
⁄
Spacemaker
Laundry
WSM2780 Gas
PRODUCT DIMENSIONS
"
9
⁄
3
8
Vent
5
"
16
Water
inlets (rear)
29
⁄
7
Drain outlet
16
(rear)
"
3
3
⁄
4
27"
"
16
1
⁄
4
Gas supply
pipe (rear)
51°
"
1
⁄
4
43"
"
41
⁄
1
4
"
36
1
⁄
16
"
30
™
"
25
1
⁄
4
"
2
1
⁄
2
47"
"
1
⁄
7
8
"
4
13
⁄
16
"
11
7
⁄
16
"
13
⁄
16
Advertisement
Table of Contents

Summary of Contents for GE Spacemaker WSM2780
- Page 1 Spacemaker ™ for your new Laundry WSM2780 Gas Before you begin – Read these instructions completely and carefully. IMPORTANT – OBSERVE ALL GOVERNING CODES AND ORDINANCES. Note to Installer – Be sure to leave these instructions with the Consumer. Note to Consumer – Keep these instructions with your Owner’s Manual for future reference.
-
Page 2: Installation Instructions
Installation Instructions UNPACKING SPACEMAKER UNPACKING SPACEMAKER (CONT.) ™ ™ NOTE: Remove tape and two corner pads from rear The tub blocking pad, shipping bolt and plastic bottom corners of appliance. spacer should be retained for use if the appliance is transported at a later date. -
Page 3: Connecting To Plumbing Facilities
Installation Instructions MOVING SPACEMAKER TO OPERATING CONNECTING TO PLUMBING FACILITIES ™ LOCATION CAUTION: Be sure water supply lines have been thoroughly flushed to remove particles that Remove the 2 screws securing the access panel might clog the washer filter screens. to the dryer cabinet. -
Page 4: Connecting To Gas Supply
Installation Instructions CONNECTING TO GAS SUPPLY CHECKING APPLIANCE OPERATION Connect the gas supply to the dryer. If codes Make sure all packing and shipping materials allow, use new flexible metal tubing (design are removed, including the washer shipping bolt certified by the American Gas Association). and plastic spacer block. -
Page 5: Plumbing Information
Installation Instructions PLUMBING INFORMATION ELECTRICAL CONNECTION INFORMATION WATER SUPPLY REQUIREMENTS CAUTION: For personal safety: • HOT AND COLD WATER FAUCETS – Must be within 42″ of the appliance water inlet hose connections. The TURN OFF ELECTRICITY AT POWER SOURCE (CIRCUIT faucets must be 3/4″... - Page 6 Installation Instructions EXHAUST (CONT.) ADJUSTING FOR ELEVATION EXHAUST DUCT LENGTH INFORMATION • Gas clothes dryers input ratings are based on sea level operation and need not be adjusted for operation at • The MAXIMUM ALLOWABLE length of the exhaust system or below 2000 ft.
-
Page 7: Mobile Home Installation
Installation Instructions MOBILE HOME INSTALLATION CONNECTING THE DRYER TO HOUSE VENT (CONT.) • Installation must conform to Manufactured Home UL-Listed Flexible Metal (Foil-Type) Transition Duct Construction and Safety Standard, Title 24 CFR, • In special installations, it may be necessary to connect Part 32-80. -
Page 8: Miscellaneous Requirements
Installation Instructions MISCELLANEOUS REQUIREMENTS WARNING – LOCATION For your safety, the information in this manual must be followed to minimize the risk of fire or explosion or to • The appliance must be installed on firm flooring to prevent property damage, personal injury or loss of life. minimize vibration during spin cycles.


