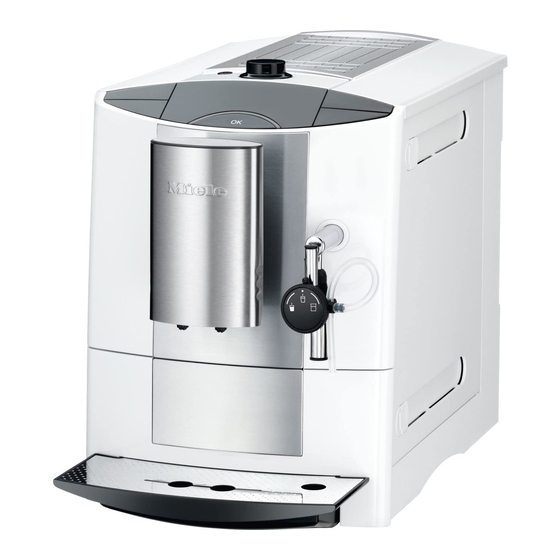
Miele CM 5100 Operating Instructions Manual
Freestanding coffee machine
Hide thumbs
Also See for CM 5100:
- Operating instructions manual (76 pages) ,
- Datasheet (5 pages) ,
- Operating instructions manual (76 pages)
Table of Contents

Related Manuals for Miele CM 5100


Summary of Contents for Miele CM 5100
-
Page 1: Operating Instructions
Operating instructions Freestanding coffee machine CM 5100 en - AU, NZ To avoid the risk of accidents or damage to the machine, it is essential to read these instructions before it is installed and used for the first time. M.-Nr. 07 995 370... -
Page 2: Table Of Contents
Contents Packing material / Disposal of old machine ......5 Guide to the machine ..........6 Warning and Safety instructions . - Page 3 Contents Pre-brewing the coffee ..........30 Brewing temperature .
- Page 4 Contents Coffee bean container ..........52 Brew unit .
-
Page 5: Packing Material / Disposal Of Old Machine
Please do not therefore dispose of it The original packaging will also be with your household waste. useful should you wish to return the coffee machine to Miele for servicing. Please dispose of it at your local community waste collection/recycling centre, or contact your Miele Chartered Agent for advice. -
Page 6: Guide To The Machine
Guide to the machine a Cup heating surface k Cappuccinatore dial for selecting hot milk, hot water and milk froth b Bean container, ground coffee chute and rotary control for selecting l Air intake nozzle fineness of ground coffee m Milk tube c Display and controls n Dispensing spout d Steam and hot water spout... -
Page 7: Display And Controls
Guide to the machine Display and controls Control How to operate Function Coffee button / Press For dispensing coffee Espresso button . Press For dispensing espresso On/Off button - Press For switching the coffee machine on or off (Standby mode) Rotary control Turn clockwise or For displaying options or settings... -
Page 8: Warning And Safety Instructions
It is not designed for use outside. Any other usage is not supported by the manufacturer and could be dangerous. Miele cannot be held liable for damage resulting from incorrect or improper use or operation. This coffee machine is not intended... -
Page 9: Technical Safety
Warning and Safety instructions Technical safety The mains connection cable should not hang down. Someone could trip Before setting up the machine, over it and the machine could be check it for any externally visible damaged. Excess cable can be damage. -
Page 10: Correct Use
Miele original steam could spatter from the nozzle spare parts. Only genuine Miele original or it could dislodge. spare parts guarantee the safety of the – The machine must not be used for machine. - Page 11 Steam could cause a short circuit. – Descale the coffee machine regularly using the appropriate number of Miele descaling tablets for the water hardness level in your area. Descale the machine more frequently in areas with very hard water. The...
-
Page 12: Functions
Functions Coffee specialities The coffee machine will remind you when to With your coffee machine you can prepare coffee and espresso at the – empty the waste container, press of a button. – degrease the brew unit or Each cup of coffee or espresso is made –... -
Page 13: Preparing The Coffee Machine For Use
"l". coffee beans (see "Filling the coffee ^ Press the On/Off button -. bean container"). The welcome message MIELE - ^ Fill the water container with fresh, WILLKOMMEN will appear in the cold tap water (see "Filling the water display briefly. -
Page 14: Water Hardness
Preparing the coffee machine for use To set the clock display The following will appear in the display: ^ If you want the time to be shown as a SYSTEM FILLING UP 12-hour clock, turn the rotary control START until 12 H appears. ^ Press the OK button. -
Page 15: Measuring The Water Hardness
Preparing the coffee machine for use – Level 2 (medium): Setting the water hardness Local water hardness level 1 ^ In the main menu, press the OK 8.4-14 °d (1.5-2.5 mmol/l) button for two seconds. Water flow rate: approx. 100 l Steam flow rate: approx. -
Page 16: Filling The Water Container
Filling the water container ^ Fill the water container with fresh, The quality of the water plays an important part in the overall quality of cold tap water up to the "Max." the coffee. marker. ^ Replace the water container in the The water container should therefore be emptied and filled with fresh tap water coffee machine. -
Page 17: Filling The Coffee Bean Container
Filling the coffee bean container Fill the coffee bean container with roasted espresso or coffee beans if you want to use freshly ground coffee beans for each cup of espresso or coffee. Alternatively, you can make coffee or espresso with ready ground coffee (see "Making espresso and coffee using ready ground coffee"). -
Page 18: Switching On And Off
Switching on and off You can use the On/Off button - Switching off (standby) to switch the coffee machine ^ Press the On/Off button -. on and off, if the master switch at the back of the machine is switched on. If the automatic rinsing function has been switched on, the pipework will be rinsed through before the coffee... -
Page 19: Pre-Heating Cups
Pre-heating cups Pre-heating cups using the Cups should always be pre-heated to allow the flavour of the coffee to cup heating function develop and be retained. The smaller the volume of coffee/espresso and the thicker the cup, the more important it is to pre-heat the cup. -
Page 20: Making Coffee Or Espresso
Making coffee or espresso Making coffee or espresso Making two portions of coffee or espresso at the same time When the / or . button is pressed, the coffee machine grinds the beans and You can select two portions of coffee or then uses the freshly ground beans to espresso at the same time. -
Page 21: Cancelling Preparation
Making coffee or espresso Adjusting the coffee spouts to To make a double portion of coffee or espresso, the correct cup height ^ place one cup under both coffee You can adjust the coffee spouts to suit spouts. the height of the cup you are using so that the coffee or espresso will not cool ^ Press the / button twice, to make a down as quickly and the crema will... -
Page 22: Making Coffee Or Espresso Using Ready Ground Coffee
Making coffee or espresso using ready ground coffee To make espresso or coffee using ready ground coffee, you add a portion of ground coffee to the ground coffee chute. This gives you the option of preparing a cup of decaffinated coffee, for example, even although the coffee bean container is filled with roasted coffee beans. -
Page 23: Preparing Coffee Or Espresso Using Ready Ground Coffee
Making coffee or espresso using ready ground coffee Preparing coffee or espresso Cancelling preparation using ready ground coffee Coffee preparation can be cancelled while STOP? is showing in the display. You can now select whether you want The ground coffee will be directed into to dispense a coffee or an espresso the waste container. -
Page 24: Frothing And Heating Milk
Frothing and heating milk Preparing milk froth You can use the coffee machine to heat or froth milk. The coffee machine draws the milk through a tube from the container, e.g. a milk carton. Steam is then used to heat the milk in the cappuccinatore. It can also be frothed if milk froth is required. -
Page 25: Preparing Hot Milk
Frothing and heating milk Preparing hot milk Cancelling preparation Milk preparation can be cancelled while STOP? is showing in the display. ^ Press the OK button. Milk preparation will be cancelled. After preparing milk The cappuccinatore can become clogged with milk residues so it should be rinsed through if more than an hour has elapsed since a drink with milk has been prepared (see "Rinsing the... -
Page 26: Temperature Of The Milk And Consistency Of The Milk Froth
Frothing and heating milk Temperature of the milk and Coffee specialities consistency of the milk froth You can use the coffee machine to prepare these easily and quickly. You can use the cappuccinatore dial to adjust the temperature of the milk and For a Cappuccino: the consistency of the milk froth. -
Page 27: Preparing Hot Water
Preparing hot water The temperature of the hot water dispensed by the coffee machine is not suitable for making black tea, but ideal for warming up cups and like. If you have previously used the cappuccinatore to prepare hot milk or milk froth: ^ Rinse the cappuccinatore with water (see "Cleaning and care"). -
Page 28: Coffee The Way You Like It
Coffee the way you like it You can customise the coffee machine – Only adjust the grinder one setting at to suit your exact requirements. You a time. – Grind the coffee beans again if you – adjust the grinder setting, want to adjust the grinder to the next setting. -
Page 29: Amount Of Coffee
Coffee the way you like it Amount of coffee You can alter the amount of coffee by selecting a different setting. There is a The coffee machine can grind and choice of three settings: brew 6-14 g of coffee per cup. The greater the quantity, the stronger the –... -
Page 30: Pre-Brewing The Coffee
Coffee the way you like it Pre-brewing the coffee Brewing temperature When the pre-brewing function is The ideal brewing temperature will switched on, the freshly ground coffee depend on is first moistened with a little hot water. – the type of coffee, Then the remaining water is forced –... - Page 31 Coffee the way you like it ^ In the main menu, press the OK button for two seconds. SETTINGS < TEMPERATURE > ^ Turn the rotary control until TEMPERATURE appears in the display. Press the OK button. ^ To set the brewing temperature for espresso, turn the rotary control until ESPRESSO appears in the display.
-
Page 32: Setting The Portion Sizes
Setting the portion sizes Programming the amount You can programme the amount of using the ., /, - or * button water used for each portion of espresso, coffee or hot water to suit Press the ., /, - or * button for at least your taste and your cups. -
Page 33: Setting The Duration Of The Steam Used For Hot Milk And Milk Froth
Setting the portion sizes Selecting the PROG. THE Setting the duration of the steam used for hot milk and milk froth AMOUNT option in the SETTINGS menu The duration of steam used is the same for heating milk and for frothing milk. ^ Press the OK button for two seconds. -
Page 34: The Settings Menu
The SETTINGS menu You can use the SETTINGS menu to customise the coffee machine to suit your individual requirements. Options which are currently selected will have a tick B next to them. If none of the buttons has been pressed for a while, the coffee machine will revert to the main menu. -
Page 35: Possible Setting Options
The SETTINGS menu Possible setting options Option Available settings Language Deutsch, English and other languages Maintenance Rinse the system Descale Clean the brew unit Time of day Clock display (available in Comfort mode) 12 H / 24 H Timer (available in Comfort mode) switch on at / switch off after (1:00) / switch off at Activate switch on at (12:00) / switch off at (12:00) -
Page 36: Language
Language You can select the language you want the display to appear in in the SETTINGS menu. ^ Press the OK button for two seconds. SETTINGS LANGUAGE F < > ^ Turn the rotary control until LANGUAGE F appears in the display. -
Page 37: Time Of Day And Clock Display
Time of day and Clock display ^ Press the OK button. If you are operating the coffee machine in Comfort mode, you can set the Time The setting is now saved. of day and the Clock display in the SETTINGS menu. To set the time of day The clock can be displayed as: ^ Turn the rotary control until SET... -
Page 38: Timer Function
Timer function To set the timer The timer is only available if you are ^ Press the OK button for two seconds. operating the coffee machine in Comfort mode. SETTINGS < TIMER > You can set the timer so that the coffee ^ Turn the rotary control until TIMER machine: appears in the display. -
Page 39: Switch Off At
Timer function ^ Turn the rotary control until the The setting is now saved. If you have minutes you want appear in the activated the timer function (see "To display. activate and deactivate the Timer"), the Press the OK button. coffee machine will now switch off at the required time. -
Page 40: To Activate And Deactivate The Timer
Timer function To activate and deactivate the timer If you have activated the "Switch on at" option for the timer, will appear in the display when the coffee machine is in Standby mode. ^ Press the OK button for two seconds. SETTINGS <... -
Page 41: Factory Default
Factory default You can reset the settings back to the ones which were set when the coffee machine was delivered - the factory settings. Please refer to the "Possible setting options" chart for the factory settings which are shown in bold. Please note that the following settings will not be reset: Language... -
Page 42: Operating Modes
Operating modes To select the operating mode You can operate the coffee machine in Eco mode or Comfort mode. ^ In the main menu, press the OK Eco mode saves energy as the coffee button for two seconds. machine will switch to Standby if no SETTINGS drink has been prepared for a while. -
Page 43: To Lock The Coffee Machine
To lock the coffee machine To deactivate the system lock You can lock the coffee machine to prevent it being used without your temporarily knowledge, by children, for example. You can deactivate the system lock temporarily, if you want to prepare To activate and deactivate the drinks, for example. -
Page 44: Displaying Information
Displaying information You can use the INFO option to check – the total number of portions of espresso, coffee, steam and hot water dispensed (TOTAL PORTIONS), – the number of portions of espresso and coffee dispensed (COFFEE), – how many times steam for hot milk and milk froth has been generated (STEAM), –... -
Page 45: Cleaning And Care
Cleaning and care Quick guide Clean the coffee machine every day to prevent a build-up of bacteria. Recommended frequency What do I have to do? Each time milk is prepared, if more Rinse the cappuccinatore than one hour has passed since the last time milk was prepared Clean the cappuccinatore Every day... -
Page 46: Rinsing The System
Cleaning and care Switching automatic rinsing on and Danger of burning and scalding on hot components or by hot liquids! The pipework is rinsed through Always allow the coffee machine to automatically when the coffee machine cool down before cleaning. Caution: is switched off if the automatic rinsing The water in the drip tray can be function is switched on and the coffee... -
Page 47: Rinsing The System Manually
Cleaning and care Rinsing the system manually If you have switched the automatic rinsing function off, you will need to rinse the system through manually if you have used the machine. ^ Place a suitable container underneath the coffee spouts. ^ In the main menu, press the OK button for two seconds. -
Page 48: Cappuccinatore
Cleaning and care Cappuccinatore Cleaning the cappuccinatore The cappuccinatore can become Danger of burning and scalding. clogged with milk residues so it should The cappuccinatore is very hot after be rinsed through if more than an hour it has been used to prepare milk. has elapsed since a drink with milk has Allow it to cool down before been prepared. -
Page 49: Water Container
Cleaning and care Water container ^ Clean all parts with a solution of hot water and washing up liquid. If Change the water every day to prevent neccessary, a small brush can be a build-up of bacteria. used to remove any stubborn milk deposits. -
Page 50: Drip Tray Cover
Cleaning and care Drip tray cover Drip tray and waste container ^ Remove the drip tray cover from the Clean the drip tray and waste drip tray. container every day to avoid ^ The drip tray cover can be cleaned in unpleasant smells and mildew. - Page 51 Cleaning and care Drip tray Waste container ^ Push the coffee spouts as far The waste container will usually contain upwards as they will go. some residual water from the rinsing process. ^ Push the coffee spouts as far upwards as they will go. ^ Carefully remove the drip tray together with the waste container.
-
Page 52: Coffee Bean Container
Cleaning and care Coffee bean container Brew unit Disconnect the coffee machine from Clean the brew unit by hand only the electricity supply before using hot water. Do not use cleaning. washing-up liquid. ^ Open the lid on the right hand side of Please note: the coffee machine. - Page 53 Cleaning and care To replace the brew unit, proceed in Do not change the position of the the reverse order: brew unit handle, as this would ^ Push the brew unit back into the cause the brew unit to be out of coffee machine, making sure it is alignment and you will not be able to straight.
-
Page 54: Degreasing The Brew Unit
These have been specially formulated GROUND COFFEE CHUTE appears: for use in this coffee machine and are ^ Open the lid on the right-hand side of available from Miele or via the Internet at www.miele-shop.com. the coffee machine. After 200 portions have been dispensed, CLEAN THE BREW UNIT will appear in the display. -
Page 55: Cabinet
Cleaning and care Cabinet Avoid using the following on all surfaces: Remove any soiling straight away. If – cleaning agents containing soda, soiling is not removed promptly, it ammonia, acids or chlorides, could cause the surface of the machine to alter or discolour. –... -
Page 56: Descaling
The programme takes approx. been specially formulated for use with 20 minutes. this coffee machine. They are available from Miele or via the internet at You can switch the coffee machine off if www.miele-shop.com. you do not want to run the descaling programme at this time. -
Page 57: Selecting The Descale Option In The Maintenance Menu
Descaling After descaling the machine carefully Follow the instructions on the packet rinse the water container and the drip carefully. It is important that you fill tray to remove all traces of descaling the water container with enough agent. water. Too little water will cause the descaling programme to be Selecting the Descale option in cancelled prematurely. -
Page 58: Saving Energy
Saving energy Eco mode Switching the coffee machine off with the master switch Using the coffee machine in Eco mode saves energy. If you are not going to be using the coffee machine for a long period of The coffee machine will switch to time, switch it off with the master switch energy saving mode if it has not been at the back of the machine. -
Page 59: After Sales / Warranty
After Sales / Warranty In the event of a fault which you cannot correct yourself, please contact: – your Miele Chartered Agent – Miele (see back cover for contact details). When contacting your Chartered Agent or Miele, please quote the model and... -
Page 60: Accessories
– Test strips for determining the water hardness level These products and other useful accessories can be ordered via the internet at www.miele-shop.com, from Miele (see back cover for contact details) or from your Miele Chartered Agent. -
Page 61: Problem Solving Guide
Problem solving guide Important Do not open the outer casing of the appliance. Maintenance and repairs should only be carried out by a suitably qualified and competent person in strict accordance with local and national safety regulations. Maintenance and repairs done by unqualified persons could be dangerous and the manufacturer will not be held liable. - Page 62 ^ Press the . and / buttons at the same time. Then press the OK button twice. This will initialise the brew unit motor and the brew unit will move into its starting position. If the fault message appears in the display again, ^ call Miele.
- Page 63 ^ Switch the coffee machine off and then back on again using the master switch. ^ If the fault message appears in the display again, contact Miele. You can hear the The coffee machine is attempting to draw in water although noise of the pump the water tank is empty.
- Page 64 ^ Fill the water container with fresh tap water and push it into the appliance. If, after doing this, the message is still in the display, contact Miele. Dispensing stops There is too little water in the container. and the following ^ Fill the water container with fresh tap water.
- Page 65 Problem solving guide Unsatisfactory results Problem Possible cause and remedy Only water is The ground coffee chute lid has been opened and then closed again without any ready ground coffee being added dispensed from the to the chute. Then the YES option was selected when the coffee spouts when GROUND COFFEE appeared in the display.
- Page 66 Problem solving guide Problem Possible cause and remedy The cup has not been pre-heated. The coffee or espresso is not hot ^ Pre-heat the cups (see "Cup heating"). enough. The brewing temperature has been set too low. ^ Set a higher brewing temperature (see "Brewing temperature).
- Page 67 Problem solving guide Unusual performance of the coffee machine Problem Possible cause and remedy Only very little The filters in the brew unit are blocked. coffee or nothing at ^ Clean the brew unit (see "Cleaning and care - Cleaning all is dispensed the brew unit") from the coffee...
- Page 68 Problem solving guide Problem Possible cause and remedy The master switch is at "0". The display remains dark when the ^ Set the master switch to "I". coffee machine is switched on using the On/Off button -. The plug is not inserted in the socket correctly. ^ Insert the plug in the socket correctly.
- Page 69 The coffee grinder makes a louder ^ Switch the coffee machine off immediately. noise than usual. ^ Call Miele. The coffee bean container has become empty during the grinding process. ^ Fill the container with fresh beans. The brew unit The brew unit or the brew unit motor is not in the correct cannot be removed.
- Page 70 Problem solving guide Problem Possible cause and remedy The descaling The descaling programme cannot be cancelled once you programme was have pressed the OK button. started by mistake. The programme has to be completed through to the end. This is a safety measure to ensure that the machine is fully descaled, and is important for the long-term protection of the machine and to ensure it functions correctly.
-
Page 71: Transporting The Coffee Machine
Transporting the coffee machine If you are not going to use the coffee Caution: Danger of burning and machine for a long period of time and it scalding from hot steam coming out needs to be moved, e.g. when moving house: of the cappuccinatore. -
Page 72: Electrical Connection
Electrical connection All electrical work should be carried out Do not connect the machine to an by a suitably qualified and competent inverter such as those used with an person only, in strict accordance with autonomous energy source e.g. Solar current national and local safety power. -
Page 73: Installation
Installation Please note: If the coffee machine is installed in a niche, the minimum dimensions for the Danger of overheating. niche are as follows: Ensure that there is sufficient ventilation around the coffee height 508 mm machine. Make sure that the vents on the top width 450 mm of the machine are not covered... -
Page 74: Coffee Machine Dimensions
Coffee machine dimensions... - Page 76 Alteration rights reserved / 4910 M.-Nr. 07 995 370 / 00 CM 5100...
Need help?
Do you have a question about the CM 5100 and is the answer not in the manual?
Questions and answers