
Related Manuals for Miele Novotronic T 560 C


Summary of Contents for Miele Novotronic T 560 C
-
Page 1: Operating Instructions
Operating instructions for condenser tumble dryer T 560 C It is essential to read these opera- ting instructions before installing or using the machine to avoid the risk of accident, or damage to the machine. M.-Nr. 04615790... -
Page 2: Table Of Contents
Contents Guide to the appliance..........3 For the user Warning and safety instructions. -
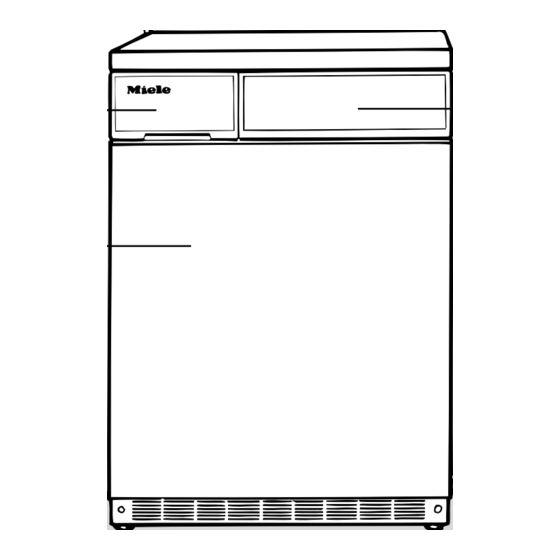
Page 3: Guide To The Appliance
Guide to the appliance a.c. connection cable (2 m long) Condensed water container Drum door Control panel Drain hose for condensed water Four height-adjustable screw feet... - Page 4 Guide to the appliance Empty out container Pushbuttons Programme selector switch Door Cottons opens the door Extra dry On/Off Normal+ for switching the appliance on and off. Normal Hand iron r Low temperature Hand iron rr low temperatures for delicate fabrics, Machine iron e.g.
-
Page 5: Warning And Safety Instructions
The tumble dryer is only intended Faulty components must only be for drying fabrics, which have exchanged for Miele original spare been washed in a water solution, parts. Only when these parts are fitted marked on the manufacturer’s wash... - Page 6 – the mains fuse is withdrawn. Accessory parts may only be fitted when expressly approved by Miele. If other parts are used, guaran- There is a danger of fire with fab- tee, performance and product liability claims may be invalidated.
-
Page 7: Notes On Laundry Care
Notes on laundry care Before drying, check the drying symbol Note on the textile care label. Some woven and loopknit materials Significance of symbols: tend to shrink to varying extents de- q = Dry at normal temperature pending on their quality. This tendency r = Dry at low temperature is exaggerated by over-drying. -
Page 8: Loading And Unloading Washing
Loading the machine Unloading the machine Load the laundry very loosely into the At the end of the programme remove drum. the washing from the machine. If this is not done, the machine automatically Duvet covers and pillowcases should proceeds into an intermittent anti- be fastened before drying in order to crease action for 60 minutes. -
Page 9: Programme Selection
Programme selection Selecting a programme After drying: This tumble dryer is fitted with an elec- Turn the programme selector switch tronic sensor system. The required de- to “Finish”. gree of dryness is measured and moni- Switch the machine off. tored electronically so that the heating Clean the fluff filter. -
Page 10: Programmes For Cottons
Programmes - Cottons Empty out container Extra dry Hand iron rr Multi-layer fabrics which would not be Cotton or linen fabrics, e.g. table linen, thoroughly dried using the “Normal +” bedding, starched laundry, etc. programme. max. 5 kg max. 5 kg Note: Note: If fabrics are too damp for hand-iron-... -
Page 11: Programmes For Minimum Iron And Timed Drying
Programmes - Minimum iron and timed drying Empty out container Normal + 15 minutes cool air Minimum iron items made of synthetics Items which are only to be aired. or blended fabrics, e.g. pullovers, max. 5 kg dresses, trousers, etc., which are not dried adequately in the “Normal”... -
Page 12: Programmes - Consumption Data
Programmes - Consumption data Capacity Final spin speed in Electricity Drying time incl. a domestic consumption cooling down time washing machine mins Cottons Extra dry 1200 3.44 1400 3.28 1550 3.17 Normal + 1200 3.17 1400 3.02 1550 2.91 Normal * 3,60 Normal 1200... -
Page 13: Emptying The Condensed Water Container
Emptying the condensed water container During the programme, water is con- When the container is empty, release densed and collected in a container on the cap. The spout closes automati- the left behind the fascia panel. The cally. container holds approx. 4 litres and Push in the container until it clicks should be emptied after each drying into place. -
Page 14: Cleaning And Care
Cleaning and care The fluff which occurs during drying is collected in the fluff filter in the door. Clean the filter after every programme to save time and energy. Remove fluff from the filters in the door opening. These filters can be taken out and rinsed if necessary. - Page 15 Cleaning and care Heat exchanger The heat exchanger should be cleaned once or twice a year. Before cleaning, disconnect the ma- chine from the mains supply. Open the door Remove the flap Turn the flap lever so that it is vertical Turn both levers on the heat ex- changer so that they are vertical...
- Page 16 Cleaning and care Pull out the heat exchanger – and along the two long sides Stand the heat exchanger lengthwise on a towel until it is quite Replace the heat exchanger in the reverse order. Attempt to pull forward the heat ex- changer and the flap to check that both are firmly positioned, as otherwise water may leak from the machine.
-
Page 17: Problem Solving Guide
Problem solving guide Drying times are too long. Electrical appliances should only be Clean the fluff filter in the door. repaired by qualified personnel. In- correctly repaired machines may The laundry was not spun for a suffi- ciently long time. pose a considerable risk to the user. - Page 18 Press the“Start” button. If the indicator lamp starts flashing again, this indicates a fault in the ma- chine. Please then contact your Miele Dealer or the Miele Service Dept. The drum door opens during the drying cycle.
-
Page 19: After Sales Service
Replace the bulb and the plastic cover. The cover must be fixed securely, as otherwise moisture may seep in and cause a short-circuit. The temperature-resistant bulb should only be ordered from your Miele Dealer or the Service Dept. -
Page 20: Installation
The tumble dryer can also be com- bined with a Miele washing machine in a washer-dryer stack. For this purpose the appropriate stacking kit * to match your washing machine is required. -
Page 21: Electrical Connection
Brown = live from your local electrical suppliers, elec- As the colours of the wires in the mains tricity showroom, or Miele Service lead of this appliance may not corre- Agent. spond with the coloured markings ident-... - Page 22 Electrical connection Electrical connection AUS Important This tumble dryer is supplied ready for The wires in the mains lead are coloured connection to an a.c. single phase 240 V, in accordance with the following code: 50 Hz supply. The rated load is 2.4 kW. Green/yellow = earth The machine is supplied with a 2 m long Blue = neutral...
-
Page 23: Condensed Water Outlet
Make sure that the hose is near a sink, drain outlet, etc. firmly secured by the clip and not kinked. Accessories (available from your Miele Dealer): - 2 m drain hose - Hose clamp - Rubber connection sleeve... - Page 24 External drainage of condensed water The machine is fitted with a non-return Connection to wash basin drain outlet valve as standard to prevent water from flowing back into the machine (eg. if the machine is connected to a siphon). Push the hose clip (1) and knurled nut connector (2) (from the sink drain outlet) over the drain hose.
-
Page 25: Technical Data
Technical data Height......85.0 cm (adjustable +1/-0.5 cm) Width ......59.5 cm Depth (incl. - Page 28 Alteration rights reserved / 000 2196 This paper consists of cellulose which has been bleached without the use of chlorine.