Table of Contents
Advertisement
Advertisement
Table of Contents

Related Manuals for H.264 NETWORK DIGITAL VIDEO SURVEILLANCE RECORDER


Summary of Contents for H.264 NETWORK DIGITAL VIDEO SURVEILLANCE RECORDER
- Page 1 INSTRUCTION MANUAL H.264 NETWORK DIGITAL VIDEO SURVEILLANCE RECORDER...
- Page 2 INSTRUCTION MANUAL...
-
Page 3: Table Of Contents
INSTRUCTION MANUAL CONTENT 1 INTRODUCTION ......................4 1.1MAIN FEATURE ......................4 1.2 PRODUCT FEATURES ....................4 1.2.1 PARAMETER(4/8CH) ..................4 1.2.2 BASIC WORKING PARAMETER ................5 1.3 ENVIRONMENT ADAPTABILITY ................6 2. DEVICE OPERATION MANUAL ..................7 2.1 REMOTE CONTROL ....................7 2.2 MOUSE OPERATION .................... -
Page 4: Introduction
4/8 channels CIF/HD1/D1 resolution digital video recorder. It has local recording, playback, support triple code remote network surveillance, data backup, parameter setting, motion detection and USB mouse. 1.2 PRODUCT FEATURES H.264 compression Two USB interface, USB2.0 for data backup, USB1.1 for mouse operation. 3.5” SATA HDD. -
Page 5: Basic Working Parameter
INSTRUCTION MANUAL Audio style ADPCM CIF: 384~768 Kbps(optional) Video code rate HD1:512~1024Kbps(optional) D1:512~1024Kbps(optional) Audio code rate 32KB/s Data storage SATA HDD storage(optional) Alarm input 4/8 alarm input Alarm Alarm output 1 alarm output Serial interface Support 1 RS485 Connector Network interface RJ45,10M/100M Support 800x600,1024x768,1280x1024,1366x768, VGA output... -
Page 6: Environment Adaptability
INSTRUCTION MANUAL 1.3 ENVIRONMENT ADAPTABILITY For safety while using the DVR and to prolong device life, please pay attention to the following details: When installing device, please comply with all the electric product safety criteria. Power and ground: Do not touch the power and DVR with a wet hand ... -
Page 7: Device Operation Manual
INSTRUCTION MANUAL 2. DEVICE OPERATION MANUAL In device operation, the enter key on remote control has the same function as left click of the mouse. 2.1 REMOTE CONTROL The remote control is the secondary input device For navigating the system’s interface. To use the remote control: 1. -
Page 8: Mouse Operation
INSTRUCTION MANUAL 2.2 MOUSE OPERATION The mouse is the primary input device for navigating system menus. NOTE: Unless otherwise noted, all system functions described in this manual are achieved through mouse input. To use a mouse with the system: Connect a USB mouse to the USB MOUSE port on front panel of the system. NOTE: Only the top USB port on the front panel is designed for data backup to a USB flash drive. -
Page 9: Using The Sub-Menu
INSTRUCTION MANUAL 2.3 USING THE SUB-MENU Mouse Only When using the mouse, use the Sub-Menu to access several system options, including the Main Menu and PTZ control. To open the Sub-Menu: Right-click anywhere onscreen. The Sub-Menu opens. Select one of the following options: •... -
Page 10: Playback
INSTRUCTION MANUAL 2.4 PLAYBACK View recorded video on the system through the Search Menu. To begin playback: 1) Right-click anywhere onscreen and select VIDEO SEARCH. The Search Menu opens. NOTE: When you first open the Search Menu, it displays the current month and date. -
Page 11: System Operation
INSTRUCTION MANUAL 2.5 SYSTEM OPERATION 2.5.1 USER LOGIN 1. STARTING THE SYSTEM To power the system ON/OFF: Connect the power cable to the DC 12V port on the rear panel. At startup, the system performs a basic system check and runs an initial loading sequence. After a few moments, the system loads a live display view. -
Page 12: Using The Main Menu
INSTRUCTION MANUAL 2.5.2 USING THE MAIN MENU Figure 2.5.2 main menu SEARCH: Search for recorded video on the system. RECORD: Configure recording parameters (quality, resolution), set record modes, and enable/disable audio recording.* HDD: Display hard drive status and format the internal hard drive of the system. BASIC: Open the Basic Setup Menu, which lets you set the system language, date and time, Device IDs and passwords, and configure audio and video settings. - Page 13 INSTRUCTION MANUAL recording; Red=alarm recording (includes both alarm and motion events). Click a date in the month grid to view recorded video files for that selected date in the hour grid. Figure 2.5.2.1.1 record grid During playback, use the onscreen controls or the playback buttons on the remote control or front panel to control playback.
- Page 14 INSTRUCTION MANUAL NOTE: The system is compatible with most major brands of USB flash drives, with capacities from 256 MB to 4 GB. To backup recorded data: Connect a blank USB flash drive to the top USB port on the front panel of the system.
- Page 15 INSTRUCTION MANUAL Figure 2.5.2.3.2 Record (DVR-8CH) To configure recording options: 1) Under CHANNEL, use the drop-down menus and select ON/OFF to enable/disable recording from the selected channel. 2) Under RESOLUTION, select CIF, HD1, or D1. DVR-4CH: Setup resolution and code rate for recording, there are three options: D1、HD1、CIF resolution.
- Page 16 INSTRUCTION MANUAL record according to a customized recording schedule. Figure 2.5.2.3.1 Recording Schedule The Schedule Grid shows the days of the week and hours 0~23. You can set Alarm Recording (Red), General (Normal) Recording (Green), or No Recording (Blue) to each time block of each day.
- Page 17 INSTRUCTION MANUAL Figure 2.5.2.3.2 Customized recording schedule Click SAVE. Click CLOSE in the confirmation window. 10) Click EXIT in all menus until all windows are closed. 4 HDD MANAGEMENT Displays essential information about the system`s internal hard drive, and lets you format the internal HDD and external USB flash drive (not included).
- Page 18 INSTRUCTION MANUAL 5 BASIC Set the system language, date and time, passwords, and configure audio and display options. The Basic Setup menu contains the following sub-menus: Language, Date/Time, Password, Display, and Video/Audio. Figure 2.5.2.5 Basic Setup menu 6 LANGUAGE Figure 2.5.2.6 system language menu To change the system language: From the drop-down menu select ENGLISH, or CHINESE.
- Page 19 INSTRUCTION MANUAL Figure 2.5.2.7 DATE/TIME To set the date and time: 1) Click DATE/TIME and configure the following options: • DATE: Enter the day, month, and year. • DATE FORMAT: Select DD/MM/YYYY, MM/DD/YYYY, or YYYY/MM/DD • TIME: Enter the time •...
- Page 20 INSTRUCTION MANUAL 2) USER NAME: USER NAME, can be changed 3) LEVEL: User level, All users can be divided into two levels. One is ADMINTRATOR,The other NORMAL user. 4) STATE: User state. ACTIVE/INACTIVE 5) CONFIG: CONFIG user NOTE: Only administrator and the user with super password can do all operation. Normal User just can parts of them, and can not do CONFIG USER CONFIG Click CONFIG...
- Page 21 INSTRUCTION MANUAL 1-16ch(channel number depends DVR model. E.G, 8 channel DVR have 8ch setting)IE preview function. User just can see the assigned channels. 1-16ch(channel number depends DVR model. E.G, 8 channel DVR have 8ch setting) video playback. User just can playback the assigned channel. Otherwise, can not do any operation.
- Page 22 INSTRUCTION MANUAL • PREVIEW TIME: Select ON/OFF to show/ hide the date and time during live viewing • RECORD TIME: Select ON/OFF to show/hide the date and time during playback. 2) Click NEXT PAGE to change the settings for the remaining channels (8-channel models only).
- Page 23 INSTRUCTION MANUAL 11 ADVANCE Use the Advanced Setup menu to configure alarm settings, motion detection, mobile surveillance, PTZ settings and network settings. The Advanced Setup menu contains the following sub-menus: Alarm, Info, MD, Mobile, System, PTZ, and Network. Figure 2.5.2.11 Video/Audio menu 12 ALARM Use the Alarm menu to configure alarm and email settings.
- Page 24 INSTRUCTION MANUAL • OUTPUT: Set the output time (in seconds) on the spot monitor from 0s, 10s, 20s, 40s, or 60s. • BUZZER: Set the time (in seconds) for the buzzer when an alarm is triggered —0s, 10s, 20s, 40s, or 60s NOTE: Set the buzzer to 0s if you want to disable the alarm during motion detection •...
- Page 25 INSTRUCTION MANUAL number of the system. Figure 2.5.2.13 System info 14 MOTION DETECT Configure motion detection for each channel. Figure 2.5.2.14 Motion detect To configure motion detection: 1) Under STATUS, select ON to enable motion detection for the desired channel. Click NEXT PAGE for additional channels (8-channel models only).
- Page 26 INSTRUCTION MANUAL 15 MOBILE Send alerts to your cellular phone Windows Mobile enabled touch-screen smart phone (Windows Mobile 6.0 or greater, S60 3 or greater is required). Figure 2.5.2.15 mobile To configure mobile notification settings: 1) Under MOBILE NETWORK, select 3G,2.75G, or 2.5G. NOTE: Contact your cellular provider if you are unsure about the network of your cellular phone.
- Page 27 INSTRUCTION MANUAL NOTE: Recorded video on the HDD will not be erased. To restart the machine (soft-reset): 1) Click RESTART. 2) Click OK in the prompt. The system will perform a soft-reset and load to a live split-screen view. To upgrade firmware: 1)...
- Page 28 INSTRUCTION MANUAL 2) Under PROTOCOL, select PELCO-D or PELCO-P for the selected channel. Click NEXT PAGE for additional channels (8-channel models only). 3) Under BAUD RATE, select 1200, 2400, 4800, or 9600. 4) Under DATA BIT select 5, 6, 7, or 8. 5) Under STOP BIT, select 1 or 2.
- Page 29 INSTRUCTION MANUAL NOTE: DHCP allows you to quickly connect to your network by obtaining an IP address from the router. After the initial setup, we recommend that you disable DHCP and set the IP address between 1~100. For example, if your IP address is 192.168.0.107, change the last digits to 90 (i.e.
- Page 30 INSTRUCTION MANUAL Figure 2.5.2.18.3 Manual DNS DDNS: A DDNS account allows you to set up a web site address that points back to your Local Network. NOTE: You must register DDNS service prior to configuring DDNS settings. Visit https://www.dyndns.com/ to register. Figure 2.5.2.18.4 DDNS To configure DDNS settings: From the Network Setup menu, enter Primary or Secondary DNS from the...
-
Page 31: Remote Surveillance Software
INSTRUCTION MANUAL 3. REMOTE SURVEILLANCE SOFTWARE 3.1 FEATURE The system features a built-in browser-based software that allows you to access your system remotely over your local area network (LAN) or over the Internet using Internet Explorer®. Figure 3.1.0 Remote Surveillance main screen Install the software through the IE browser of OS and you operate the network remotely and conveniently. -
Page 32: Using Remote Surveillance
INSTRUCTION MANUAL 3.2 USING REMOTE SURVEILLANCE With your system connected to your local area network, you can now log in to your system using Internet Explorer. NOTE: Your system must be connected to your local or wide area network before attempting remote access. -
Page 33: Remote Surveillance Main Screen
INSTRUCTION MANUAL 3.3 REMOTE SURVEILLANCE MAIN SCREEN Upon login, the Remote Surveillance main screen appears in your browser. Figure 3.3.0 DVR Net viewer main screen 1) Modes: Click LIVE, REPLAY (playback), and SETUP. 2) Main Screen: Main display screen for live viewing and playback. 3)... -
Page 34: Live Viewing
INSTRUCTION MANUAL 3.3.1 LIVE VIEWING By default, remote surveillance opens in Live Viewing mode (split-screen). To use Live Viewing: 1) Click LIVE at the top of the main screen. 2) Click the display mode icons to view the main screen in single-channel, quad, or split-screen configurations. - Page 35 INSTRUCTION MANUAL To control a PTZ camera: 1. Select the channel of the connected PTZ camera(s). 2. Click the navigation arrows to pan and tilt the camera. 3. Click + /- to control zoom, focus, and iris. 4. Enter presets. 5.
- Page 36 INSTRUCTION MANUAL 2) Click REFRESH below the calendar to view the recorded files for the current month. NOTE: Normal recording is indicated by a clock icon; alarm recording (alarm, loss, and motion events) are indicated by an exclamation mark icon. 3)...
- Page 37 INSTRUCTION MANUAL REMOTE BACKUP You can backup recorded video files from your system to your PC using the Replay menu in the remote surveillance software. To backup files remotely: 1) Click PLAYBACK at the top of the main screen. 2) Double-click a file from the File List to begin playback. 3)...
-
Page 38: Remote Setup
INSTRUCTION MANUAL 3.3.2 REMOTE SETUP Use the Setup tab to configure the settings of your system from a remote location. NOTE: If the Main Menu is open on the system, you will not be able to make changes to the system from the remote location. To open remote setup: Click SETUP at the top of the main screen. - Page 39 INSTRUCTION MANUAL 3.3.2.3 PTZ Click to access setup interface; you can check the parameter settings in GUI of DVR. 3.3.2.4 NETWORK Click to access setup interface; you can check the parameter settings in GUI of DVR.
- Page 40 INSTRUCTION MANUAL 3.3.2.5 SETTING Click to access setup interface; you can check the parameter settings in GUI of DVR BANDWIDTH: Set the bandwidth in kbps (128k、192k、256k、384k、512k、1024k) that you want to allocate for traffic that matches the internet. This bandwidth does not include audio.
- Page 41 INSTRUCTION MANUAL 3.3.2.6 MAINTENANCE Click into system CONFIG interface TELECONTROL: Remote reboot DVR or format HDD. REMOTE UPGRADE: Remote upgrade DVR firmware. 3.3.2.7 HOST INFO Click to access system information interface (see below picture). This interface includes HDD status, remain record time, firmware version and MAC Address.
-
Page 42: Dvr Installation Guideline
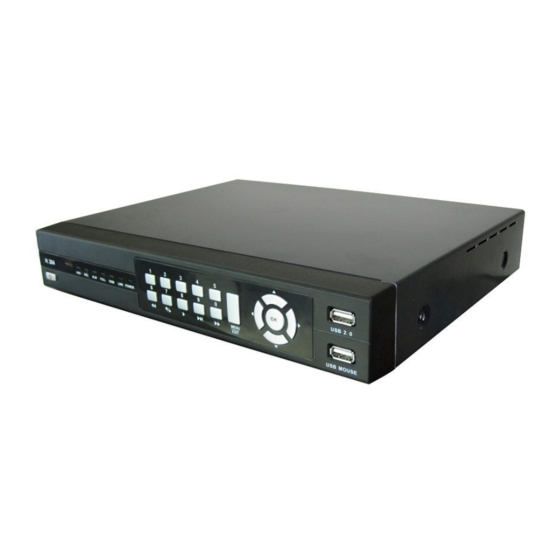
INSTRUCTION MANUAL 4. DVR INSTALLATION GUIDELINE 4.1 FRONT PANEL 1. THE DEFINITION OF BOTTOMS AND CONNECTORS ON FRONT PANEL 1) Power: Press to power the system ON/OFF. 2) IR Sensor: IR receiver for the remote control. 3) LED Indicators: Shows status of HDD, recording, alarm, network, and power. 4)... -
Page 43: Rear Panel
INSTRUCTION MANUAL 4.2 REAR PANEL 4-CHANNELS MODEL Connectors on Rear Panel Item Physical connector Connector description POWER input DC 12V/3A Audio Input For connecting audio signal Video input For connecting analog video signal input (BNC) Audio output For connection audio output Video output One video output for connecting TV or monitor (BNC) Network... - Page 44 INSTRUCTION MANUAL 8-CHANNELS MODEL Connectors on Rear Panel Item Physical connector Connector description POWER input DC 12V/3A Network For connecting Ethernet VGA output VGA output Video output One video output for connecting TV or monitor (BNC) Alarm Input 8 I/O alarm input Alarm Output I/O output for alarm RS485...
-
Page 45: Full Connectivity Diagram
INSTRUCTION MANUAL 4.3 FULL CONNECTIVITY DIAGRAM Example: 8channels... -
Page 46: Hdd Installation
INSTRUCTION MANUAL 4.4 HDD INSTALLATION Caution: When working with electrostatic sensitive devices such as hard disk driver or DVR unit, make sure you use a static-free workstation. Any electrostatic energy coming in contact with the hard disk or DVR can damage it permanently. Please install the HDD following these steps: 1)Open the cover of the DVR and then you will see one HDD plate as follow. -
Page 47: Faq
INSTRUCTION MANUAL 5. FAQ If your problem is not listed below, please call our toll-free number for more support. Question: DVR is not working after starting? Answer: Check the adaptor input Check the on-off power line, is it well-connected? ... - Page 48 INSTRUCTION MANUAL “M” means the channel is on motion detection “I”means the channel is on alarm “H” means there is either no HDD. the HDD is bad or the HDD is full Question: DVR is having problem with real-time images, such as bad image color or serious brightness distortion Answer: ...
- Page 49 INSTRUCTION MANUAL Answer: The data exceeds the capacity of backup device The backup device is incompatible The backup device is damaged 14. Question: Remote control cannot work? Answer: The address of remote control is not correct ...
- Page 50 INSTRUCTION MANUAL TROUBLESHOOTING...
- Page 51 INSTRUCTION MANUAL Troubleshooting (cont`d.)
Need help?
Do you have a question about the NETWORK DIGITAL VIDEO SURVEILLANCE RECORDER and is the answer not in the manual?
Questions and answers