
Related Manuals for Pioneer DV-565A


Summary of Contents for Pioneer DV-565A
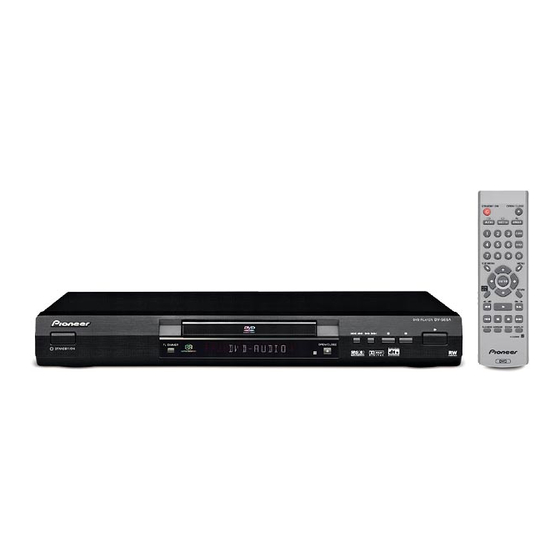
- Page 1 DVD Player Lettore per DVD DV-565A Operating Instructions Istruzioni per l’uso...
- Page 2 IMPORTANT CAUTION RISK OF ELECTRIC SHOCK DO NOT OPEN The lightning flash with arrowhead CAUTION: The exclamation point within an symbol, within an equilateral triangle, is TO PREVENT THE RISK OF ELECTRIC equilateral triangle is intended to alert intended to alert the user to the presence SHOCK, DO NOT REMOVE COVER (OR the user to the presence of important of uninsulated “dangerous voltage”...
-
Page 3: Operating Environment
WARNING: This product is for general household purposes. Any BEFORE PLUGGING IN THE UNIT failure due to use for other than household purposes FOR THE FIRST TIME, READ THE FOLLOWING SECTION (such as long-term use for business purposes in a res- CAREFULLY. -
Page 4: Table Of Contents
....42 Pioneer component ....18 Searching a disc . - Page 5 Subtitle Language....59 Switching the DVD-Video audio language ......44 DVD Menu Language .
- Page 6 About the audio output settings..76 Language code list ....77 Country code list ....77 Glossary .
-
Page 7: Before You Start
Before you start Chapter 1 Before you start Features PureCinema progressive scan When connected to a progressive scan- compatible TV or monitor using the DVD-Audio and SACD compatible component video outputs, you can enjoy Experience the super high-quality audio extremely stable, flicker free images, with the performance of DVD-Audio and Super Audio same frame refresh rate as the original movie. -
Page 8: What's In The Box
Before you start What’s in the box Open the battery compartment cover on the back of the remote control. Please confirm that the following accessories are in the box when you open it. • Remote control • AA/R6P dry cell batteries x2 •... -
Page 9: Using The Remote Control
Before you start Using the remote control Disc / content format Keep in mind the following when using the playback compatibility remote control: • Make sure that there are no obstacles General disc compatibility between the remote and the remote This player was designed and engineered to sensor on the unit. -
Page 10: Cd-R/Rw Compatibility
Before you start PC-created disc compatibility type of disc used; the type of recording; damage, dirt or condensation on either the • If you record a disc using a personal disc or the player’s pick-up lens. See below for computer, even if it is recorded in a notes about particular software and formats. -
Page 11: Jpeg File Compatibility
Before you start • When naming MP3 files, add the corresponding file name extension (.mp3). Files are played according to the file extension. To prevent noise and malfunctions, do not use these extensions for other kinds of files. • This player can recognize up to 999 files (MP3/JPEG) and up to 499 folders. -
Page 12: Connecting Up Rear Panel Connections
Connecting up Chapter 2 Connecting up Rear panel connections AUDIO OUT(2CH) CENTER DIGITAL COAXIAL AUDIO OUT(5.1CH) CONTROL AUDIO OUT AV CONNECTOR 2 AV CONNECTOR 1(RGB) - TV/AV Receiver FRONT SURROND OPTICAL VIDEO OUT WOOFER COMPONENT VIDEO OUT Connect using a commercially available three-way component video cable. -
Page 13: Easy Connections
For passing remote control signals to other Glossary on page 78. Pioneer components (page 18). Easy connections The setup described here is a basic setup that allows you to play discs using just the cables supplied with the player. -
Page 14: Using Other Types Of Video Output
Connecting up See below if you want to use a SCART cable video gives better picture quality still. The for the audio/video connection, or an S-video variety of outputs also gives you the flexibility or component cable connection. of connecting your particular equipment using the best connection type available. -
Page 15: Connecting Using The Av Connector
Connecting up Connecting using the Connecting using the AV component video output connector output You can use the component video output If your TV has a SCART-type AV input, you can instead of the standard video out jack to use a SCART cable to connect this player to connect this player to your TV (or other your TV. -
Page 16: Connecting For Multichannel Surround Sound
Connecting up Connecting using the • Use a SCART cable (not supplied) to connect the AV CONNECTOR 2 to an AV multichannel analog outputs output on the VCR, SET TOP BOX etc. If your AV receiver has 5.1 channel analog inputs, we recommend connecting this player SCART to it using the multichannel analog outputs. -
Page 17: Connecting To An Av Receiver
Connecting up Connect the analog AUDIO OUT L/R You’ll probably also want to connect a video and VIDEO OUTPUT jacks on this player to output to your AV receiver. You can use any of a set of analog audio and video inputs on the video outputs available on this player (the your AV receiver. -
Page 18: Controlling This Player From Another Pioneer Component
This player has SR jacks which allow you to your AV receiver. use the remote sensor on one Pioneer component to control another. Use a mini-jack plug to connect the AV receiver... - Page 19 Connecting up • My TV only has one input for the sound. What should I plug it into? If you don’t mind mono sound, you can buy a stereo RCA-to-mono RCA cable from an electronics store. Connect the stereo end to this player and the mono end to your TV.
-
Page 20: Controls And Displays
Controls and displays Chapter 3 Controls and displays Front panel FL DIMMER OPEN/CLOSE STANDBY/ON STANDBY/ON Remote control sensor Press to switch the player on or into standby. The remote control has a range of up to about Disc tray 10 Display ... -
Page 21: Display
Controls and displays Display 14 13 V-PART D.MIX Lights when playing a video part of a DVD During multichannel audio playback, disc. indicates that the output signal has been “downmixed” from the original audio source. PRGSVE This is an automatic function performed by Lights when the player is set to output the player in order to present the most progressive scan video (see Component Out... -
Page 22: Remote Control
Controls and displays STANDBY/ON Remote control Press to switch the player on or into standby. AUDIO Press to select the audio channel or language (see Switching the DVD-Video audio language STANDBY/ON OPEN/CLOSE on page 44). SUBTITLE AUDIO SUBTITLE ANGLE Press to select a subtitle display (see Switching subtitles on page 43). - Page 23 Controls and displays 12 PLAY MODE 24 ZOOM Press to display the Play Mode menu. (You Press to change the zoom level (see Zooming can also get to the Play Mode menu by the screen on page 45). pressing HOME MENU and selecting Play Mode).
-
Page 24: Getting Started
Getting started Chapter 4 Getting started Switching on Let’s Get Started After making sure that everything is When you switch on the player for the first connected properly and that the player is time, you should see a welcome screen plugged in, press ... -
Page 25: Using The On-Screen Displays
Getting started Use the / (cursor left/right) Using the on-screen displays buttons to select either ‘Wide screen For ease of use, this player makes extensive (16:9)’ or ‘Standard size screen (4:3)’ use of graphical on-screen displays (OSDs). according to the kind of TV you have, then You should get used to the way these work as press ENTER. -
Page 26: Setting Up With The Setup Navigator
Getting started Select ‘Setup Navigator’. • The buttons to navigate the on-screen HOME MENU displays are available on the front panel Audio Settings Video Adjust as well as the remote control. (See Front panel on page 20 for the location and Play Mode Disc Navigator description of all the front panel controls.) - Page 27 Getting started Did you connect the 5.1 channel Do you have surround speakers analog audio outputs to your AV receiver? connected to your AV receiver? • Select Connected or Not Connected. Select Connected or Not Connected. Setup Navigator Setup Navigator Language Settings AV Receiver Language Settings...
- Page 28 Getting started 12 Is your AV receiver DTS compatible? 15 Press ENTER to complete the setup, or Select Compatible, Not Compatible or press HOME MENU to quit the Setup Don’t Know. Navigator without making any changes. Setup Navigator Setup Navigator Language Settings Dolby Digital Language Settings...
-
Page 29: Playing Discs
Getting started Playing discs Load a disc. Load a disc with the label side facing up, The basic playback controls for playing DVD, using the disc tray guide to align the disc (if CD, SACD, Video CD/Super VCD and MP3 you’re loading a double-sided DVD disc, load discs are covered here. - Page 30 Getting started • My AV receiver is definitely compatible with 96/88.2kHz Linear PCM audio, but it doesn’t seem to work with this player. • After I load a DVD disc, it ejects What’s wrong? automatically after a few seconds! For digital copy-protection purposes, Most likely, the disc is the wrong region some 96/88.2kHz DVD discs only output for your player.
-
Page 31: Basic Playback Controls
Getting started Basic playback controls Front panel controls The (play), (stop), and (pause) buttons The table below shows the basic controls on on the front panel work in exactly the same the remote for playing discs. The following way as their remote control equivalents. -
Page 32: Dvd Disc Menus
Getting started Button What it does TOP MENU Displays the ‘top menu’ of a DVD • When a Video CD is loaded, the Resume disc—this varies with the disc. point is lost if the player is switched off. • For the Last Memory function to work, you MENU Displays a DVD disc menu—this must press ... -
Page 33: Video Cd/Super Vcd Pbc Menus
Getting started Video CD/Super VCD PBC menus Some Video CD/Super VCDs have menus from which you can choose what you want to watch. These are called PBC (Playback control) menus. You can play a PBC Video CD/Super VCD without having to navigate the PBC menu by starting playback using a number button to select a track, rather than the ... -
Page 34: Playing Discs
Playing discs Chapter 5 Playing discs Introduction Press HOME MENU and select ‘Disc Navigator’ from the on-screen display. Most of the features described in this chapter Alternatively, if a VR format DVD-RW, CD, make use of on-screen displays. For an Video CD/Super VCD or MP3/JPEG disc is explanation of how to navigate these, see loaded, you can press MENU, which takes... - Page 35 Playing discs For DVD-Audio discs select a group, or a track (The screen below shows a CD loaded.) within a group. Disc Navigator Track 1-10 Disc Navigator Track 01 Group 1-03 Track 1-14 Track 02 Track 01 Track 03 DVD-Audio Group 01 Track 04 Track 02...
-
Page 36: Scanning Discs
Playing discs Scanning discs • There is no sound during slow motion playback. You can fast-scan discs forward or backward at various different speeds. Press repeatedly to change the slow motion speed. During playback, press or to • The slow motion speed is displayed on- start scanning. -
Page 37: Looping A Section Of A Disc
Playing discs • When changing direction with a DVD- Press ENTER on ‘B(End Point)’ to set the loop end point. Video disc, the picture may ‘move’ in an unexpected way. This is not a malfunction. Play Mode A-B Repeat A(Start Point) Looping a section of a disc Repeat B(End Point) - Page 38 Playing discs Select a repeat play option. For MP3 discs, select Disc Repeat, Folder If program play is active, select Program Repeat or Track Repeat (or Repeat Off). Repeat to repeat the program list, or Repeat Off to cancel. Play Mode For DVD-Video and DVD-RW discs, select A-B Repeat Disc Repeat...
-
Page 39: Using Random Play
Playing discs Using random play For DVD-Audio discs, select Random Group or Random Track, (or Random Off). Use the random play function to play titles or chapters (DVD-Video), groups or tracks (DVD- Play Mode Audio), or tracks (CD, SACD, Video CD/Super A-B Repeat Random Group VCD and MP3 discs) in a random order. -
Page 40: Creating A Program List
Playing discs Creating a program list Select a title, chapter, group, folder or track for the current step in the program This feature lets you program the play order of list. titles/groups/chapters/folders/tracks on a For a DVD-Video disc, you can add a whole disc. - Page 41 Playing discs • To add a track, first highlight the group, • To add a track, first find the folder, then then press (cursor right) and select a press (cursor right) and select a track track from the list. name from the list.
-
Page 42: Editing A Program List
Playing discs Editing a program list Other functions available from the program menu After creating a program list, you can add, delete and change steps. As well as creating and editing a program list, you can start program play, cancel program Press PLAY MODE and select ‘Program’... -
Page 43: Searching A Disc
Playing discs Searching a disc • Some DVD-Audio discs feature pages of browsable pictures. Enter the page You can search DVD-Video discs by title or number you want. chapter number, or by time. DVD-Audio discs can be searched by group or track number. Press ENTER to start playback. -
Page 44: Switching The Dvd-Video Audio Language
Playing discs Switching the DVD-Video Press AUDIO repeatedly to select an audio channel option. audio language When playing a DVD-Video disc recorded with Audio Linear PCM 192kHz24bit 2CH dialog in two or more languages, you can switch audio language during playback. When you change the audio channel, playback restarts from the beginning of the Press AUDIO repeatedly to select an... -
Page 45: Zooming The Screen
Playing discs Zooming the screen Using the zoom feature you can magnify a • We do not recommend using DVD disc part of the screen by a factor of 2 or 4, while menus when the screen is zoomed as watching a DVD-Video, DVD-Audio or Video menu options will not be highlighted. - Page 46 Playing discs • DVD-Video displays • CD and Video CD displays Play Play Current / Total Elapsed Remain Total Current / Total Elapsed Remain Total Track 2/16 1.07 4.40 5.47 Title 11/38 2.05 4.57 7.02 1. French 1. English Audio Dolby Digital 3/2.1CH Subtitle Angle...
-
Page 47: Viewing Jpeg Discs
Viewing JPEG discs Chapter 6 Viewing JPEG discs Viewing JPEG discs After loading a CD/CD-R/RW containing , ANGLE and ZOOM buttons do not • The JPEG pictures, press to start a slideshow work while the display shows LOADING. from the first folder/picture on the disc. -
Page 48: Zooming The Screen
Viewing JPEG discs Zooming the screen To resume the slideshow from the highlighted file, press ENTER. Using the zoom feature you can magnify a part of the screen by a factor of 2 or 4, while Using the Photo Browser viewing pictures from a JPEG disc. -
Page 49: Audio Settings Menu
Audio Settings menu Chapter 7 Audio Settings menu Audio DRC • Default setting: Off • Audio DRC is only effective with Dolby When watching Dolby Digital DVDs at low Digital audio sources. volume, it’s easy to lose the quieter sounds •... -
Page 50: Channel Level
Audio Settings menu Press HOME MENU and select ‘Audio • Make sure that Audio Output Mode is Settings’ from the on-screen display. set to 2 Channel (page 66). • How good the surround effect is varies with the disc. HOME MENU Audio Settings Video Adjust Channel Level... -
Page 51: Speaker Distance
Audio Settings menu Variable setting only: Set the channel Press SETUP and select ‘Audio levels for each speaker. Settings’ from the on-screen display. press (cursor down) until you reach 2/3 page Audio Settings the Speaker Distance setting screen. Channel Level L 0.0 dB Channel Level C 0.0 dB... -
Page 52: Video Adjust Menu
Video Adjust menu Chapter 8 Video Adjust menu Video Adjust Creating your own presets You can create up to two presets of your own. • Default setting: Standard From the Video Adjust screen you can select Select one of the Memory presets (see the standard video presentation or define above). - Page 53 Video Adjust menu You can adjust any or all of the following picture quality settings: • Contrast – Adjusts the contrast between light and dark. • Brightness – Adjusts the overall brightness. • Chroma Level – Adjusts how saturated colors appear. Press ENTER to save the preset and exit the Video Adjust screen.
-
Page 54: Initial Settings Menu Using The Initial Settings Menu
Initial Settings menu Chapter 9 Initial Settings menu Using the Initial Settings Digital Audio Out settings menu The Initial Settings menu gives you complete Digital Out control in setting up your DVD player, You only need to make this setting if you including audio, and video output settings, connected this player to an AV receiver (or other audience limitation settings, among others. -
Page 55: Dolby Digital Out
Initial Settings menu Dolby Digital Out If your AV receiver (or other connected component) has a built-in DTS decoder, set You only need to make this setting if you this to DTS, otherwise set to DTS > PCM (DTS connected this player to an AV receiver (or other audio is converted to more compatible PCM component) using one of the digital outputs. -
Page 56: Mpeg Out
Initial Settings menu Video Output settings • Even when set to Down Sample Off, TV Screen some discs will still output down-sampled • Default setting: 4:3 (Letter Box) audio through the digital outputs (you only get full sampling rate audio through Initial Settings the analog outputs). -
Page 57: Av Connector Out
SERVICE CENTER. display video on more than one monitor • This player is compatible with the simultaneously, make sure that it is set to following Pioneer displays and monitors: Interlace. See also Setting the TV System PDP-503HDE, PDP-433HDE. on page 73. -
Page 58: S-Video Out
Initial Settings menu S-Video Out You only need to make this setting if you connected this player to your TV using an S- • If you make a setting here that is incom- video cable. patible with your TV, the TV may not display any picture at all. -
Page 59: Subtitle Language
Initial Settings menu The DVD-Video format recognizes 136 different languages. Select Other Language if you want to specify a language other than • You can change or switch off the subtitles those listed. See also Selecting languages on a DVD disc during playback using the using the language code list on page 75. -
Page 60: Subtitle Display
Initial Settings menu Subtitle Display Angle Indicator • Default setting: On • Default setting: On Initial Settings Initial Settings Digital Audio Out OSD Language Digital Audio Out Audio Language Video Output On Screen Display Video Output Subtitle Language Language Angle Indicator Language DVD Menu Lang. -
Page 61: Options
Initial Settings menu Options Registering a new password You must register a password before you can change the Parental Lock level or enter a Parental Lock Country code. • Default level: Off Select ‘Password’. • Default password: none • Default Country code: us (2119) Initial Settings Some DVD-Video discs feature a Parental Digital Audio Out... -
Page 62: Changing Your Password
Initial Settings menu Changing your password Setting/changing the Parental Lock level To change your password, confirm your Select ‘Level Change’. existing password then enter a new one. Select ‘Password Change’. Initial Settings Digital Audio Out Parental Lock Password Change Initial Settings Video Output Bonus Group Level Change... -
Page 63: Bonus Group
Initial Settings menu • Select by code number: Press (cursor Setting/changing the Country code right) then use the number buttons to You may also want to refer to the Country code enter the 4-digit Country code (you can list on page 77. find the Country code list on page 77.) Select ‘Country Code’. -
Page 64: Auto Disc Menu
Initial Settings menu Group Playback When you play a DVD-Audio disc that has a bonus group, the key number input screen • Default setting: Single appears automatically. Select Bonus Group to access the same screen. Initial Settings Digital Audio Out Parental Lock Initial Settings Video Output... -
Page 65: Sacd Playback
Initial Settings menu Some DVD-Audio discs contain DVD-Video This setting is important if you load a disc that content in addition to the DVD-Audio. Set to contains both MP3 audio files and JPEG DVD-Video to play a DVD-Audio disc as if it picture files. -
Page 66: Speakers
Initial Settings menu Speakers • Some DVD-Audio discs don’t allow down- mixing of audio. These discs always output multi-channel audio regardless of Audio Output Mode the setting made here. • Set in Setup Navigator (Default: 2 Channel) Speaker Installation • Set in Setup Navigator (default: L/R: Large Initial Settings | C: Large | LS/RS: Large| SW: On ) Digital Audio Out... -
Page 67: Speaker Distance
Initial Settings menu • You can see the effect of your changes in To get the best surround sound from your the room graphic on the right of the system, you should set up the speaker screen. distances from your listening position. •... -
Page 68: Channel Level
Initial Settings menu • Surround left/right (LS/RS) speakers can Automatic: Select Auto to start the test tone be set from –4.5 m to 0 m relative to the output. front left/right speakers. Initial Settings Press (cursor left) to go back to the Auto speaker list if you want to modify another Digital Audio Out... - Page 69 Initial Settings menu To turn the test tone on/off for an individual speaker, press (cursor right). The test tone continues playing even when you select a different speaker. Initial Settings Auto Digital Audio Out Video Output 0.0dB Language 0.0dB 0.0dB Display 0.0dB...
-
Page 70: Additional Information
Additional information Chapter 10 Additional information Taking care of your player and If necessary, use a cloth soaked in alcohol, or a commercially available CD/DVD cleaning kit discs to clean a disc more thoroughly. Never use benzine, thinner or other cleaning agents, including products designed for cleaning Handling discs vinyl records. -
Page 71: Discs To Avoid
For this reason you should product. Pioneer disclaims all liability arising leave it to adjust to the warmer temperature in connection with the use of shaped discs. -
Page 72: Moving The Player
A damaged power cable can cause a fire or give you an electric shock. Check the power cable once in a while. If you find it damaged, ask your nearest Pioneer authorized service center or your dealer for a replacement. -
Page 73: Setting The Tv System
Additional information Setting the TV System Set to 4:3 (Pan&Scan), widescreen discs are shown with the left and right sides cropped. The default setting of this player is AUTO, and Although the picture looks larger, you don’t unless you notice that the picture is distorted actually see the whole picture. -
Page 74: Watching Ntsc On A Pal Tv
Additional information Watching NTSC on a PAL TV Resetting the player Most models of the newly developed Use this procedure to reset all the player’s countdown PAL TV system detect 50 Hz settings to the factory default. (PAL)/60 Hz (NTSC) and automatically switch Switch the player into standby. -
Page 75: Dvd-Video Regions
Additional information Selecting languages using the CD-ROMs contain folders and files. MP3 files are referred to as tracks. Folders may contain language code list further folders. Some of the language options (such as ‘DVD Language’ in the Setup Navigator) allow you to set your prefered language from any of the 136 languages listed in the language code list Folder A... -
Page 76: About The Audio Output Settings
Additional information About the audio output settings The table below shows how the audio settings you make in the Initial Settings menu (pages 55– 56, 66) affect the output from the 2 channel and the 5.1 channel analog outputs, and from the digital outputs with various types of disc. -
Page 77: Language Code List
Additional information Language code list Language (Language code letter), Language code Japanese (ja), 1001 Esperanto (eo), 0515 Lingala (ln), 1214 Sinhalese (si), 1909 English (en), 0514 Estonian (et), 0520 Laothian (lo), 1215 Slovak (sk), 1911 French (fr), 0618 Basque (eu), 0521 Lithuanian (lt), 1220 Slovenian (sl), 1912 German (de), 0405... -
Page 78: Glossary
Additional information Glossary Dolby Digital Analog audio An electrical signal that directly represents Using a maximum of 5.1 channels of audio, sound. Compare this to digital audio which this high quality surround system is used in can be an electrical signal, but is an indirect many of the finer movie theaters around the representation of sound. - Page 79 Additional information File extension Packed PCM (DVD-Audio only) A tag added to the end of a filename to A lossless compression system that enables indicate the type of file. For example, “.mp3” more PCM audio to be stored on a DVD-Audio indicates an MP3 file.
- Page 80 Additional information S1 S-video output This S-video signal format includes aspect ratio information (4:3 or 16:9) within the video signal. TVs which are compatible with S1 S- video automatically switch aspect ratio according to the signal. See also S-Video Out on page 58.
-
Page 81: Troubleshooting
Sometimes the trouble may lie in another component. Inspect the other components and electrical appliances being used. If the trouble cannot be rectified after checking the items below, ask your nearest Pioneer authorized service center or your dealer to carry out repair work. - Page 82 Additional information Problem Remedy No picture/No color. • Incorrect video connections: Check that connections are correct and that plugs are inserted fully. Also check the video cable for damage. • TV/monitor or AV amplifier settings are incorrect: Check the instruction manual of the connected equipment. •...
- Page 83 Additional information Problem Remedy Noticeable difference in • This is due to differences in the audio format and is not a DVD and CD volume. malfunction. Cannot play multi- • Make sure that Audio Output Mode is set to 5.1 Channel channel audio (page 66).
- Page 84 • Static electricity or other external influences may cause malfunctioning of this unit. In this case, unplug the power cord and then plug back in. This will usually reset the unit for proper operation. If this does not correct the problem, please consult your nearest Pioneer service center.
-
Page 85: Specifications
Additional information Specifications Component video output Y (luminance) - Output level ..1 Vp-p (75 Ω) (color) - Output level ..0.7 Vp-p (75 Ω) General (color) - Output level ..0.7 Vp-p (75 Ω) System . - Page 86 Warranty card ......1 Published by Pioneer Corporation. Copyright © 2003 Pioneer Corporation. All rights reserved...
- Page 87 Additional information...
- Page 88 IMPORTANTE CAUTION RISK OF ELECTRIC SHOCK DO NOT OPEN Il simbolo del lampo con terminale a ATTENZIONE: Il punto esclamativo in un triangolo forma di freccia situato all’interno di un PER EVITARE IL RISCHIO DI SCOSSE equilatere serve ad avvisare l’utilizzatore triangolo equilatere serve ad avvisare ELETTRICHE, NON RIMUOVERE IL della presenza di importanti istruzioni di...
- Page 89 AVVERTENZA: Questo prodotto è destinato esclusivamente all’uso PRIMA DI COLLEGARE domestico. Eventuali disfunzioni dovute ad usi diversi L’UNITÀ PER LA PRIMA VOLTA, LEGGERE LA SEZIONE (quali uso prolungato a scopi commerciali, in ristoranti, SEGUENTE CON ATTENZIONE. IL VOLTAGGIO PER o uso in auto o su navi) e che richiedano particolari L’ALIMENTAZIONE È...
- Page 90 Cambio di lingua per l’audio dei componente Pioneer ....17 DVD-Video ......43...
- Page 91 Zoom su schermo ....44 Options ......59 Cambio dell’angolo di visuale.
-
Page 92: Prima Di Iniziare
Prima di iniziare Capitolo 1 Prima di iniziare Caratteristiche PureCinema a scansione progressiva Se quest'unità viene collegata ad un televisore Compatibile con DVD-Audio e SACD o monitor compatibile con la scansione Provate la qualità audio ultra alta di DVD- progressiva che fa uso di uscite video Audio e Super Audio CD (SACD). -
Page 93: Contenuto Della Confezione
Prima di iniziare Contenuto della confezione Inserire due batterie AA/R6P nel vano portabatterie seguendo le indicazioni (, Verificare che i seguenti accessori siano ) riportate all’interno del vano. inclusi nella confezione. • Telecomando • Batterie a secco AA/R6P x2 • Cavo audio/video (spine rosse/bianche/ gialle) •... -
Page 94: Utilizzo Del Telecomando
Prima di iniziare Utilizzo del telecomando Disco / Compatibilità di Quando si utilizza il telecomando tenere riproduzione dei diversi presente quanto segue: formati dei contenuti • Verificare che tra il telecomando e il sensore per il controllo a distanza dell’unità non siano presenti ostacoli. Compatibilità... -
Page 95: Compatibilità Con Dischi Cd-R/Rw
Prima di iniziare Compatibilità con dischi creati con di condensa sul disco o sulla testina ottica del lettore. Riportiamo qui di seguito alcune note personal computer specifiche riguardanti formati e software • In caso di registrazione di un disco particolari. tramite personal computer, anche se in Compatibilità... -
Page 96: Compatibilità Con File Jpeg
Prima di iniziare • Nel dare un nome ai file MP3, non dimenticare mai l'estensione (.mp3). I file vengono riprodotti leggendone l'estensione. Per evitare rumori o errori di funzionamento, non usare delle estensioni con tipi scorretti di file. • Questo lettore può riconoscere sino a 999 file (MP3/JPEG) e sino a 499 cartelle. -
Page 97: Collegamenti
Collegamenti Capitolo 2 Collegamenti Collegamenti del pannello posteriore AUDIO OUT(2CH) CENTER DIGITAL COAXIAL AUDIO OUT(5.1CH) CONTROL AUDIO OUT AV CONNECTOR 2 AV CONNECTOR 1(RGB) - TV/AV Receiver FRONT SURROND OPTICAL VIDEO OUT WOOFER COMPONENT VIDEO OUT Collegarlo con un cavo video di tipo Component a tre vie da acquistarsi separatamente. -
Page 98: Collegamenti Facili
Si tratta di un’uscita audio digitale per il Per trasmettere i segnali di telecomando ad collegamento a un ricevitore AV compatibile altri componenti Pioneer (pagina 17). con le tecnologie PCM, Dolby Digital, DTS e/o MPEG con ingresso digitale ottico. Per il collegamento, utilizzare un cavo audio digitale ottico disponibile in commercio. -
Page 99: Uso Di Altri Tipi Di Uscita Video
Collegamenti Uso di altri tipi di uscita video Collegare le prese VIDEO OUT e AUDIO OUT (2ch) alla serie di ingressi A/V del Questo lettore possiede uscite standard televisore. (segnale composito), SCART AV, S-Video e Utilizzare il cavo audio/video in dotazione, video Component. -
Page 100: Collegamento A Un'uscita Video Component
Collegamenti Collegamento a un’uscita trasmissione sia dell’audio che delle immagini e pertanto non è necessario video Component collegare le prese AUDIO OUT L/R e VIDEO Potete usare un'uscita video Component al OUT. posto della presa di uscita video standard per •... -
Page 101: Collegamenti Per La Riproduzione Multicanale Con Circondamento
Collegamenti Collegamenti attraverso le • Usare un cavo SCART (non fornito) per collegare il connettore AV CONNECTOR 2 uscite analogiche multicanale all'uscita AV del videoregistratore, SET TOP BOX, ecc. Se il vostro ricevitore AV possiede ingressi analogici a 5.1 canali, si raccomanda di SCART collegarvi questo lettore facendo uso delle uscite analogiche multicanale. -
Page 102: Collegamento A Un Ricevitore Av
Collegamenti Collegare le prese analogiche AUDIO Collegare un’uscita DIGITAL AUDIO OUT L/R e VIDEO OUTPUT del lettore alla OUT del lettore a un ingresso digitale del serie di ingressi audio e video analogici ricevitore AV. del ricevitore AV. DIGITAL IN (OPTICAL) Ricevitore AV AUDIO/... -
Page 103: Controllo Di Questo Lettore Da Un Altro Componente Pioneer
Questo lettore possiede prese SR che Component quando disponibili. permettono di utilizzare il sensore di Collegare l’uscita video del ricevitore telecomando di un componente Pioneer per AV a un ingresso video del televisore. controllarne un altro. Usare un minispinotto a jack per collegare la presa CONTROL OUT di un componente a quella CONTROL IN di un altro. - Page 104 Collegamenti • Il televisore dispone soltanto di un ingresso per l’audio. Quale cavo conviene inserire? Se ci si accontenta dell’audio mono, è possibile acquistare da un rivenditore di apparecchiature elettroniche un adattatore RCA da stereo a mono. Collegare l’estremità stereo del cavo al lettore e l’estremità...
-
Page 105: Controlli E Display
Controlli e display Capitolo 3 Controlli e display Pannello anteriore FL DIMMER OPEN/CLOSE STANDBY/ON STANDBY/ON Sensore di telecomando Premere questo pulsante per accendere il Il telecomando funziona fino a circa 7 metri di lettore o attivare il modo standby. distanza. -
Page 106: Display
Controlli e display Display 14 13 V-PART D.MIX Si illumina quando si riproduce una porzione Durante la riproduzione audio muticanale, video di un disco DVD. indica che il segnale in uscita è stato "rimissato" in due canali. Questa è una PRGSVE funzione automatica eseguita dal lettore per Si illumina quando il lettore viene portato... -
Page 107: Telecomando
Controlli e display Telecomando STANDBY/ON Premere questo pulsante per accendere il lettore o attivare il modo standby. AUDIO Premere questo pulsante per selezionare il STANDBY/ON OPEN/CLOSE canale audio o la lingua (vedere Cambio di lingua per l’audio dei DVD-Video a pagina 43). SUBTITLE AUDIO ANGLE... - Page 108 Controlli e display 12 PLAY MODE 23 DISPLAY Premere questo pulsante per visualizzare il Premere questo pulsante per visualizzare le menu Play Mode. (È anche possibile informazioni relative alla riproduzione del visualizzare il menu Play Mode premendo disco (vedere Visualizzazione delle HOME MENU e selezionando Play Mode).
-
Page 109: Come Iniziare
Come iniziare Capitolo 4 Come iniziare Accensione Come iniziare Dopo aver verificato che tutti i cavi siano Quando si accende il lettore per la prima collegati correttamente e che il lettore sia volta, viene visualizzata sul televisore una collegato ad una presa di corrente, premere schermata di benvenuto. -
Page 110: Utilizzo Dei Display Su Schermo
Come iniziare Utilizzare i pulsanti / (cursore Utilizzo dei display su destra/sinistra) per selezionare ‘Wide schermo screen (16:9)’ o ‘Standard size screen (4:3)’ in base al televisore utilizzato, quindi Per maggiore comodità di uso di questo lettore vengono utilizzati display su schermo premere ENTER. -
Page 111: Impostazioni Tramite Setup Navigator
Come iniziare Selezionare ‘Setup Navigator’. • I pulsanti per la navigazione dei display HOME MENU sullo schermo sono disponibili sia sul pannello anteriore che sul telecomando. Audio Settings Video Adjust (Per quanto riguarda la posizione e la descrizione di tutti i controlli del pannello Play Mode Disc Navigator anteriore del proprio modello, vedere... - Page 112 Come iniziare Avete collegato le uscite audio Possedete diffusori di circondamento analogiche da 5.1 canali al vostro collegati al vostro ricevitore AV? ricevitore AV? Selezionare Connected oppure Not • Selezionare Connected oppure Not Connected. Connected. Setup Navigator Setup Navigator Language Settings Center Speaker Connected Not Connected...
-
Page 113: Riproduzione Di Dischi
Come iniziare Riproduzione di dischi 12 Il ricevitore AV è DTS compatibile? Selezionare Compatible, Not Compatible Vengono qui spiegati i comandi di base per la oppure Don’t Know. riproduzione di dischi DVD, CD, SACD, Video CD/Super VCD e dischi di file MP3. Nel Setup Navigator capitolo successivo vengono spiegate ulteriori funzioni. - Page 114 Come iniziare Caricare un disco. Caricare il disco con l’etichetta rivolta verso l’alto utilizzando la guida del cassetto del • Quando si carica un disco DVD, questo disco per allineare il disco (se il disco è un viene espulso automaticamente dopo DVD a doppio lato, inserirlo con il lato che si pochi secondi.
- Page 115 Come iniziare • Possiedo un televisore standard (4:3) e ho • Il mio disco DVD-Audio inizia la impostato il lettore sulla visualizzazione di riproduzione, ma questa cessa subito. DVD widescreen in formato Pan & Scan. Il disco potrebbe essere una copia Perché...
-
Page 116: Controlli Di Riproduzione Di Base
Come iniziare Controlli di riproduzione di base Pulsante A cosa serve Nella seguente tabella vengono spiegati i Numeri Utilizzati per immettere un numero controlli basilari per la riproduzione di dischi di traccia o di titolo. Premere tramite telecomando. Nel capitolo successivo ENTER per selezionare (oppure vengono spiegate ulteriori funzioni di... -
Page 117: Menu Dei Dischi Dvd
Come iniziare Se il piatto portadisco viene aperto, la prossima volta che si inizia la riproduzione appare l'indicazione RESUME e la riproduzione riprende da quel punto. ENTER Per soli dischi DVD: Se si toglie un disco dal lettore, la posizione di ultima riproduzione TOP MENU MENU viene memorizzata. -
Page 118: Menu Pbc Di Video Cd/Super Vcd
Come iniziare Menu PBC di Video CD/Super VCD posizione e la descrizione di tutti i controlli del pannello anteriore del proprio Alcuni Video CD/Super VCD presentano modello, vedere Pannello anteriore a menu che consentono di scegliere il pagina 19.) programma desiderato. Questi menu sono chiamati menu PBC (Playback Control). -
Page 119: Riproduzione Di Dischi
Riproduzione di dischi Capitolo 5 Riproduzione di dischi Introduzione Premere HOME MENU e selezionare ‘Disc Navigator’ dal display su schermo. Per la maggior parte delle funzioni descritte in È anche possibile, se è stato caricato un disco questo capitolo vengono utilizzati i display su DVD-RW di formato VR, un CD, un Video CD/ schermo. - Page 120 Riproduzione di dischi Nel caso di dischi DVD-Audio, scegliere un (La schermata che segue mostra un CD gruppo, una traccia o una traccia entro un caricato.) gruppo. Disc Navigator Track 1-10 Disc Navigator Track 01 Group 1-03 Track 1-14 Track 02 Track 01 Group 01 DVD-Audio...
-
Page 121: Scansione Dei Dischi
Riproduzione di dischi Scansione dei dischi Premere ripetutamente per modificare la velocità di riproduzione lenta. È possibile eseguire la scansione veloce del • La velocità di scansione viene visualizzata disco in avanti e indietro a diverse velocità. su schermo. Durante la riproduzione premere Per riprendere la normale o ... -
Page 122: Ripetizione Ripetuta Di Una
Riproduzione di dischi Ripetizione ripetuta di una Premere ENTER su ‘A(Start Point)’ per impostare il punto iniziale del passaggio. sezione di un disco La funzione A-B Repeat consente di Play Mode specificare due punti (A e B) all’interno di una A-B Repeat A(Start Point) traccia (DVD-Audio, CD, SACD e Video CD) o... - Page 123 Riproduzione di dischi Durante la riproduzione, premere Per i SACD, CD e i Video CD/Super VCD, PLAY MODE e selezionare ‘Repeat’ selezionare Disc Repeat o Track Repeat dall’elenco di funzioni sulla sinistra. (oppure Repeat Off). Play Mode Play Mode A-B Repeat Title Repeat A-B Repeat Disc Repeat...
-
Page 124: Utilizzo Della Riproduzione Casuale
Riproduzione di dischi Utilizzo della riproduzione Per i dischi DVD-Audio, selezionare Random Group o Random Track (oppure Random casuale Off). Utilizzare la funzione di riproduzione casuale Play Mode per visualizzare titoli o capitoli (DVD-Video), gruppi o tracce (DVD-Audio) o tracce (CD, A-B Repeat Random Group SACD, Video CD/Super VCD e dischi MP3) in... -
Page 125: Creazione Di Una Lista Programmi
Riproduzione di dischi • Non è possibile utilizzare la riproduzione CD/Super VCD) o i nomi delle cartelle (per casuale assieme alla riproduzione dischi MP3). Sull’estrema destra viene programmata o ripetuta. riportato l’elenco dei capitoli (per i DVD- Video) o i nomi delle tracce (per i file MP3). Creazione di una lista Selezionare un titolo, un gruppo, un programmi... - Page 126 Riproduzione di dischi • Per aggiungere un gruppo, scegliere il • Per aggiungere una cartella, selezionare gruppo desiderato. la cartella desiderata. Program Program Program Step Folder 1-6 Track 1-10 Program Step Track 1-14 Group 1-03 Group 01 Track 01 01. 01 01.
-
Page 127: Modifica Della Lista Programmi
Riproduzione di dischi Altre funzioni disponibili dal menu • Durante la riproduzione programmata, premere per passare al successivo di programmazione passaggio del programma. Oltre a creare e modificare la lista programmi, • Premere CLEAR durante la riproduzione è possibile riprodurla, annullarla, eliminarla e per disattivare la riproduzione memorizzarla dal menu Play Mode. -
Page 128: Ricerche Sul Disco
Riproduzione di dischi Ricerche sul disco premere 4, 5, 0, 0 perché la riproduzione venga avviata dal 45 minuto del disco. Per Sui dischi DVD-Video è possibile eseguire 1 ora, 20 minuti e 30 secondi, premere 8, ricerche per numero di titolo o capitolo 0, 3, 0. -
Page 129: Cambio Di Lingua Per L'audio Dei Dvd-Video
Riproduzione di dischi Cambio di lingua per l’audio dei DVD-Video • Alcuni dischi permettono di cambiare dal Durante la riproduzione di un disco DVD- menu del disco solo il canale audio. Video registrato con dialoghi in due o più Premere TOP MENU per avere accesso al lingue, è... -
Page 130: Zoom Su Schermo
Riproduzione di dischi Zoom su schermo Durante la riproduzione di un DVD-Video, • Si consiglia di non utilizzare i menu di un DVD-Audio o Video CD/Super VCD, è disco DVD se l’immagine è ingrandita, in possibile ingrandire una parte dello schermo quanto le opzioni del menu non appaiono di un fattore di due o quattro tramite la evidenziate. - Page 131 Riproduzione di dischi • Display di DVD-Video • Display di CD Video CD Play Play Current / Total Elapsed Remain Total Current / Total Elapsed Remain Total Track 2/16 1.07 4.40 5.47 Title 11/38 2.05 4.57 7.02 1. French 1. English Audio Dolby Digital 3/2.1CH Subtitle...
-
Page 132: Visualizzazione Da Dischi Di File Jpeg
Visualizzazione da dischi di file JPEG Capitolo 6 Visualizzazione da dischi di file JPEG Visualizzazione da dischi di file JPEG , ANGLE e ZOOM non funzionano • I tasti Dopo aver caricato un CD/CD-R/RW mentre è visualizzato LOADING sul contenente immagini JPEG, premere ... -
Page 133: Zoom Su Schermo
Visualizzazione da dischi di file JPEG Zoom su schermo Per riprendere lo show dal file scelto, premere il pulsante ENTER. Utilizzando la funzione zoom è possibile Utilizzo di Photo Browser ingrandire una parte della schermata di un fattore di zoom pari a 2x o 4x durante la Photo Browser visualizza nove anteprime alla visualizzazione di immagini da un disco JPEG. -
Page 134: Menu Delle Impostazioni Audio (Audio Settings)
Menu delle impostazioni audio (Audio Settings) Capitolo 7 Menu delle impostazioni audio (Audio Settings) Audio DRC • Impostazione predefinita: Off • L’audio DRC (Audio DRC) funziona Quando si riproducono DVD di formato Dolby soltanto con sorgenti audio Dolby Digital. Digital a basso volume, spesso non è •... -
Page 135: Livello Dei Canali
Menu delle impostazioni audio (Audio Settings) Livello dei canali Premere HOME MENU e selezionare ‘Audio Settings’ dal display su schermo. • Impostazione predefinita: Fix Questa impostazione permette di impostare il livello di ciascun canale mandato ad una HOME MENU uscita analogica a 5.1 canali. Audio Settings Video Adjust Premere HOME MENU e selezionare... -
Page 136: Distanza Dei Diffusori
Menu delle impostazioni audio (Audio Settings) • Utilizzare i tasti / (cursore alto/basso) Le distanze dei diffusori di destra/sinistra (L/ R) possono venire impostate su valori da 30 per selezionare un'impostazione. • Usare i pulsanti / (cursore destro/ cm a 9 m a passi di 30 cm alla volta. sinistro) per regolare il livello dei canali Il diffusore centrale (C) possono venire per quel diffusore. -
Page 137: Menu Di Regolazione Video (Video Adjust)
Menu di regolazione video (Video Adjust) Capitolo 8 Menu di regolazione video (Video Adjust) Video Adjust Creazione di impostazioni prefissate • Impostazione predefinita: Standard Potete creare sino a due impostazioni Dalla schermata Video Adjust potete prefissate. scegliere la presentazione video standard o fare impostazioni predefinite tutte vostre. - Page 138 Menu di regolazione video (Video Adjust) Potete regolare una o tutte le seguenti caratteristiche delle immagini. • Contrast – Regola il contrasto dell'immagine. • Brightness – Regola la luminosità dell'immagine. • Chroma Level – Regola la saturazione dei colori. Premere ENTER per salvare l’impostazione e uscire dalla schermata Video Adjust.
-
Page 139: Menu Initial Settings Utilizzo Del Menu Initial Settings
Menu Initial Settings Capitolo 9 Menu Initial Settings Utilizzo del menu Initial Impostazioni Digital Audio Settings Il menu Initial Settings consente di Digital Out controllare le impostazioni del lettore DVD, È necessario eseguire queste impostazioni se il incluse quelle relative alle uscite audio e video lettore è... -
Page 140: Dolby Digital Out
Menu Initial Settings Dolby Digital Out È necessario eseguire queste impostazioni se il • Se si seleziona l’impostazione DTS con un lettore è collegato a un ricevitore AV (o a un amplificatore non DTS compatibile, altro componente) tramite una delle uscite quando viene riprodotto un disco DTS digitali. -
Page 141: Mpeg Out
Menu Initial Settings Impostazioni Video Output TV Screen • Anche se si sceglie Down Sample Off, alcuni dischi producono sempre audio • Impostazione predefinita: 4:3 (Letter ricampionato attraverso le prese digitali (è Box) possibile ottenere l'audio prodotto dalla piena frequenza di campionamento Initial Settings attraverso le prese analogiche). -
Page 142: Av Connector Out
UN CENTRO ASSISTENZA CLIENTI. S (segnale S-video). Se si vuole riprodurre • Questo lettore è compatibile con i segnale video su più di un monitor seguenti display e monitor Pioneer: PDP- 503HDE, PDP-433HDE. contemporaneamente, controllare che si trovi su Interlace. Vedere anche... -
Page 143: S-Video Out
Menu Initial Settings • Impostazione predefinita: S2 • Se si esegue un’impostazione Initial Settings incompatibile con il televisore utilizzato, Digital Audio Out TV Screen questo potrebbe non visualizzare alcuna Video Output Component Out immagine. In tal caso spegnere il Language AV Connector Out Display S-Video Out... -
Page 144: Subtitle Language
Menu Initial Settings impostazione non viene modificata da • In caso di dischi con due o più lingue per questo cambiamento.) Vedere Cambio di sottotitoli sarà possibile effettuarne la lingua per l’audio dei DVD-Video a relativa selezione desiderata dal menu del disco. -
Page 145: Impostazioni Display
Menu Initial Settings Impostazioni Display Alcuni dischi DVD-Video presentano un livello di Parental Lock. Se il lettore è impostato su OSD Language un livello inferiore rispetto a quello del disco, il disco non viene riprodotto. Tale funzione • Impostazione predefinita: English consente di avere un certo controllo sui dischi che i bambini possono guardare. -
Page 146: Menu Options
Menu Initial Settings Utilizzare i pulsanti numerati per Utilizzare i pulsanti numerati per immettere una password a 4 cifre. immettere la password esistente, quindi premere ENTER. I numeri vengono visualizzati come asterischi Initial Settings al momento dell’immissione. Digital Audio Out Parental Lock: Register Code Number Video Output Initial Settings... - Page 147 Menu Initial Settings Utilizzare i pulsanti numerati per Utilizzare i pulsanti numerati per immettere la password esistente, quindi immettere la password esistente, quindi premere ENTER. premere ENTER. Initial Settings Initial Settings Parental Lock : Level Change Parental Lock: Country Code Digital Audio Out Digital Audio Out Video Output...
-
Page 148: Bonus Group
Menu Initial Settings Bonus Group Indica se il menu (Top Menu) viene automaticamente visualizzato dopo che un disco è stato caricato. Scegliere On per fare Initial Settings comparire il menu automaticamente e Off per non farlo comparire. Digital Audio Out Parental Lock Off (us) Video Output... -
Page 149: Dvd Playback Mode
Menu Initial Settings DVD Playback Mode PhotoViewer • Impostazione predefinita: DVD-Audio • Impostazione predefinita: On Initial Settings Initial Settings Digital Audio Out Parental Lock DVD-Audio Digital Audio Out Parental Lock Video Output Bonus Group DVD-Video Video Output Bonus Group Language Auto Disc Menu Language Auto Disc Menu... -
Page 150: Speakers
Menu Initial Settings Speakers Questa impostazione è necessaria solo se si è collegato questo lettore ad un amplificatore Audio Output Mode usando le uscite analogiche a 5.1 canali. Questa impostazione non influenza l'uscita • Impostata in Setup Navigator (impostazione predefinita: 2 Channel) audio digitale. -
Page 151: Speaker Distance
Menu Initial Settings Premere (cursore destro) per • Il subwoofer può essere impostato solo su On e Off. cambiare la distanza del diffusore scelto Premere (cursore sinistro) per sul display. Utilizzare i tasti / (cursore alto/ tornare alla lista dei diffusori e modificare un altro diffusore, oppure premere ENTER basso) per cambiare la distanza. - Page 152 Menu Initial Settings Manual: Utilizzare i tasti / (cursore alto/ Se si sceglie Fix, il livello di ciascuno dei 5.1 canali analogici di uscita è fisso. Scegliere basso) per selezionare un diffusore. Variable per poter regolare i livelli relativi dei diffusori e bilanciare il suno di circondamento Initial Settings in modo più...
-
Page 153: Informazioni Aggiuntive Manutenzione Del Lettore E Dei Dischi
CD/ non utilizzare un disco di forma non standard DVD disponibile in commercio. Non utilizzare con questo prodotto. Pioneer non si ritiene mai benzene, solventi o altri detergenti, responsabile per danni causati dall’uso un inclusi i prodotti per la pulizia dei dischi in disco di forma non standard disco. -
Page 154: Pulizia Della Parte Esterna Dell'unità
Pioneer. In commercio sono disponibili morbido leggermente inumidito con un kit per la pulizia della lente dei lettori CD, detergente neutro diluito cinque o sei tuttavia se ne sconsiglia l’utilizzo, in quanto... -
Page 155: Spostamento Del Lettore
Controllate il filo di alimentazione regolarmente. Quando localizzate un eventuale danno, rivolgetevi al più vicino centro assistenza autorizzato della Pioneer oppure al vostro rivenditore per la sostituzione del filo di alimentazione. -
Page 156: Impostazione Del Sistema Televisivo
Informazioni aggiuntive Con l’impostazione 4:3 (Pan&Scan) i dischi Il sistema di colore televisivo cambia nel widescreen vengono riprodotti con le seguente modo: AUTO NTSC estremità destra e sinistra dell’immagine NTSC PAL tagliate. Anche se l’immagine sembra più grande su schermo, in realtà viene PAL ... -
Page 157: Reimpostazione Del Lettore
Informazioni aggiuntive Reimpostazione del lettore Regioni dei DVD-Video Utilizzare questa procedura per ripristinare Tutti i dischi DVD-Video presentano sulla tutte le impostazioni predefinite di fabbrica custodia un contrassegno che indica la del lettore. regione del mondo con cui il disco è compatibile. -
Page 158: Impostazione Delle Uscite Audio
Informazioni aggiuntive Impostazione delle uscite audio La tabella che segue mostra come le impostazioni audio fatte nel menu Initial Settings (pagine 54–55, 64) influenzano il segnale a 2 canali o a 5.1 canali analogico emesso, e dalle uscite digitali con tipi diversi di disco. Formati dischi audio Impostazioni Uscite di circondamento Uscite digitali,... -
Page 159: Lista Di Codici Delle Lingue
Informazioni aggiuntive Lista di codici delle lingue Lingua (sigla), codice della lingua Japanese (ja), 1001 Esperanto (eo), 0515 Lingala (ln), 1214 Sinhalese (si), 1909 English (en), 0514 Estonian (et), 0520 Laothian (lo), 1215 Slovak (sk), 1911 French (fr), 0618 Basque (eu), 0521 Lithuanian (lt), 1220 Slovenian (sl), 1912 German (de), 0405... -
Page 160: Glossario
Informazioni aggiuntive Glossario Dolby Digital Audio analogico Segnale elettrico che rappresenta in maniera diretta il suono. Confrontare con l’audio Sistema surround di elevata qualità, basato digitale, che può essere un segnale elettrico, su un massimo di 5.1 canali audio, utilizzato ma non è... - Page 161 Informazioni aggiuntive Estensione dei file PBC (PlayBack Control) (solo Video CD/ Tre lettere aggiunte alla fine del nome del file Super VCD) per indicare il tipo di file. Ad esempio “.mp3” Sistema di navigazione di Video CD/Super indica un file MP3. VCD tramite menu su schermo registrati sul disco.
- Page 162 Informazioni aggiuntive televisori che sono compatibili con S2 S-Video cambiano automaticamente le proporzioni dell'immagine riprodotta. Vedere anche S- Video Out a pagina 57. Frequenza di campionamento Frequenza cui un suono deve venire misurato quando deve venire trasformato in dati audio digitali.
-
Page 163: Diagnostica
A volte il problema può risiedere in un altro componente. Controllare gli altri componenti e accessori usati. Se anche consultando la lista che segue il guasto non sparisce, chiudere aiuto al centro assistenza Pioneer più vicino o al proprio negoziante di fiducia. - Page 164 Informazioni aggiuntive Problema Rimedio Immagine/colori assenti. • Collegamenti video scorretti: Controllare che i collegamenti fatti siano corretti e che tutti gli spinotti siano ben collegati. Controllare anche che il cavo video non abbia danni. • TV/monitor o amplificatore AV impostato scorrettamente: Controllare il manuale del componente in questione.
- Page 165 Informazioni aggiuntive Problema Rimedio Differenze percettibili di • Il problema è dovuto a differenze di formato audio e non a un volume fra DVD e CD guasto. Audio multicanale non • Controllare che Audio Output Mode sia impostato su 5.1 Channel riproducibile (pagina 64).
- Page 166 • L'elettricità statica o altre influenze esterne possono causare malfunzionamenti di quest'unità. In questo caso, scollegare il cavo di alimentazione e quindi ricollegarlo. Ciò di solito riporta l'apparecchio alle sue condizioni normali. Se non ha questo effetto, consultare il centro assistenza Pioneer più vicino.
-
Page 167: Specifiche
Informazioni aggiuntive Specifiche Uscita video Livello di uscita ....1 Vp-p (75 Ω) Generali Connettore....Connettore RCA Sistema. - Page 168 Informazioni aggiuntive • Le specifiche e il disegno di questo prodotto sono soggette a modifica senza preavviso, dovuta a miglioramenti. Pubblicato da Pioneer Corporation. Copyright © 2003 Pioneer Corporation. Tutti i diritti riservati <TPTZZ/03L00001> Printed in China <VRD1182-A>...
Need help?
Do you have a question about the DV-565A and is the answer not in the manual?
Questions and answers