Table of Contents
Advertisement
Advertisement
Table of Contents

Related Manuals for Cuisinart CBK250U


Summary of Contents for Cuisinart CBK250U
- Page 1 CBK250U Bread Maker Instructions for Use...
- Page 2 Congratulations on the purchase of your new Cuisinart Bread Maker. For over 30 years Cuisinart’s aim has been to produce the very finest kitchen equipment. All Cuisinart products are engineered for exceptionally long life, and designed to be easy to use as well as to give excellent performance day after day.
-
Page 3: Table Of Contents
Contents Product Features Safety Cautions UK Wiring Instructions Instructions for Use Using the bread maker Adding additional ingredients Automatic dispenser Table of program and cycle times A Guide to Ingredients Hints and Tips Troubleshooting Cleaning & Maintenance UK Guarantee UK After Sales Service... -
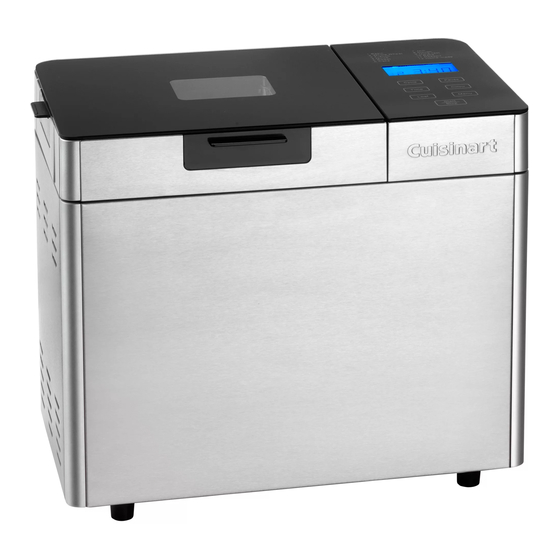
Page 4: Product Features
Product Features Measuring Kneading spoon paddle Removable Measuring bread pan with handle Metal hook Lid with viewing Control panel window (see page 12 for Automatic further details) dispenser Baking chamber (not shown) -
Page 5: Safety Cautions
Always inspect the appliance before use for noticeable signs of damage. Do not use if damaged, or if the appliance has been dropped. In the event of damage, or if the appliance develops a fault, contact the Cuisinart Customer Care Line (See ‘UK After Sales Service’ section for further information). - Page 6 n This appliance complies with the basic requirements of Directives 04/108/EC (Electromagnetic Compatibility) and 06/95/EC (Safety of domestic electrical appliances). n WARNING: A cut off plug inserted into a 13 amp socket is a serious safety (shock) hazard. Ensure the cut off plug is disposed of safely. The temperature of all surfaces marked with this symbol will be very hot when the appliance is in use.
-
Page 7: Uk Wiring Instructions
UK Wiring Instructions - Cuisinart n Your Cuisinart Bread Maker includes a BS 5 amp moulded (fused) mains plug on the supply cord. n Should it be necessary at any stage to remove this moulded plug and replace it with a re-wireable BS 13 amp... -
Page 8: Instructions For Use
Instructions for Use How to measure ingredients One of the important steps for making good bread is to use the exact measure of ingredients. Always use a measuring cup or measuring spoon to obtain the exact amount. n Any liquid should be measured with the measuring cup provided. Observe the level of the measuring cup at eye level. -
Page 9: Delay Timer
Bread maker cycles Once you start a selected program, the appliance will automatically take care of each step of the bread making process until the loaf finishes baking. An indicator on the LCD will display the current function: Delay, Preheat, Knead, Rest, Rise, Bake, Keep Warm or End. Delay timer This allows you to delay the bread making process for up to 13 hours. -
Page 10: Control Panel
Control panel 1. Basic 7. Jam 2. Whole Wheat 8. Dough 3. French 9. Ultra-fast 4. Quick 10. Bake 5. Sweet 11. Dessert 6. Cake 12. Home-made Cycle Pause Time Colour Menu Loaf Start Stop LCD display screen Indicates your menu selection, current baking cycle, loaf size, crust colour and baking time. Cycle The ‘Cycle’... - Page 11 10 to 20 minutes. If the display shows ‘E E0’ or ‘E E1’ after you have pressed the ‘Start/Stop’ button, the temperature sensor has malfunctioned; contact the Cuisinart Customer Care Line, (See ‘UK After Sales Service’ section for further information).
-
Page 12: Using The Bread Maker
Using the bread maker Before first use n Check all parts and accessories are complete and free of damage. n Clean all parts accordingly (refer to ‘Cleaning and Maintenance’ section on page 28). n Set the bread maker on program 10 (‘Bake’) and bake empty for about 10 minutes, then let it cool down and clean all the detached parts again. - Page 13 n Select your crust colour (light, medium or dark) by pressing the ‘Colour’ button until your desired colour is selected. Your current selection will be displayed on the display screen. n Press ‘Loaf’ button to select desired loaf size (700g or 1000g). Your current selection will be displayed on the display screen.
-
Page 14: Adding Additional Ingredients
Adding additional ingredients Nuts and seeds, raisins and dried fruits, shredded cheeses, chocolate morsels and any other additions to the dough should be added after the first rise cycle of the appropriate program, or automatically via the automatic dispenser. The below table indicates what products can be distributed by the automatic dispenser. Suitable for use with Ingredient... -
Page 15: Automatic Dispenser
Automatic dispenser The bread maker is fitted with an automatic dispenser, which releases additional ingredients into the dough during the kneading cycle. This means that ingredients are not over-processed and are distributed evenly. n The automatic dispenser is located at the top left side panel of the bread maker. n To open pull lever out towards you. - Page 16 Program 7. Jam 8. Dough 9. Ultra-fast 10. Bake 11. Dessert 12. Home-made cycle For jams, marmalades Hand shape and bake in The bread maker can For bake function only. Use Mixing/Kneading Self program the and compote. the oven. bake a loaf within 1 hour this setting if you want &...
- Page 17 Home-made program The home-made program allows you to adapt recipes and create one that is perfect for your needs. n Select program 12 using the menu button on the touch screen control pad and press repeatedly until the program is reached. n Touch the ‘Colour’...
- Page 18 N B If you plan to remove the dough and reshape it in another pan for baking in your conventional oven, this automatically resume the process after 15 minutes. NOTE: The paddle is designed to sit firmly in the bread pan to prevent sticking in the base of a baked loaf. If the paddle becomes difficult to remove after cooking, fill the bread pan with enough water to cover the paddle and leave for 10 minutes.
-
Page 19: A Guide To Ingredients
A guide to Ingredients The major ingredient in bread making is flour, so it is important to use the correct one for a good loaf. Bread flour Bread flour has a high gluten and protein content. As the gluten content is higher than most common flours, it is good for making larger loaves and has a better inner fibre. - Page 20 n Pour 125 mls hot water (43ºC - 46ºC) into a measuring cup. n Put 1 teaspoon white sugar into the cup and stir, then sprinkle 2 teaspoons of yeast over the water. n Place the measuring cup in a warm place for about 10 minutes. Do not stir the water. n The froth should be up to 250 mls, otherwise the yeast is dead or inactive.
-
Page 21: Hints And Tips
Hints and Tips n Use top quality ingredients to make your bread machine breads. n Measure all ingredients accurately and have them ready before adding to the bread pan. n The key to successful bread making is to use exact measurements. When measuring ingredients use liquid measuring utensils for liquids and dry measures flour for dry ingredients. - Page 22 n The temperature of ingredients is important in bread machine baking. Ideal temperature is room temperature between 24ºC and 32ºC. Use an instant read thermometer to check the temperature. Cold ingredients should be allowed to come to room temperature. Liquids and butter may be combined and placed in a microwave on the defrost setting to warm without heating too hot.
- Page 23 n Too much cinnamon, garlic, citrus zest or alcohol can counteract the rising properties of yeast. n Always add nuts via the automatic dispenser or when the mix-in signal sounds. Adding them too early may result in their becoming too finely ground.
-
Page 24: Troubleshooting
Troubleshooting Dough does not rise properly Check expiry date of yeast. Make certain yeast is fresh and properly stored (sealed in a cool dark place). Liquid may have been too hot and killed yeast or liquid may have been too cool and yeast did not activate completely. - Page 25 Open texture n Dough too wet. When baking next loaf of same bread, watch dough during the first knead and add additional flour, 1 to 2 teaspoons at a time. n Too much yeast was used. n Salt was omitted or incorrectly under measured. Dense, heavy texture n Dough too dry.
-
Page 26: Cleaning & Maintenance
UK Guarantee n This Cuisinart appliance is guaranteed for domestic consumer use for 5 years. n The guarantee covers defects under normal use from date of purchase and ceases to be valid in the event of alteration or repair by unauthorised persons. -
Page 27: Uk After Sales Service
For further inspiration and recipes for using your Cuisinart Bread Maker please visit our website www.cuisinart.co.uk or our YouTube channel www.youtube.com/user/CuisinartUK, for technical advice and troubleshooting, contact the Cuisinart Customer Care Line on 0870 240 6902 (09:00 to 17:00 hrs Monday to Friday) or alternatively, email your enquiry to support@cuisinart.co.uk. - Page 28 IB-11/431A...
Need help?
Do you have a question about the CBK250U and is the answer not in the manual?
Questions and answers