Table of Contents
Advertisement
Advertisement
Table of Contents

Related Manuals for Kurio 7


Summary of Contents for Kurio 7
- Page 1 The Ultimate Android™ Tablet for Families™ INSTRUCTION MANUAL...
-
Page 2: Table Of Contents
1) FEATURES Included in the box..................................Overview......................................Charging......................................Automatic lock....................................Home screen....................................Portrait / Landscape orientation............................Touch screen navigation................................Camera ......................................Connect Kurio to PC/Mac®................................ 1-10 External storage..................................1-11 Transfer file....................................1-12 Android interface ..................................1-13 Connect Kurio to TV screen.............................. - Page 3 2) STARTING WITH KURIO 7 Setup Kurio.................................... Step 1 Choose your language............................... Step 2 Set-Up date and time................................Step 3 Select and connecting to Wi-Fi............................Step 4 Serial number..................................Step 5 Create parental account..............................Step 6 Create user account................................Step Internet security level...............................
- Page 4 4) SUPPORT AND IMPORTANT INFORMATION Update Kurio system................................Warning......................................Tech support and warranty information........................... Restricted use of electronic devices..........................FAQ / Troubleshooting................................Exposure to radio frequency energy..........................Recycling ....................................Declaration of conformity............................... Copyrights ....................................
-
Page 5: Included In The Box
1- FEATURES Included in the box The following are included in the box: Protective USB to Bumper Mini-USB adapter Power Adapter Kurio Tablet (DC 5V–2A) USB Cable... -
Page 6: Overview
Overview Power ON/OFF/STANDBY Volume - Exit the Volume + profile Rear camera Microphone Front camera Headphone 3.5mm jack Mini-HDMI Back Mini-USB Home DC Input Options Micro SD Card Slot Speaker Wi-Fi settings Help & More Info... -
Page 7: Charging
Automatic lock After a time of inactivity, your Kurio will go into Sleep Mode and lock automatically. The length of time can be modified in the Display Settings section in the Parental Area (see section ″Tablet Setup″ on page 40). -
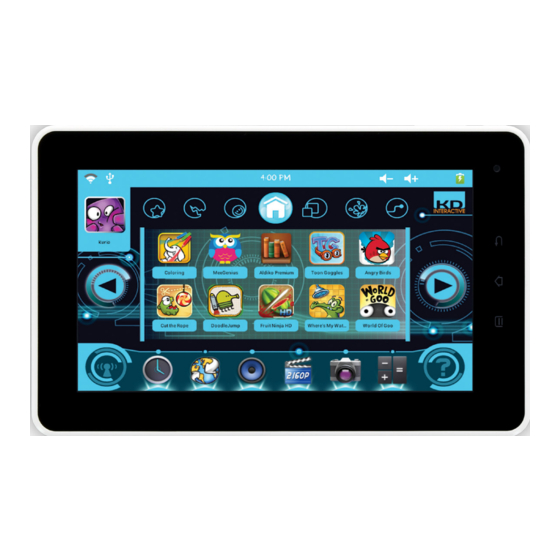
Page 8: Home Screen
Home screen Here are the icons you can see on the Home screen of your Kurio: Volume + Micro SD card inserted Volume - Battery level indicator USB peripheral connected Strength of Wi-Fi signal (if activated) Wi-Fi Settings Help & More Info... -
Page 9: Portrait / Landscape Orientation
Portrait / landscape orientation The Kurio has a built-in accelerometer (gravity sensor). This allows you to hold your tablet in either a landscape or portrait orientation, depending on which application you are using. For most screens, you can automatically change the orientation by rotating your Kurio. -
Page 10: Touch Screen Navigation
1- 7 Touch screen navigation Your Kurio has a capacitive multi-touch screen, so just use your fingers to control your Kurio! Tap on an icon to open the application. Press and hold on an empty space to add an application. - Page 11 Slide up/down to scroll, and swipe left/right to Use 2 fingers to zoom-in or out while viewing photos, navigate in the menu. webpages or other applications.
-
Page 12: Camera
Camera Your Kurio comes with 2 cameras for photos and videos. The front 0.3Mpx VGA camera is for self-portraits, and a 2.1MPx camera is on the back. Zoom IN Switch between Front and Rear Camera Take a photo or Start/Stop video... -
Page 13: Connect Kurio To Pc/Mac
Connect Kurio to PC/MAC ® You can transfer your photos, videos, E-Books and music from your home computer to your Kurio via the included USB cable. When the cable is plugged in, the ″USB Peripheral Connected″ icon will appear at the top of the main screen. Press on the icon to turn on the USB storage function. -
Page 14: External Storage
Note: The data you have transferred from your computer to your Kurio will be visible on your Kurio when you disconnect the USB cable. 1-10 External storage Kurio allows you to read some files (photos, videos, music and more) from external storage (USB key, hard drive or Micro SD card). -
Page 15: Transfer File
Manager application. Please note that, by default, the File Manager is not available in the Kurio Interface. You can make it available by going to the Applications settings in the Parental Area. For more information about Applications, please go to Step 9 in Chapter 2 (page 30). - Page 16 / Wi-Fi / Settings Back Recently Home opened files To exit the Android interface and go back to Kurio interface, press Note: The Android interface should only be used by adults. The parental controls are disabled when you are in this mode.
-
Page 17: Connect Kurio To Tv Screen
Connect Kurio to TV screen (HDMI cable required) You can connect your Kurio to a TV screen to view your videos, pictures or listen to your music via the mini HDMI slot. Connect a mini HDMI to HDMI cable (purchased separately) to your Kurio and then to the HDMI port on your television. -
Page 18: Starting With Kurio
2 - STARTING WITH KURIO 7 Note: Your Kurio is powered by a Lithium-Polymer battery. To prolong the life of your battery, it is recommended that you charge the battery for at least 3 hours before the first use. Please use the 5V power adapter that is included with your tablet. -
Page 19: Step 2 Set-Up Date And Time
Step 2: Set-up date and time Before starting the setup of Kurio, you will be requested to adjust the Date and Time. Please make sure to enter the correct time and date as an incorrect date may prevent the web filtering... - Page 20 Welcome to the Kurio Interface Setup > Press ″Start Setup″...
-
Page 21: Step
Step 3: Select and Connect to Wi-Fi access: • Select your hotspot and tap to ″Connect″ • Enter the Wi-Fi key of the selected hotspot • Press to confirm Upgrade check: When the Wi-Fi connection is established, the system will automatically check for a software update. The update will be applied if it is available. -
Page 22: Step
Step 4: Please type in the serial number to authenticate your Kurio. The serial number is a 12 character alphanumeric code in the form of AAAA-BBBB-CCCC. You can find the serial number sticker on the back of the unit. Press... -
Page 23: Step
Step 5: Create the Parent account The information entered in this part will be used to inform you about new software updates and for registration. • Only one email address is authorized. • This account will be protected by a password. •... - Page 24 Press to confirm. Now that the parental account is set, you can start creating your first user profile!
-
Page 25: Step 6 Create User Account
Step 6: Create user account This profile can either be a child or adult profile using the Kurio Interface. If the Kurio will be used by your child, have fun filling it out together! • Enter basic information about the child (name, birth date, gender). - Page 26 Your password can be 1-16 characters long, containing only letters and numbers. Select the ″Pattern″ box if you would like to use a pattern as your password, then press ″Define Pattern″. You can now create your pattern with a sliding movement that links 5 dots. Your password must be 5 dots, and you can’t use the same dot twice.
-
Page 27: Step 7 Internet Security Level
This part determines the user’s access to the Internet. By default, no Internet access is selected. Full Internet Access Gives the profile complete access to the internet. We recommend this only for the parent’s Kurio profiles. Any profile that has full access to the internet should be password protected. -
Page 28: Step 8 Kid-Safe Content Filtering Settings
Kid-Safe Content Filtering Settings Your Kurio comes with a fully customizable web content filtering system, providing the most secure solution for each member of your family to surf the web safely. Provided by CronLab, over 150 million websites in 1... - Page 29 • Define blocked URLs: Add some specific websites you want to block by entering the URL. Press to add URLs you want to block. You can also add a preset list of websites or a block list from another profile by pressing the ″Import Blocked List″ button.
- Page 30 • Define custom filter: Define which categories of websites you want to block.
- Page 31 To individually select which categories to block, scroll up/down the list and tap to put a checkmark next to the category you wish to block.
- Page 32 Note: The Internet access control is available only with the Kurio Safe Browser. It won’t be applied on any other web browser installed. Note 2: The filtering is amongst the strongest filtering systems available, but, as with any system, it can't filter 100% of the websites so...
- Page 33 You can add specific website you want to allow by pressing , or import a predefined list of approved websites. Press 'Add All to Bookmarks' to have these safe sites automatically added to the Favorites tab of the Kurio Safe Browser.
-
Page 34: Step 9 Time Management
Session max. length Maximum play time granted to the user for each session, which can range from 15 to 7 20 min. Rest between sessions Resting time between two sessions once the maximum play time is reached. - Page 35 The following screens will be shown when there are 5 minutes left as well as when the time limit for the session is reached.
-
Page 36: Step 10 App Management
By default, the user will be allowed to add or remove authorized apps by themselves in the Kurio interface. If you want to lock the user's screen, press the lock icon. When the icon is like this , the user won’t be able to delete or add... - Page 37 • Screen layout On this screen you can build the interface that will be displayed on the user’s Kurio main screen. TABS Shortcut Bar In each tab, you can insert 10 different apps that will be visible in the user’s interface. To select the app, drag...
- Page 38 The apps you can see in the list on the left are the ones you have selected in the previous step ″App Management″. If you want to remove an app from the user’s interface, just select it and press ″Delete″. Any newly installed application will have to be approved to be used in the user profile.
-
Page 39: Step 11 Initial Setup Completed
Step 11: Initial setup completed The initialization of your Kurio is now finished and ready for use. Press ″Exit Setup″ to reach the Kurio user interface. -
Page 40: Logging Into The Parental Area
3 – PARENTAL AREA Logging into the Parental Area When you are in the main screen of the Kurio interface, press on the avatar located in the top left corner. - Page 41 When you are on the profile login screen, you will have 5 options: Parental Area Select another profile Enter the profile Select and Help & More Info Connect to Wi-Fi access...
- Page 42 Press the Parental Area icon. You will have to enter the password you chose when you created the parental account (STEP 5 – page 19). Welcome to the Kurio Parental Area!
- Page 43 From here you can create and manage the different profiles, download new applications and content, change the device settings, manage your account or exit the Kurio interface to access the Android interface. Select what you would like to do from the menu on the right or press the red arrow to exit the Parental Area.
-
Page 44: Profile
Kurio setup. Tablet setup Load the Kurio system on startup: If this function isn’t checked, then the Android Interface will be loaded on startup. The parental controls will be deactivated when you are in the Android Interface. Keep currently used rules: The Internet security settings of the safe browser used in the Kurio interface will be maintained in Android interface. -
Page 45: Kurio Store
By default, for safety control reasons, the Kurio Store is not available in the Kurio Interface. If you want to allow a profile to have access to the Kurio Store on the Kurio Interface, please check the Kurio Store App in the Parental Area >... - Page 46 Create New Account: To download any application, you will have to create an account for the Kurio Store. This account is different than the one you created when you first activated the tablet. This means the email address can be different.
-
Page 47: Main Account
Note 1: Once it is downloaded, the App will not appear automatically in the Kurio interface. Select it in the App Management/Authorized Application menu of the Parental Area. Note 2: You can find several Internet browsers on the Kurio Store. Please note that the Internet Security Level defined in the user’s profile is only available with the Kurio Safe Browser. -
Page 48: Update Kurio System
Update Kurio system You can update the Kurio system by using Kurio Store. When a new update is available, you will be alerted in the Kurio Store. You will also automatically be informed by email. The email address you entered when installing the system will be used. -
Page 49: Warning
• Never force a connector into a port of Kurio. If a connector and a port do not join with reasonable force, make sure that the connector matches the port and that you have positioned the connector correctly in relation to the port. -
Page 50: Tech Support And Warranty Information
Kurio, read our related FAQs, and for any technical support. All of our products have a 1 Year Limited Warranty. In the unlikely event you experience any problems with your Kurio, please visit www.kurioworld.com to contact Kurio Customer Service. If the service representative is unable to solve the issue, he or she will provide instructions regarding how to have your Kurio serviced if it is under warranty. -
Page 51: Exposure To Radio Frequency Energy
If Kurio does cause harmful interference, try to correct it by reorienting or relocating the receiving antenna. You can also try to increase the separation between the device and the receiver, or connect the equipment to another outlet. -
Page 52: Declaration Of Conformity
Declaration of conformity CIDE Interactive declares that Kurio device complies with the basic requirements and the other relevant provisions required by directive 1999/5/CE. The original declaration of conformity can be obtained at the following address: CIDE Interactive Edificio Europa - Avenida Electricitat n°19 Piso 6P4 P.O. -
Page 53: Copyrights
Copyrights © 2012 Copyrights. Kurio™, Kurio™ logo, KD Interactive™ and KD Interactive™ logo are trademarks or registered trademarks of CIDE Interactive Inc. All rights reserved. Angry Birds is a trademark of Rovio Entertainment Ltd. © 2009-2012 Rovio Entertainment Ltd. All rights reserved. Doodle Jump® © 2011 RealNetworks, Inc and Lima Sky, LLC. All rights reserved. - Page 54 The Ultimate Android™ Tablet for Families™...
Need help?
Do you have a question about the 7 and is the answer not in the manual?
Questions and answers