Indesit IWE 7168 Instructions For Use Manual
Indesit washer user manual
Hide thumbs
Also See for IWE 7168:
- Instructions for (60 pages) ,
- Instructions for use manual (24 pages) ,
- Instructions for use manual (16 pages)
Table of Contents
Advertisement
Instructions for use
GB
English,1
IWE 7168
Contents
Installation, 2-3-4-5
Cutting off the water or electricity supply
Troubleshooting, 13-14
Assistance, 15-16
WASHING MACHINE
GB
1
Advertisement
Table of Contents

Related Manuals for Indesit IWE 7168


Summary of Contents for Indesit IWE 7168
-
Page 1: Table Of Contents
Instructions for use English,1 IWE 7168 WASHING MACHINE Contents Installation, 2-3-4-5 Unpacking and levelling Connecting the electricity and water supplies The first wash cycle Technical data Description of the washing machine, 6-7 Control panel Display Running a wash cycle, 8... -
Page 2: Installation
Connecting the water inlet hose 3. Remove the 4 protective screws (used during tran- sportation) and the rubber washer with the correspon- ding spacer, located on the rear part of the appliance (see figure). 3. Make sure that the hose is not folded over or bent. - Page 3 Connecting the drain hose Connect the drain hose, wi- thout bending it, to a draining duct or a wall drain situated between 65 and 100 cm from the floor; The drain hose may be connected to an under-sink trap. Before connecting the drain hose from the machine ensure that any blanks or removable ends have been...
-
Page 4: The First Wash Cycle
As the colours of the wires in the lead may not correspond with the coloured markings identifying the terminals in your plug, proceed as follows: Connect Green & Yellow wire to terminal marked E or coloured Green or Green & Yellow. Connect Brown wire to terminal marked L or coloured Red. -
Page 5: Technical Data
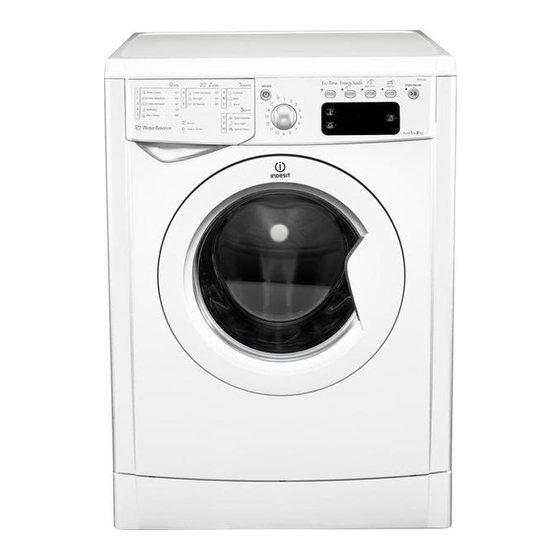
Technical data Model IWE 7168 width 59.5 cm Dimensions height 85 cm depth 53,5 cm Capacity from 1 to 7 kg Electrical please refer to the technical data plate fixed to the machine connections maximum pressure 1 MPa (10 bar) Water connection minimum pressure 0.05 MPa (0.5 bar) -
Page 6: Description Of The Washing Machine
Description of the washing machine Control panel Detergent dispenser drawer Detergent dispenser drawer: used to dispense deter- gents and washing additives (see “Detergents and laundry”). ON/OFF button : press this briefly to switch the machine on or off. The START/PAUSE indicator light, which flashes slowly in a green colour shows that the machine is switched on. -
Page 7: Display
Display The display is useful when programming the machine and provides a great deal of information. The duration of the available programmes and the remaining time of a running cycle appear in section A; if the DELAY START option has been set, the countdown to the start of the selected programme will appear. Pressing the relative button, the machine automatically displays the maximum temperature and spin speed values set for the selected cycle, or the most recently-used settings if they are compatible with the selected cycle. -
Page 8: Running A Wash Cycle
Running a wash cycle 1. SWITCH THE MACHINE ON. Press the START/PAUSE indicator light will flash slowly in a green colour. 2. LOAD THE LAUNDRY. Open the porthole door. Load the laundry, making sure you do not exceed the maximum load value indicated in the table of programmes on the following page. -
Page 9: Wash Cycles And Options
Wash cycles and options Table of wash cycles Description of the wash cycle Daily 1 White Cotton: extremely soiled whites. 1 White Cotton (1): heavily soiled whites and resistant colours. 1 White Cotton (2): lightly soiled whites and delicate colours. 2 Cotton: heavily soiled whites and resistant colours. -
Page 10: Detergents And Laundry
Detergents and laundry Detergent dispenser drawer Good washing results also depend on the correct dose of detergent: adding too much detergent will not necessarily result in a more efficient wash, and may in fact cause build up on the inside of your appliance and contribute to envi- ronmental pollution. -
Page 11: Precautions And Tips
Precautions and tips This washing machine was designed and constructed in accordance with international safety regulations. The fol- lowing information is provided for safety reasons and must therefore be read carefully. General safety • This appliance was designed for domestic use only. •... -
Page 12: Care And Maintenance
Care and maintenance Cutting off the water and electricity supplies • Turn off the water tap after every wash cycle. This will limit wear on the hydraulic system inside the washing machine and help to prevent leaks. • Unplug the washing machine when cleaning it and du- ring all maintenance work. -
Page 13: Troubleshooting
Troubleshooting Your washing machine could fail to work. Before contacting the Technical Assistance Centre (see “Assistance”), make sure that the problem cannot be not solved easily using the following list. Problem: The machine does not switch on. The wash cycle does not start. The machine does not fill with wa- ter or ‘H20’... - Page 14 • The fill hose is loose, check both the cabinet and tap ends. • The fill hose is tight but still leaks, if so replace the rubber washers, or the fill hose is missing the rubber washer. • The drain hose is not fixed in properly.
-
Page 15: Assistance
NON-DOMESTIC PREMISES. Indesit also offers you a free 5 year parts guarantee. This additional guarantee is conditional on you registering your appliance with us and the parts being fitted by one of our authorised engineers. There will be a charge for our engineer’s time. To... -
Page 16: After Sales Service
No one is better placed to care for your Indesit appliance during the course of its working life than us - the manufacturer. We are the largest service team in Europe offering you access to 400 skilled telephone advisors and 1100 fully qualified...
Need help?
Do you have a question about the IWE 7168 and is the answer not in the manual?
Questions and answers