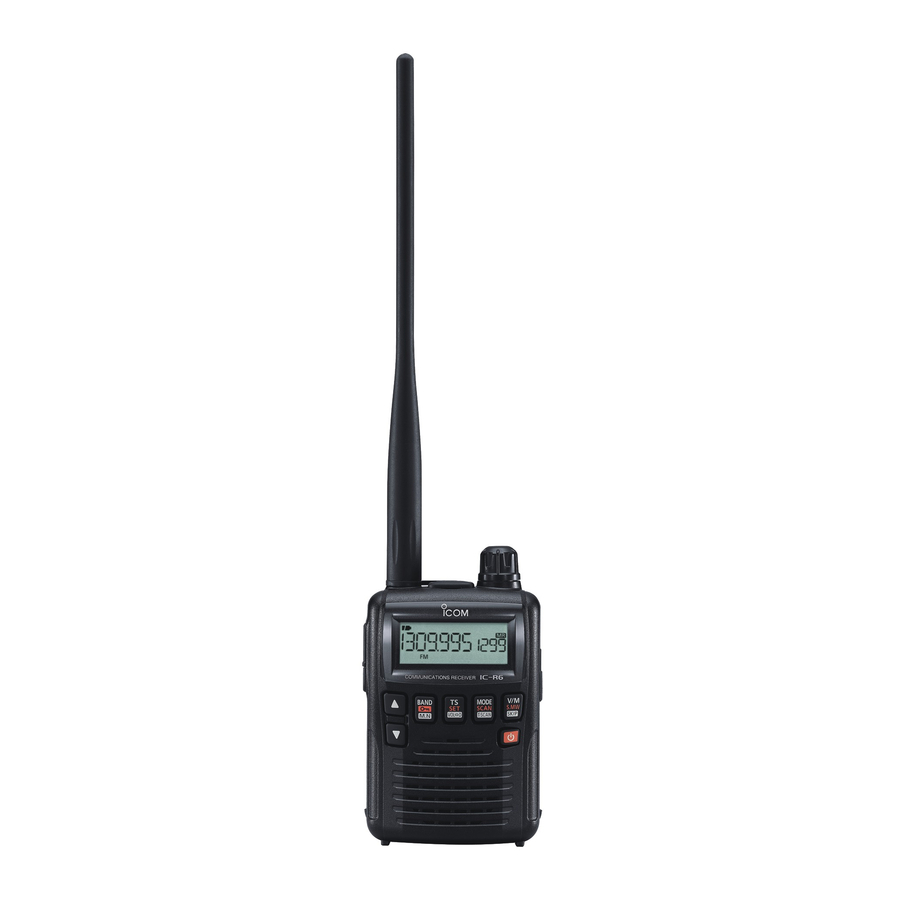
Icom IC-R6 Instruction Manual
Communication receiver
Hide thumbs
Also See for IC-R6:
- Instruction manual (96 pages) ,
- Service manual (36 pages) ,
- Price list (158 pages)
Table of Contents
Advertisement
Quick Links
INSTRUCTION MANUAL
COMMUNICATIONS RECEIVER
iR6
This device complies with Part 15 of the FCC Rules. Operation
is subject to the following two conditions: (1) this device may
not cause harmful interference, and (2) this device must accept
any interference received, including interference that may cause
undesired operation.
WARNING: MODIFICATION OF THIS DEVICE TO RECEIVE
C E L L U L A R R A D I OT E L E P H O N E S E RV I C E S I G N A L S I S
PROHIBITED UNDER FCC RULES AND FEDERAL LAW.
Advertisement
Table of Contents

Related Manuals for Icom IC-R6


Summary of Contents for Icom IC-R6
- Page 1 INSTRUCTION MANUAL COMMUNICATIONS RECEIVER This device complies with Part 15 of the FCC Rules. Operation is subject to the following two conditions: (1) this device may not cause harmful interference, and (2) this device must accept any interference received, including interference that may cause undesired operation.
-
Page 2: Important
IC-R6. We want to take a moment of your time to thank you for mak- ing your IC-R6 your radio of choice, and hope you agree with Icom’s philosophy of “technology first.” Many hours of research EXPLICIT DEFINITIONS and development went into the design of your IC-R6. -
Page 3: Precautions
PRECAUTIONS RWARNING! NEVER NEVER operate the receiver with a expose the receiver to rain, snow or any liquids. earphone, headphones or other audio accessories at high The receiver may be damaged. volume levels. Hearing experts advise against continuous NEVER operate or touch the receiver with wet hands. This high volume operation. -
Page 4: Fcc Information
CAUTION: Changes or modifications to this device, not Icom, Icom Inc. and the Icom logo are registered trademarks of expressly approved by Icom Inc., could void your authority Icom Incorporated (Japan) in Japan, the United States, the United to operate this device under FCC regulations. -
Page 5: Table Of Contents
TABLE OF CONTENTS FOREWORD ………………………………………………… i 4 BASIC OPERATION ……………………………… 13–17 Receiving ……………………………………………… 13 IMPORTANT ………………………………………………… i EXPLICIT DEFINITIONS …………………………………… i Setting audio volume ………………………………… 13 PRECAUTIONS ……………………………………………… ii Squelch level setting ………………………………… 14 FCC INFORMATION ……………………………………… Receive mode selection ……………………………… 14 OPERATING THEORY ……………………………………... -
Page 6: Table Of Contents
TABLE OF CONTENTS 7 PRIORITY WATCH ……………………………… 36–38 13 SPECIFICATIONS ……………………………………… 70 Priority watch types…………………………………… 36 14 OPTIONS ……………………………………………… 71 Priority watch operation ……………………………… 37 15 POCKET GUIDE ………………………………… 72–73 8 TONE SQUELCH AND POCKET BEEP ……… 39–41 16 CE …………………………………………………… 73–74 Tone/DTCS squelch operation ………………………... -
Page 7: Quick Reference Guide
QUICK REFERENCE GUIDE Preparation D Antenna D Battery installation Insert the antenna connector into q Remove the batter y the antenna base and tighten the cover from the receiver. antenna screw. w Install 2 R6(AA) size • NEVER carry the receiver by Ni-MH or alkaline cell holding only the antenna. -
Page 8: Charging The Battery
[DC4.5V] CP-18A/E jack Cigarette lighter cable with DC-DC converter IC-R6 to a cigarette lighter socket • The charging confirmation is displayed. q Install the Ni-MH batteries. w Plug the optional AC adapter into an AC outlet. -
Page 9: Your First Scanning Experience
QUICK REFERENCE GUIDE Your first scanning experience Now that you have your IC-R6 ready, you are probably ex- 2. Adjusting audio level cited to start listening. We would like to take you through a [DIAL] Push [ ]/[ ] to set a desired few basic operation steps to make your first “Listennig Expe-... -
Page 10: Memory Programming
Memory programming Your first scanning experience (continued) 5. Receive mode selection The IC-R6 has a total of 1300 memory channels for stor- Push [MODE] repeatedly to ing often used receive frequency, mode, etc. The memory select a desired receive mode. -
Page 11: Programmed Scan Operation
QUICK REFERENCE GUIDE Programmed scan operation 25 pairs, 50 channels of memories are used for programmed 3. Writing a memory channel scan operation, that specifies a scanning ranges. The pro- Hold down [S.MW](V/M) for 1 second until 3 beeps sound. grammed scan scans between “xxA”... - Page 12 QUICK REFERENCE GUIDE D Starting scan 1. Select the VFO mode. Push [V/M] to select the VFO mode for a VFO scan opera- tion, such as full scan, band scan and programmed scan. • Select the memory mode by pushing [V/M] again for a memory scan operation, such as all memory scan, bank link scan or bank scan.
- Page 13 QUICK REFERENCE GUIDE 3. Starting scan Push [SCAN](MODE) to start the scan. For your information • Rotate [DIAL] to change the scanning direction. The memory channel number you program the scan edges into correlates “PROGxx” as follows: In the VFO mode In the memory mode 00A/00B: Selects “PROG 00”...
-
Page 14: Panel Description
PANEL DESCRIPTION Front, top and side panels e SQUELCH • ATTENUATOR KEY [SQL] • [ATT](SQL) Hold down to temporarily open the squelch and moni- tor the operating frequency. (p. 13) While holding down this switch, rotate [DIAL]* to adjust the squelch level. (p. 12) While holding down [FUNC], push to toggle the attenu- Function display ator function ON or OFF. - Page 15 PANEL DESCRIPTION y TUNING STEP • SET • DIAL EXCHANGE KEY !0 EXTERNAL DC-IN CONNECTOR [DC4.5V] (p. 6) Connects an AC adapter or an optional cigarette lighter [TS] • [SET](TS) • [ ](TS)] cable for both charging the installed re-chargeable battery Push to enter tuning step selecting mode.
-
Page 16: Function Display
PANEL DESCRIPTION Function display q BATTERY ICON e DUPLEX ICONS (p. 14) Both segments appear when the batteries have ample “DUP” appears when plus duplex, and “DUP–” appears capacity. when minus duplex operation is selected. • They do not appear when operating with an external power r TONE ICONS source. - Page 17 PANEL DESCRIPTION y AUTO WRITE CHANNEL ICON (p. 29) !5 FREQUENCY READOUT Appears when an auto write channel is selected. Shows a variety of information, such as the operating fre- quency, Set mode contents, memory names. u SKIP ICONS (p. 30) •...
-
Page 18: Battery Charging
BATTERY CHARGING Battery installation Caution • R DANGER! NEVER short the battery terminals (or charg- Before installing, or replacing the batteries, hold down [ ] ing terminals). Also, current may flow into nearby metal for 1 second to turn the power OFF. objects such as a necklace, so be careful when placing q Remove the battery cover from the receiver. - Page 19 To prevent over –20˚C to +35˚C (–4˚F to +95˚F) (up to six months) charging, the IC-R6 has charging timer that automatically –20˚C to +25˚C (–4˚F to +77˚F) (up to a year*) disconnecting* the charging line electronically after 15 hours * We recommend charging the batteries every 6 months.
-
Page 20: Battery Charging
[DC4.5V] • The battery confirmation is displayed. CP-18A/E jack Cigarette lighter cable with DC-DC converter IC-R6 to a cigarette lighter socket If the confirmation does not appear, following operation is necessary. q Disconnect the adapter plug from [DC4.5V]. -
Page 21: Battery Charging
BATTERY CHARGING D Charge adapter BC-194 • The charging confirmation is displayed. The BC-194, charge adapter, is useful to charge, and the receiver is easy to attach to or detach from the BC-194. The BC-194 can be used the BC-196S/BC-153SC or CP-18A/E to a power source. -
Page 22: Frequency And Channel Setting
FREQUENCY AND CHANNEL SETTING VFO and memory channels Operating band selection The IC-R6 has 2 normal operating modes: the VFO mode The receiver can receive the AM broadcast, HF band, 50 MHz, and the memory mode. FM broadcast, VHF air, 144 MHz, 300 MHz, 400 MHz, 800 †... - Page 23 FREQUENCY AND CHANNEL SETTING • Available frequency bands AM broadcast band HF band 50 MHz band FM broadcast band : Push : While holding down , rotate VHF air band The actual frequencies may differ, depending on your receiver version. Weather channels* *Available in only the USA version 144 MHz band...
-
Page 24: Setting A Frequency
VHF Air band (8.33 kHz) and in the AM broadcast band (9 desired frequency band. kHz)*. The following tuning steps are available for the IC-R6. The following tuning steps are available for the IC-R6. e Rotate [DIAL] to select a desired frequency band. -
Page 25: Selecting A Memory Channel
FREQUENCY AND CHANNEL SETTING Selecting a memory channel Lock function q Push [V/M] to select the memory mode. To prevent accidental frequency changes and unnecessary • “ ” appears when the memory mode is selected. function access, use the lock function. w Rotate [DIAL] to select a desired memory channel. -
Page 26: Basic Operation
BASIC OPERATION Receiving Setting audio volume Make sure charged Ni-MH or brand new alkaline batteries The audio level can be adjusted through 40 levels. are installed (p. 5). Push [ ] or [ ] to adjust the audio level. q Hold down [ ] for 1 second to turn power ON. •... -
Page 27: Squelch Level Setting
BASIC OPERATION Squelch level setting Receive mode selection The squelch circuit mutes the received audio signal, depend- The receiver has three receive modes, FM, AM and WFM. ing on the signal strength. The receiver has 9 squelch levels, The mode selection is stored independently in each band a continuously open setting and an automatic squelch set- and memory channels. -
Page 28: Monitor Function
BASIC OPERATION Monitor function Attenuator function This function is used to listen to weak signals, without dis- The attenuator prevents a received signal from distorting turbing the squelch setting. It can also be used to open the when very strong signals are near a desired frequency, or squelch manually, even when mute functions such as the when very strong electric fields, such as from a broadcasting tone squelch are in use. -
Page 29: Duplex Operation
BASIC OPERATION Duplex operation EXPAND SET MODE USING Duplex communication uses 2 different frequencies for trans- t Rotate [DIAL] to select the “OFFSET” item. mitting and receiving. Generally, duplex is used in communi- • “OFFSET” disappears after 1 second and “0.600” (default) and “OW”... -
Page 30: Dial Select Step
BASIC OPERATION Dial select step This receiver has a 1 MHz tuning step for quick frequency setting. You can select 100 kHz, 1 MHz or 10 MHz steps, as desired. D Setting dial select step q Push [V/M] to select the VFO mode. w Hold down [SET](TS) for 1 second to enter the Set mode. -
Page 31: Memory Channels
MEMORY CHANNELS General description Selecting a memory channel The receiver has 1350 memory channels, including 50 scan q Push [V/M] to select the memory mode. edge memory channels (25 pairs) for storage of often-used • Push [V/M] to toggle between the VFO mode and the memory frequencies. -
Page 32: Memory Channel Programming
MEMORY CHANNELS Memory channel programming q Push [V/M] to select the VFO mode. r Rotate [DIAL] to select a desired channel. w Set a desired frequency: • Scan edge channels, 00A/B to 24A/B can also be selected. • While holding down [FUNC], rotate [DIAL] to select memory Select a desired band with [BAND]. -
Page 33: Memory Bank Setting
MEMORY CHANNELS Memory bank setting r While holding down [BAND], rotate [DIAL] to select a The IC-R6 has a total of 22 banks (A to R, T, U, W and Y) desired bank group. Regular memory channels 000 to 1299, and scan edge •... -
Page 34: Memory Bank Selection
MEMORY CHANNELS Memory bank selection e Rotate [DIAL] to select the bank channel. q Push [V/M] to select the memory mode. w While holding down [BAND], rotate [DIAL] to select a • Only programmed channels are displayed. desired bank. Bank initial [DIAL] •... -
Page 35: Programming Memory/Bank Name
MEMORY CHANNELS Programming memory/bank name Each memory channel can be programmed with an alpha- t While holding down [FUNC], rotate [DIAL] to select a numeric channel name for easy recognition, and can be dis- desired character. played independently by channel. Names can be a maximum •... -
Page 36: Selecting Display Type
MEMORY CHANNELS Selecting display type D Selecting bank channel display During memory mode operation, either the programmed During bank channel operation, the bank channel number bank name, memory name or the channel number can be can also be displayed, instead of the memory channel displayed instead of the frequency display. -
Page 37: Copying Memory Contents
MEMORY CHANNELS Copying memory contents Holding down [S.MW](V/M) for 2 seconds in step w will This function transfers a memory channel’s contents to the also copy the memory contents to the VFO. In that case, VFO (or another memory channel). This is useful when search- steps e and r are not necessary. -
Page 38: Memory Clearing
MEMORY CHANNELS Memory clearing r Hold down [S.MW](V/M) for 1 second to clear the con- Contents of programmed memories can be cleared (erased), tents. if desired. • 3 beeps sound. q Hold down [S.MW](V/M) for 1 second to enter the select •... -
Page 39: Transferring Memory Contents
MEMORY CHANNELS Transferring memory contents The contents of programmed memory channels can be • Example transferred to another memory channels. Transferring the contents of memory channel 51 to channel 33. q Hold down [S.MW](V/M) for 1 second to enter the select Steps q and w memory write mode. -
Page 40: Erasing/Transferring Bank Contents
MEMORY CHANNELS Erasing/transferring bank contents The contents of programmed memory channels can be e While holding down [MODE], rotate [DIAL] to select the erased or transferred to another memory. “BANK” item. • Pushing [MODE] repeatedly also selects the “BANK” item. INFORMATION: Even if the memory bank contents are r While holding down [BAND], rotate [DIAL] to select a erased, the memory channel contents still remain pro-... -
Page 41: Scan Operation
SCAN OPERATION Scan types Scanning automatically searches for signals and makes it There are 7 scan types and 4 resume options to suit your easier to locate new stations for listening purposes. operating needs. FULL SCAN Repeatedly scans all frequen- SELECTED BAND SCAN Repeatedly scans all fre- (p. -
Page 42: Full/Band/Programmed Link/Programmed Scan
SCAN OPERATION Full/band/programmed link/programmed scan q Push [V/M] to select the VFO mode. t To start the scan, push [SCAN](MODE). • Push [BAND] to select a desired frequency band. • The scan pauses when a signal is received. w Set the squelch level. •... -
Page 43: Scan Edges Programming
SCAN OPERATION Scan edges programming r Rotate [DIAL] to select a desired programmed scan edge Scan edges can be programmed in the same manner as channel from 00A to 24A. memory channels. Scan edges are programmed into scan t Hold down [S.MW](V/M) for 1 second. edge memory channels, 00A/00B to 24A/24B. -
Page 44: Memory/All Bank/Bank Link/Bank Scan
SCAN OPERATION Memory/all bank/bank link/bank scan q Push [V/M] to select the memory mode. • Rotate [DIAL] to change the scanning direction. This also resumes scanning. w Set the squelch level. • Push [SCAN](MODE) again to stop the scan. e Hold down [SCAN](MODE) for 1 second to enter the scan type selection mode. -
Page 45: Auto Memory Write Scan
SCAN OPERATION Auto memory write scan This scan is useful for searching a specified frequency range, and automatically storing busy frequencies into memory channels. The same frequency ranges used for a [DIAL] • During auto memory program scan are used for an auto memory write scan. write scan q Start a VFO scan. - Page 46 SCAN OPERATION D During auto memory write scanning: D Clearing the stored frequencies: q Select the auto memory write channel group. • When a signal is received, the scan pauses and the w While holding down [FUNC], push and hold [S.MW](V/M) frequency is stored into an auto memory write channel group ( 000–...
-
Page 47: Skip Channel/Frequency Setting
SCAN OPERATION Skip channel/frequency setting Memory channels can be set to be skipped for a memory r While holding down [FUNC], rotate [DIAL] to select the skip scan. In addition, memory channels can be set to be skip option from “SKIP,” “PSKIP” or “OFF,” for the selected skipped for both a memory skip scan and a frequency skip channel. -
Page 48: Scan Resume Setting
SCAN OPERATION Scan resume setting EXPAND SET MODE USING D Scan pause timer D Scan resume timer The scan pauses when receiving signals according to the The scan resumes after a signal disappears according to the scan pause time. It can be set from 2–20 seconds, or unlim- resume time. -
Page 49: Priority Watch
PRIORITY WATCH Priority watch types Priority watch checks for signals on a frequency every 5 sec- MEMORY SCAN WATCH onds, while operating on a VFO frequency or scanning. The While operating on a VFO fre- receiver has four priority watch types to suit your needs. 5 seconds quency, priority watch sequen- Mch 000... -
Page 50: Priority Watch Operation
PRIORITY WATCH Priority watch operation D Memory channel/memory scan watch y Push [TS] to exit the Set mode and start the watch. q Select the VFO mode; then, set an operating frequency. w Select the channel(s) to be watched. • The “PRIO” icon appears. •... -
Page 51: Priority Watch
PRIORITY WATCH D VFO scan watch q Select the channel(s) to be watched. i Push [SCAN](MODE) to start the VFO scan watch. • The receiver checks the memory channel(s) every 5 seconds. For memory channel watch: • The watch resumes according to the selected scan resume set- Select a desired memory channel. -
Page 52: Tone Squelch And Pocket Beep
TONE SQUELCH AND POCKET BEEP Tone/DTCS squelch operation u Push [SET](TS) to exit the Set mode. The tone or DTCS squelch opens only when receiving a • One of “S T SQL,” T SQL,” “SDTCS,” “DTCS,” “T SQL-R” signal with the same pre-programmed subaudible tone or or “DTCS -R”... -
Page 53: Tone Squelch Frequency/Dtcs Code Setting
TONE SQUELCH AND POCKET BEEP Tone squelch frequency/DTCS code setting 88.5 Hz and 023 is set as the default for the tone squelch • Available tone frequency list frequency and the DTCS code, respectively. The frequency 67.0 79.7 94.8 110.9 131.8 156.7 171.3... -
Page 54: Dtcs Polarity Setting
TONE SQUELCH AND POCKET BEEP DTCS polarity setting t While holding down [FUNC], rotate [DIAL] to select the As well as the code setting, the polarity setting is also avail- polarity from normal (NORMAL) and reverse (REV). able for the DTCS operation. When a different polarity is set, the DTCS never releases audio mute even a signal with matched code number is received. -
Page 55: Tone Scan
TONE SQUELCH AND POCKET BEEP Tone scan r When the CTCSS tone frequency or 3-digit DTCS code By monitoring a signal that is being operated with pocket is matched, the squelch opens and the tone frequency or beep, tone or DTCS squelch function, you can determine the code is temporarily programmed into the selected condi- tone frequency or DTCS code necessary to open a squelch. -
Page 56: Set Mode
Hold down [SET](TS) for 1 second to enter the Set mode. w Rotate [DIAL] to select the “EXPAND” item. In addition, the IC-R6 has the Expand set mode which is used for programming even more infrequently changed val- ues or options of the functions. When turning the Expand set mode OFF, only half of the Set mode items are displayed for simple operation. -
Page 57: Set Mode Items
SET MODE Set mode items D Expand set mode items The following items are available in the Set mode and the Expand set mode. Guide Item name Ref. D General Set mode items LOCK Key lock effect SPEED Dial speed acceleration *Appears when accessing the Set mode in only the AM or FM MONI Monitor switch action... - Page 58 SET MODE D Dial select step D Key-touch beep Select the tuning step between 100 kHz, 1 MHz (default) The key-touch beep can be turned OFF for silent operation. and 10 MHz for a temporary faster frequency setting. When (default: ON) setting a frequency with the increased tuning step, hold down [FUNC], and then rotate [DIAL].
-
Page 59: Antenna Selection
SET MODE D Antenna selection D Display backlighting This item appears only when accessing the Set mode The receiver has a backlit display with a 5 seconds timer, for in the AM or FM broadcast band mode (frequencies dim light operation. The backlighting can be turned ON con- may differ, depending on the receiver version.) tinuously or turned OFF, if desired. -
Page 60: Dial Speed Acceleration
SET MODE D Expand set mode D Dial speed acceleration Turn the Expand set mode ON or OFF. The dial speed acceleration automatically speeds up the • OFF : Displays only the regular set mode. (default) tuning dial speed, when rotating [DIAL] rapidly. •... - Page 61 SET MODE D Auto power OFF The receiver can be set to automatically turn OFF, and D Scan resume timer sound a beep, after a specified period when no key opera- Selects the scan resume time. The scan resumes after the tions are performed.
-
Page 62: Frequency Offset
SET MODE D Frequency offset D Tone squelch Sets the frequency offset for each frequency band independ- Selects the tone or DTCS squelch operation and pocket ently within 0 to 159.995 MHz range. During duplex opera- beep capability, when waiting for a desired signal. tion (–DUP or +DUP), the monitoring frequency (while [SQL] •... - Page 63 SET MODE D Tone frequency D DTCS polarity Selects a subaudible tone frequency for tone squelch opera- Selects the DTCS polarity between normal and reverse. tion. A total of 50 tone frequencies (67.0–254.1 Hz) are (default: NORMAL) selectable.(default: 88.5 Hz) •...
- Page 64 SET MODE D Memory bank link function (B-LINK) D Program scan link function (P-LINK) Turns the memory bank link function ON (default) or OFF. Sets the program scan link function. During program scan, The link function provides continuous bank scan, scanning link function performs a continuous program scan in the se- all channels in the selected banks during bank scan.
- Page 65 SET MODE • Program scan link setting • Program scan link name programming q Push to [MODE] to enter the program scan link setting. q Push to [MODE] to enter the program scan link setting. w Rotate [DIAL] to select the program scan link number w Rotate [DIAL] to select the program scan link number that you want to change.
-
Page 66: Lcd Contrast
SET MODE D LCD contrast D AF filter Selects the LCD contrast level between 1 (light) and 5 (dark), The AF filter suppresses high-pitch tone when this setting is as desired. (default: 3) ON. This function can be set for AM and WFM mode, but it does not appear for FM mode. -
Page 67: Set Mode
CI-V transceive operation is possible even if the IC-R6 re- has its own Icom standard address in hexadecimal number. ceiver is connected to an Icom CI-V radio. When set to “ON”, The IC-R6’s address is “7E.” the frequency and the operating mode of the IC-R6 automat- When 2 or more IC-R6 receivers are connected with an op- ically change to those of connected radios, and vice versa. -
Page 68: Other Functions
OTHER FUNCTIONS [DIAL] function assignment Weather channel operation U.S.A. version only The [DIAL] control can be used as an audio volume control, instead of [Y]/[Z] keys. However, while [DIAL] functions as D Weather channel selection an audio volume control, the [Y]/[Z] keys function as tuning controls. - Page 69 OTHER FUNCTIONS D Weather alert function NOTE: While receiving a signal (on a frequency other NOAA broadcast stations transmit weather alert tones before important weather announcements. When the weath- than the weather alert ON frequency), the receiving signal er alert function is turned ON, the selected weather channel or audio will be interrupted momentarily every 5 seconds when the alert function is turned ON.
-
Page 70: Data Cloning
OTHER FUNCTIONS w While holding down [V/M], turn only the master receiver Data cloning power ON, to enter the cloning mode (master receiver only— power ON only for sub-receiver) Cloning allows you to quickly and easily transfer the pro- grammed contents from one receiver to another; or data from a personal computer to a receiver, using the optional CS-R6 CLONING SOFTWARE... -
Page 71: Auto Power-Off Function
OTHER FUNCTIONS Auto power-off function D Cloning using a personal computer The IC-R6 can be set to automatically turn OFF after a Data can be cloned to and from a personal computer specified period in which no operation is performed. -
Page 72: Partial Reset
OTHER FUNCTIONS Partial reset All reset If you want to initialize the operating settings (VFO frequen- The function display may occasionally display erroneous cy, VFO settings, Set mode contents) without clearing the information (e.g. when first applying power). This may be memory contents, a partial resetting function is available for caused externally by static electricity or by other factors. -
Page 73: Frequency Table
FREQUENCY TABLE D CCIR channels D Australian channels TV channels (unit: MHz) (unit: MHz) Freq. Freq. The following tables show the channels versus 46.75 628.75 Freq. Freq. video and audio frequencies, depending on 53.75 636.75 51.75 637.75 60.75 644.75 62.75 644.75 each version. - Page 74 FREQUENCY TABLE D China channels D UK channels D French channels (unit: MHz) (unit: MHz) (unit: MHz) Freq. Freq. Freq. Freq. Freq. Freq. Freq. 56.25 669.75 917.75 477.25 725.25 49.25 653.75 64.25 677.75 925.75 485.25 733.25 54.00 661.75 72.25 685.75 933.75 493.25 741.25...
- Page 75 FREQUENCY TABLE D Indonesian channels D Italian channels D Taiwan channels (unit: MHz) (unit: MHz) (unit: MHz) Freq. Freq. 59.25 644.75 Freq. Freq. Freq. 67.75 652.75 53.75 628.75 179.75 87.75 660.75 60.75 636.75 185.75 180.75 668.75 67.75 644.75 191.75 188.75 676.75 180.75 652.75...
-
Page 76: Vhf Marine Channels
FREQUENCY TABLE VHF marine channels Weather channels (unit: MHz) (unit: MHz) Ship Ship Ship Ship Ship Ship WX CH Frequency No. Transmit Receive No. Transmit Receive No. Transmit Receive 162.550 156.050 160.650 157.050 157.050 156.525 156.525 162.400 156.050 156.050 161.650 161.650 156.575 156.575... -
Page 77: Other Communications In The Usa
FREQUENCY TABLE Other communications in the USA D HF CB D GMRS D B R S channels (Citizens Band) (General Mobile ( B u s i n e s s R a d i o channels channels Radio Service) Service) Frequency Frequency 26.965 MHz... - Page 78 FREQUENCY TABLE D General aviation frequencies D Cable TV (IRC) (unit: MHz) Frequency Frequency Description Remarks range 121.500 Emergencies 122.000 Flight Advisory Service 2– 13 54–216 (same as broadcast VHF) 122.200 Flight Service Stations 14– 22 120–174 Mid band Ch. A–I 122.700 Unicom—...
-
Page 79: Other Communications- Other Countries
FREQUENCY TABLE Other communications— other countries D LPD D PMR446 channels channels (Low Power Device) (unit: MHz) (unit: MHz) Frequency Frequency Frequency Frequency 433.800 434.525 433.075 446.00625 433.825 434.550 433.100 446.01875 433.850 434.575 433.125 446.03125 433.875 434.600 433.150 446.04375 433.900 434.625 433.175 446.05625... - Page 80 FREQUENCY TABLE D UHF C.R.S channels (Citizen Radio Service) Frequency Frequency 476.425 MHz 476.925 MHz 476.450 MHz 476.950 MHz 476.475 MHz 476.975 MHz 476.500 MHz 477.000 MHz 476.525 MHz 477.025 MHz 476.550 MHz 477.050 MHz 476.575 MHz 477.075 MHz 476.600 MHz 477.100 MHz 476.625 MHz 477.125 MHz...
-
Page 81: Maintenance
MAINTENANCE If your receiver seems to be malfunctioning, please check Troubleshooting the following points before sending it to a service center. PROBLEM POSSIBLE CAUSE SOLUTION REF. No power comes on. • The batteries are exhausted. • Replace the batteries or charge the batteries. pgs. -
Page 82: Cp-18A/E Fuse Replacement
MAINTENANCE CP-18A/E fuse replacement If the fuse blows, or the receiver stops functioning while operating with the optional CP-18A/E, find the source of the problem if possible, solve it and only then replace the dam- aged fuse with a new rated one (FGB 5 A) as shown below. Fuse 5 A... -
Page 83: Specifications
SPECIFICATIONS D GENERAL D RECEIVER • Receive system : Triple-conversion superheterodyne • Frequency coverage (Unit: MHz) 0.100–823.995, 851.000–866.995, • Intermediate frequencies : 1st : 266.7 MHz, 896.000–1309.995 : 19.65 MHz (FM/AM), France 0.100–29.995, 50.200–51.200, 19.95 MHz (WFM) 87.500–107.995, 144.000–146.000, : 450 kHz (FM/AM), 430.000–440.000, 1240.000–1300.000 750 kHz (WFM) Other than above... -
Page 84: Options
OPTIONS Options BC-196SA/SD/153SC CP-18A/E AD-92SMA SP-13 AC ADAPTER CIGARETTE LIGHTER ANTENNA EARPHONE CABLE WITH DC DC CONVERTER CONNECTOR ADAPTER Regularly charges the installed A l l ow s yo u t o o p e ra t e t h e Provides clear audio in noisy batteries. -
Page 85: Pocket Guide
<CUT HERE> Frequency band selection Frequency setting Push [BAND] repeatedly, or hold Push [V/M] to select the VFO down [BAND], rotate [DIAL] to mode. POCKET GUIDE select the desired frequency band. Rotate [DIAL] to set the desired operating frequency. Memory channel selection Tuning step selection VFO and memory mode selection Push... -
Page 86: 16 Ce
Memory channel programming VFO scans Memory scans Push [V/M] to select the VFO Push [V/M] select Set the desired frequency and mode. memory mode. other functions in the VFO mode. Push and hold [SCAN] (MODE) Push and hold [SCAN](MODE) Push and hold [S.MW](V/M) for for 1 sec. - Page 87 DECLARATION OF CONFORMITY We Icom Inc. Japan 1-1-32, Kamiminami, Hirano-ku Osaka 547-0003, Japan Declare on our sole responsibility that this equipment complies with the essential requirements of the Radio and Telecommunications Terminal Bad Soden 24th Dec. 2009 Equipment Directive, 1999/5/EC, and that any applicable Essential Test Place and date of issue Suite measurements have been performed.
- Page 88 <Intended Country of Use> #14 Italy-1 #07 France <Intended Country of Use> #17 France-1 #08 Spain <Intended Country of Use> #18 Spain-1 A-6810H-1EX Printed in Japan 2009 Icom Inc. © 1-1-32 Kamiminami, Hirano-ku, Osaka 547-0003, Japan Printed on recycled paper with soy ink.
Need help?
Do you have a question about the IC-R6 and is the answer not in the manual?
Questions and answers