Table of Contents
Advertisement
USER GUIDE
9CH/16CH MPEG4
Digital Video Recorder
Ver. 2.1
About this user guide
Before installing and using this unit, please read this user guide carefully.
.
Be sure to keep it handy for later reference
The specification and information are subject to change without notice for quality improvement.
Advertisement
Table of Contents

Related Manuals for Nadatel SDVR-9000C


Summary of Contents for Nadatel SDVR-9000C
-
Page 1: Digital Video Recorder
USER GUIDE 9CH/16CH MPEG4 Digital Video Recorder Ver. 2.1 About this user guide Before installing and using this unit, please read this user guide carefully. Be sure to keep it handy for later reference The specification and information are subject to change without notice for quality improvement. -
Page 2: Safety Precautions
Safety Precautions Explanation of Graphical Symbols This symbol indicates the presence of important operating and maintenance (servicing) instruction in the literature accompanying the product. This symbol indicates the presence of un-protected ”dangerous voltage” within the product’s enclosure that may be of sufficient magnitude to constitute a risk of electric shock to persons. - Page 3 Warnings Installation and servicing should be performed only by qualified and experienced personnel. Power off the DVR when connecting cameras, audio or sensor cables. The manufacturer is not responsible for any damage caused by improper use of the product or failure to follow instructions for the product.
-
Page 4: Rack Mount Instructions
Rack Mount Instructions The following or similar rack-mount instructions are included with the installation instructions: A) Elevated Operating Ambient - If installed in a closed or multi-unit rack assembly, the operating ambient temperature of the rack environment may be greater than room ambient. Therefore, consideration should be given to installing the equipment in an environment compatible with the maximum ambient temperature (Tma) specified by the manufacturer. -
Page 5: Product Components
Product Components The package contains the main unit and its components as specified below. When you purchase the unit, please check to ensure the components specified below are included. DVR Set CDRW (Option) Client Software CD Remote Control Battery1.5V (AAA x 2EA) User Guide IDE HDD Cable 80pin (1EA) IDE CDRW Cable 40pin(1EA)-(Option) - Page 6 Power Cord (110V or 220V) Video Signal Select & RS-422/485 Settings Video mode Video output NTSC RS-422/485 Select RS-485 Termination NOTICE 1. Do not change the setting when the power is on. When the switch is changed, the DVR should be rebooted to apply the new setting. 2.
-
Page 7: Compatible Hdd Models
Compatible HDD Models Company Capacity Buffer Interface 80 GB 7200 RPM E-IDE 160 GB 7200 RPM E-IDE HITACHI 250 GB 7200 RPM E-IDE 500 GB 7200 RPM E-IDE 80 GB 7200 RPM E-IDE 200 GB 7200 RPM E-IDE MAXTOR 250 GB 7200 RPM E-IDE 300 GB... - Page 8 are different with others, the DVR could not recognize HDD. CDRW Installation Guide 1. Open the top cover of DVR set and Install the CDRW inside the DVR. 2. Fasten the screws on both side of CDRW as indicated in red circle below. 3.
- Page 9 HDD Installation Guide 1. Unfasten the cover of the unit. 2. Fix the bracket to the hard disk using the supplied HDD mounting bracket screws. 3. Connect the supplied IDE HDD 80pin cable and Power cable to the hard disk and fix the hard disk to the unit the supplied HDD fixing screws.
-
Page 10: Specifications
4. HDD JUMPER SETTING HDD = MASTER HDD = SLAVE Specifications ITEM DVR-9CH/16CH Channel, Input Level 9/16CH, Composite 1.0Vp-p, 75 Ohm Input Signal Format NTSC/PAL Video Loss Check Video Main Monitor Output 1 CH BNC, 1 CH S-VIDEO, 1CH VGA Output Level Composite 1.0Vp-p +_0.2, 75 Ohm Output... - Page 11 704x480 352x288 704x288 704x576 Recording quality grade 5 grades Recording Mode Continuous / Schedule / Motion/ Sensor/ Manual Motion Detection Motion detection setup by Grid Pre & Post Recording Display Frame Rate ( /Sec) NTSC: 30fps/ch, 60 fields / PAL: 25fps/ch, 50 fields Multi-Decoding 1, 4, 9, 16 Playback...
-
Page 12: Table Of Contents
Recording performances and resolutions per models MODEL Recoding performance (Max.) SDVR-9000C NTSC 352x240: 120fps 704x240: 60fps 704x480: 30fps 352x288: 100fps 704x288: 50fps 704x576: 25fps SDVR-9200C NTSC 352x240: 240fps 704x240: 120fps 704x480: 60fps 352x288: 200fps 704x288: 100fps 704x576: 50fps SDVR-16000C NTSC... - Page 13 3-6. Setup – System Mode ....................31 3-7. Setup – PASSWORD Mode ..................35 3-8. Setup – Network Mode ....................37 3-8-1. Ports .......................... 38 3-8-2. Network Types......................39 3-8-2-1. LAN ........................39 3-8-2-2. DHCP ........................40 3-8-2-3. ADSL (PPPoE) ....................... 40 3-8-3.
- Page 14 9-6. PC System configuration ....................62 9-6-1. General........................62 9-6-2. Site ..........................62 9-6-3. Event ......................... 63 9-6-4. Record........................64 9-6-5. Disk ........................... 65 10. Network – By an web-browser viewer................66 10-1. Download Web Brower Viewer and Connection............66 10-2. Main Features......................67 10-2-1.
-
Page 15: Features
1. Features ● 9/16 channels real-time live display and 9/16 channels simultaneous playback. ● MPEG-4 - Unbeatable recording picture quality and compression ratio. Best format for minimizing recording space and bandwidth requirements for network transmission. ● TRIPLEX - Simultaneous recording, playback and transmission via network ●... -
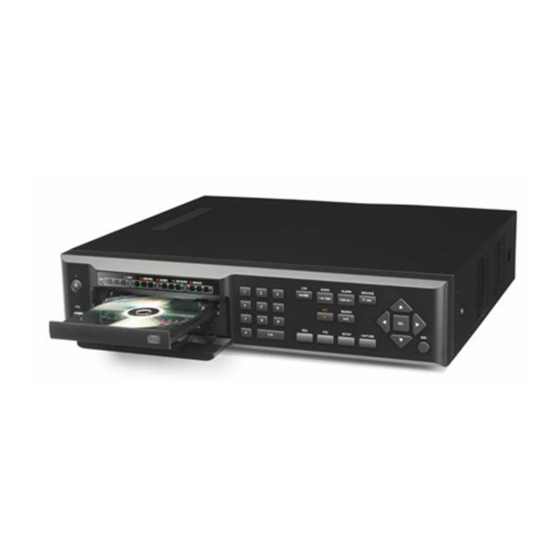
Page 16: Name, Function And Connection
2. Name, Function and Connection 2-1. Front Panel The following information will help you to operate the front panel controls. Figure 2.1.1. Front panel Table2.1.1. Indication lamps Name Description Indicating that the system is accessing the hard disk. RECORD Indicating that the system is recording video data. ALARM Indicating that when sensor(s) is/are triggered or motion is detected. - Page 17 SINGLE- Highlighted channel only. MIX- All of 4 channels. F/REW Jump/Step backward. In playback mode, the playback position moves 60 seconds backward. ALARM Press to enable/disable ALARM operation. Jump/Step forward. In playback mode, the playback position moves F/ADV 60 seconds forward. Press to fast forward the footage in playback mode.
-
Page 18: Rear Panel
2-2. Rear Panel Figure 2.2.1. Rear Panel Table 2.2.1. Rear panel connections Connection Purpose VIDEO IN connectors for video input. (NTSC/PAL) 9/16 connectors for video output. (Loop Back) VIDEO OUT 9/16 SPOT Composite video output for spot monitoring. VIDEO Composite video output in NTSC or PAL format. S-VHS output. -
Page 19: Remote Controller
2-3 Remote controller POWER Power On/Off Display of Full, Quad or 9 split view DISPLAY F/REW Jump 60 seconds backward PLAY Play/Pause Jump 60 seconds forward F/ADV FREEZE/CAP Freeze/Capture Fast Forward Disable alarm operation ALARM SETUP Setup menu screen ARCHIVE Display archive list Disable, Mute or Highlighted AUDIO... -
Page 20: Setting Up The Dvr
3. Setting up the DVR The following sections detail the initial setup of the DVR 3-1. Setup – Main Screen When the SETUP button is pressed, the DVR will ask for a password. The default password is 1111, which can be entered by pressing the up button 4 times and then pressing the SEL button. It is recommended that a new password be assigned to protect the system. - Page 21 3.1.1. will appear. Navigate through the menu items and press the SEL button to enter the sub- category menu. Figure 3.1.1. Setup screen Table 3.1.1. Setup menu configuration DISPLAY SEQUENCE SEQ-DWELL TIME OSD CONTRAST CHANNEL DISPLAY, BRIGHTNESS, CONTRAST, HUE, SATURATION RECORD RESOLUTION CHANNEL...
-
Page 22: Setup - Display Mode
SYSTEM DVR-ID DESCRIPTION LANGUAGE DATE FORMAT SET DATE & TIME SEND EMAIL PASSWORD ADMIN PASSWORD USER PASSWORD NETWORK PASSWORD NETWORK PORT CLIENT ACCESS BANDWIDTH SAVING NETWORK TYPE IP, GATEWAY, SUBNET MASK, DNS DDNS CONFIG SAVE CONFIG LOAD CONFIG LOAD DEFAULT LOAD FACTORY DEFAULT 3-2. -
Page 23: Setup - Recording Mode
Table 3.2.1. Menu items in DISPLAY mode setup Item Description Enable/disable on-screen-display. SEQUENCE Enable/disable sequential display of video in Full Screen mode. Set the dwell time for each, 4 or 9 channels display in sequential SEQ-DWELL TIME display mode. Set the visibility level of the On Screen Display (OSD). OSD CONTRAST CHANNEL Select the channel for applying the following settings. - Page 24 Table 3.3.1. Menu items in Recording mode setup Menu item Description Set the resolution to either 704x480, 704x240, or 352x240 for RESOLUTION NTSC. (PAL: 704*576/ 704*288/ 352*288) CHANNEL Select the channel to apply the following settings on. Changes you make will immediately take effect with the selected channel. FRAME RATE Set the frame rate for the specified channel.
-
Page 25: Quick Record Setting
3-3-1. Quick record setting User can setup all the values related with record such as Frame rate, quality, recording type, Pre-recording, and Post-recording on one page of setup screen. 1. Go to Record>Channel and press SEL button. 2. Then the bellow setup screen will pop up. Figure 3.3.2. -
Page 26: Setup - Device Mode
channels. [SUN to SAT]: Selected recording mode using the SEL button is applied to the entire time zone for the specified channel. [Vertical Bar “ | “]: Selected recording mode using the SEL button is applied to the entire channel for the selected time zone. Each vertical bar “ | “ corresponds to one hour. [- Individual Block of Time]: Selected recording mode using the SEL button is applied to the selected 1-hour increment for the selected channel. -
Page 27: Alarm-Out
Table 3.4.1. Menu items in Device Setup screen Item Description Set the sensor, motion, and video loss for each alarm. ALARM OUT SPOT-OUT Set the all details for spot monitoring. Set the PTZ camera speed, number, type and ID. Select specified channel for motion zone setup. CHANNEL MOTION ZONE Select Full Zone or Partial Zone for motion sensing. -
Page 28: Spot - Out
Select alarm from 1 to 4. ALARM OUT SENSOR IN Enable setting up to 4 sensors of 9/16 sensors for the each alarm. MOTION ON Enable setting up to 4 cameras of 9/16cameras for the each alarm. Enable setting up to 4 cameras of 9/16 cameras for the alarm. VIDEO LOSS ON ALARM DURATION Set the dwell time of alarm from1 to 60seconds. -
Page 29: Motion Zone Setup
Figure 3.4.4. PTZ Control Setup Screen Note: For speed dome cameras that support RS-485, connect them directly to the RS-485 port. If the camera is controlled with RS-232C, use an RS-485 to RS-232C signal converter. On the PTZ control Setup screen, you can select or set the protocol type of the camera that is the same as the one installed on the site. -
Page 30: Setup - Storage Mode
Figure 3.4.5. Motion Zone selection screen 3-5. Setup – Storage Mode Set the storage parameters in the Storage setup screen. Figure 3.5.1. STORAGE setup screen Table 3.5.1. Menu items in STORAGE Setup screen Item Description... -
Page 31: Setup - System Mode
When enabled, the DVR will continue recording and OVERWRITE overwrite the oldest existing recorded data once the hard drive is full. When disabled, recording will stop once the hard drive is full. Format the hard drive. Use the UP and DOWN arrow buttons DISK FORMAT to select ON, then press SEL. - Page 32 Item Description DVR ID Set the name of the DVR. Press the SEL button, use the LEFT and RIGHT or UP and DOWN arrow controls to navigate through the position for each alphanumeric character and Press SEL to apply the selected character. And Press OK to confirm the name.
- Page 33 DATE & TIME Set the present date and time for the DVR. Press SEL, then use the LEFT and RIGHT arrow controls to navigate through the position of each alphanumeric character in the date and time. Use the UP and DOWN arrow controls to change the selected character.
- Page 34 3. OTHERS BEGIN (MAR/1 /SUN/00H) (SEP/1 /MON/00H) (Set the BEGIN and END time for the specific area except EU and USA) use the UP and DOWN arrow controls to change the value of month, week, day and hour. CAUTION: -Do not set the start time to 23:00 for DLS. -DLS can’t be applied, if the date of BEGIN and END is same.
-
Page 35: Setup - Password Mode
3-7. Setup – PASSWORD Mode Use the LEFT or RIGHT and UP and DOWN arrow controls to set the password. Figure 3.7.1. PASSWORD setup screen Table 3.7.1. Menu Items in PASSWRORD Setup Screen Item Description Set the administrator password. After selecting this menu item ADMIN PASSWORD you will be promoted for your current password and then the new password. - Page 36 DOWN=3 LEFT=4 Admin password is asked for the following functions. Setup, Power, Search, and Key Lock from remote control. Set the user password. After selecting this menu item you will be USER PASSWORD promoted for your current password and then the new password. Follow the prompts to change and confirm the new password.
-
Page 37: Setup - Network Mode
3-8. Setup – Network Mode Set up your network parameters on the Network Setup screen. Figure 3.8.1. NETWORK setup screen Table 3.8.1. Menu items in Network Setup screen Item Description Port number (Default: 5445) PORT Enable/Disable remote access through client software. CLIENT ACCESS BANDWIDTH SAVING Enable/Disable only key frame transmission. -
Page 38: Ports
The DDNS sever name is ns.standalone4ch.com. CAUTION: Do not change this sever name. If this is changed, the DDNS service cannot be used. Registration Check the MAC address of DVR from Setup>System>Description. Please contact a distributor or an installer to register your DVR on a DDNS Server. -
Page 39: Network Types
3-8-2. Network Types 3-8-2-1. LAN 1. for the use of fixed IP. (See your network administrator if you do not have this information.) 2. When DVR is installed in IP sharer that is connected with ADSL, a user can assign fixed IP to DVR from IP sharer itself using “DMZ”... -
Page 40: Dhcp
The address for the DNS server 3-8-2-2. DHCP An IP address is automatically assigned by the DHCP server, which automatically assigns IP address and other parameters to new devices. When ADSL or other network being used adopts variable IP method, not fixed IP. This option is used as a way to automatically get IP address. -
Page 41: Saving Setup Of Network Setup
The user ID for the ADSL connection PASSWORD The password for the ADSL connection 3-8-3. Saving Setup of Network setup After changing the network configuration, confirmation window will popup. To preserve the setup values that you have selected, select YES. Then system will reboot. Figure 3.8.5. - Page 42 the saving process. LOAD User can upload the configuration of DVR to another DVR using the USB CONFIG Memory stick. Put the USB stick on the front panel and press SEL to start the loading process. LOAD Select ON to reset the system to the default settings. DEFAULT (Password, date format, DLS, Network setting, and HDD Overwrite will not be included.)
-
Page 43: Saving Setup
LOAD Select ON to reset the system to the factory default settings. FACTORY DEFAULT 4. Saving Setup To preserve the setup values that you have selected, select YES. Figure 4.1.1. SAVE SETUP screen... -
Page 44: Live, Search, And Playback
5. Live, Search, and Playback 5-1. Live Viewing Screen In the Live screen, video inputs from the cameras are displayed as they are configured in the Display Setup screen. Various on-screen display (OSD) symbols, which indicate the status of the DVR, are described in Table 5.1.1. Figure 5.1.1. - Page 45 Alarm indicator. When there is an alarm (sensor or motion alarm) in the video channel, this icon will be highlighted bright red. Indicates that a network client is connected to the DVR. Indicates that sequencing mode is enabled. Table 5.1.2. Button functions in Live Viewing Screen Button Description POWER ON/ OFF.
-
Page 46: Search Screen
To exit from each menu. 5-2. SEARCH Screen Press SEARCH in live mode to enter the Search screen. When you press the Search button, DVR asks for a password as in Figure 5-2-1. Figure 5.2.1. Search Screen Enter the password using the arrow controls. There are 7 ways of search menu such as TIMELINE, EVENT, GO TO FIRST TIME, GO TO LAST TIME, GO TO SPECIFIC TIME, LOG, and ARCHIVE on the screen. -
Page 47: Event Search
C: Continuous-Green M: Motion-Yellow S: Sensor-Red R: Manual -Purple 4. Once you have selected the time zone, press the SEL button to move to the 60 minutes time table. 5. Select All or a specific channel to search by using the UP and DOWN arrow buttons. 6. -
Page 48: Go To First Time
after the current selection. 9. Once the desired event has been selected, press SEL to start playing back the selected video. 10. Press the BACKUP button to launch the archiving function in playback mode. 5-2-3. Go To First Time You can access the oldest recorded data on the DVR hard drive by selecting GO TO FIRST TIME on the SEARCH window. -
Page 49: Archive Search
Figure 5.2.5. Log Search Screen 5-2-7. Archive Search The ARCHIVE Search window is used to find previously stored video or images. 1. Select the date to begin searching by using the LEFT, RIGHT, UP and DOWN buttons to navigate through the days. 2. -
Page 50: Ptz Control
Figure 5.3.1. PLAY Mode Screen Table 5.3.1. Button functions in PLAY Mode Button Description Return to the previous menu screen, search window, or exit from the menu Press to rewind the footage at 1x, 2x, 4x, and 8x speeds. Reverse playback speed is shown as -1x(normal), -2x (2 times normal), -4x (4 times normal), and -8x (8 times normal) at the bottom right of the screen. -
Page 51: Backup
Select the item you wish to control the PTZ camera and control them by using the UP and DOWN or LEFT and RIGHT buttons. Please refer to the table 6.1.1. for the control. Figure 6.1.1. PTZ Control Screen Table 6.1.1. Button Functions in PTZ Control Item Description PAN / TILT... -
Page 52: Video Backup Onto Usb Flash Memory Or Cd Media
2. And the DVR will ask which media you will take for archiving. 3. Once you select the media, the system will start to archive the data to the selected media. Figure 7.1.1. Still Image Archiving and Backup Screen 7-2. Video backup onto USB flash memory or CD media Video can be captured and archived onto the USB stick, CD media or hard drive while playing back recorded video. -
Page 53: Transferring Still Images Or Video From The Archive List
Figure 7.2.1. Video Archiving and Backup Screen The DVR will convert the corresponding portion of the video into an AVI file. 7-3. Transferring still images or video from the ARCHIVE list The stored data onto hard drive will be found in the ARCHIVE list in SEARCH menu. User can back up still images or video into the storage device from the ARCHIVE list. -
Page 54: Playback Of Backup Video In Exclusive (Nafs) Format
7-4-2. Playback of backup video in exclusive (NaFs) format If the data is backed up in an exclusive file format, this video can be playbacked only an exclusive player in CD that is provided with DVR. -
Page 55: Upgrading Firmware
8. Upgrading Firmware In order to upgrade, the firmware upgrade file must first be downloaded and copied into the USB memory stick. Create a new folder in the USB memory stick and name it “upgrade”. Copy the firmware upgrade file “app16xxxxxx.bin” for 16CH DVR or “app9xxxxxx.bin” for 9CH DVR into the “upgrade”... -
Page 56: Network - By An Exclusive Viewer
9. Network – By an exclusive viewer The DVR provides a live remote monitoring feature. Remote monitoring requires installation of a software client program on your PC. NOTICE In a high bandwidth network, a maximum of four users can access one DVR simultaneously. In a low bandwidth network it is recommended that only one user access the DVR at a time. -
Page 57: Minimum Pc Requirements
9-2. Minimum PC requirements PC Specification Minimum Requirement Recommended Intel Pentium Ⅲ Intel Pentium Ⅳ 500Mhz 2Ghz Memory 128MB 256MB 16MB 64MB Resolution 1024x768 1024x768 Disk space 10MB 10MB Windows 2000 Windows 2000, Professional, XP Vista Network 10/100Base T 10/100Base T Others Direct X 8.1 Direct X 9.0 or Higher... -
Page 58: Live Viewer
9-4. Live viewer When installation is complete, double click the icon on your desktop to start the program. Figure 9.4.1. Main user interface Table 9.4.1. Main controls in Live Button Description DATE & TIME Displays the current date and time. CONNECT Click this icon to connect to the DVR Click this icon to search for recorded video. - Page 59 LOCK/ UNLOCK Click this icon to lock/unlock all operations of the client software. Once the lock or unlock icon is clicked, this pop up window appears. Remember the password and enter it when you operate the client software. Use these buttons to control the PAN/TILT features on the PAN/TILT remote camera.
-
Page 60: Search And Playback Viewer
9-5. Search and Playback Viewer The search window can be accessed by clicking the search icon on the upper right of the main user interface. Figure 9.5.1. Main user interface Table 9.5.1. Main controls in Search No Button Description Displays the recording time of the data selected on the time bar at DATE &... -
Page 61: Backup
CAPTURE Click this icon to capture a still image of recorded video. Once the capture icon is clicked, this pop up window appears. The still image is captured in either jpeg or bmp file format. MARK IN Click this icon to set the start time for video backup. MARK OUT Click this icon to set the ending time for video backup. -
Page 62: Pc System Configuration
9-6. PC System configuration Click the setup icon to setup the configuration of PC that the network client S/W is installed. 9-6-1. General Once you click the setup icon, this pop up window appears. Select security options and set a password. -
Page 63: Event
9-6-3. Event You can set event items, the amount of local disk space you want to allow and the save path for the log file. LOG – Select to save event log into ‘log file’. ICON – Select to display the event on live video. EVENT LIST –... -
Page 64: Record
9-6-4. Record You can set the recording conditions for Always, Event, or Auto recording. You can also select individual channels or all channels to record. When you set the recording condition to Event, you can set event for motion or alarm with duration. -
Page 65: Disk
9-6-5. Disk You can select which local disk to use and the amount of disk space you want to allow the program to use for recording. You can also choose to overwrite data or stop recording when the maximum amount of disk space is full. -
Page 66: Network - By An Web-Browser Viewer
10. Network – By an web-browser viewer The DVR provides a live remote monitoring feature by web-browser viewer. 10-1. Download Web Brower Viewer and Connection 1. User needs to access http://ns.standalone4ch.com/webview2/ to get a web browser viewer. Then the window will appear as bellow. Click “YES” to download Web Browser Viewer from the server run by the manufacturer. -
Page 67: Main Features
3. Click button and enter IP address (or Domain name using DDNS), the password, and Port number. 4. Then user can access DVR. 10-2. Main Features 10-2-1. Live Figure 10.2.1. Main user interface - Live... -
Page 68: Search And Playback
Table 10.2.1. Main controls in Live Name Description Displays the current date and time. DATE & TIME CONNECT Click this icon to connect to the DVR Click this icon to search for recorded video. SEARCH LIVE DISPLAY MODE Click these icons to select display mode. PAUSE Click this icon to pause the display screen. -
Page 69: Appendix
Name Description DATE & TIME Displays the current date and time. Connect/Disconnect Click this icon to connect to the DVR Click this icon to search for recorded video. LIVE DISPLAY MODE Click these icons to select display mode. Click this icon to pause the display screen. BACKUP Click this icon to capture the image from playback. -
Page 70: Checking Mac Address On The Rear Panel Of Dvr And Registration No
LAN: Select when DVR is installed in Local Area Network with router or IP sharer and IP address is static and private IP address. ADSL (PPPoE): To use this ADSL (PPPoE) function when the network type connecting the DVR is using PPPoE method. If ADSL type is not using inputting IP and Password like VDSL or DVR is installed in IP sharer, a user can not select this function. - Page 71 enter your e-mail address correctly. B. Press Registration and register DVR as bellows, Input MAC Address and Registration that you checked from the rear of DVR. And input Domain Name and press [check] to see if Domain name is usable or not. NOTICE ID and password of registration DDNS is not the same as “Domain name”.
-
Page 72: Network Access Using Domain Name
2. Network access using Domain name If DDNS registration is successful, you can access your DVR via the provided Network Client S/W. A. Run Network Client S/W program and click the “connect” button. B. Enter your domain name instead of IP address in the “IP Address” field. C.
Need help?
Do you have a question about the SDVR-9000C and is the answer not in the manual?
Questions and answers