
Summary of Contents for Tevion GPS-4301
-
Page 1: Gps Receiver
GPS Receiver Instruction Manual Model Number: GPS-4301 After Sales Support TEL: 1300 88 6649 N13275... -
Page 2: Getting Started
Getting Started Congratulations on choosing to buy a Tevion® product. By doing so you now have the assurance and peace of mind that comes with purchasing a product made by one of the leading manufac- turers. All products brought to you by Tevion® are manufactured to the highest standards of performance and safety, and, as part of our philosophy of customer service and satisfaction, are backed by our comprehensive 1 Year Warranty. -
Page 3: Table Of Contents
Contents Getting Started 4. Image Viewing Function Precautions 4.1 Features 1. Welcome 4.2 Interfaces and Operations 1.1 Packing List 5. Ebook Reading Function 1.2 How to use this manual 5.1 Features 2. Introduction 5.2 Interfaces and Operations 2.1 Product appearance 6. -
Page 4: Precautions
Precautions 01. Do not shake or knock the device. Rough handling may lead to damage or missing of the data and failures to play files. 02. Keep the device away from direct sunlight or high temperature, to prevent overheating of the batteries and device body which may cause failures or dangers. 03. - Page 5 13. Films, music, and images may be copyrighted. Playing those files without permission would violate the copyright law 14. Do not use metal objects to short-circuit a charger or device input. This may result in device failures. 15. Keep the device away from heat source. 16.
-
Page 6: Welcome
24. Violent collision or drop may damage the device or spoil its appearance. Please take care. 25. Do not use an earplug with over high volume, or it will hurt your hearing and even cause permanent hearing impairment. 26. Please do not set the volume of an external loudspeaker too high for a long time. Longstanding use may cause an output distortion of the loudspeaker. -
Page 7: Packing List
waiting for a meeting. The perfect “GPS + entertainment” functions provide you with a colorful work and life. 1.1Packing List Make sure all the items are included in the package of the navigator: Main equipment Vehicle power adaptor... - Page 8 Mini USB cable Power adaptor (Optional) Earphone (Optional) Touch pen Bracket SD card storing maps (Optional)
-
Page 9: How To Use This Manual
In case there is any divergence between the above and the real products, the real products will prevail. For any defective items, please contact your dealer or agent who sold you the product as soon as possible. 1.2 How to Use This Manual To make best use of the navigator, read the Product Manual thoroughly to know the operation details. -
Page 10: Product Appearance
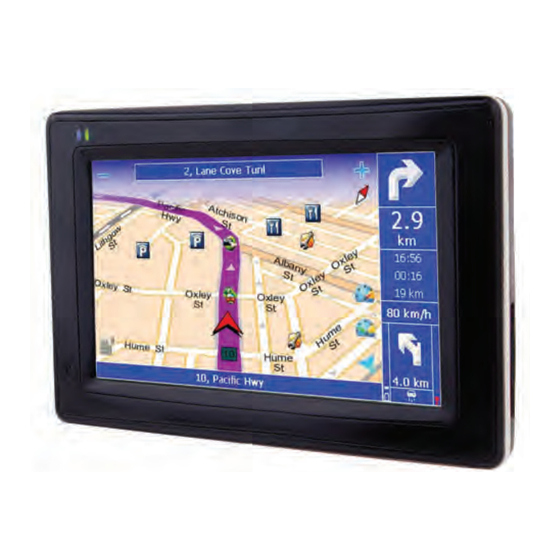
2.1 Product Appearance... - Page 11 Sleep key System hot start or sleep. Menu key This is used to return to the system interface SD/MMC card slot Inside holds a SD/MMC memory card. This card is optional and is not required to operate the navigation aspects of this device. It is for back –up and multi-media..
-
Page 12: Power Supply And Charging Your Navigator
2.2 Power Supply and Charging of a Navigator When the GPS navigator is used for the first time or no used for a long time, the batteries must be completely charged with a MINI USB cable. Recommended to charge overnight for 12 hours for first time use or on long drive with car adaptor 2.2.1Power supply The navigator can be powered in two ways, i.e. -
Page 13: Charging With A Vehicle Power Adaptor
substance. 2.2.2 Charging with a power adapter Used for the first time or no used for a long time, the GPS navigator must be completely charged by a MINI USB charger adaptor. 1. Connect the DC terminal of the adapter to the power terminal on the bottom side of a GPS navigator. -
Page 14: Basic Operation
2.3 Basic Operation 2.3.1 Switching on/off & hot start 1. Switching on/off Press the power switch key [ ] at the back of GPS, ON represent starting, OFF represent closing. [Caution] When transports the main unit from a place to another place, only after main unit adapt to the circumstances, can start to use. -
Page 15: Pressing The Power Key Fails To Switch On/Off The Device
3. Pressing the power key fails to switch on/off the device. [Caution] If the system fails, you will miss the system information not yet saved by restarting the system. 2.3.3 Using the vehicle bracket to fix a navigator A vehicle bracket is composed of a bracket and a support. Please fix the device using the vehicle bracket onto the front windshield or dashboard while using the GPS navigator in vehicle. -
Page 16: Using Sd/Mmc Memor Card (Optional)
2.3.5 Using SD/MMC Memory card Optional Insert the card properly into the slot. [Caution] Do not take out the card at random when the system is running a navigation program or playing a media file. 1. Do not press hard or bent the SD/MMC card. Prevent SD/MMC card from falling and bumping. - Page 17 Access a computer via the mini USB interface on the right side of the navigator, and you can copy files from the navigator to the computer and vice versa or backup the data in the navigator to the computer for future use. 1.
-
Page 18: Description Of Main Interface And Main Functions
2.5 Description of the Main Interface and Main Functions 1. System interface: 4301 System interface 2. Description of functions: Open navigation map-----then go to quick start guide or detailed Navigation instruction manual in cd disk Video player: This is to play wmv/mpeg/mpg/mp4/3gp/asf and avi Media format video files;... -
Page 19: Maintaining The Gps Navigator
Audio player: This supports WMA9, MP3 and WAV format audio files and random play, orderly play and cycling play. Image viewer: This is to view JPG、JPEG、BMP and PNG format Image files; this allows you to rotate, scale up/down and automatically display images Ebook: This allows you to read TXT-format files;... -
Page 20: Audio Playing Function
drop: hard falling and bumping may damage the display screen and other precision parts. [Caution] Accidental damages are beyond the warranty coverage. Avoid operating in the following circumstances: flash variation in temperature, high temperature (60°C above), low temperature (0°C below), high voltage, dustiness, static interference, moisture. Keep the device away from erosion by corrosive liquid and do not dip it in any liquid.Avoid radiated interference: The radiated interference from other electronic equipment may affect the performance of navigator's display screen. -
Page 21: Features
3.1 Features The audio player supports WMA, MP3 and WAV format files. You can set the play order at random. Please copy your audio files to any folder in the memory card before playing. 3.2 Interfaces and Operations 1.Click the "Media"\"Music" button; click the selected song to activate the audio player, as shown in Figure 3-1. - Page 22 stopped playing; click to continue Pause This indicates a song is being played; click to pause Stop Click to stop playing Last Click to play the last file Next Click to play the next file Drag the nib of the touch pen on the screen Volume leftward/rightward to adjust the volume.
- Page 23 Cycling play Cycling play current songs of a folder Random play Random play current songs of a folder 2. Refer to Figure 3-2 for the audio folder Figure 3-2 the audio folder Close Click to close the current folder...
-
Page 24: Image Viewing Function
Last Click to show the last page Next Click to show the next page Back Click to back to mother folder Name and format of Click to show the track name and its formats a track Chapter 4 Image Viewing Function This chapter provides information on how to view images with the image viewer of the GPS navigator. -
Page 25: Interfaces And Operations
4.2 Interfaces and Operations 1. Click the “Photo” button in the system menu, click the selected image to activate the viewer, as shown in Figure 4-1. Figure 4-1 the image viewer Close Click to close the image viewer... - Page 26 Full screen Click to full screen display the picture Rotate clockwise Click to rotate the current picture clockwise of 90° Rotate Click to rotate the current picture counterclockwise counterclockwise of 90° Last Click to view the last picture in the same folder Next Click to view the next picture in the same folder Click to switch to the image folder interface to...
- Page 27 Figure 4-2: Interface of picture folder Close Click it to close the current folder Last Click it to show last page Next Click it to show the next page Back Click it to back to mother folder Click to show the picture's name and format Picture's name and format...
-
Page 28: Ebook Reading Function
[Note] When glance over the picture, except press button can show the entire screen picture, double click picture demonstration region, can also show entire screen, double click again, resume the normal demonstration. When show entire screen, single click the right half part of picture region to browse next picture; single click the left half part of picture region to browse last picture. - Page 29 Figure 5-1: the viewer of txt Close Click it to close the e-Reader. Last Click it to read the last page Next Click it to read the next page Page selecting Click to prompt "page-selecting interface", skip to any page for reading Back Click to back to the current folder’s interface to select the required book...
- Page 30 of a text file text file Page/pages The page of the current text file or the total pages 2. Refer to Figure 5-2 for page-selecting interface: Figure 5-2: Page number selection interface Close Click to quit Number keypad Composed of 10 figures from 0 to 9, the keypad supports any figure between 0 to 99999999 Figure display This is to show the typed-in figure...
- Page 31 Backspace Click to delete the last figure automatically Zero Click to reset figures Skipping Click to skip to the current page shown in the figure display zone to read the page 3.Refer to Figure 5-3 for the text file folder Figure 5-3: Text file folder interface Close Click it to close the current folder.
-
Page 32: Features
Next page Display the contents of next page. Return Return to the previous-level folder. File name Display the name of the folder. Chapter 6 Video Playing Function This chapter provides information on how to use the GPS navigator to play video. 6.1 Features 1. - Page 33 Figure 6-1 the media player interface Close Click to close the video player Play This indicates a film is being played; click to pause Pause This indicates that a film has been paused; click to continue Stop Click to stop playing Fast forward Click to fast play a film;...
- Page 34 Full-screen Click to play a video file in full-screen mode play Volume Drag the nib of the touch pen on the screen adjusting leftward/rightward to adjust the volume. Drag leftward to decrease and rightward to increase Progress Drag the nib of the touch pen on the screen adjustment leftward/rightward to adjust the progress.
- Page 35 Figure 6-2 the video folder interface Close Click to close the current folder Last Click to show last page Next Click to show the next page Back Click to back to mother folder Film's name This is to show the film's name and its format and format...
-
Page 36: System Setting
[Note] When play the movie, double plays click movie’s demonstration region, show entire screen movie, double click again, and resume the normal demonstration. Chapter 7 System Setting Click the "Setting" button to enter the "setting" menu; then, you can implement relevant settings. -
Page 37: Volume Setting
Volume Click to adjust the loudspeaker's volume Switch on/off screen click sound Power Click to check current battery status Brightness This is to adjust the back light brightness Time and date This is to set the system time and date and show the system time zone Language This is to set the prompt language... - Page 38 Figure 7-2: Setting of volume interface...
-
Page 39: Power Information
Close Click to quit the volume adjusting application; Volume - The system provides ten-grade volumes (from silence to maximum); click to decrease the volume in one grade; Volume + The system provides ten-grade volumes (from silence to maximum); click to increase the volume in one grade;... -
Page 40: Brightness Setting
Figure 7-4: Power information interface Close Click to quit the power information application Battery The yellow bars refer to the remaining energy of the battery; if status the battery is being charged, the dynamic red bars will fill the grid from left to right 7.3 Brightness Setting The back light setting is to adjust the brightness, as shown in Figure 7-5:... -
Page 41: Date And Time Setting
Figure 7-5: The setting of brightness interface Close Click to quit the brightness setting application Brightness down Click to decrease the brightness level by level until it is minimized Brightness up Click to increase the brightness level by level until it is maximized Brightness display The yellow bars refer to the current brightness... - Page 42 1. System date setting; 2. System time setting. Figure 7-6: Setting of Date and Time interface 1. Click the [ ] button to enter the "Date" interface (as shown in Figure 7-7), and you can click [ ] or [ ] to set the year, month and day.
-
Page 43: Language Setting
you can click [ ] or [ ] to set the hour and minute. Figure7-8: Setting of Time interface 7.5 Language Setting The language setting is shown as Figure7-9: Figure 7-9: Setting of language interface Click the button [ ] or [ ] in the language bar to select a system language. -
Page 44: System Information
system provides English. 7.6 System Information The system information setting is shown as Figure 7-10: 1. Factory defaults setting; 2. GPS resetting; 3. Touch screen calibration. Figure 7-10: Setting of system information interface Click the button [ ] to prompt the "Factory Defaults" interface (as shown in Figure 7-11);... - Page 45 Figure 7-11: Factory Defaults interface Click the button [ ] to prompt the "GPS Resetting" interface (as shown in Figure 7-12); click the button [ ] to implement GPS resetting; click [ ] to close the "GPS Resetting" interface. Figure7-12: GPS Resetting interface...
- Page 46 Click the button [ ] to prompt the “Touch Screen Calibration” interface (as shown in Figure 7-13); click the cross center with the touch pen and the cursor moves towards the center, top left corner, bottom left corner, top right corner and bottom right corner until successful positioning.
-
Page 47: Technical Specifications
Chapter 8 Technical Specifications The specification of this product is subject to change without previous notice. Dimensions 128mm X 82mm X 21mm Weight About 250 grams Supported memory card 32M/64M/128M/256M/512M/1G/2G and capacity Battery Embedded lithium battery, 1300mAH/3.7V Loudspeaker 2W@4ohm Earphone 20 mW/32ohm Audio WMA/MP3/WAV... -
Page 48: Troubleshooting
Chapter 9 Troubleshooting If your GPS navigator fails to work, please check it following the solutions below. If the problem still exists, please contact our customer service center.1300886649 Failures Causes Solutions The device does not The battery Power the system with external power turn on energy is source and charge the battery at the... - Page 49 There is no sound The volume is set Increase the volume while playing too low The earphone is in Plug the earphone properly poor contact The device can not The USB cable Connect the USB cable properly access a computer fails to connect The device can not It depends on whether local GPS...
Need help?
Do you have a question about the GPS-4301 and is the answer not in the manual?
Questions and answers