Table of Contents

Related Manuals for iSimple PXDP

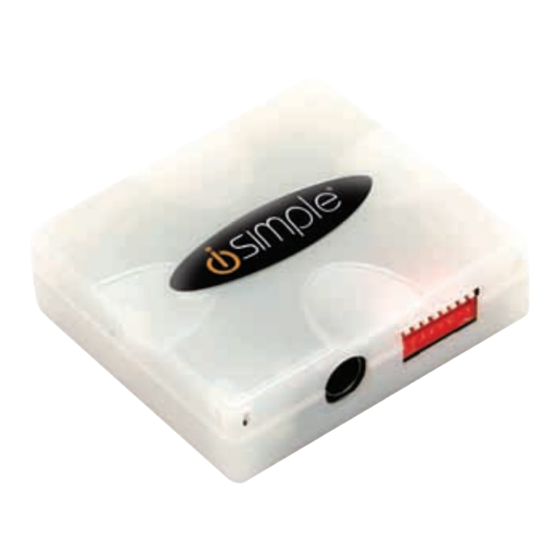
Summary of Contents for iSimple PXDP
- Page 1 ® Add iPod Capability to Your Factory Radio Owner’s Manual PXDP SoundByte iSimple Solutions ® A division of AAMP of America™ 13160 56th Court Clearwater, Florida 33760 Ph. 866-788-4237 support@isimplesolutions.com ©2009 AAMP of Florida, Inc. 01-27-11...
-
Page 2: Table Of Contents
Table of Contents Pages CHAPTER 1-Getting Started 1.1 Introduction 1.2 Precautions 1.3 Configuration & Harnesses 1.4 Programming the PXDP CHAPTER 2-General Installation 2.1 Installation Location 2.2 Pre-Installation Checklist 2.3 Wiring Connections 2.4 Installation at Changer Location 2.5 Installation at Radio CHAPTER 3 -Operation 3.1 Operation... - Page 3 PXDP Connections Factory Radio (not included) Vehicle Specific Harness ( actual harness may vary) PXDP Interface iPod Input...
-
Page 4: Chapter 1-Getting Started
PXDP interface. The PXDP interface will allow you to connect your iPod to a factory radio that has the ability to control a CD changer. The PXDP is designed to be used with most iPod Models featuring the 30 pin docking port. -
Page 5: Configuration & Harnesses
Depending on the type of PXDP kit you purchased, it might include a bundle of different vehicle harnesses or none at all. If the kit contains many harnesses, only one will be needed for your specific vehicle. -
Page 6: Programming The Pxdp
Switches are in their default setting of “off” in the up position and are turned “on” when switched down. This programs the PXDP to work with the vehicle in which it will be installed. The dip-switches MUST be set before the interface is plugged into the vehicle. -
Page 7: Chapter 2-General Installation
Some common locations of these cables are in the trunk, behind the glove box, and in or under a center console. ( see Fig.2 below) Common Connection Locations iPod PXDP interface M EN U iPod Docking Cable (Sold Separately) -
Page 8: Pre-Installation Checklist
2.2 Pre-Installation Checklist At this time and before beginning the installation please ensure that: • You have read and understand the precautions outlined in section 1.2 • Your iPod’s Firmware is up to date. (section 1.2) • You have your radio’s security code.(when applicable, see section 1.2) •... - Page 9 Once you’ve identified the constant 12V+ circuit, strip back about 1/8” of the insulation. Now take the positive test lead and insert it into the wire stranding so that you can now probe for a suitable ground location in the dash cavity using the negative test lead.
-
Page 10: Installation At Changer Location
2.4 Installation at the CD Changer Location In this section you will learn how to install the PXDP in the factory CD changer location. If your vehicle is equipped with a factory CD changer you will need to disconnect it from the factory pre-run harness in order to connect the PXDP interface. -
Page 11: Installation At Radio
2.5 Installation at the Radio In this section you will learn how to install the PXDP behind the radio. If your vehicle is equipped with a factory CD changer or other external audio source, you will need to disconnect it from the back of the radio in order to connect the PXDP interface. - Page 12 4. Now that the interface is connected to the radio, you will need to test the operation of the interface before permanently running the black iPod docking cable or re- assembling the dash. First, connect the black iPod cable to the iPod. The iPod should indicate that it is being charged.
-
Page 13: Chapter 3 -Operation
PXDP to initialize. CONTROLLING THE IPOD FROM THE RADIO With the PXDP interface, the radio will control the iPod as if it were a factory CD changer. Therefore, operation will be done by using the same buttons you would use to control a factory CD changer. - Page 14 RADIO DISPLAY DURING IPOD OPERTION Some factory radio’s may show DISC and TRACK numbers on the display of the radio. The PXDP interface does not send any information from the iPod to the radio. This means that the DISC and TRACK numbers shown on the display will not and can not reflect the song number on the iPod due to the complex nature of the music library.
-
Page 15: Troubleshooting
Audio is Low or PXDP interface is con- Disconnect the factory Distorted nected with an external CD external audio source. changer or other external... -
Page 16: Warranty
3.3 Warranty One Year Limited Warranty The quality controls used in the manufacture of this product This warranty covers any supplied or manufactured parts of this product that, upon inspection by iSimple authorized personnel, is found to have failed in normal use due to defects in material or workmanship. -
Page 17: Fcc Statement
3.5 FCC Class B Radio Frequency Interference Statement This equipment has been tested and found to comply with the limits for a Class B digital device, pursuant to Part 15 of FCC rules. These limits are designed to provide reasonable protection against harmful interference in a residential installation. - Page 27 Notes ____________________________________________________ _ ____________________________________________________ _ ____________________________________________________ _ ____________________________________________________ _ ____________________________________________________ _ ____________________________________________________ _ ____________________________________________________ _ ____________________________________________________ _ ____________________________________________________ _ ____________________________________________________ _ ____________________________________________________ _ ____________________________________________________ _ ____________________________________________________ _ ____________________________________________________ _ ____________________________________________________ _ ____________________________________________________ _ ____________________________________________________ _ ____________________________________________________ _ ____________________________________________________ _ ____________________________________________________ _ ____________________________________________________ _ ____________________________________________________ _ ____________________________________________________...
- Page 28 Solutions ® a division of AAMP of America™ 13160 56th Court Clearwater, Florida 33760 Ph. 866-788-4237 support@isimplesolutions.com ©2009 AAMP of Florida, Inc. For Best Performance Have It Professionally Installed.
Need help?
Do you have a question about the PXDP and is the answer not in the manual?
Questions and answers