Advertisement
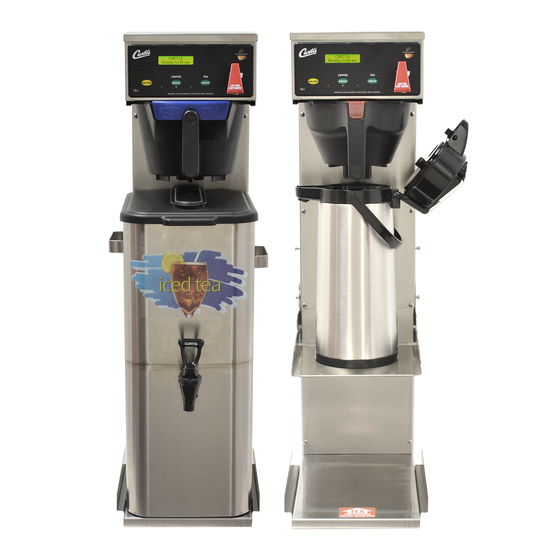
Models:
• CBS
• CBP
CAUTION: Please use
this setup procedure
before attempting to use
this brewer. Failure to follow the
instructions can result in injury or the
voiding of the warranty.
CAUTION: DO NOT
connect this brewer to hot
water. The inlet valve is
not rated for hot water.
IMPORTANT: After
setup, run a full TEA
cycle first before running
a COFFEE cycle. Place an empty
tea container to catch both hot water
from the brewcone and dilution water
from spout on the front cover.
WARNING HOT LIQUID,
Scalding may occur.
Avoid splashing.
C
ISO 9001:2008 REGISTERED
WILBUR CURTIS CO., INC.
6913 West Acco Street
Montebello, CA 90640-5403
For the latest information go to
www.wilburcurtis.com
Tel: 800-421-6150
Fax: 323-837-2410
Service Manual – Combo Brewer
Important Safeguards/Conventions
This appliance is designed for commercial use. Any servicing other than cleaning and maintenance should be performed by an
authorized service technician.
• Do NOT immerse the unit in water or any other liquid
• To reduce the risk of fire or electric shock, do NOT open top or front panel. No user serviceable parts inside.
• Keep hands and other items away from hot parts of unit during operation.
• Never clean with scouring powders, bleach or harsh chemicals.
Symbols
WARNINGS – To help avoid personal injury
Important Notes/Cautions – from the factory
Sanitation Requirements
Your Curtis Combo Brewer is Factory Pre-Set and Ready to Go... Right out of the Box.
Following are the Factory Settings for your Coffee/Tea Brewing System:
• Brew Temperature = 204°F
• Brew Volume = Set to dispensing vessel requirements (2.2 liters)
Generally there will never be a reason to change the G3/Gold Cup Series default settings. However, should you need to make slight
adjustments to meet your brewing needs, programming instructions are provided later in this manual.
System Requirements:
• Water Source 20 – 90 PSI. Minimum flow rate of ½ gpm (1 gpm preferred flow rate).
• Electrical: See attached schematic for standard model or visit www.wilburcurtis.com for your model.
Equipment to be installed to comply with applicable federal, state, or local plumbing/electrical codes having jurisdiction.
SETUP STEPS
The unit should be level (left to right and front to back) and located on a solid counter top. Connect a water line from the water filter to the
brewer.
NOTE: Some type of water filtration device must be used to maintain a trouble-free operation. (In areas with extremely hard water, we
suggest that a sedimentary and taste & odor filter be installed.) This will prolong the life of your brewing system and enhance coffee and
tea quality.
NSF International requires the following water connection:
1. A quick disconnect or additional coiled tubing (at least 2x the depth of the unit) so that the machine can be moved for cleaning
underneath the unit.
2. This equipment is to be installed with adequate back flow protection to comply with applicable federal, state and local codes..
3. Water pipe connections and fixtures directly connected to a potable water supply shall be sized, installed and maintained in
accordance with federal, state, and local codes.
1. A 1/4" Flare has been supplied for water line connection. Use tubing sized sufficiently to provide a minimum of ½ gpm (1 gpm is
preferred).
2. Connect the unit to an appropriate electrical power circuit.
3. Turn on the toggle (STANDBY/ON) switch behind the unit. The heating tank will start to fill. When the water level in the tank rises
to the correct volume, the heating element will energize automatically. With the G3/Gold Cup Series there is no danger of element
burnout due to an unfilled heating tank.
4. The heating tank will require 20 to 30 minutes to reach operating temperature (204°F) as indicated by the READY-TO-BREW
LCD readout.
5. Important: Run one full TEA brewcycle first, before running a coffee brewcycle to purge water lines and valves of air. Five
seconds of pulsing dilution water at the beginning of each TEA brewcycle is normal pre-programmed operating behavior.
BREWING INSTRUCTIONS – COFFEE
1. Ready-to-Brew should be displayed on the UCM screen.
2. Make sure that the folding airpot deck is is in the proper position to accomodate your airpot. Place a clean, empty airpot on the deck.
3. Place a new paper filter into the brewcone.
4. Pour ground
coffee into
brewcone
marked
COFFEE
FOR THE LATEST SPECIFICATIONS AND INFORMATION GO TO WWW.WILBURCURTIS.COM
W
C
C
ilbur
urtis
ompany
5. Position
filled brew-
cone into
brew rails.
, i
.
nC
6. Press the
COFFEE
Brew button.
1
Advertisement
Table of Contents

Related Manuals for Curtis CBS


Summary of Contents for Curtis CBS
- Page 1 • Do NOT immerse the unit in water or any other liquid • To reduce the risk of fire or electric shock, do NOT open top or front panel. No user serviceable parts inside. • Keep hands and other items away from hot parts of unit during operation. • Never clean with scouring powders, bleach or harsh chemicals. Symbols WARNINGS – To help avoid personal injury Important Notes/Cautions – from the factory Sanitation Requirements Your Curtis Combo Brewer is Factory Pre-Set and Ready to Go… Right out of the Box. Following are the Factory Settings for your Coffee/Tea Brewing System: • Brew Temperature = 204°F • Brew Volume = Set to dispensing vessel requirements (2.2 liters) Generally there will never be a reason to change the G3/Gold Cup Series default settings. However, should you need to make slight Models: adjustments to meet your brewing needs, programming instructions are provided later in this manual. • CBS System Requirements: • CBP • Water Source 20 – 90 PSI. Minimum flow rate of ½ gpm (1 gpm preferred flow rate). • Electrical: See attached schematic for standard model or visit www.wilburcurtis.com for your model. Equipment to be installed to comply with applicable federal, state, or local plumbing/electrical codes having jurisdiction. CAUTION: Please use SETUP STEPS this setup procedure before attempting to use The unit should be level (left to right and front to back) and located on a solid counter top. Connect a water line from the water filter to the this brewer. Failure to follow the brewer. instructions can result in injury or the NOTE: Some type of water filtration device must be used to maintain a trouble-free operation. (In areas with extremely hard water, we voiding of the warranty. suggest that a sedimentary and taste & odor filter be installed.) This will prolong the life of your brewing system and enhance coffee and tea quality.
-
Page 2: Program Menus
Brewing Instructions – Tea 1. Brewer should be ON (Confirm at rear toggle switch, then press ON/OFF button) and Ready-to-Brew displayed. 2. Make sure deck is folded down and tea container is in place. IMPORTANT – Tea container must be pushed all the way to the back to ensure the safety switch is engaged and tea brewing can start (see exception on page 11). 3. Place filter in brew 4. Slide brew cone 5. Slide container in 6. Press the tea brew basket. Pour tea into rails. Place to activate switch button to begin into basket marked tea container behind folded brewing tea. ICED TEA. under brew cone. coffee deck. Your Curtis G3/Gold Cup Series is Factory Pre-Set for Optimum Performance. After connection to water and power;... - Page 3 Program Menus Tea by Volume: Scroll until Brew by Volume is displayed. Press to Select. The display will read Select Brew But- ton! Once the desired brew button is selected (COFFEE or TEA), the display will read Press BREW to Start 0:00 Time. Tea By Volume Press the FULL BREW button and hot water starts dispensing.
- Page 4 Program Menus conditions, the three Pulse Brew options help “tune” or change the coffee flavor. Filter Pack type coffees typically extract better with the A and B pulse setting. Decaf coffees typically extract better with the B pulse setting. High-Yield coffees typically extract better with the C pulse setting.
-
Page 5: Error Message
Program Menus Half Batch (Factory set to OFF) Half Batch Activates Half Brew buttons. Press to display ON or OFF. Pressing either < or > toggles between on and off. When this feature is ON, a half batch button can be used on the control panel. Displ. -
Page 6: Illustrated Parts
Illustrated Parts... -
Page 7: Parts List
Parts List ITEM PART Nº DESCRIPTION ITEM PART Nº DESCRIPTION WC-58117 COVER, TOP BREWER WC-1438-101* SENSOR, TEMPERATURE TANK WC- 889* VALVE, DUMP LEFT 120V 12W WC- 523* THERMOSTAT, MANUAL RESET 120/220V 25A 220ºF MAX WC-2962-101K* KIT, FITTING SPRAYHEAD KYNAR WC-5231* COMPOUND SILICONE 5 OZ WC-37184* KIT, LABEL & UCM CBS CURTIS WC-5310* TUBING, 5/16” ID X 1/8” W SILICONE 4A WC-37301 KIT, LABEL & UCM CBS W/½ BREW (OPTIONAL) TCO308A000 TEA CONTAINER OVAL 3 GAL 8 ½” (INCLD W/PTT BRWR) WC-3417 BREW CONE,ASSY W/SPLASH POCKET BROWN COFFEE TCO417A000 TEA CONTAINER OVAL 4 GAL 17” (SOLD SEPARATELY) WC-3398* BREW CONE, ASSY STD TEA NON-METAL W/BLU GUARD TCO419A000 TEA CONTAINER OVAL 4 GAL 19” (SOLD SEPARATELY) 5B WC-37242 KIT, BREW CONE BLACK W/COFFEE LABELS (OPTIONAL) TCO421A000 TEA CONTAINER OVAL 4 GAL 21” (SOLD SEPARATELY) - Page 8 Illustrated Parts List TCN Tea Server ITEM PART Nº DESCRIPTION WC-56036 LID, BLACK PLASTIC TCN WC-38471 LABEL, FRONT TCN GENERIC WC-1803 FAUCET, SPB WC-37260 KIT, FAUCET W/ADAPTER CMPLT WC-3707 KIT, REPAIR SPB FAUCET WC-1805 SEAT CUP, FAUCET S’ WC-38163 LABEL, CURTIS SWP CLR/WHT WC-5686 DRIP TRAY, OCTAGON STYLE WC-3531 LEG, PLASTIC GLIDE TCN WC-3289 HANDLE, GASKET Cleaning the Brewer Regular cleaning and preventive maintenance is essential to keep your coffee brewer looking and working like new. CAUTION – Do not use cleansers, bleach liquids, powders or any other substance containing chlorine. These products promote corro- sion and will pit the stainless steel. USE OF THESE PRODUCTS WILL VOID THE WARRANTY. 1. Wipe exterior surfaces with a moist cloth, removing spills and debris. 2. Slide the brew cone out and clean it. Clean the spray head area with a moist clean cloth. 3. Rinse and dry the brew cone. 4. Rub a stainless steel polish on the outside surfaces to protect the brewer.
- Page 9 To sanitize the disassembled parts: Wear rubber gloves for protection. 1. Place the cleaned parts into a sink. 2. Immerse them in commercial Bar Tabs/Sani-Tabs sanitizing solution The solution must be warm (75°F.) Allow the parts soak in the sanitizer for at least one minute. 3. Remove the parts from the sanitizer and air dry. 4. After cleaning, sanitizing and drying, assemble the parts taken from the tea container. Cleaning Airpots: 1. In a container, mix a mild detergent solution for cleaning your airpots. 2. Discard any old coffee from the airpot. 2. Wipe the exterior surfaces with a sponge moistened with the detergent solution, removing water spots and coffee. 3. Remove and clean the syphon tube/funnel with a detergent solution. 3. Clean inside the airpots with a sponge brush soaked in detergent solution. 4. An easy way to clean remove mineral deposits from the brewcone and airpot, is to use coffee equipment cleaning tablets. a. Place a tablet into the brewcone. b. Place the airpot onto the brew deck and open the lid. c. Start a coffee brew cycle by pressing the Brew button on the control panel. c. Once the brew cycle has finished, allow the cleaning solution to sit in the airpot for a minute. Discard the used cleaner from the airpot. d. Rinse the airpot and brewcone with running water. Both the brewcone and airpot should be clean and ready to use.
-
Page 10: Electrical Schematic
Electrical Schematic... -
Page 11: Rough-In Drawing
Rough-In Drawing... -
Page 12: Product Warranty Information
Curtis equipment that have not been purchased from the Wilbur Curtis Company, Inc. The Wilbur Curtis Company will not accept any responsibility if the following conditions are not met. The warranty does not cover and is void under the following circumstances: 1) Improper operation of equipment: The equipment must be used for its designed and intended purpose and function.
Need help?
Do you have a question about the CBS and is the answer not in the manual?
Questions and answers