Samsung ITP-5112L User Manual
Ip keyset for officeserv 100; officeserv 500; officeserv 7000 series
Hide thumbs
Also See for ITP-5112L:
- User manual (345 pages) ,
- Quick reference manual (9 pages) ,
- User instructions (368 pages)
Table of Contents
Advertisement
Quick Links
Advertisement
Table of Contents

Related Manuals for Samsung ITP-5112L


Summary of Contents for Samsung ITP-5112L
- Page 1 ITP-5112L IP Keyset User Guide...
- Page 2 ITP-5112L User Guide For OfficeServ 100, OfficeServ 500, ™ ™ OfficeServ 7000 Series ™ 05/2006...
- Page 3 Samsung Telecommunications America reserves the right without prior notice to revise information in this guide for any reason. Samsung Telecommunications America also reserves the right without prior notice to make changes in design or components of equipment as engineering and manufacturing may warrant.
-
Page 4: Table Of Contents
..................1 THINGS YOU SHOULD KNOW ..........2–8 ASSEMBLING YOUR KEYSET ............9 ITP-5112L SETUP ..................10 Initializing the ITP-5112L......................10 IP Setup Menu ..........................10 Menu Structure ..........................11 Navigating the Menus ........................12 Setting the Network Parameters ....................12 OUTSIDE CALLS Making an Outside Call ......................16 Dialing from the Outgoing / Incoming Menu ..............17 Dialing the Most Recent Outgoing / Incoming Number ..........17... - Page 5 Hold Recall ............................24 Consultation Hold ........................24 Retrieving Calls Held at Another Station................24 Transferring Calls ..........................25 Transfer with Camp-On ......................25 Transfer to Voice Mail ........................26 Call Waiting............................26 Conference Calls ..........................26 Conference Splitting ........................27 Conference Groups ......................27–28 Forwarding Calls ........................28-29 Call Forward Options ........................29 Station Call Pickup ........................30 Group Call Pickup..........................30 My Group Pickup ..........................30...
- Page 6 Background Music ........................40 Established Call Pick-Up ......................41 Appointment Reminder/Alarm Clock..................41 Door Phone Calls ........................43-44 Executive/Secretary Hotline......................44 Group Listening ..........................46 Account Codes ..........................46 Locking Your Keyset ........................46 Manual Signalling ........................47 Off-Hook Voice Announce ......................47 OHVA Block............................48 OHVA Reject ............................48 In Group/Out of Group ......................48 CUSTOMIZING YOUR KEYSET AME Password ..........................49 Auto Camp-On ..........................49...
- Page 7 Managing Key Assignments ....................59 LCR with Clear ..........................60 Backspace with LCR........................60 Text Messaging ........................60–61 CALLER ID ......................62 Selecting your Caller ID Display ....................62 Viewing the Next Caller ID Call....................62 Saving the Caller ID Number ....................62 Redialing a Saved Caller ID Number..................62 Storing a Caller ID Number ......................63 Inquire Caller ID Park/Hold Info ....................63 Reviewing Past Caller ID Calls ....................64...
-
Page 8: About This Book
Samsung’s new OfficeServ technology keyset model ITP-5112L is part of the OfficeServ 100, OfficeServ 500, and OfficeServ 7000 Series. The ITP-5112L IP keyset represents a new concept of Internet phone, in that it uses an IP address to Send/Receive voice and data. For voice communications, the ITP- 5112L uses the data network line already in place in most offices and increasing number of homes. -
Page 9: Things You Should Know
THINGS YOU SHOULD KNOW USER ORIENTATION The ITP model telephones are called “IP keysets” . The IP keyset incorporates but- tons or “keys” that are used to access or activate the many features of your office phone system. The lower five buttons (ten total) that reside on either side of the Large Display screen are programmable buttons. -
Page 10: Volume Controls
TERMINAL STATUS INDICATOR The terminal status indicator light is positioned on the top right corner of the key- set above the display. The terminal status indicator is a tri-colored (red, green, and amber) light that provides greater visibility of your keysets status than the indi- vidual button LEDs. -
Page 11: Conference Button
SCREEN BUTTON The 5112L incorporates a SCREEN button. This button allows you to choose your keyset’s idle screen display. The default is CALENDAR. The options are STATION FIXED FEATURE buttons (two levels), or STATION PROGRAMMABLE buttons (ten levels). NOTE: From the default CALENDAR screen: •... -
Page 12: Navigation Button
SCROLL BUTTON ASSEMBLY The scroll button is actually a type of thumbwheel assembly. You may use it to scroll through the station screens. Rolling the SCROLL BUTTON DOWN (towards the navigation button) will advance you through the multiple SOFT MENU and STATION PROGRAMMABLE button screens. -
Page 13: Feature Access Codes
Note that the DIRECTION BUTTON has four icons, at the top, bottom, left and right of the ENTER button. These icons are used to navigate directly to particular programming options from the CALENDAR screen. Pressing the top (INFO) icon will take you directly to the STATUS INFO SCREEN. -
Page 14: System Tones
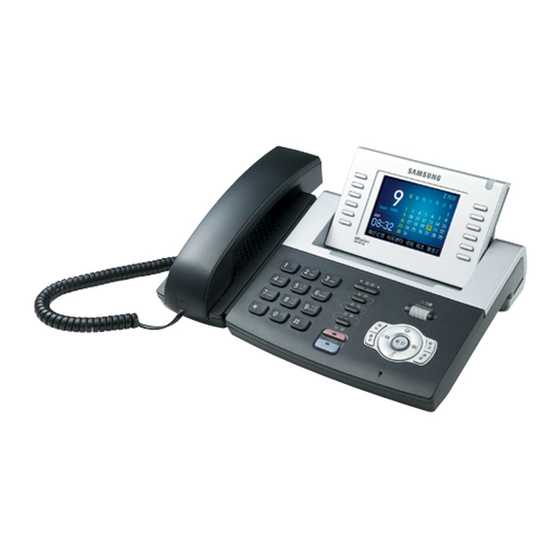
SYSTEM TONES The system provides several tones to assist you. Some of these tones are already familiar to you. - Page 15 ITP-5112L KEYSET Color LCD Panel Displays a large quantity of information so that Select Buttons (6) the users can easily To select a specific item search. the user can simply Volume Button press the Select button Used to adjust Select Button (6) next to the item.
-
Page 16: Assembling Your Keyset
The power adapter is not required if the ITP is connected to a LAN connection that provides power over the ethernet. The ITP-5112L supports the power over ethernet feature when it is connected to a IEEE 802.3af compliant LAN switch or power injector port. -
Page 17: Itp-5112L Setup
ITP-5112L SETUP INITIALIZING THE ITP-5112L Initially the ITP-5112L IP keyset will need to be setup to operate within the users network.The Setup Menu is also used to make changes to the keyset, in the event that the system information should change. The option chosen via scroll button will be highlighted. -
Page 18: Menu Structure
• The [0]-[9] dial buttons are used to directly choose a menu, or sub menu options. • The [ENTER] button in the navigation button assembly is used when saving a modification. • The [MENU] button in the navigation button assembly is used to to display the IP Setup Main Menu. -
Page 19: Navigating The Menus
[✱ ✱ ] ..........To enter [.] between IP address fields. [0]-[9] ........To enter numerical values. SETTING THE NETWORK PARAMETERS Utilize the following programming steps to program the ITP-5112L IP keyset to operate within the users network. System Easy Wizard By selecting this option, the System Easy Wizard can guide you through setting up your network parameters. - Page 20 • If [1. Manual IP] is selected, the user must enter the IP address, subnet mask, and gateway value for the customer network that the 5112L resides on. • If [2. DHCP] is selected, the IP address, subnet mask, and gateway value will be set to the default values automatically.
- Page 21 Load and Upgrade Set/Modify The fourth item [4. Load & Upgrade Setup] sets or modifies the IP phone’s soft- ware version. Use extreme caution when upgrading the keyset. Select the [4. Load & Upgrade] item. The screen below is displayed. 1.TFTP Server Setup 2.Upgrade Start •...
- Page 22 Press the [ENTER] button to save and exit. Completion of Settings From the Main Menu verify settings at the second item [2. System Information] after setting all of the above items. Select the seventh item [7.Reboot] to save all modified settings and reboot the ITP-5112L phone.
-
Page 23: Outside Calls
OUTSIDE CALLS Note: When making calls, internal or outside calls, in order to access the program- mable button screens, press the SCREEN button. Then you can utilize either the SCROLL button or the UP/DOWN arrow (select) buttons on the display. MAKING AN OUTSIDE CALL IMPORTANT: Put phone in OVERLAP MODE: •... -
Page 24: Dialing From The Outgoing / Incoming Menu
DIALING FROM THE OUTGOING / INCOMING MENU • From the station idle screen, press the MENU button and select PHONE- BOOK. • Select OUTGOING CALLS or INCOMING CALLS from the submenu. These menus will store the last thirty calls made to and from the station. •... -
Page 25: Universal Answer
While a call is ringing in, press the SCREEN button to display the programma- ble button screen. This will enable you to view and invoke any of the station features that you may wish. UNIVERSAL ANSWER Outside lines may be programmed to ring a general alerting device. To answer calls ringing this device, dial 67—OR—press the UA button. -
Page 26: Canceling Callback
CANCELING CALLBACK A callback will be canceled if not answered within 30 seconds. If you have set a callback, the cursor associated with the CALLBACK button, will be solid black. To cancel a callback: • Press the CALLBACK button, if programmed, or dial 44. The display will show the callback details and an option to CLEAR the callback. -
Page 27: Intercom Calls
INTERCOM CALLS CALLING OTHER STATIONS • Dial the extension number or group number. • Wait for the party to answer. If you hear a brief tone burst instead of ringback tone, the station you called is set for Voice Announce or Auto Answer. Begin speaking immediately after the tone. -
Page 28: Auto Answer Mode
AUTO ANSWER MODE When another station calls you, your keyset will sound a brief attention tone and then automatically answer the call. • Your microphone and speaker are turned on and you can speak handsfree. For privacy, use the handset. •... -
Page 29: Calling Your System Operator
If the Hot Keypad feature has been turned off, you must first lift the handset or press the SPEAKER button before dialing. AUTO CAMP-ON When you want to automatically camp on to a busy station without pressing the camp on button every time you call a busy station, you can set your phone for auto camp-on. -
Page 30: Call Processing
CALL PROCESSING SYSTEM HOLD When you are connected to any call, press HOLD.The call will flash at the keyset. If this call appears on a line button at other keysets, it will flash at those keysets also. • To take the caller off hold, press that button and the flashing LED will go steady again. -
Page 31: Hold Recall
HOLD RECALL If you leave a call on hold longer than the hold timer, it will recall your station. The button that the call appears on will have a slow flashing indicator. • When your phone rings, lift the handset or press the SEND button to answer the recall. -
Page 32: Transferring Calls
TRANSFERRING CALLS Transfer is used to send any calls to another extension in one of two ways.You can do a screened transfer by informing the other extension who is calling or you can do a blind transfer without notification. • While on a call, press the TRANSFER button and dial an extension number or group number. -
Page 33: Transfer To Voice Mail
TRANSFER TO VOICE MAIL This feature is used to send a call directly to a voice mailbox.Your keyset must have a correctly programmed VT button to accomplish this. To transfer a call directly to a voice mailbox: • While on a call, press the VT button and dial the mailbox number. •... -
Page 34: Conference Splitting
NOTE: To leave the conference, hang up. Control is passed to the next internal sta- tion. If there are no internal stations and you wish to leave outside lines connect- ed together in a trunk to trunk conference, press the CONFERENCE button plus the CALL button that the call appears on or follow the instructions to drop a party and use your extension number. -
Page 35: Conference Groups
Using Conference Groups • From the idle condition press the CONFERENCE button. • Select the Conference Group by pressing the corresponding soft key on the left. • Press SEND to call all members of the group – OR – press the ENTER key to deselect one or more members, then press SEND. -
Page 36: Call Forward Options
From the LCD: • Press the MENU button, scroll to the CALL FORWARD icon, press ENTER. • Scroll to the desired Forward Option. Press ENTER button. • You will be prompted to enter the Forward Destination. Enter it and press ENTER. -
Page 37: Station Call Pickup
STATION CALL PICKUP To pick up (answer) a call ringing at another station, lift the handset and dial 65 plus the extension number of the ringing phone. If you have a DP key assigned with a station number, you only need to press this DP key with the flashing light to answer this ringing station. -
Page 38: Dialing Features
DIALING FEATURES All “DIALING FEATURES” instructions are written to support Overlap Dialing mode. This is the technical name for dialing from a telephone as it has been for many years. In recent years the cell phone industry has changed the cell phones to use Enblock Dialing. -
Page 39: Programming Personal Speed Dial Numbers
1. BY SPEED DIAL #: Searches all speed dial numbers assigned to the phone. Enter the speed dial number of the party you wish to call. When the number is displayed, press ENTER and the number will be automatically dialed for you. -
Page 40: One Touch Speed Dialing
• While on-hook, press TRANSFER and then dial 105. • Dial a speed dial number (00–49). • Dial a line or line group access code. • Dial the telephone number to be stored (24 digits maximum). It can include #, ,, FLASH and PAUSE. •... -
Page 41: Last Number Redial
DIAL - Dials the displayed number. PREVIOUS - Moves you to the previous entry. EXIT - Exit programming and return to idle screen. NEXT - Moves you to the next entry. • Press END to return to idle screen. LAST NUMBER REDIAL To redial the last telephone number you dialed, press the REDIAL button or dial To redial the last telephone number you dialed, from the Main Fixed screen, press the LAST REDIAL button. -
Page 42: Automatic Redial/Retry
AUTOMATIC REDIAL/RETRY When you are making an outside call and you receive a busy signal, the system can automatically redial the number for you. It will automatically redial at a pre-pro- grammed interval for up to 15 attempts. • When you hear a busy signal, press the AUTO-RETRY button. •... -
Page 43: Paging And Messaging
PAGING AND MESSAGING MAKING AN INTERNAL PAGE To make an announcement through the keyset speakers in the idle condition: • Lift the handset. • Press the PAGE button or dial 55. • Dial the desired zone number 0, 1, 2, 3 or 4. •... -
Page 44: Call Park And Page
• Press WAIT or TRANSFER. • Remain off-hook until the person dials 56 from any phone. • The paged person will be automatically connected with you. CALL PARK AND PAGE When you have an outside call for someone who is not at his/her desk, you can park the call prior to paging. -
Page 45: Messages-Set And Cancel
• You will be connected to the parked call. NOTES: If the call is not retrieved within a pre-programmed period of time, it will recall your keyset and have a slow flashing amber light. You cannot park and page intercom calls. If the Hot Keypad feature has been turned off, you must first lift the handset or press the SPEAKER button before you begin dialing. -
Page 46: Programmed Messages
If the Hot Keypad feature has been turned off, you must first lift the handset or press the SPEAKER button before you begin dialing. If a message has been left at your keyset by a keyset in Auto Answer, you must manually cancel the message after it has been returned. -
Page 47: Convenience Features
CONVENIENCE FEATURES DO NOT DISTURB Use this feature when you want to block calls to your keyset. • While on-hook, press the DND button or dial 401. The DND button indicator will be lit steady to remind you of this mode. •... -
Page 48: Established Call Pickup
ESTABLISHED CALL PICKUP To pick up an established call in progress at a single line extension connected to a computer modem on your PC. • Press the EP button for that station on your keyset and the call is automati- cally moved to your keyset. - Page 49 From the LCD: • Press MENU button. • Scroll to E-DIARY option, press ENTER. • Scroll to ALARM option and press ENTER—OR—you may dial 2 and immedi- ately enter the option. • Choose the desired ALARM NUMBER (1/2). • Enter TIME via the dial pad in 24-hour format. •...
-
Page 50: Door Phone Calls
• Write your message using the dial pad buttons. Each press of a key selects a character. Pressing the next key moves the cursor to the next position. For example, if your message is “TAKE MEDICATION” , press 8 once to get the letter “T”... -
Page 51: Executive/Secretary Hotline
CALLING THE DOOR PHONE/ ROOM MONITOR You may call the door phone and listen to what may be happening outside or in another room. • Dial the extension number of the door phone. • You will be connected to the door phone and you can listen or have a con- versation. - Page 52 message and press ENTER (while maintaining contact with t he caller). This method does not give you the option to transfer the call to another station. • Take necessary action (take message, etc.) To set up the Executive/Secretary messages (10 each): •...
-
Page 53: Group Listening
• Pressing the EXEC DIVERT button, when the keyset is in idle status, will divert all calls after, to the Secretary station. Pressing the EXEC DIVERT button again, will cancel the divert function. GROUP LISTENING When you are engaged on a call and you are using the handset, you may want other people to hear the distant party’s voice over the speaker: •... -
Page 54: Manual Signalling
• Press CANCEL to return to Main Config Menu—OR—press END to return to idle screen. MANUAL SIGNALLING Use this feature when you want to send a brief 500ms ring burst to another sta- tion, regardless of the status of your phone (on-hook, off-hook, handsfree, DND, or ringing). -
Page 55: Ohva Block
OHVA BLOCK Your keyset can be programmed with an OHVA Block (BLOCK) button. Pressing this button will prevent anyone from making an OHVA to you until you press the button again and cancel the blocking. OHVA REJECT Your keyset can be programmed with an OHVA Reject (REJECT) button. Pressing this button while receiving an OHVA call will disconnect the voice announcing party and return you to your original call. -
Page 56: Customizing Your Keyset
CUSTOMIZING YOUR KEYSET AME PASSWORD This feature allows people using the AME feature to enable password protection. This will prevent unauthorized people from listening to your messages being left. The passcode is the same as your station passcode. This feature only applies if there is a SVMi card installed in the system and your keyset has a programmed AME button. -
Page 57: Select Ring Tone
SELECT RING TONE Each ITP-5112L user can select from a variety of ring tones. From the LCD: • Press MENU button. • Scroll to SOUND/SCREEN option and press ENTER. • Scroll to RING TONE SELECT and press ENTER—OR—you may dial 1 and immediately enter the option. -
Page 58: Set Answer Mode (Intercom)
SET ANSWER MODE (INTERCOM) You can receive internal calls in one of three modes (see Answering Intercom Calls under Intercom Calls for descriptions). • While on-hook, press TRANSFER and then dial 103. • Dial 0 for Ringing, 1 for Auto Answer or 2 for Voice Announce. •... -
Page 59: Headset Operation
From the LCD: • Press MENU button • Scroll to SETUP option and press ENTER. • Scroll to STATION ON/OFF and press ENTER—OR—you may dial 6 and immediately enter the option. • Scroll to AUTO HOLD, press ENTER to change option status. •... -
Page 60: Key Confirmation Tone
From the LCD: • Press MENU button. • Scroll to SETUP option, press ENTER. • Scroll to STATION ON/OFF and press ENTER—OR—you may dial 6 and immediately enter the option. • Scroll to HOT KEYPAD, press ENTER to change option status. •... -
Page 61: Auto Answer Co Calls
• With the handset on-hook, press TRANSFER and then dial 110. • Dial 061 to turn ring preference on or 060 to turn it off. • Press TRANSFER to store your selection. From the LCD: • Press MENU button. • Scroll to SETUP option, press ENTER. -
Page 62: Caller Id Review All
• Scroll to STATION ON/OFF and press ENTER—OR—you may dial 6 and imme- diately enter the option. • Scroll to DISP SPDNAME, press ENTER to change option status. • Press CANCEL to enter change and return to Main Configuration Menu— OR—press END to return to idle screen. -
Page 63: Display Features
DISPLAY FEATURES DIRECTORY INFORMATION An 11 character directory name can be assigned to each extension number. Display keyset users can view the name of the called or calling station before an- swering. Each outside line can have an 11 character directory name. Incoming calls can be easily identified and answered with different greetings. -
Page 64: Dial By Name
DIAL BY NAME Each station or speed dial number can have an associated directory name. A sta- tion or speed dial number can be selected by scrolling alphabetically through a directory name list. This on-line “phone book” allows the user to look up and dial any station or speed dial number in seconds. -
Page 65: Display Number Dialed
DISPLAY NUMBER DIALED Display keysets begin showing digits as they are dialed. They will stay in the dis- play until the call duration timer comes on automatically or the TIMER button is pressed. If the call duration timer is not used, the number dialed will be displayed until the call is released, transferred or put on hold. -
Page 66: Viewing Message Indications
VIEWING MESSAGE INDICATIONS You can view all of your message indications before you return them: • With the handset on-hook, press the MESSAGE button with the flashing indi- cator. • The first station that left a message indication will be displayed. •... -
Page 67: Lcr With Clear
LCR WITH CLEAR When you are making outside call using LCR and dial an incorrect digit, you can press the CLEAR soft key to reenter the telephone number. You do not need to redial 9 to reaccess LCR. BACKSPACE WITH LCR If you misdial while using LCR, you can delete digits shown in the display by press- ing the BACKSPACE soft key as many times as necessary. - Page 68 STATION 201: LINDA STATION 205: JOHN received a call on line 702 is talking on line 701 Talking on line 702 702: 01:15 701: 05:25 CONF PAGE MUTE Press TRANSFER Transfer: RETURN Dial 205 205:busy OHVA CAMP ON OHVA to 205 OHVA from 201 TMSG REJECT...
-
Page 69: Caller Id
CALLER ID SELECTING YOUR CALLER ID DISPLAY You can decide if you want to see the Caller ID name or Caller ID number in the display. Regardless of which one is selected, you can press the NND button to view the other pieces of Caller ID information. -
Page 70: Storing A Caller Id Number
STORING A CALLER ID NUMBER At any time during an incoming call that provides CID information, you may save the CID number as a speed dial number in your personal speed dial list. To store a Caller ID number in a personal speed dial bin: •... -
Page 71: Reviewing Past Caller Id Calls
REVIEWING PAST CALLER ID CALLS This feature allows you to review CID information for calls sent to your keyset.This list can contain 10–50 calls in a last-in, first-out basis.The list includes calls that you answered and calls that rang your keyset but that you did not answer. When reviewing this list, you can press one button to dial the person back. -
Page 72: Application Program Menus
APPLICATION PROGRAM MENUS Much of the call processing of the ITP 5112L can be accomplished by using the various feature/function screens on the LCD. Below are instructions for additional call processing and special applications that can be accomplished via the LCD programming. -
Page 73: Message
3. DAILY PLANNER: See Alarm Reminder Programming Section. 4. MEMO PAD: Self memo feature. Allows you to set text message notes. Up to 5 memos may be stored. • Add NEW MEMO: Type in memo on keypad. Press MENU button to change fonts or add characters. -
Page 74: Sound/Screen
b. RETRIEVE MESSAGE: Select this option to RETRIEVE a saved message fro the Message Box. When selected a list of saved messages will be shown. You can select one of these messages and open it or you can press the MENU buttons for deleting, editing or sending. 2. - Page 75 4. AOM PAGE SETUP 5. DIAL MODE: Select dial type options. (enblock-requires SEND button to com- plete the call, or overlap - direct out dial) • Scroll to or dial 9, press ENTER. • Scroll LEFT/RIGHT to select desired display option. •...
-
Page 76: My Phone
7. OUT CODE SETUP 8. NETWORK INFO: Provides all IP network related information. MY PHONE Used to personalize your keyset. 1. MY NAME: Enters the user’s name on the phone.The name registered here is displayed on the LCD screen od the opponent’s phone when making an inter- nal call. -
Page 77: Svmi E-Series
SVMi E-Series This section describes how to setup and use the various features available to a Subscriber. A Subscriber is a person that has been authorized access to the vari- ous features and services available in the SVMi E-Series. Please review this section carefully before you use your Authorized Features and Services, known as Subscriber Services. -
Page 78: Accessing Your Mailbox
ACCESSING YOUR MAILBOX [Also known as Subscriber Services Menu] Inside Callers [Subscriber logging in from their Desk] • Dial the SVMi E-Series access number or press the key assigned to ring SVMi E-Series [VMMSG]. • Enter your personal password when prompted (the default password is 0000). -
Page 79: Svmi E-Series Subscriber Services Menu Diagram
SVMi E-Series Subscriber Services Menu SVMi-8 Subscriber Calais Executary NOTE: All options shown MAY NOT be authorized. If an option is not available please speak to your system administrator. -
Page 81: Getting Started
GETTING STARTED Using your new SVMi E-Series Subscriber Services is as simple as following a few simple spoken instructions. First time users should read this section as a tutorial. You should start with the following steps: • Access your Subscriber Services Menu - You already know how to do this. From the Subscriber Services Menu: •... -
Page 82: Listening To Old Or New Messages
PLAY MENU OPTIONS EXIT TO AUTO ATTENDANT PERSONAL SERVICES LISTENING TO OLD OR NEW MESSAGES Play / replay the message you just heard. Play the previous message. Save the message you just heard and listen to the next message. Delete the message you just heard and listen to the next message. Reply to the message. -
Page 83: Group New Or Old Messages
Change playback speed of the recording. There are two levels of speed during playback. Dialing this code will toggle between the two speeds. Play options. Pressing this key will play all the menu options available to you from this point. Hear the time and date, and sender's information of the message you just heard. -
Page 84: Access Manager
b) Record your message at the tone. After recording the message, you will hear the Send Menu with the following functions: Review Continue Recording Discard and Re-Record Set Message Attributes (Delivery Options) Schedule Future Delivery Save and Send then Send a Copy to Someone Else Save and Send the Recording Setting Message Attributes If after recording a message you select [4] you can set up any combination of the... - Page 85 Note: ALL Access Manager options MUST be individually allowed by the System Administrator for each Subscriber. They are: Follow Me Allows the subscriber to enter an alternate location and set how long the new destination (Designated Location) will be active. This number may be an internal or external number.
-
Page 86: Personal Greetings
play your primary, No Answer greeting during the day (when you are avail- able) and will NOT ring your extension but simply play your Night greeting during the night (when you are not available). Note: This does NOT use the Day and Night schedules of the phone system. It is solely controlled by the Subscriber’s Availability Schedule. - Page 87 Example:“Hi this is John Smith. I'm sorry I am not available to answer your call. If someone else can help you, please enter the extension number now. Or, to leave me a message, press 1.” Busy Greeting Played to a caller when you are already talking to someone on your extension or the telephone at your Designated Location.
-
Page 88: Mailbox Administration
Edit Personal Greetings You may also edit/record each one of the greetings (1-9) at any time. Select a greeting number to edit and follow the instructions to record your greeting. When you are done recording your greeting, you will be able to lis- ten to the greeting you recorded, save the greeting you recorded and return to the previous menu, record the greeting again, or exit without saving the greeting. - Page 89 Setting Up Message Alert: ■ From the Subscriber Services Menu press [6] for Mailbox Administration. ■ Press [1] for Message Alert. ■ There are 4 options available to you: Press [1] to toggle message alert on and off. Press [2] to set the schedule when you would like to be notified. Press [3] to be notified on urgent messages only.
-
Page 90: Message Broadcast
This useful feature will allow you to cancel any messages that have NOT yet been picked up by the recipient. Auto Play New Messages If this option is enabled, after you enter your password correctly any new messages will immediately begin to play.To enable (or if already enabled tog- gle and disable) this feature: ■... -
Page 91: Personal Services
PERSONAL SERVICES The Personal Administration Menu is used to set your password and record your name. Many of these features must be allowed by the System Administrator. Workload Management Allows you to access to all reminders, both Active and Pending. If authorized you can group your reminders as Commitments, Follow-Ups or Tasks for bet- ter organization. -
Page 92: Personal Administration Settings
PERSONAL ADMINISTRATION SETTINGS This menu allows you to make changes to basic setup settings, that are rarely changed. Use these when you initially set up your personal Subscriber settings. You probably will not need to change them after that. Setting your Password ■... -
Page 93: Keyset User Features
Note: Remember if you know what digits to press, you can enter them at any time you do not have to wait to be prompted. This feature can be toggled on/off at anytime. Also if it is off you will be prompted within each subscriber menu to press zero for more options. -
Page 94: Call Record
AME Password If your keyset has AME PASSWORD (MMC 110) set to YES, you must enter your station password to listen to messages being left. This will prevent unauthorized people from listening to messages being left for you. If the password option is turned on, while a message is being left, press the flash- ing AME indicator and enter your station password (not your SVMi E-Series pass- word). -
Page 95: Shortcuts
SHORTCUTS Calling Calling a station that is busy or does not answer you can press [#] to immediately send the call to the called parties mailbox. Call Divert to Voicemail While receiving an incoming (ringing) call, dial [,] to immediately send the caller to your personal voicemail box. -
Page 96: Personal Speed Dial Numbers
PERSONAL SPEED DIAL NUMBERS CODE NAME TELEPHONE NUMBER _________________________ _________________________ _________________________ _________________________ _________________________ _________________________ _________________________ _________________________ _________________________ _________________________ _________________________ _________________________ _________________________ _________________________ _________________________ _________________________ _________________________ _________________________ _________________________ _________________________ _________________________ _________________________ _________________________ _________________________ _________________________ _________________________ _________________________ _________________________ _________________________ _________________________ _________________________ _________________________ _________________________ _________________________ _________________________... - Page 97 PERSONAL SPEED DIAL NUMBERS CODE NAME TELEPHONE NUMBER _________________________ _________________________ _________________________ _________________________ _________________________ _________________________ _________________________ _________________________ _________________________ _________________________ _________________________ _________________________ _________________________ _________________________ _________________________ _________________________ _________________________ _________________________ _________________________ _________________________ _________________________ _________________________ _________________________ _________________________ _________________________ _________________________ _________________________ _________________________ _________________________ _________________________ _________________________ _________________________ _________________________ _________________________ _________________________...
-
Page 98: System Feature Codes
12 _____________________________ 13 _____________________________ 14 _____________________________ 15 _____________________________ 16 _____________________________ 17 _____________________________ 18 _____________________________ 19 _____________________________ 20 _____________________________ w w w . s a m s u n g . c o m / b c s ITP-5112L KUG 01 05/06...