Table of Contents
Advertisement
Advertisement
Table of Contents

Summary of Contents for Opticum Dekoder STB
-
Page 1: User Guide
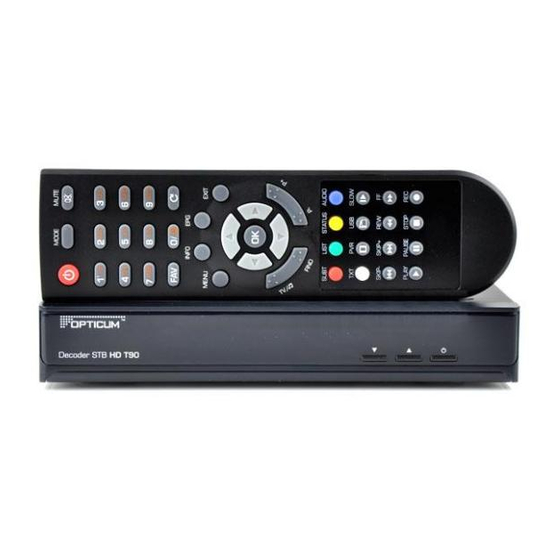
Dekoder STB • HD T90 User Guide For Digital Terrestrial Receiver... -
Page 2: Table Of Contents
Contents Chapter1 At a Glance _________________________ 4 Chapter4 Menu _____________________________ 20 1.1 Overview __________________________________________________ 4 4.1 The Main Menu ____________________________________________ 20 1.2 Kit Contents _______________________________________________ 4 4.2 Edit Channel ______________________________________________ 20 1.3 Front Panel ________________________________________________ 5 4.3 Installation _______________________________________________ 22 1.4 Rear Panel _________________________________________________ 5 4.4 System Setup _____________________________________________ 23 1.5 Remote Controller __________________________________________ 6... -
Page 3: Chapter1 At A Glance
At a Glance 1.3 Front Panel HD T90 Read this chapter to learn about Opticum HD T90 and Dekoder STB features, power/signal change channel / move cursor remote control and more. 1.1 Overview 1. Support of SD/HD (MPEG2/MPEG4, H.264), DVB-T, 2. -
Page 4: Remote Controller
1.5 Remote Controller Button Function POWER - Switch receiver on from standby mode. MODE Select video output resolution. MUTE - Enable or disable the audio. numeric buttons Select channel or enter programming parameters. Switch between Sleep Timer Off 10/30/60/90/120 minutes. Set current channel as favorite. -
Page 5: Chapter2 Installation
Installation 2.2 Starting up for the first time Turn on the TV Set. After a while on TV Set you should see receiver’s OSD. If the TV Set is not displaying receiver’s OSD, probably a signal source is set Read this chapter to learn how to connect the receiver to a TV set, configure wrong. -
Page 6: First Scan
2.3 First Scan 2.4 Automatic Power Down After the configuration, use the blue button or OK on remote control to start In accordance with actual European Union requirements, your receiver is scanning TV and radio channels. It will not happen if your antenna is not con- equipped with function “Automatic Power Off”. -
Page 7: Chapter3 Operation
Operation Press EPG button in viewing mode to display Electronic Program Guide on screen. Use in the detailed view of EPG to change channel or in the Read this chapter to learn how to use the receiver, about it’s features and the shortened view use / to select a channel and press OK to switch to the menu and more to get the best performance from your receiver. -
Page 8: Timer
3.6 TIMER Detailed view In the detailed view of EPG you can see a schedule of one channel on the left Timer is a function you can get access to through the EPG view by pressing side and detailed info about highlighted program on the right side. Use / the RED button. -
Page 9: Find
3.8 FIND buttons of the remote control allow you to jump to selected pages directly, as indicated on the bottom of the teletext screen. Use the / buttons to FIND is an function that lets you find a channel by its name. Use the select one page up or down. -
Page 10: Time Shift
• • Use OK to start playing the recording. (SKIP–)or (SKIP+)buttons to skip forward or backward. You • Use GREEN button to lock the recording. Use the 0—9 buttons to input can set the time of jump in the menu REC. See chapter XXX (p. 111) for the password to secure the record from undesirable access. -
Page 11: Chapter4 Menu
Menu made, press EXIT twice. A confirmation banner will pop up. Select Yes to save the changes or No to discard. Delete Press RED while in Channel List to enable the Delete function. The Read this chapter to learn how to use the receiver’s menu, how to adjust the Delete sign will move up to indicate that Delete is selected. -
Page 12: Installation
Delete All Set LCN to On to activate operator defined channel numbering or Off to store channels in found order. Use this function to delete all stored channels. Select Delete All with / and press OK. A confirmation banner will pop up. Select Yes to save the changes Allow mux repeating Use / to toggle between On or Off. - Page 13 Language GMT Usage Set to On for broadcaster defined time or to Off to This menu allows you to set up your language preferences. Select Language input time and date manually. with / and press OK to enter. GMT Offset Allows you to adjust the time zone you live in.
-
Page 14: Tools
If new software is available for your receiver, it can be downloaded from our after a blackout. website www.opticum.com.pl. Place the software file (unzipped) in the root directory of your USB storage 4.5 Tools device (HDD, memory stick etc.) and insert this device into the USB port of... - Page 15 Use / to select Upgrade File and choose the file containing the new soft- Setup Use INFO button to enter Setup menu. ware. Once all settings are made, move the highlight to Start and press OK to Slide Show Time Use / to set the time for displaying a slide.
-
Page 16: Game
Save to USB Please make a backup copy of all data you wish to keep before entering the HDD Format menu. Select HDD Format from the REC menu and press OK to This function allows you to save the current software of you receiver to enter. -
Page 17: Chapter5 Troubleshooting
Troubleshooting Problem Possible Cause Suggested solution No response to Receiver off Plug in and turn on the There may be various reasons for abnormal operation of the receiver. Check remote control receiver the receiver according to the procedures shown below. If the receiver does Remote not aimed Aim remote at front panel not work properly after checking it, please contact your dealer or the local... -
Page 18: Chapter6 Safety Precautions
Safety Precautions ATTENTION: Warning: The lightning flash with arrowhead symbol, Attachments: Never add any attachments and/or equipment without the within an equilateral triangle, is intended to alert the manufacturer consent; as such additions may result in the risk of fire, user to „dangerous voltage”... -
Page 19: Chapter7 Environment Protection
Environment Protection Technical Specification Attention! Main processor: ALI M3601 Your product Is marked with this symbol. It means that used Input plugs: F-type, IEC 169-2, female electrical and electronic products should not be mixed with Frequency range: VHF III: MHz to 174 - 230 MHz; UHF IV: MHz to general household waste.
Need help?
Do you have a question about the Dekoder STB and is the answer not in the manual?
Questions and answers