BNF Blade 300 X Instruction Manual
Hide thumbs
Also See for Blade 300 X:
- Manuel d'instructions (22 pages) ,
- Instruction manual (22 pages) ,
- Instruction manual (64 pages)

Related Manuals for BNF Blade 300 X


Summary of Contents for BNF Blade 300 X
- Page 1 300 X Instruction Manual Bedienungsanleitung Manuel d’utilisation Manuale di Istruzioni ®...
-
Page 2: Battery Warnings
NOTICE All instructions, warranties and other collateral documents are subject to change at the sole discretion of Horizon Hobby, Inc. For up-to-date product literature, visit horizonhobby.com and click on the support tab for this product. Meaning of Special Language The following terms are used throughout the product literature to indicate various levels of potential harm when operating this product: NOTICE: Procedures, which if not properly followed, create a possibility of physical property damage AND a little or no possibility of injury. CAUTION: Procedures, which if not properly followed, create the probability of physical property damage AND a possibility of serious injury. -
Page 3: Table Of Contents
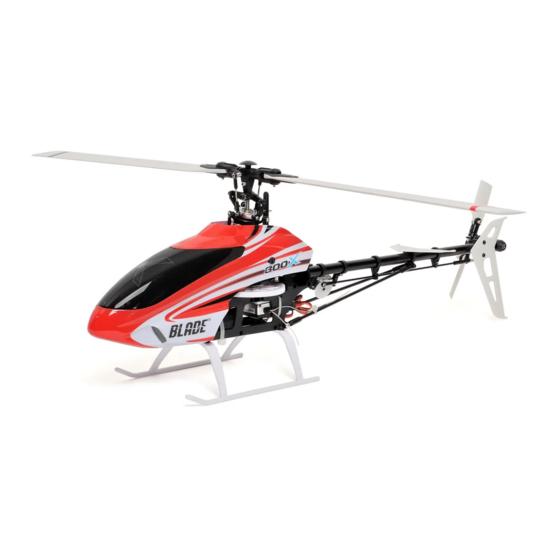
Introduction The Blade® 300 X features the Spektrum® AR7200BX 7-channel receiver with integrated BeastX™ flybarless technology. The Spektrum AR7200BX provides maximum precision, stability, and control for advanced 3D maneuvers. A new flybarless rotorhead design combined with the Spektrum AR7200BX results in sim- plified setup, easier maintenance and a lighter helicopter. The Blade 300 X also includes a high-performance 320H brushless motor, digital servos and main blades designed to handle the rigors of 3D flybarless flight. Read this manual thoroughly before your first flight. This manual contains important pre-flight information to help ensure your first flight is a great one. Table of Contents Blade 300 X Specifications Charging the Flight Battery ................6 20.1 in (510mm) Length Battery Charging Codes ................6 7.7 in (195mm) Height Low Voltage Cutoff (LVC) ................6 21.7 in (550mm) Main Rotor Diameter Transmitter Setup .................. -
Page 4: Charging The Flight Battery
Charging the Flight Battery DC Li-Po Balancing Charger Features The Blade 300 X comes with a DC balancing charger and 3S Li-Po battery. Use only Horizon Hobby approved battery packs and chargers compatible with this • Charges 3-cell lithium polymer battery packs product. Never leave the battery and charger unattended during the charging • 1.8A charge rate process. Failure to follow the instructions properly could result in a fire. When charging, make sure the battery is on a heat-resistant surface. Charge the • LED charge status indicator flight battery before binding the aircraft or performing control tests. • LED cell balance indicator • 12V alligator clip input cord Specifications... -
Page 5: Transmitter Setup
Transmitter Setup Program your transmitter before attempting to bind or fly the helicopter. Transmitter programming values are shown below for the Spektrum DX6i, DX7/DX7se, DX7s and DX8. The Spektrum model files for AirWare™ transmitters are also available for download online in the Spektrum Community. NOTICE: When using a Futaba transmitter with a Spektrum DSM module, you must reverse the throttle channel. Spektrum DX6i SETUP LIST ADJUST LIST Model Type Reverse Swash Type Timer Expo TRAVEL ADJUST SUB-TRIM* THRO HELI THRO—N 1 Servo 90 Degree Type—Down THRO 100% AILE 0 100% AILE—N Time—4:00... - Page 6 Transmitter Setup Spektrum DX7s SYSTEM LIST Model Type Swash Type Switch Select F Mode Setup Warnings Frame Rate 1 Servo All Switches Flight Mode — Throttle — Helicopter 11ms Normal F Mode Over 10 Stunt 1—Active DSMX Hold — Hold Hold—Active Alarm—Tone/Vibe FUNCTION LIST SERVO SETUP D/R AND EXPO TRAVEL SUB TRIM*...
- Page 7 Transmitter Setup Spektrum DX8 SYSTEM LIST Model Type Swash Type Switch Select F Mode Setup Trim Step Warnings Frame Rate Helicopter 1 Servo Normal All Switches INH Flight Mode — F Mode THR 5 Throttle —Over 10 11ms Hold — Hold AIL** 0 Stunt 1—Act DSMX ELE** 0 Stunt 2—Act RUD** 0 Hold—Act R TRIM 0...
-
Page 8: Transmitter And Receiver Binding
Transmitter and Receiver Binding Binding is the process of programming the receiver to recognize the GUID (Globally Unique Identifier) code of a single specific transmitter. You need to ‘bind’ your chosen Spektrum™ DSM2/DSMX technology equipped aircraft transmitter to the receiver for proper operation. Binding Procedure 1. Program your transmitter using the Transmitter Setup found in this manual. Insert the bind plug in the BND/DAT port on the receiver. 3. Connect the flight battery to the ESC. The H menu LED should be flashing, indicating the AR7200BX is in bind mode. Move the throttle stick to the desired failsafe position (low throttle position in normal mode). Follow the procedures of your specific transmitter to enter Bind Mode. The system will connect within a few seconds. Once connected, the H LED will turn off and the AR7200BX will start the initialization process. 6. When the initialization process is complete, the Status LED light will come ON solid BLUE. 7. Disconnect the flight battery and remove the bind plug from the AR7200BX. Store the bind plug in a convenient place. NOTICE: Remove the bind plug to prevent the system from entering bind mode the next time the power is turned on. If you encounter problems, obey binding instructions and refer to transmitter troubleshooting guide for other instructions. If needed, contact the appropriate Horizon Product Support office. -
Page 9: Control Tests
Control Tests Rudder and Cyclic Gyro Test Rudder 5. Release the rudder control. Manually turn the helicopter nose to the left. 1. Power on the transmitter. The tail rotor blades automatically 2. Turn TH HOLD ON and put the transmitter into normal mode. move as shown. If they do not move NOTICE: Do not allow the helicopter to move until the Status LED is solid as shown, refer to the AR7200BX blue and all menu LEDs are OFF. -
Page 10: Flying The Blade 300 X
Please refer to the diagrams above for reference. NOTICE: If the main rotor blades are spinning counterclockwise, reduce the throttle to low immediately. Turn throttle hold on. Disconnect the battery from the helicopter and reverse any two motor wire connections to the ESC and repeat the motor control test. Blade 300 X Pre-Flight Checklist ❏ Check all screws to ensure that they are tight ❏ Check gears to make sure no teeth are missing ❏ Check belt tension to ensure that it is not too tight or too loose ❏ Do a complete control test ❏... -
Page 11: Ar7200Bx Parameter Menu Tips
Gyro Gain Adjustment • If the tail wags or oscillates, lower the gain on the gyro. • If the tail is drifting while hovering, increase the gain on the gyro. On your transmitter ’s gyro menu, decrease the gyro gain values a small On your transmitter, increase the gyro gain values a small amount at a time amount until the helicopter is stable within a particular flight mode until the tail starts to wag/oscillate. -
Page 12: Ar7200Bx Default Blade 300 X Setup
If you update the firmware on the AR7200BX to non-Blade 300 X firmware: All Blade 300 X helicopter default settings will be deleted. You will need to complete the entire AR7200BX setup process before flying the helicopter again. Please refer to the Spektrum AR7200BX instruction manual included... -
Page 13: Blade Helicopter Belt Tension
Decrease Dial 2 on the AR7200BX The helicopter tail stops too abruptly Decrease Dial 3 on the AR7200BX Increase Dial 3 on the AR7200BX Increase the rudder gain in your transmitter The helicopter tail does not stop precisely Adjust the rudder heading lock gain parameter in the AR7200BX Make sure the tail drive belt tension is adjusted correctly Blade 300 X Troubleshooting Guide Problem Possible Cause Solution Low flight battery or transmitter battery voltage Fully charge or replace the flight battery and/or transmitter batteries AR7200BX is not in bind mode Make sure the bind plug is connected to the AR7200BX BND/DAT port Helicopter will not bind to the trans-... -
Page 14: Limited Warranty
Blade 300 X Troubleshooting Guide, continued Problem Possible Cause Solution Input voltage to the charger is too low Input voltage must be between 11.5–15V DC with a minimum 3A current The battery balance tab is damaged Make sure the balance tab wires are fully seated in the balance plug Flight battery will not charge If any cell voltage drops below 3V, the battery is damaged and must be re- The flight battery is overdischarged placed. Make sure the rudder control and the rudder sensor are operating in the cor- Rudder control and/or sensor direction reversed rect direction The helicopter tail spins out of... -
Page 15: Warranty And Service Contact Information
Union No. HH2011111303 This product must not be disposed of with other waste. Instead, it is the user’s responsibility to dispose of their waste equipment by Product(s): Blade 300 X BNF handing it over to a designated collections point for the recy- Item Number(s): BLH4580 cling of waste electrical and electronic equipment. The separate Equipment class:... -
Page 16: Parts List
Parts List / Ersatzteile / Pièces de rechange / Pezzi di ricambio Part # English Deutsch Françias Italiano 245mm Hauptrotorblätter Holz Set: 245mm Wood Main Rotor Blade Set: 300 X -Paire de pales principales en Set pale rotore principale in legno BLH4501 300 X bois 245mm. - Page 17 Part # English Deutsch Françias Italiano BLH4537 Tail Rotor Blade Set: 300 X Heckrotorblätter: 300 X 300 X -Paire de pales d’anticouple Set pale coda: 300 X Tail Rotor Blade Grip/Holder Set: B450, B450,300 X -Pieds de pales Set supporto pale rotore coda: B450, BLH1670 Heckrotor Blatthalter: B450, 300 X 300 X...
-
Page 18: Optional Parts
Optional Parts / Optionale Bauteile / Pièces optionnelles / Parti opzionali Part # English Deutsch Françias Italiano Pinion Gear, 10T 0.5M: B450 3D/X, Ritzel 10T 0,5M : B450 3D/X, B400, B450 3D/X,B400, B300 X -Pignon 10 dents Pignone, 10T 0.5M: B450 3D/X, BLH1610* B400 , 300 X B300X... - Page 22 ©2012 Horizon Hobby, Inc. Blade, DSM, DSM2, ModelMatch, AirWare and EC3 are trademarks or registered trademarks of Horizon Hobby, Inc. DSMX is a trademark of Horizon Hobby, Inc., registered in the U.S. The Spektrum trademark is used with permission of Bachmann Industries, Inc. BeastX is a trademark of Markus Schaack and is used with permission.
Need help?
Do you have a question about the Blade 300 X and is the answer not in the manual?
Questions and answers