Table of Contents
Advertisement
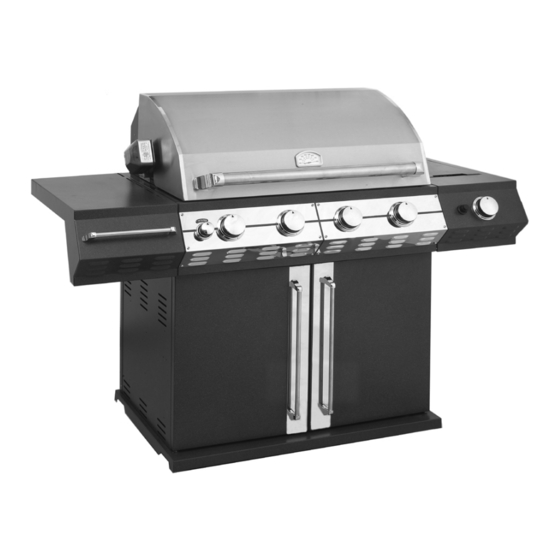
Tuscany
" Value at its Finest"
USE AND CARE MANUAL
For Model CS812LP
Stop! Missing a part? DO NOT RETURN PRODUCT TO STORE
The store where you made the purchase does not stock
parts for this item. If you need parts, whether they are
missing or damaged, please call Customer Service at
Call us between 8:00 AM and 5:00 PM Eastern time, Monday through Friday
FOR YOUR SAFETY:
1. Read this Manual before attempting to assemble or operate your grill.
2. Follow saftety instructions.
3. Check for leaks according to the directions in this Manual before operating your grill,
even if purchasing an assembled grill.
4. Keep this Manual for future reference.
5. Contact 1-800-229-5647 should you need assembly assistance or have any questions.
THIS GRILL IS FOR OUTDOOR USE ONLY.
If stored indoors, then detach and leave propane cylinder outside.
TM
or email us at saleshelp@sureheat.com
1-800-229-5647
Advertisement
Table of Contents

Related Manuals for Tuscany CS812LP


Summary of Contents for Tuscany CS812LP
- Page 1 Tuscany " Value at its Finest" USE AND CARE MANUAL For Model CS812LP Stop! Missing a part? DO NOT RETURN PRODUCT TO STORE The store where you made the purchase does not stock parts for this item. If you need parts, whether they are...
-
Page 2: General Safety Instructions
General Safety Instructions IMPORTANT SAFETY INFORMATION - Read this manual carefully before using your grill to reduce the risk of fire, burn hazard or other injury. - Extreme care should be used because of the high temperatures produced by this appliance. -
Page 3: For Your Safety
General Safety Instructions ▲ ▲ WARNING WARNING NOTE: Do Not operate the main burners and Do not use the rotisserie in the rain. infrared back burner at the same time. This can cause warping of the roll top grill hood. ▲... -
Page 4: Grill Features
Grill Features 1. Roll top grill hood 9. Bread warming rack 10. Rear Infrared burner 2. Rotisserie kit 3. Grilling/cooking surface 11. Side burner 4. Side shelf 12. Control Knob: Side burner 5. Towel bar/utensil hanger 13. Electronic igniter: main burners, side burner, rear infrared burner and searing burner 6. -
Page 5: Getting Started
Getting Started Self-tapping screw x 1 Phillips pan head screw x 2 Getting Started 1. Please follow the steps in the order that they are presented. 2. Assemble the grill where you plan to use it. 3. You may want to place an old towel or cloth at the assembly site to prevent nuts and bolts from becoming lost. -
Page 6: Grill Assembly
Grill Assembly Fig. 1 LEFT SHELF ASSEMBLY 1. Loosen the four hex head bolts on the side of the grill by approximately 1/4". (See Fig. 1) Bolts Fig. 2 2. Attach the left shelf by inserting the four bolt heads into the holes on the left shelf. - Page 7 Grill Assembly Fig. 4 SIDE BURNER PARTS ASSEMBLY 1. Remove side burner valve assembly from packaging. Feed the valve assembly through the large cut out in the side of the cart. (See Fig. 4) Fig. 5 2. Loosen the four hex head bolts on the side of the grill by approximately 1/4".
- Page 8 Grill Assembly Side burner bracket SIDE BURNER PARTS ASSEMBLY Fig. 9 6. Remove the two phillips pan head M5 x 10 screws to from the orifice bracket, then hold the orifice bracket, make sure the orifice goes into the center hole on the side burner bracket.
-
Page 9: Interior Parts Assembly
Grill Assembly Fig. 14 INTERIOR PARTS ASSEMBLY 1. Rotate the tank barrier bar away from the cart back, use a self-tapping screw to secure it on the cart base. (See Fig. 14) self-tapping screw Long side of flavor grid 2. Insert the top row of flavor grids into the cutouts Fig. -
Page 10: Gas Requirements
Gas Requirements GENERAL INFORMATION ▲ Never attach an unregulated gas line to the appliance. Connection to WARNING an unregulated gas line can cause excessive heat or fire. Verify the type of gas supply to be used, either Natural Gas (N.G.) or Liquid Propane (L.P.), and make sure the serial plate agrees with that of the supply. -
Page 11: Gas Installation
Gas Requirements L.P. GAS INSTALLATION Tuscany™Gas Grills that are set to operate with L.P. gas come with a high capacity hose and regulator assembly. (Note: Only use the pressure regulator and hose assembly supplied with the grill or a replacement pressure regulator and hose assemblies specified by Tuscany™). This assembly is designed to connect directly to a standard 20 lb. -
Page 12: Pre Operation Leak Testing
Pre Operation Leak Testing GENERAL INFORMATION Although all gas connections on the grill are leak tested prior to shipment, a complete gas tightness check must be performed at the installation site due to possible shifting during shipment, installation or excessive pressure unknowingly being applied to the unit. Periodically check the whole system for leaks and immediately check the system if the smell of gas is detected. -
Page 13: Lighting The Grill
Lighting the Grill Do not attempt to "Light" the grill if the odor of gas present!! BEFORE LIGHTING Fig. 20 ▲ Important! Before Lighting: WARNING • Check the gas supply line for cuts, wear or abrasion. • Always keep your face and body as far away from the grill as possible when lighting. - Page 14 Using the Grill and Side Burner GRILL LOCATION Do not use the grill in garages, breezeways, sheds or any enclosed area. Never operate the grill ▲ WARNING in enclosed areas as this could lead to a carbon monoxide buildup, which could result in injury or death.
-
Page 15: Using The Rotisserie Burner
Using the Rotisserie Burner The grill rotisserie system is designed to cook items from the back using infrared heat. The rotisserie burner is an infrared type which provides intense searing radiant heat. Preferred by chefs over other cooking methods, this intense heat sears in the natural juices and nutrients found in quality cuts of meats. -
Page 16: Rotisserie Lighting
Rotisserie Lighting ROTISSERIE LIGHTING Fig. 28 Open the lid. Push and turn the control knob for the rotisserie counter-clockwise to the “HIGH” position. Wait 5 seconds. Then press and hold the electronic igniter button. You’ll hear a snapping sound. If the burner does not light in 4 seconds, turn the control knob to OFF and wait 5 minutes before trying again. -
Page 17: Bottom Infrared Cooking Tips
Bottom Infrared Cooking Tips Even with an expert chef, infrared cooking can be quite a challenge. If you follow these simple suggestions, you will soon be making juicier, more savory foods than you have ever experienced before. In general, foods will cook in less time then they would take an ordinary grill. If you rotate food regularly (about every 2 minutes), extreme charring is avoided. -
Page 18: General Maintenance
Care and Maintenance PROTECTION OF INFRARED BURNERS The burners of your grill are designed to provide a long life of satisfactory performance. However, there are steps you must take to prevent cracking of the burner's ceramic surfaces, which will cause the burners to malfunction. - Page 19 Care and Maintenance DRIP TRAY The drip tray should be cleaned periodically to prevent heavy buildup of debris. NOTE: Allow the drip tray to cool before attempting to clean. Important: Do not leave the grill outside during inclement weather unless it is covered. Rain water can collect inside of the grill, the grill cart or the drip tray if left uncovered.
-
Page 20: Troubleshooting Your Grill
Troubleshooting Your Grill GENERAL TROUBLE SHOOTING You should inspect the burners at least once a year or immediately if any of the following conditions occur: • The smell of gas. • Flames appearing mostly yellow. (some yellow at the tips is OK) •... - Page 21 Troubleshooting Your Grill Problem SOLUTION Grill will not light with a match or low heat with dial • Is your gas supply fully turned on? set to "High" position. • Is there gas in your L.P. tank? Check your gas level. •...
-
Page 22: Replacement Part List
Replacement Part List... - Page 23 Replacement Part List Part No. Description Part No. Description Hood Assy. bolt set FCCS3308009 Side IR burner 2 FCCS3308001 Hood Assy. FCCS3308010 Side burner door 3 FCCS0007030 Temp. gauge FCCS0007039 Side burner grate Side burner orifice holder 4 FCTG3307014 Hood handle end 5 FCTG3307014 Hood handle tubing FCCS3308011 Side burner valve Assy.
-
Page 24: Limited Warranty
LIMITED WARRANTY Sure Heat Mfg warrants that for 2 years from the date of purchase, the stainless steel panels will not break due to defects in material or workmanship. All other components of this grill are warranted free from defects in material and workmanship for one year from the date of purchase.
Need help?
Do you have a question about the CS812LP and is the answer not in the manual?
Questions and answers