Table of Contents
Advertisement
Advertisement
Table of Contents
Troubleshooting

Related Manuals for NanoEnTek Frend system

Summary of Contents for NanoEnTek Frend system
- Page 1 System User manual...
-
Page 2: Read Me First
Thank you for purchasing the FREND System. Read me Please take a few minutes to read this user manual. first If you have any questions at any time, please contact NanoEnTek Inc. customer support. Tel: +82-2-6220-7940 Fax: +82-2-6220-7721 E-mail: sales@nanoentek.com... -
Page 3: Table Of Contents
System setup procedure 19-26 Operation 27-37 FREND System operating procedure 27-33 FREND System data management 34-37 Maintenance 38-56 FREND System maintenance 38-43 Cleaning and storage Troubleshooting 45-54 General specification-normal environmental conditions Customer support information FREND System © 2012 NanoEnTek Inc. -
Page 4: Introduction
Na- noEnTek Inc., not regularly maintained, used with equipment not ap- proved by NanoEnTek Inc. or used for purposes for which it was not designed. This warranty does not apply to damages incurred during the initial shipment of the instrument and associated auxiliary materials. -
Page 5: Introduction
The concentration of the analyte of interest in an unknown sample is calculated using the ratio of the fluorescent intensity of the test zone and the reference zone. The principle of the fluorescence detection and calculation of the analyte con- centration (drawing from the manual). FREND System © 2012 NanoEnTek Inc. -
Page 6: Intended Use
Introduction The FREND System is designed to accommodate the FREND car- ™ ™ Intended use tridge in which a quantitative in vitro measurement of specific antigens in human serum or plasma are made to be used as an aid in the clinical management of patients. -
Page 7: Product Components
Adaptor / Power cord Q.C. Pouch System Q.C. Pouch [Components] 1 x Q.C. Cartridge 1 x Q.C. Code chip Q.C. Cartridge Q.C. Code chip User manual Quick manual USB drive Optional Optional Pipettor Mobile printer FREND System © 2012 NanoEnTek Inc. -
Page 8: Symbols And Abbreviations
Introduction The following symbols are found on the FREND™ System and in the Safety manual and package inserts. Study the meanings of the symbols and symbols & always use the equipment in a safe manner. abbreviations Symbol Definition Warning or caution Biohazard Class I laser product CLASS 1 LASER PRODUCT... -
Page 9: Symbols And Abbreviations
For more detailed information about disposal of your old appliance, please contact local distributor, waste disposal service or call the number listed in the manual. FREND System © 2012 NanoEnTek Inc. -
Page 10: Safety Precautions
System as this could • ™ result in an electrical shock, personal injury and equipment damage. insert only qualified and authorized devices supplied by NanoEnTek Inc. • Do not insert any foreign materials into the air vent or the speaker. -
Page 11: General Safety Warnings
The equipment itself and the electronic accessories must be dis- posed of according to the regulations for the disposal of electronic components. Be sure to understand what the rules at your site are. FREND System © 2012 NanoEnTek Inc. - Page 12 Introduction • Do not attempt to disassemble/modify the equipment. General • Do not insert foreign objects into the equipment and insert only Na- safety noEnTek Inc.-provided cartridges. warnings • Do not handle the equipment or the power cord with wet hands. •...
-
Page 13: Frend Tm System Description
Location for the insertion of Q.C. or cartridge code chip Serial port Connection for an optional mobile printer Power supply port Screen Speaker USB D Ventilation Power switch Serial port USB H Cartridge slot Code chip slot FREND System © 2012 NanoEnTek Inc. -
Page 14: The Function Of The Code Chip And Associated Cartridge
Introduction The function Product Definition Q.C. Code chip The chip containing information for the of the code proper functioning of the Q.C. Cartridge. chip and Q.C. Cartridge The cartridge used to check the associated mechanics and optics of the FREND ™... -
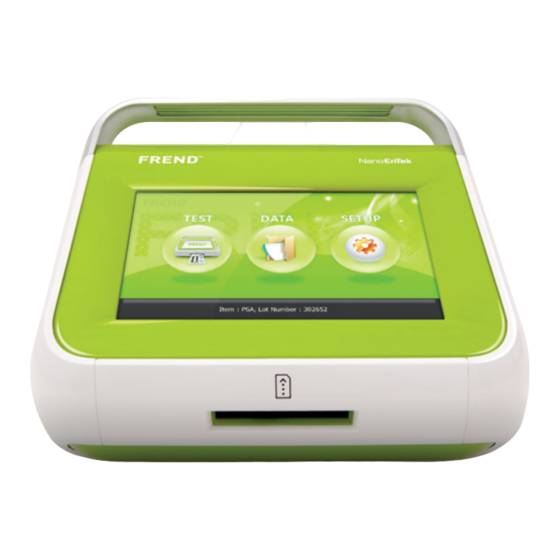
Page 15: Software Keys
Check and search results. Back up the data and transfer the data to a USB DATA drive. Set up the FREND™ System SETUP parameters specific for the site and operator. FREND System © 2012 NanoEnTek Inc. - Page 16 Introduction Setup screen Software keys Button Purpose Allows user to check the information on the Q.C. or the cartridge code chip. Allows the user to check the serial number, software or firmware version, and the production date of the instrument. Allows the user to check the cartridge ID and its associated lot number.
- Page 17 View the information of the selected file or data. Print the detailed data, using the optional printer if it is connected to the system. Backup a selected set of data to the connected USB drive. FREND System © 2012 NanoEnTek Inc.
- Page 18 Introduction Software Data screen keys Purpose Button Backup all the saved data to the connected USB drive. Delete all the saved data. (confirmation required) Delete one selected piece of data. Select data by moving one location at a time. Select data by moving one page at a time.
-
Page 19: Setup
If this happens, it will no longer work properly anymore. 4. Turn the power switch to the ON position. Power switch 5. While the system is booting up, this image will appear. 6. Check the main screen. FREND System © 2012 NanoEnTek Inc. - Page 20 Setup 7. Press the SETUP button on the main screen. FREND System setup procedure 8. Press the Date & Time button on the setup screen. 9. Set the local date and time. 2012 AM 00 10. After setting the date and time, press the OK button to return to the setup screen.
- Page 21 The Q.C. Pouch contains one Q.C. Code chip which is used with the Q.C. Cartridge to do instrument validation. 14. Press the Code Chip button on the setup screen. FREND System © 2012 NanoEnTek Inc.
- Page 22 Setup 15. The information on the Q.C. Cartridge is automatically saved. FREND System setup procedure 16. When the Q.C. Code chip installation is complete, press the OK button to go to the setup screen. 17. Press the Item button on the setup screen. 18.
- Page 23 System setup procedure 20. After all settings are done, press the button and move to the main screen. 21. Press the TEST button on the main screen. FREND System © 2012 NanoEnTek Inc.
- Page 24 Setup 22. Insert the Q.C. Cartridge into the cartridge slot. FREND System setup procedure Caution: Please check the direction of the Q.C. Cartridge before insertion. 23. The Q.C. check that the instrument is operating correctly will complete automatically and the Q.C. Cartridge will be expelled. Please wait patiently.
- Page 25 If all tests do not pass, try steps 21-24 again. If the instrument does not pass all three steps, please contact customer support via email. 25. Press the button and move to the main screen. 26. Remove the Q.C. Cartridge. FREND System © 2012 NanoEnTek Inc.
-
Page 26: Setup
Setup 27. Remove the Q.C. Code chip. FREND System setup procedure Caution: Press the Q.C. Code chip into the slot slightly in order to release it and remove the Q.C. Code chip from the slot. The FREND System setup is complete!!! -
Page 27: Operation
Please double check the direction of the cartridge code chip before insertion. Each cartridge box contains one analyte and lot specific cartridge code chip. The code chip 000000 works for all cartridges in the same box. FREND System © 2012 NanoEnTek Inc. -
Page 28: Frend Tm System Data Management
Operation 5. Press the SETUP button on the main screen. FREND System operating procedure 6. Press the Code Chip button on the setup screen. 7. The information in the cartridge is automatically saved. 8. If the cartridge code chip installation is complete, press the OK button to go to the setup screen. - Page 29 • A maximum of 3 code chips per item can be installed. Any cartridge, whose lot number matches that of any one of the three code chips’ lot numbers can be used. 11. Press the button and move to the main screen. FREND System © 2012 NanoEnTek Inc.
- Page 30 Operation 12. Prepare the cartridge and patient samples. FREND System operating procedure • For patient samples, collect 2-4 mL of blood in a 5 mL tube. Spin the tube in a centrifuge and collect the serum or plasma. 13. After entering the patient information or ID on the sticker of the cartridge, inject into the inlet of the cartridge, using a calibrated micro- pipette and disposable tip, the volume of serum or plasma specified in the package insert sheet for the analyte being measured.
- Page 31 15. Type the ‘Patient ID’ and press the ENTER button. FREND System operating procedure 16. Insert the cartridge into the cartridge slot. Caution: Please check the direction of the cartridge before insertion. And also check if the insertion is complete. FREND System © 2012 NanoEnTek Inc.
- Page 32 Operation 17. Wait until the test is done automatically. FREND System operating procedure 18. After the reaction is complete, the FREND System starts to record the fluorescent readings. Caution: Do not turn off the FREND™ System, while there is a cartridge in the system.
- Page 33 21. The test is complete. If another sample is to be run, repeat again steps 12-19. • The results are stored automatically. If the DATA button on the main screen is pressed, more information is visible. FREND System © 2012 NanoEnTek Inc.
- Page 34 Operation Press the DATA button on the main screen to check, search or delete FREND the test data, and perform data backup. System data management Data selection Click the direction of the arrow button on the right to select the data moving one file moving one page).The selected data is indicated by the arrow on the left side.
- Page 35 After selecting the data, click the result button to check the results. Print If the printer is connected, click the Print button to print the result. If you click the List button, it will return to the DATA screen. • Printer should be purchased separately. FREND System © 2012 NanoEnTek Inc.
- Page 36 Operation Click DATA buttons on the main screen to check, search, delete the FREND test data, and perform your backup. System data management Data backup Connect the USB drive that will receive the data backup to a USB H port on the back of the device.
-
Page 37: Operation
If you want to delete only a selected data, click the black Select button after selecting the data and the selected data will be deleted. If you want to delete all of the data, click the black all button and all of the data will be deleted. FREND System © 2012 NanoEnTek Inc. -
Page 38: Maintenance
Maintenance The FREND™ System checks FREND To assure reliable and accurate test results, please check the following: System • Observe the external appearance and screen of the FREND™ Sys- maintenance tem every time you use the device. Check the signal input part of the FREND™ System once a month •... -
Page 39: Frend Tm System Maintenance
Pouch contains one Q.C. Code chip. The Q.C. Code chip works with Q.C. Code chip Q.C. Cartridges. 000000 3. Check the main screen and press the setup button on main screen. 4. Press the code chip button on the setup screen. FREND System © 2012 NanoEnTek Inc. - Page 40 Maintenance 5. The Information on the Q.C. Cartridge is automatically saved. FREND System maintenance 6. When the Q.C. Code chip installation is complete, press the OK button to go to the setup screen. 7. Press the item button on the setup screen. 8.
- Page 41 System maintenance 11. Press the test button on the main screen. 12. Insert the Q.C. Cartridge into the cartridge slot. Caution: Please check the direction of the Q.C. Cartridge before insertion. FREND System © 2012 NanoEnTek Inc.
- Page 42 Maintenance 13. Wait until the test is done automatically. FREND System maintenance • The system automatically checks three steps while reading. Step1. Laser power Step2. Laser alignment Step3. Calculate ratio 14. When the test is done, the Q.C. Cartridge is ejected and the results from each of the three steps are displayed.You will see three Passes, if the system is properly operating.
- Page 43 FREND System maintenance 16. Remove the Q.C. Cartridge. 17. Remove the Q.C. Code chip. Caution: Press the Q.C. Code chip first to remove the Q.C. Code chip. The FREND System check is complete!!! FREND System © 2012 NanoEnTek Inc.
-
Page 44: Cleaning And Storage
Maintenance • Do not clean the FREND System with strong or caustic cleansing Cleaning and agents, chemicals or cleansing tissues impregnated with chemicals. storage • Use a soft and dry cloth to clean the FREND System. For safety reasons, disconnect the power supply from the main out- •... -
Page 45: Troubleshooting
• Re-insert the cartridge correctly. After insertion, check to make sure the cartridge is properly and completely inserted. EMCI-03 - The cartridge is not inserted correctly. • Re-insert the cartridge correctly. After insertion, check to make sure the cartridge is properly and completely inserted. FREND System © 2012 NanoEnTek Inc. - Page 46 Maintenance Cartridge insertion issues Trouble- shooting EMCI-04 - The direction of the inserted cartridge is not correct. • Re-insert the cartridge correctly. After insertion, check to make sure the cartridge is properly and completely inserted. Barcode issues EMBR-01 - The barcode printed on the cartridge may have been damaged so the reader is unable to interpret the code correctly.
- Page 47 Data backup issues EMDB-01 - The USB drive version is not correct, or the USB drive is not properly connected to the FREND System. In addition, the USB drive or USB H port has somehow been damaged. • Check to be sure the USB drive is the version 1.1 required for the FREND...
- Page 48 Maintenance Data backup issues Trouble- shooting EMDB-02 - A problem has been detected when attempting to transfer data from the FREND System to the USB drive. • Check to be sure the USB drive is the version 1.1 required for the FREND system and that the USB drive is connected properly to the USB H port.
- Page 49 • Restart the code chip installation process. If the problem persists, locate another code chip from the same lot number and restart the code chip installation process. If the problem continues, contact customer Support. FREND System © 2012 NanoEnTek Inc.
- Page 50 Maintenance Test result issues Trouble- shooting EMTF-01 - The lot number of the inserted cartridge is different from the lot number of the installed code chip. • Check that the lot number printed on the cartridge is the same as the lot number on the code chip.
- Page 51 If the problem persists, try a different sample. If the problem still continues, contact customer support. FREND System © 2012 NanoEnTek Inc.
- Page 52 Maintenance Test result issues (cont.) Trouble- shooting EMTF-05 - The lateral flow of the sample within the cartridge is incomplete. • Load the sample into a new cartridge and restart the test. If the same error message is displayed, centrifuge the sample to remove particulate matter and fibrin clots and retry with a new cartridge.
- Page 53 Update issues EMUF-01 -There is no executable file (FREND.exe) on the USB drive. • Save the executable file, FREND.exe, transfer it to the USB drive and then retry the update process. FREND System © 2012 NanoEnTek Inc.
-
Page 54: Troubleshooting
Maintenance Update issues Trouble- shooting EMUF-02 -There is no executable file (FRENDUPDATE.exe) on the USB drive. • Save the executable file, FRENDUPDATE.exe, transfer it to the USB drive and then retry the update process. NOTE: In addition to the above, for any reason, if the instrument does not work, please turn off and turn on again. -
Page 55: General Specification-Normal Environmental Conditions
Operating condition: • Temperature: 15 ~ 30 °C, Humidity: 10 % ~ 80 % • Storage condition: Temperature: 15 ~ 30 °C, Humidity: 10 % ~ 80 % FREND System © 2012 NanoEnTek Inc. -
Page 56: Customer Support Information
Every effort has been made to avoid errors in text and diagrams. How- ever, NanoEnTek Inc. assumes no responsibility for any unintentional errors which may appear in this publication. Information and specifica- tions contained in this document are subject to change at any time without prior notice. - Page 57 System NESMU-F10-002EN (V.0.6) NanoEnTek Inc. (HQ) 12F, 5, Digital-ro 26-gil, Guro-gu, Seoul, 152-740, Korea Tel : +82-2-6220-7940 Fax : +82-2-6220-7721 NanoEnTek USA Inc. 5627 Stoneridge Drive Suite 304, Pleasanton, CA 94588, USA Tel : +1-925-225-0108, +1-888-988-0108(Toll free) Fax : +1-925-225-0109 MT Promedt Consulting GmbH Altenhofstrasse 80, 66386 St.
Need help?
Do you have a question about the Frend system and is the answer not in the manual?
Questions and answers