Table of Contents
Advertisement
Advertisement
Table of Contents

Related Manuals for SERVIS DG60B


Summary of Contents for SERVIS DG60B
-
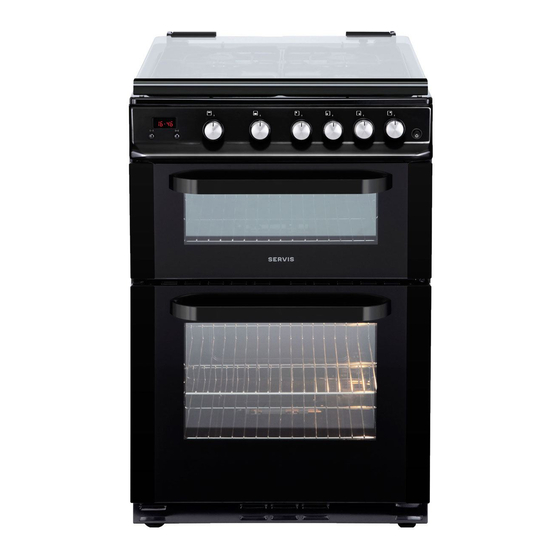
Page 1: Double Oven
DOUBLE OVEN User Manual Model Numbers: DG60B DG60W DG60SS... -
Page 2: Table Of Contents
2 YEAR Safety Instructions Your Oven GUARANTEE NOW Technical Specifi cation SERVIS.CO.UK 0800 0124382 Installation Parts & Labour for 2 years. Go to www.servis.co.uk for more information Usage Cleaning and Care Troubleshooting Guarantee Index T: 0800 0124 382 T: 0800 0124 382... -
Page 3: Welcome
The Oven must be installed by a registered gas engineer prior to use. Servis provides you with a guarantee which will protect you should your Oven develop a fault Unpack and examine your Oven for any damage. If you think there is a defect, contact the during the guarantee period. - Page 4 Do not make any alterations to your Oven, unless authorised to do so by Servis. Turn off all burners before shutting the lid. Make sure that you Oven is turned off at the mains before carrying out any cleaning or Do not place pans or cookware on top of the lid.
-
Page 5: Your Oven
SAFETY INSTRUCTIONS Glass lids may shatter when heated. Turn off all burners before shutting the lid. CE Declaration of Conformity Remove any spillages from the lid before opening. Your oven has been designed to be used only for cooking. Any other use (such as heating a room) is improper and dangerous. -
Page 6: Your Oven
YOUR OVEN FRONT VIEW Rack Positions; available rack positions for the Top Oven Oven Rack Top Oven/Grill Main Oven Oven Lamp Rack Position 2 Rack Positions; available rack positions for the Main Oven Rack Position 1 Control Panel; used to operate your Double Gas Oven a b c Hob burners Oven Rack... -
Page 7: Rear View
YOUR OVEN REAR VIEW Lid Safety Device. Gas Connection; connect your Oven to the gas supply. Lid Safety Device Electrical Connection Terminals; connect your Oven to the mains electricity supply. Adjustable feet; allow you to level your Oven. ELECTRICAL INFORMATION Your Oven requires a 220-240V, 50Hz mains supply. -
Page 8: Technical Specifi Cation
TECHNICAL SPECIFICATION TECHNICAL SPECIFICATION INJECTOR TABLE Model Number Total Consumption: G30 28~30 mbar 12.3 kW Power Supply 220-240 V AC, 50Hz 894 g/h Maximum Power (W) 10400 Gas Category: II2H3+ Size (H x W x D) (mm) 900 x 600 x 600 Destination: GB Class:1 G20 20 mbar G20/G31 28-30/37 mbar... -
Page 9: Installation
TECHNICAL SPECIFICATION INSTALLATION INJECTOR TABLE - CONTINUED INSTALLATION REQUIREMENTS Before unpacking and manoeuvring your Oven, please take the time to read and become familiar Main Oven Burner with the following points: DIA. of Injector (1/100mm) To avoid risk of injury, please take care when moving your Oven. It is heavy and we Nominal Rating (kW) recommend that a minimum of two people move the Oven. -
Page 10: Usage
INSTALLATION USAGE ADJUSTING THE FEET CONTROL PANEL OVERVIEW For safe operation, it is important that your Oven is stable and balanced. The four adjustable feet Digital Minute Top Oven and Main Oven Lamp are used to level your Oven. Make sure that your Oven is level prior to cooking. Minder Grill Control Control Knob... -
Page 11: Using Your Oven
USAGE USING YOUR OVEN Ignition of the Burners: Controlling the Hob Burners: Warning: Always make sure the Oven lid is raised before using the burners. The hob burner knobs have 3 positions; ‘off’ (0), ‘min’ (small flame symbol) and ‘max’ (large flame symbol). - Page 12 USAGE To obtain maximum performance from the main burners, we suggest you use pots with the Control of the Grill Burner following flat bottom diameters. Using pots smaller than the minimum dimensions shown below will cause energy loss. The grill burner can be operated with the Oven door in one of two positions: Rapid Burner: 22-26 cm Completely open Medium Burner: 14-22 cm...
- Page 13 USAGE The Grill Pan Handle Set: Control of the Oven Burners Warning: Always use an oven glove to protect your hand when using the grill as the metal parts After you have ignited the burner for the top or main oven, you can adjust the temperature as can become very hot.
- Page 14 USAGE The Digital Minute Minder To turn the Oven off: The Digital Minute Minder can either display the current time or be used as a timer to assist with Turn the Control Knob in a clockwise direction until it is in the ‘0’ position. your cooking preparations.
-
Page 15: Cleaning And Care
USAGE CLEANING AND CARE The Oven Lamp In order to prevent damage to your Oven, always test an approved cleaner on a small area first and follow the manufacturer’s instructions for use. To assist with your cooking, the main Oven has a lamp that can be turned On or Off by using the Lamp Switch on the Control Panel. - Page 16 Gas Connection Pipe: Periodically check the gas connection pipe. If there is a defect contact the Servis helpdesk. We recommend the gas connection components are changed annually. If there is a defect found when operating the control knobs, cooker or oven, contact the Servis helpdesk or a registered service engineer.
-
Page 17: Troubleshooting
If your Oven is not operating as expected, you may find a simple solution listed in the table Fault Possible Cause Solution below. If you are experiencing a fault not covered in the manual, please contact the Servis helpdesk. The Oven Lamp does not The lamp has failed. -
Page 18: Guarantee
The Servis guarantee is not transferable. For your Servis guarantee to be valid, you will need to retain your original purchase receipt and be able to provide it when you make a claim. The above summary does not include all of the terms and conditions and exclusions which can Please refer to the rear cover for disposal instructions. -
Page 19: Index
INDEX Adjusting the feet .........15 Hob burners ...........18 Technical specifications ........11 Temperature Chart ........22 Transportation ..........28 Troubleshooting ..........29 Changing the oven lamp .......25 Cleaning ............25 Igniting the burners ........17 Control panel ..........16 Injector table ..........12 Installation requirements......14 Using your oven ..........16 Oven burners ..........22 Digital minute minder ........24 Oven lamp ............25... - Page 20 T: 0800 0124 382 E: info@servis.co.uk The symbol on the product or on its packaging indicates that this product may not be treated as household waste. Instead it shall be handed over to the applicable collection point for the recycling of electrical and electronic equipment. By ensuring this product is disposed of correctly, you will help prevent potential negative consequences for the environment and human health, which could otherwise be caused by inappropriate waste handling of this product.
Need help?
Do you have a question about the DG60B and is the answer not in the manual?
Questions and answers