Table of Contents
Advertisement
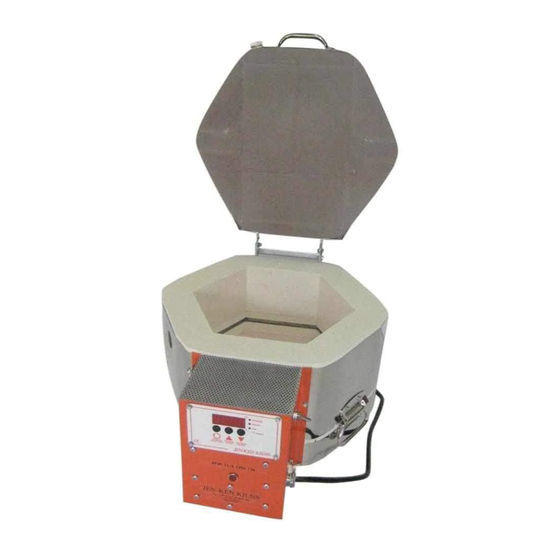
Jen-Ken Kilns
AF3P Pre-programmed
"One Smart Controller"
-LP-
Large Piece Glass
Fuse
Tack
Slump
Polish
+ 4 Extra
-CONE-
Ceramic
Cones 022 to 6
+4 Extra
Set for Limits of kiln
Jen-Ken Kilns and Orton have produced the most user friendly and powerful, kiln controller for artists. If the Jen-
Ken Kiln can perform all the above tasks then all of the above settings will been turned on. The Chilipepper is a
low firing annealing kiln and will only have the –BEAD- setting turned on. The AF3P Bead Annealer with flip
door will have all of the above turned on except the Cone feature because the kiln cannot fire that hot.
Small Piece Glass
6 User Defined
Programs that can
Jen-Ken Kilns
3615 Ventura Dr. W. – Lakeland, FL 33811
863-648-0585
www.jenkenkilns.com
-SP-
Fuse
Tack
Slump
Polish
+ 4 Extra
-USER-
be used for
anything
Operating
Manual
-CLA-
PMC
Fast Fire PMC+
Slow Fire PMC+
Slow Fire PMC3
Firing PMC Standard
Firing PMC Gold
+4 Extra
-BEAD-
Small Moretti
Large Moretti
Batch Anealing
Borosilicate
+4 Extra
1
Advertisement
Table of Contents

Summary of Contents for Jen-Ken Kilns AF3P
- Page 1 Ken Kiln can perform all the above tasks then all of the above settings will been turned on. The Chilipepper is a low firing annealing kiln and will only have the –BEAD- setting turned on. The AF3P Bead Annealer with flip door will have all of the above turned on except the Cone feature because the kiln cannot fire that hot.
- Page 2 Jen-Ken Kilns wants you to have this controller to get you firing sooner and to see sample programs that you can use (or modify)
-
Page 3: Table Of Contents
Choosing a Location for Your Kiln............10 Setting up Your Kiln................11 Quick Start Guide or Enough Reading – I want to fire something!........... 12 AF3P Controller……………………………………………………….13 Audible Alarm................13 Temperature Display Preference..........14 Temperature measurement............14 Temperature Control ..............14 Firing Program Terminology............ -
Page 4: Safety First
Do not drop or slam the lid shut. o Let the kiln cool to room temperature before opening the lid. o NOTE: If you are in doubt about anything, call Jen-Ken Kilns during regular business hours M-F 8-4 Eastern at 863-648-0585 or send an email to mike@jenkenkilns.com. -
Page 5: About Your Kiln
Introduction The AF3P Preprogrammed Controller is an outstanding unit that we have developed for a range of Jen-Ken kilns. The controller has been designed and programmed to Jen-Ken Kilns specifications by Orton Ceramics. Elements Elements are the coils of wire that produce heat inside the kiln. - Page 6 Kiln Brick All Jen-Ken kilns are made of hand selected 2300°F refractory brick. The brick is strong as a whole and has a very long life. The brick can chip easily and care should be taken to avoid bumps while loading and unloading shelves.
-
Page 7: Kiln Accessories
RECOMMENDED KILN ACCESSORIES Glass Kiln Wash is a mixture of very fine minerals that will not fuse or melt together at high temperatures and act as a barrier between the kiln shelf or mold and glass. It is used to help prevent glass from sticking to the tops of the kiln shelves and the firebrick bottom of the kiln. -
Page 8: Kiln Specifications
KILN SPECIFICATIONS To operate the kiln safely and efficiently, your kiln needs the proper electrical outlet with the correct electrical capacity and voltage. The chart below will assist you in the selection of the proper wire and breaker size for your Jen-Ken Kiln. A licensed electrician or the local power company should determine if you have the proper voltage and wiring. - Page 9 JEN-KEN CERAMIC KILNS Models Amperage Wire Size Fuse Voltage Draw Required Required Receptacle 11/9 5-20R 15/9 5-20R 1811 6-30R 1822 6-30R 1829 6-50R 2122 6-50R 2422 6-50R 2431 6-50R 2829* 45 OR 55 50 OR 60 6-50R OR Oval 27 Direct Wire 6-50R ²...
-
Page 10: Choosing A Location For Your Kiln
CHOOSING A LOCATION FOR YOUR KILN The proper location is as important as choosing the right kiln. Below are some safety guidelines. o Please review the safety considerations listed on page 5 when selecting a location for your kiln. o Your kiln should be located in a covered, dry, fireproof and well ventilated area, but never in a small enclosed area such as a closet, cabinet or very small room. -
Page 11: Setting Up Your Kiln
You’re now almost ready to plug in the kiln and fire it for Brush kiln wash on the floor. the first time. Before we go there, however, It’s important for you to get acquainted with your AF3P controller. Position posts on the bottom. -
Page 12: Quick Start Guide Or
Enough of this reading stuff – I want to fire something! For those of you who can’t wait, here is a brief guide to get you up and running. It is strongly recommended that you do take time to look over the controller instructions as soon a possible. Quick Start Guide: Plug the Kiln in to an appropriate outlet and turn it on using the toggle switch on the side of the control box. -
Page 13: Af3P Controller
AF3P Controllers (Auto Fire 3 Button Programmable Controller) AF3P Controller AF3P Chilipepper Controller This button is for selecting a firing program and advancing through the programming steps. After programming is complete, use this button to Start and Stop the firing. -
Page 14: Temperature Display Preference
The controller is equipped with a small buzzer that will sound during button presses and at the successful diagnostic alarms that completion of a firing for 30 seconds. The alarm will also sound to notify you of may occur during a firing. To silence an active buzzer, Press any button. Temperature display preference All temperature displays on the controller can be viewed as ... -
Page 15: Program Modes
Without the cooling soak, the glass could retain stress resulting in breaks. Program Modes The AF3P controller allows the operator to select 1 of 5 program modes for different glass art or craft applications. The program mode is prompted on the controller display when the controller is turned on. The 5... -
Page 16: Selecting The Firing Schedule Or Programs
-LP- For larger glass projects for the kiln (full shelf size and/or 3 or more layers) -SP- For smaller glass projects (small pieces on the same shelf and/or 2 layers) bEAd For bead annealing projects CONE For Cone Firing of Ceramics (Only if kiln is rated for over 1800ºF and is not top firing) For Metal Clay projects For custom firings... -
Page 17: -Lp- Large Piece Program Mode
-LP- Large Piece Program Mode For pieces that are large in size for the shelf of the kiln (over 2/3 the shelf area and/or 3 or more layers thick). This is a good place to start for that large project knowing that you can speed up the rates (Ra) later if the piece turns out well. The Large Piece mode provides 4 preset firing schedules for glass forming and 4 optional User Programs for creating custom firing schedules. -
Page 18: -Sp- (Small Piece) Program Mode
100.0F(55.5C)/hour * 700.0F(371.1C) * 00.00 * Pr01 User Pr02 User Pr03 User Pr04 User The preset Large Piece programs can be edited. Each program segment can be changed by the operator. To restore the factory values, enter a zero value for the first rA1 segment of each program and press the Program button. -
Page 19: Bead Program Mode
Fire Polish Displayed as POL This program heats at 300ºF/hour to 1000ºF and holds this temperature for 0 minutes. Then heats at 500ºF/hour to 1200ºF and holds this temperature for 15 minutes. Then heats at Full Power (fast as it can) to 950ºF and holds this temperature for 30 minutes. -SP- Programs -SP- Program... - Page 20 Ramp and Holding Working Programs are useful while beading and lampworking. When the program is started the kiln heats fast and then holds at an annealing temperature for the longest amount of time that is planned to work. In this case 4 hours and if the time to work suddenly becomes less, then use skip step feature (sstp) (the middle button once and the left button twice) to advance the segment of the program.
-
Page 21: Metal Clay Program Mode
FULL* 940.0F(504.4C) * 00.30 * 100.0F(55.5C)/hour * 500.0F(260.0C) * 00.00 * Pr01 User Pr02 User Pr03 User Pr04 User The preset bead programs can be edited. Each program segment can be changed by the operator. To restore the factory values, enter a zero value for the first rA1 segment of each program and press the Program button. -
Page 22: User Program Mode
PMC Standard FULL * 1650.2°F(899 .0°C) * 02.00 * GoLd PMC 22c. Gold FULL * 1290.0°F(698.8°C) * 01.30 * Pr01 User Pr02 User Pr03 User Pr04 User The preset metal clay programs can be edited. Each program segment can be changed by the operator. -
Page 23: Other Program Notes
Each step of a firing program must have a programmed heating or cooling temperature. The controller must have at least one heating step to accept the firing program as valid (an invalid program results in a bAdP display alarm). A heating step is simply any step with a temperature setting that is above the current display temperature. -
Page 24: Delay Start Option
If no buttons are pressed for 1 full minute during programming, the controller will automatically exit the program mode and return to the IdLE display. During a firing, if the options menu is activated for programming, the controller will return to the active display if no buttons are pressed for 1 full minute. -
Page 25: Options Menu
prompt. The Review can be used to bypass making any changes to the current firing schedule. Program Recall Program Review can be used to quickly select any firing schedule that is already programmed into the controller memory. To select a saved program, the controller should first be at the IdLE prompt. -
Page 26: Threshold Alarm
Threshold Alarm During the firing, it is possible to set an audible alarm and display alarm for when the actual temperature reaches a specified value. The buzzer will sound (for 30 seconds) and the display will show the alarm code ALAr. To set the alarm, Press Increase button during the active firing until the alarm prompt ALAr is displayed. -
Page 27: Status Display Codes
3. When power is restored, the temperature drop during the power interruption must be less than 72ºF (40ºC). If not, the display will show the alarm code PF 3 and terminate the firing. Status Display Codes Below is a list of normal display codes which indicate the controller mode of operation. IdLE - This is ready mode;... - Page 28 1. The heating or cooling rate is slower than 27°F (15°C) per Hour 2. The current program step has lasted 2 hours longer than anticipated. In most cases, the FtL alarm occurs during heating if the heating rate is set to a fast speed that cannot be maintained by the kiln.
-
Page 29: Wiring Diagram
Wiring Diagram The controller can be set to read in ºF or ºC. There is a small black shunt on the back of the controller. If the shunt is on the pins it will read in ºF and if the shunt is off it reads in ºC. -
Page 30: Beginner Instructions
FUSED GLASS PROJECTS Working with Tested Compatible Glasses To ensure success when fusing glass, use glass that has been pre-tested by the manufacturer How to prepare your glass project Select glass that is “tested compatible” and has the same COE (Coefficient of Expansion) for the entire project. -
Page 31: Firing Process
Between 1250°F and 1350°F (577°C - 732°C), the glass is becoming even softer, and at the top end of this range will be fully slumped. It’s not recommended to exceed 1350 F if you are slumping because at higher temperatures, there is a loss of control of the glass and it may slide down too far or unevenly into the mold. -
Page 32: Firing Pieces Of Glass For Beginners
soaked only long enough to achieve the desired look. It’s important not to hold the project at these temperatures for a long period of time, or you run the risk of devitrification (a visible clouding of the glass surface due to crystallization). Fast Cooling (1500°F to 1100°F range): After the finished look has been achieved, it’s important to cool the inside of the kiln and the glass as quickly as possible to stop the firing... - Page 33 Another possible scenario is that the edges of the glass have melted more quickly, trapping a large amount of air in the center of the piece which expands into large bubbles within the glass, thus distorting the design. Both scenarios could have been avoided simply by slowing down the firing program. Think about your finished piece again.
-
Page 34: Firing Your Metal Clay Projects
FIRING METAL CLAY Drying Time Allow your pieces to be completely dried before firing them in the kiln to ensure that they don’t warp. Loading the kiln If you fire both glass and metal clay in your kiln, it is recommended that you invest in a second shelf so that you can fire only glass on the glass kiln shelf, and only metal clay silver on the other kiln shelf. -
Page 35: Keeping A Log
Metal Clay Press (Program) button to select this configuration. Once completed the LED display will return to the IdLE mode. Select firing program To select the correct firing program, Press (Program) button to display the current firing program Press (Increase) button to scroll to the correct program for your project P-FS Fast Fire PMC+ P-SL Slow Fire PMC+ P3SL Slow Fire PMC3... - Page 36 KILN FIRING LOG PRO 2 PRO 3 PRO 4 PRO 5 PRO 6 ºF/Hr ºF/Hr ºF/Hr ºF/Hr ºF/Hr ºF/Hr ºF1 ºF ºF ºF ºF ºF ºF Min. Min. Min. Min. Min. Min. Hld1 ºF/Hr ºF/Hr ºF/Hr ºF/Hr ºF/Hr ºF/Hr ºF2 ºF ºF ºF...
-
Page 37: Cone Firing Programs For Ceramics (Certain Kilns Only)
CONE FIRINGS Ceramic and Ceram-a-Glass Kilns Only This is not for glass fusing kilns. Kilns that have top and side heating elements only fire to 1700 degrees F max. and will not fire ceramics, glazes, or pottery. Please do not attempt it will harm the kiln. Ceramics Projects and Pottery Firing Note: Ceram-a-Glass Kilns will need to be in the ceramic mode using the toggle switch located on the side. - Page 38 3. Cone Number alternates with the firing temperature. Use to change the cone number . Press to continue. 4. Firing Speed is Displayed. Use to change the speed to [FASt] = 20% faster, [ Ed] = Medium or [SLO] =20% slower – Press to continue.
-
Page 39: Cone Charts
Cone # Ramp 1 Setpoint 1 Ramp 2 Setpoint 2 Low Fire Degrees F 1087 1004 1112 1051 1159 Cone Fire 1144 1252 Schedules - F 1211 1319 1252 1360 1314 1422 1348 1456 1377 1485 1431 1539 1474 1582 1499 1607... -
Page 40: Controller Warranty And Kiln Warranty
Orton Controller Limited Warranty ® This limited warranty is given only to the immediate purchaser (“Buyer”) of the Autofire Express kiln controller. This limited warranty is not ® transferable. The Edward Orton Jr. Ceramic Foundation (“Orton”) warrants the controller motherboard installed on the Autofire Express (“Warranted Components”) to be in good working order under normal operating conditions for a period of one (1) year from the date of purchase. - Page 41 JEN-KEN KILN WARRANTY JEN-KEN KILNS are warranted to the original purchaser to be free from defects in materials and workmanship when used under normal and proper conditions for the periods specified below. The warranty period begins at the date of original purchase from JEN-KEN KILNS, a JEN-KEN KILN authorized distributor or dealer.
Need help?
Do you have a question about the AF3P and is the answer not in the manual?
Questions and answers