Table of Contents
Advertisement
Quick Links
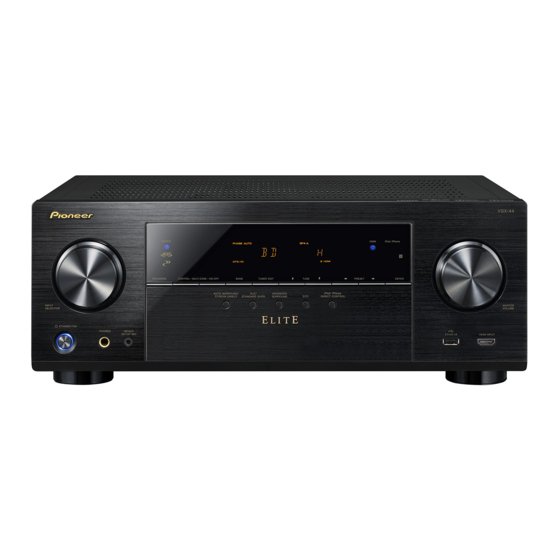
AV Receiver
VSX-44
Register your product on
http://www.pioneerelectronics.com (US)
http://www.pioneerelectronics.ca (Canada)
• Protect your new investment
The details of your purchase will be on file for reference in the event of an insurance claim such as loss or theft.
• Receive free tips, updates and service bulletins on your new product
• Improve product development
Your input helps us continue to design products that meet your needs.
• Receive a free Pioneer newsletter
Registered customers can opt in to receive a monthly newsletter.
Operating Instructions
Advertisement
Table of Contents
Troubleshooting

Related Manuals for Pioneer Elite VSX-44


Summary of Contents for Pioneer Elite VSX-44
-
Page 1: Operating Instructions
• Receive free tips, updates and service bulletins on your new product • Improve product development Your input helps us continue to design products that meet your needs. • Receive a free Pioneer newsletter Registered customers can opt in to receive a monthly newsletter. Operating Instructions... -
Page 2: Operating Environment
VENTILATION CAUTION IMPORTANT When installing this unit, make sure to leave space around the unit for ventilation to improve heat radiation (at CAUTION least 40 cm at top, 20 cm at rear, and 20 cm at each side). RISK OF ELECTRIC SHOCK WARNING DO NOT OPEN Slots and openings in the cabinet are provided for... - Page 3 CAUTION This product satisfies FCC regulations when shielded cables and connectors are used to connect the unit Only use attachments/accessories specified by Read these instructions. to other equipment. To prevent electromagnetic the manufacturer. Keep these instructions. interference with electric appliances such as radios Use only with the cart, stand, tripod, bracket, or Heed all warnings.
-
Page 4: Table Of Contents
Contents Thank you for buying this Pioneer product. Please read Enjoy Roku video streaming service....25 Using surround back channel processing... . . 38... - Page 5 Contents Channel Level ....... . 54 Speaker Distance ......55 The Input Assign menu .
-
Page 6: Features
Features Audio Network Easy setup using MCACC ® Roku Ready The MCACC automatically creates the optimum acoustic environment by compensating for ® This receiver is certified Roku Ready . By just plug the Roku Streaming Stick™ into the MHL differences in speaker size, level and distance, and equalizing response. port, you can enjoy the hottest movies, TV shows, music, games and more on your TV by streaming it directly from the Internet. - Page 7 Features Playback / Processing Installation High Resolution Music Playback iControlAV5 Remote Application High resolution music files with resolutions of 96 kHz/24 bit to 192 kHz/24 bit can be played. This is an application that allowing intuitive operation of many of the receiver’s functions. Playback of AIFF, Apple Lossless, WAV and FLAC files via the front USB port and network is This application is available on the App Store for iPhone, iPod touch and iPad.
-
Page 8: Before You Start
Before you start Flow of settings on the receiver The unit is a full-fledged AV receiver equipped with an The Speaker System setting (page Checking what’s in the box abundance of functions and terminals. It can be used easily (Specify either using the surround back front height after following the procedure below to make the connections Please check that you’ve received the following supplied Speaker Bi-amp ZONE 2 speaker.) -
Page 9: Controls And Displays
Chapter Controls and displays Front panel INPUT SELECTOR dial Tuner control buttons PHONES jack Selects an input source (page 29). Use to connect headphones. When the headphones are BAND – Switches between AM, FM ST (stereo) and FM connected, there is no sound output from the speakers. The MONO radio bands (page 36). -
Page 10: Display
Controls and displays DTS indicators Switches between ECO Mode 1/ECO Mode 2. When ECO DTS – Lights when a source with DTS encoded audio Mode is turned ON, the display will go dark (page 38). signals is detected. iPod iPhone DIRECT CONTROL HD –... -
Page 11: Remote Control
(page 38). The BD, DVD, and operation using the component control buttons are limited only to Pioneer components. SURR – Press for standard decoding and to switch The controls above these buttons can be accessed after you between the modes of... -
Page 12: Loading The Batteries
Batteries with the same shape may have different SOURCE Mutes/unmutes the sound. voltages. Do not use different batteries together. Press to turn on/off the power to the Pioneer device VOLUME +/– When disposing of used batteries, please comply with connected to the receiver. -
Page 13: Operating Range Of Remote Control
Controls and displays Operating range of remote control The remote control may not work properly if: • There are obstacles between the remote control and the receiver’s remote sensor. • Direct sunlight or fluorescent light is shining onto the remote sensor. •... -
Page 14: Connecting Your Equipment
Chapter Connecting your equipment Bi-amping connection Important Determining the speakers’ application Bi-amping connection of the front speakers for high sound • Both the surround back speakers and the front height quality with 5.1-channel surround sound. The unit permits you to build various surround systems, in speakers can be connected at the same time. -
Page 15: Some Tips For Improving Sound Quality
Connecting your equipment • Surround and surround back speakers should be Some tips for improving sound quality Connecting the speakers positioned 60 cm to 90 cm higher than your ears and titled Where you put your speakers in the room has a big effect on slight downward. -
Page 16: Connection Diagram
Connecting your equipment Connection diagram CAUTION The front height terminals can also be used for Speaker B. • These speaker terminals carry HAZARDOUS LIVE voltage. To prevent the risk of electric shock when connecting or disconnecting the speaker cables, disconnect the power cord Front height setting before touching any uninsulated parts. - Page 17 Connecting your equipment Front Bi-Amp connection Front right Front left Hight Hight Front height left Center Subwoofer 1 Front height right Subwoofer 2 Surround right Surround left...
-
Page 18: Switching The Speaker Terminal
Connecting your equipment Switching the speaker terminal About HDMI When the The Speaker System setting on page 57 is set to The HDMI connection transfers uncompressed digital video, SPB, each press of the speaker button will switch the as well as almost every kind of digital audio that the speaker used for playback: SP, SPA, SPB, SPAB. -
Page 19: Analog Audio Cables
Connecting your equipment • Turning on/off the device connected to this unit’s HDMI Note About video outputs connection OUT terminal during playback, or disconnecting/ • When connecting optical cables, be careful when inserting connecting the HDMI cable during playback, may cause This receiver is not loaded with a video converter. -
Page 20: Connecting A Tv And Playback Components
Connecting your equipment Connecting a TV and playback components DVD player HDMI/DVI-compatible components Blu-ray Disc player Connecting using HDMI DVD recorder, If you have an HDMI or DVI (with HDCP) equipped component Blu-ray Disc recorder Game console (Blu-ray Disc player, etc.), you can connect it to this receiver MHL-compatible device HDMI OUT HDMI OUT... -
Page 21: Connecting Your Tv With No Hdmi Input
Connecting your equipment Connecting your TV with no HDMI input DVD player Set-top box This diagram shows connections of a TV (with no HDMI input) and DVD player (or other playback component) to the receiver. • With these connections, the picture is not output to the TV Select one Select one VIDEO OUT... -
Page 22: Connecting Optional Bluetooth ® Adapter
DHCP server function, it is necessary to set up the network manually. For details, see interface When the Bluetooth ADAPTER (Pioneer Model No. AS-BT100 Network Setup menu on page or AS-BT200) is connected to this unit, a product equipped... -
Page 23: Connecting Antennas
Connecting your equipment To improve AM reception Place the AM antenna on a flat surface and in a Connecting antennas Connect a 5 m to 6 m (16 ft. to 20 ft.) length of vinyl-coated direction giving the best reception. wire to the AM antenna terminal without disconnecting the Connect the AM loop antenna and the FM wire antenna as supplied AM loop antenna. -
Page 24: Connecting An Ir Receiver
Connecting your equipment Connecting an IR receiver Switching components on and off using the 12 Connecting an iPod volt trigger If you keep your stereo components in a closed cabinet or This receiver has a dedicated iPod/iPhone terminals that will shelving unit, or you wish to use the sub zone remote control allow you to control playback of audio content from your iPod You can connect components in your system (such as a... -
Page 25: Connecting A Usb Device
Connecting your equipment • iPod recharging occurs whenever an iPod is connected to • When the Roku Streaming Stick (sold separately) is Connecting a MHL-compatible device this unit. (Recharging is enabled only when the unit’s connected to the receiver via the MHL terminal, and the power is turned on.) power switched on for the first time, a setup screen will be An MHL-compatible mobile device can be connected to enjoy... -
Page 26: Plugging In The Receiver
A damaged power cord can cause a fire or give you an electrical shock. Check the power cord once in a while. When you find it damaged, ask your nearest PIONEER authorized service center or your dealer for a replacement. -
Page 27: Basic Setup
Chapter Basic Setup RECEIVER Switch on the receiver and your TV. Press on the remote control, then press the Automatically setting up for surround sound HOME MENU button. (MCACC) Switch the TV input to the input that connects this /// The Home Menu appears on your TV. -
Page 28: Other Problems When Using The Auto Mcacc Setup
Basic Setup appliances (air conditioner, fridge, fan, etc.), that may be Make sure ‘OK’ is selected, then press ENTER. Wait for the test tones to finish. affecting the environment and switch them off if necessary. If A progress report is displayed on-screen while the If the screen in step 9 is left untouched for 10 seconds there are any instructions showing in the front panel display, receiver outputs test tones to determine the speakers... -
Page 29: Basic Playback
Chapter Basic playback Selecting the audio input signal AUTO Press to select ‘AUTO SURROUND’ and start Playing a source playback of the source. The audio input signal can be selected for each input source. Here are the basic instructions for playing a source (such as If you’re playing a Dolby Digital or DTS surround sound Once it is set, the audio input that was selected will be applied a DVD disc) with your home theater system. - Page 30 Basic playback • When digital input (optical or coaxial) is selected, this receiver can only play back Dolby Digital, PCM (32 kHz to 96 kHz) and DTS (including DTS 96 kHz/24 bit) digital signal • In order to enjoy the picture and/or sound from devices connected to each terminal, select the input by doing the following. formats.
-
Page 31: Playing An Ipod
Installing software versions other than indicated on the • When or is pressed at the list screen, the website of Pioneer to your iPod/iPhone may result in HOME MENU page switches. Press to switch to the iPod controls. -
Page 32: Playing Back Audio Files Stored On A Usb Memory Device
Basic playback Basic playback controls Note Playing back audio files stored on a USB memory • Compatible USB devices include external magnetic hard device drives, portable flash memory (particularly keydrives) and The maximum number of levels that you can select in Step 1 digital audio players (MP3 players) of format FAT16/32. -
Page 33: Playing A Mhl-Compatible Device
MHL can 176.4 kHz, 192 kHz specifically, Pro, Lossless, Voice. carry high quality multi-channel audio data and full-HD video Uncompressed FLAC files are not supported. Pioneer does not Quantization bitrate 16 bit, 24 bit formats. -
Page 34: Bluetooth ® Adapter For Wireless Enjoyment Of
To enable Bluetooth communication, pairing should be Wireless music play done with both of your system and Bluetooth wireless When the Bluetooth ADAPTER (Pioneer Model No. AS-BT100 technology device. or AS-BT200) is connected to this unit, a product equipped •... -
Page 35: Listening To Music Contents Of Bluetooth Wireless Technology Device With Your System
Bluetooth SIG, Inc. and any use of such technology. If this happens, check that the same passcode marks by PIONEER HOME ELECTRONICS CORPORATION is WAITING appears in the receiver display. In this case, is displayed on this receiver and the device equipped with under license. -
Page 36: Listening To The Radio
Basic playback Note Improving FM sound Listening to the radio • If the receiver is left disconnected from the AC power outlet If the TUNE or ST indicators don’t light when tuning to an FM The following steps show you how to tune in to FM and AM for over a month, the station memories will be lost and will station because the signal is weak, set the receiver to the radio broadcasts using the automatic (search) and manual... -
Page 37: Listening To Your System
Chapter Listening to your system Note Choosing the listening mode • Stereo surround (matrix) formats are decoded accordingly This receiver offers a variety of listening modes to using NEO:6 CINEMA or DOLBY PLIIx MUSIC (see accommodate playback of various audio formats. Choose one Listening in surround sound below for more on these according to your speaker environment or the source. -
Page 38: Using The Advanced Surround
Listening to your system If surround back channel processing (Using surround back Note Sources are heard according to the settings DIRECT channel processing below) is switched off, or the surround back made in the Manual SP Setup (speaker • During ECO mode, the brightness switches between 2 speakers are set to NO, DOLBY PLIIx becomes DOLBY PLII (5.1 setting, channel level, speaker distance), as levels. -
Page 39: Setting The Up Mix Function
Listening to your system • With a 7.1-channel surround system, audio signals that • Depending on the positions of the speakers and the sound Setting the Audio options have undergone matrix decoding processing through source, in some cases it may not be possible to achieve surround back channel processing to which the Up Mix good results. - Page 40 Listening to your system Setting/What it does Option(s) Setting/What it does Option(s) Setting/What it does Option(s) EQ (Acoustic Calibration EQ) LFE ATT (LFE Attenuate) 0 (0 dB) 0 to 7 C.WIDTH (Center Width) Switches on/off the effect of Acoustic Some Dolby Digital and DTS audio sources Default: 3 (Applicable only when using a center speaker) 5 (–5 dB)
- Page 41 Listening to your system Phase matching is a very important factor in achieving proper sound reproduction. If two waveforms are ‘in phase’, they crest and trough together, resulting in increased amplitude, clarity and presence of the sound signal. If a crest of a wave meets a trough, then the sound will be ‘out of phase’...
-
Page 42: Playback With Network Features
Files stored in a PC or DMS (Digital Media Server) as on the Pioneer website. AirPlay may not be compatible with described above can be played via command from an external... -
Page 43: About Htc Connect
The HTC Connect-compatible smartphones, Please check When NETRADIO is selected, the radio station that being played back. Pioneer website for up to date information about compatible was playing last time is played. devices and audio format support. -
Page 44: Listening To Internet Radio Stations
Check the access code required for registration on the stations on the vTuner list can be registered. In this case receiver, use this access code to access the special Pioneer Internet radio is an audio broadcasting service transmitted via they are registered on the receiver as favorite broadcast Internet radio site and register the desired broadcast stations the Internet. -
Page 45: About The Spotify Audio Stream Playback Function
Playback with NETWORK features In order to use the Spotify audio stream playback Playing back audio files stored on components on About the Spotify audio stream playback function from the Spotify application the network function To use the Spotify audio stream playback function, select this This unit allows you to play music on media servers connected Spotify is a music streaming distribution service managed unit on the Spotify application. -
Page 46: The Network Setup Menu
Playback with NETWORK features Network Configuration Select ‘Network Configuration’ from the Network The Network Setup menu Setup menu. Setting up the network to listen to Internet radio on this IP address/Proxy setting receiver. Select ‘IP Address, Proxy’ from the Network In case the router connected to the LAN terminal on this Configuration menu. -
Page 47: Language
Store the file in the USB memory device’s ENTER to confirm your selection. If an update file does not exist in the Pioneer’s website, root directory. updating the firmware for the receiver is not necessary. Try disconnecting then reconnecting the USB device... -
Page 48: Network Setting Using Safari Browser
Playback with NETWORK features Network setting using Safari browser Setup the network settings manually and then press Click Friendly Name. Apply. Launch Safari on your computer. Enter friendly name and then press Apply. Network Setup Press Bookmark icon. Click Bonjour list (a), and then Network Setup select this receiver’s name (Friendly Name) (b) in Bookmark. -
Page 49: Factory Reset
Playback with NETWORK features Factory Reset Click Firmware Update. Browse the latest firmware on your computer (a) and then press Upload (b). Use to reset all network connection settings to their initial, The extension of the firmware is fw. Please select a file factory-setting condition. -
Page 50: About Network Playback
DLNA Interoperability Guidelines v1.5. GUARANTEE, REPRESENT, OR WARRANT THAT CONTENT Pioneer is not responsible for any malfunction of the player When a PC running DLNA server software or other DLNA SERVICES WILL BE FREE FROM ERRORS, INTERRUPTION,... -
Page 51: Glossary
“This product is protected by certain intellectual property rights Make sure the gap is at the minimum when using MP3 or of NEMS and BridgeCo. - Page 52 MPEG Layer-3 audio decoding technology licensed from Fraunhofer IIS and Thomson multimedia. Files encoded using Windows Media Codec 9 may be playable but some parts of the specification are not supported; specifically, Pro, Lossless, Voice. Uncompressed FLAC files are not supported. Pioneer does not guarantee playback.
-
Page 53: Home Menu
Chapter Home Menu Select the setting you want to adjust. Using the Home Menu Manual speaker setup The following section shows you how to make detailed This receiver allows you to make detailed settings to optimize Home Me nu settings to specify how you’re using the receiver, and also the surround sound performance. -
Page 54: X.over
Home Menu • Center – Select LARGE if your center speaker reproduces • If you have a subwoofer and like lots of bass, it may seem Channel Level bass frequencies effectively, or select SMALL to send bass logical to select LARGE for your front speakers and PLUS Using the channel level settings, you can adjust the overall frequencies to the other speakers or subwoofer. -
Page 55: Speaker Distance
Home Menu Adjust the level of each channel using /. Select ‘Manual SP Setup’ from the Home Menu. The Input Assign menu / If you selected Manual, use to switch speakers. The Assigns input function for analog audio input terminal and Select ‘Speaker Distance’... -
Page 56: The Auto Power Down Menu
Home Menu • Even if images are being output, if the input volume level is Select ‘Component Input’ from the Input Assign menu. The MHL Setup menu exceptionally low, it will automatically turn OFF. • Depending on the connected device, the static caused by 3 . -
Page 57: The Speaker System Setting
Home Menu When you’re finished, press RETURN. Select ‘12V Trigger’ from the Home Menu. The OSD Setup menu You return to the Home Menu. Sets the overlay function ON/OFF. H ome Me nu 1 . Auto MC AC C Select ‘OSD Setup’ from the Home Menu. The Speaker System setting 2 . -
Page 58: Using The Multi-Zone Feature
Chapter Using the MULTI-ZONE feature • When the receiver is on, make sure that any operations MULTI-ZONE remote controls MULTI-ZONE listening for the sub zone are done while ZONE lights in the With button pressed, press the buttons below to SHIFT display. -
Page 59: Control With Hdmi Function
Synchronized operations below with a Control with HDMI- Important Select ‘HDMI Setup’ from the Home Menu. compatible Pioneer TV or Blu-ray Disc player are possible • When connecting this system or changing connections, be when the component is connected to the receiver using an Home Me nu 5 . -
Page 60: Before Using Synchronization
Control with HDMI function • BD, DVD, SAT/CBL, MHL, HDMI, GAME – The HDMI only when a Control with HDMI-compatible component • Synchronized amp mode input signal selected here will be output. (Blu-ray Disc player, etc.) and compatible TV are From the menu screen of the Control with HDMI- connected. -
Page 61: Additional Information
If there is a PHASE setting on your ask your nearest Pioneer authorized independent service No sound is output when an input function is selected. subwoofer, set it to 0º (or depending on the subwoofer, the company to carry out repair work. -
Page 62: Network Feature
Additional information Check that pairing is correct. The pairing setting was deleted - Check whether the component is affected by special Can’t operate the remote control. from this unit or the Bluetooth wireless technology device. circumstances or is in the sleep mode. ... -
Page 63: Troubleshooting Of Wireless Lan
Additional information this does not solve the problem, stop using other devices that the second wireless LAN converter’s IP address to This unit’s volume does not increase when the volume emit electromagnetic waves. “192.168.1.248”, using values between 2 and 249 (such as “249” slider in the Spotify application is raised. -
Page 64: Hdmi
Additional information (*1) Set the “XXX” in “192.168.1.XXX” to a number between 2 Change the output settings of the source, or connect using the Configuration and 248 that is not assigned to other devices. composite video jacks. Connect your HDMI-equipped component directly to the (*2) Set the “249”... -
Page 65: Htc Connect
Additional information MHL, the MHL Logo, and Mobile High-Definition Link are USB works with iPhone 5s, iPhone 5c, iPhone 5, iPhone 4s, THIS SOFTWARE IS PROVIDED BY THE COPYRIGHT HOLDERS trademarks or registered trademarks of MHL, LLC in the United iPhone 4, iPhone 3GS, iPhone 3G, iPhone, iPod touch (1st AND CONTRIBUTORS “AS IS”... -
Page 66: About Messages Displayed When Using Network Functions
Additional information About messages displayed when using Resetting the main unit network functions Use this procedure to reset all the receiver’s settings to the factory default. Use the front panel controls to do this. Refer to the following information when you come up with a •... -
Page 67: Specifications
Additional information Network Section The Safety of Your Ears is in Your Hands Specifications LAN terminal ....10 BASE-T/100 BASE-TX Get the most out of your equipment by playing it at a Integrated control section safe level –... - Page 68 253 Alexandra Road, #04-01, Singapore 159936 TEL: 65-6472-7555 PIONEER ELECTRONICS AUSTRALIA PTY. LTD. 5 Arco Lane, Heatherton, Victoria, 3202, Australia, TEL: (03) 9586-6300 PIONEER ELECTRONICS DE MEXICO S.A. DE C.V. Blvd.Manuel Avila Camacho 138 10 piso Col.Lomas de Chapultepec, Mexico, D.F. 11000 TEL: 55-9178-4270 K002_B3_En...
Need help?
Do you have a question about the Elite VSX-44 and is the answer not in the manual?
Questions and answers