
Related Manuals for Globo GLOBO 7010CR


Summary of Contents for Globo GLOBO 7010CR
- Page 1 Digital Satellite Receiver Digital Satellite Receiver Digital Satellite Receiver Digital Satellite Receiver User’s Manual GLOBO 7010CR OPTICUM 7000CR OPTICUM 7100CR OPTICUM 4000TS OPTICUM 4100TS OPTICUM 4000TSCR OPTICUM 4100TSCR...
-
Page 2: Table Of Contents
CONTENTS 1. SAFETY ..........................3 2. ENVIRONMENT PROTECTION ..................3 ..4 NFORMATION ON ISPOSAL FOR SERS PRIVATE HOUSEHOLDS IN THE UROPEAN NION DECLARATION OF CONFORMITY....................4 3. REMOTE CONTROL.......................5 4. SUPPORT & COPYRIGHT....................6 5. ACCESSORIES.......................6 6. FRONT PANEL .......................7 7. REAR PANEL .........................7 8. - Page 3 Sleep ......................................21 Sleep Time ....................................21 A/V C ............................21 ONTROL TV-SCART ....................................21 VCR-SCART ....................................21 Screen Ratio.....................................21 TV Standard.....................................21 Video Brightness..................................21 Video Contrast..................................21 Video Saturation ..................................21 UHF S ............................21 ETTING ........................22 ISCELLANEOUS ETTINGS 13. SYSTEM........................23 ..........................23 YSTEM NFORMATION RS232............................
-
Page 4: Safety
1. SAFETY This STB has been manufactured to satisfy the international safety standards. Please read the following safety precautions carefully. MAINS SUPPLY: 100 - 250V AC 50/60Hz OVERLOADING: Do not overload wall outlet, extension cord or adapter as this may result in fire or electric shock. -
Page 5: Information On Disposal For Users (Private Households) In The European Union
If the product is used for business purposes and you want to discard It: Please contact your GLOBO POLSKA dealer who will inform you about the take-back of the product. You might be charged for the costs arising from take-back and recycling Small products (and small... -
Page 6: Remote Control
3. Remote Control POWER Button Switch the STB between Operation and Standby mode. UFH Button Alter the UHF setting. MUTE Button Enable / Disable the Audio. Numeric Buttons Select the TV or Radio services and menu options. “0/ ” 0&ZOOM Button After other Numeric buttons, it’s used for 0 button. -
Page 7: Support & Copyright
Switch the TV Standard on the Screen. TV/SAT Button Switch the TV or AV mode on the Screen. F1 Button Enter Organizing Services menu direct on the Screen. F2 Button Enter Manual Installation menu direct on the Screen. “ ” WHITE(SUBTITLE) Button Setup the Subtitle and watch on the Screen. -
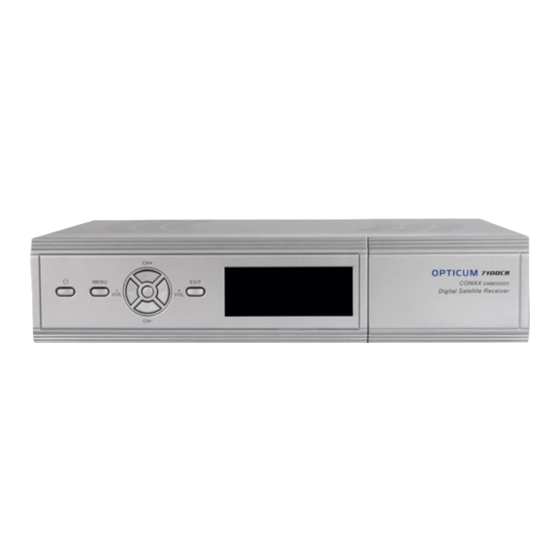
Page 8: Front Panel
Do not connect the unit to the mains socket until all other connections have been made and checked. GLOBO 7010CR, OPTICUM 7000CR, OPTICUM 7100CR: Opticum 4000TS, Opticum 4100TS, Opticum 4000TSCR, Opticum 4100TSCR: AERIAL OUT (optional): This enables the connection of another receiver. -
Page 9: Connecting Your System
a serial cable. TV: This is used to connect your TV through SCART cable. SPDIF: Digital Audio interface, connect to AV amplifier SPDIF (optical) input terminal. ANT IN (optional): Connect to Analog TV antenna. TV OUT (optional): This is used to connect your TV through RF cable. 8. -
Page 10: Getting Started
9. GETTING STARTED Install your dish Easy Install Press the POWER button to operate the receiver from “Standby” mode. If you did not install it before, the “Easy Install” Menu will be displayed automatically to guide you to install your box and dish. *Notice: There are two parts, Box Setting and Install Setting. -
Page 11: Automatic Install Satellite And Search Channel
Automatic install satellite and search channel The receiver will detect your antenna and search available signals and download services for you automatically. Manually install satellite and search channel You need to choose your interested satellites and set right parameters for LNB Type, 22KHz Tone, 12V, DiSEqC1.0 or Motorized DiSEqC1.2 or USALS items, then press RED button to do scan to complete install. -
Page 12: Menu Operations
INFO button: check detail information of MENU OPERATIONS current service Move: select one or more services and press Services RIGHT button to select MOVE icon. Press UP/DOWN, P+/P-, 0~9 button to move the selected service to where you want to locate, then all the selected services will be reordered and move to the new location one by one. - Page 13 FAV service list, FAV information select RENAME icon. “Rename” menu will be Operations: displayed, you can enter new FAV name LEFT/RIGHT button: switch frame between through keyboard submenu. service list, operating frame, FAV service list RED button: enter “Group” menu to switch service group GREEN button: enter “Options”...
-
Page 14: Installation
INSTALLATION A map for the location of satellite We supply the following functions: A. Scan Satellite Installation 1. Use OK button to select one or more satellites at one time, then press RED button, an “Scan” menu will be displayed for you to select Scan Mode (ALL, FTAL, FTA_TV, ALL_TV) and Network (NIT OFF, NIT ON) options by LEFT/RIGHT button. -
Page 15: Edit Satellite
of signal or LNB your receiver is connected antenna. Press OK button to select one to. Press BLUE button, it will automatically from the list or press LEFT/RIGHT button to detect DiSEqC connecting and set the right switch one by one configuration of LNB as well. -
Page 16: Diseqc1.2
DiSEqC1.2 USALS is very convenient motorized DiSEqC system that supports DiSEqC1.3 command a. Move Continuously and also can get the satellite position Press LEFT/RIGHT button on this item, you automatically if you know your geographical can continuously drive the motor to West location. - Page 17 Freq.:Use 0-9 buttons or LEFT/RIGHT button to enter new frequency. H/V: Use the LEFT/RIGHT button to select the polarization (H, V). H(Horizontal): 18V/19V is output through LNB cable V(Vertical): 13V/14V is output through LNB cable Sym.: Use 0-9 buttons or LEFT/RIGHT button to enter new symbol rate.
-
Page 18: Terrestrial Installation (Optional)
all dishes connecting to this machine and scan Auto Scan the available services belonging to the satellite matched according to satellites and transponders data in current database. You don’t have to input any parameter of your antenna settings. Just press OK button to enter this “Auto Installation”... -
Page 19: Ca Settings (Optional)
In this menu, you can press LEFT/RIGHT key to select the Region and set the “Antenna Power” on or off. CA Settings (OPTIONAL) Factory default Receiver has build in smart card module with CONAX system. By using cards in this system provided by operators, it is possible to watch many scrambled channels coded in this system. - Page 20 Press OK button to set current database as default data. Press MENU/EXIT button to abort the operation. Delete all channel Press OK button to delete all channels. Press MENU/EXIT button to abort the operation.
-
Page 21: Preference
Parental Control Preference Set “Parental Control” options to protect children watching programs. Please use The “Preference” menu supports the receiver UP/DOWN button to select one of the following internal settings according to the connection of items and press LEFT/RIGHT or OK button to the receiver and external units. -
Page 22: Daylight Time
your country’s time zone. The step is half an Screen Ratio hour. Set the screen aspect ratio of the TV set connected to this receiver (Auto, 16:9 Full, 4:3 Daylight Time Full, 16:9 Letter Box or 4:3 Letter Box). Set “Daylight Time” option to “ON” means the summer time is on thus local time is one hour TV Standard late than normal. -
Page 23: Miscellaneous Settings
PAL Format UHF Offset Miscellaneous Settings You can set other miscellaneous settings in this menu by using UP/DOWN button to select one of the following items and press LEFT/RIGHT or OK button to set certain value. Details are as the following˘ Banner Display Time OSD Transparency Service Switch Mode... -
Page 24: System
System You can check information about your receiver or upgrade the firmware or data of the receiver through this menu. System Information We provide you production information about the receiver, such as “Model ID”, “Software Version”, “Hardware Version”, “Loader Version”, “Latest Update”... -
Page 25: Sokoban
12.Game Receiver has one game for you. Please enjoy it. Sokoban... -
Page 26: Trouble Shooting
Trouble Shooting If you suspect there is a fault with your receiver, please check the following trouble shooting guide before calling authorized service agent. Warning! Under no circumstances attempt to repair the receiver yourself. Tampering with the receiver may result in fatal electric shock and will invalidate your warranty. Symptom Possible cause Settings you made in the... -
Page 27: Specifications
Specifications Satellite specification System standard Fully MPEGII/DVB Compliant Channel Storage Max.4000 TV and Radio Channels totally Input Frequency 950~2150Mhz RF Input level -65~-25dBm LNB Control DiSEqC1.0/1.2 LNB Power 13V/18V (Max, 500mA) LNB tone switch 22KHZ Waveform QPSK (SCPC, MCPC capable) Symbol rate 2~45Mbps Terrestial specification (optional)
Need help?
Do you have a question about the GLOBO 7010CR and is the answer not in the manual?
Questions and answers