Table of Contents
Advertisement
Quick Links
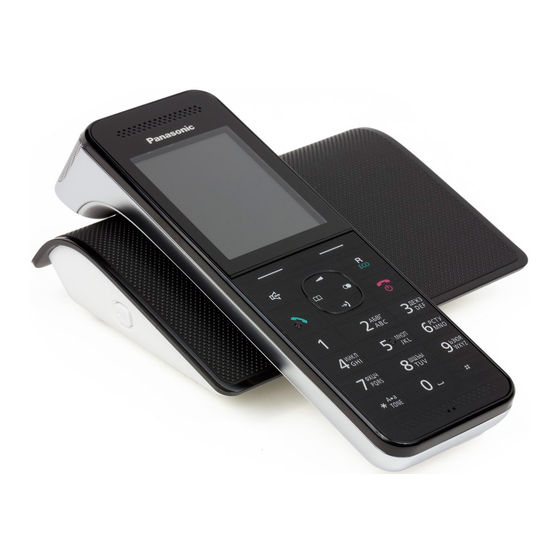
Premium Design Phone with Smartphone Connect
Before initial use, see "Getting Started"
on page 9.
Thank you for purchasing a Panasonic product.
Please read these operating instructions before using the unit and save them for
future reference.
Consulte "Guía Rápida Española", página 55.
For assistance, visit our Web site: http://www.panasonic.com/help for customers
in the U.S.A. or Puerto Rico.
Please register your product: http://www.panasonic.com/prodreg
Operating Instructions
Model No.
KX-PRW120
Advertisement
Table of Contents
Troubleshooting

Related Manuals for Panasonic KX-PRW120


Summary of Contents for Panasonic KX-PRW120
-
Page 1: Operating Instructions
Please read these operating instructions before using the unit and save them for future reference. Consulte “Guía Rápida Española”, página 55. For assistance, visit our Web site: http://www.panasonic.com/help for customers in the U.S.A. or Puerto Rico. Please register your product: http://www.panasonic.com/prodreg... -
Page 2: Table Of Contents
Table of Contents Introduction Remote operation ........39 Answering system settings ......41 Accessory information ........3 Smartphone Integration Important Information Smartphone integration ......42 For your safety ..........5 Network settings .........42 Important safety instructions ......6 Smartphone Connect app ......43 For best performance ........6 Other network features .......43 Other information .........7 Specifications ..........7... -
Page 3: Introduction
This product can be purchased online. Please visit our Web site: http://www.panasonic.com/RangeExtender By registering the key detector (4 max.) to a Panasonic Digital Cordless Phone and attaching it to an easy-to-lose item in advance, you can locate and find the mislaid item to which the key detector is attached. -
Page 4: Expanding Your Phone System
Connect app on your smartphone and registering your smartphone to the base unit. R You must configure the base unit and download the app before you can use these features. See the “Smartphone Integration” chapter beginning on page 42 for more information. For assistance, please visit http://www.panasonic.com/help... -
Page 5: Important Information
Hospitals or cause fire or electric shock. Confirm that smoke has stopped emitting and contact health care facilities may be using the Panasonic Call Center at equipment that could be sensitive to 1-800-211-PANA (1-800-211-7262). external RF energy. -
Page 6: Important Safety Instructions
Do not tamper with the base unit (or charger). Base unit location/avoiding noise Failure to follow these instructions may The base unit and other compatible Panasonic cause the batteries to swell or explode. units use radio waves to communicate with Attention: each other. -
Page 7: Other Information
R Wipe the outer surface of the product with a soft moist cloth. R Do not use benzine, thinner, or any Specifications abrasive powder. R Communication standards DECT 6.0 (Digital Enhanced Cordless Telecommunications 6.0) Wi-Fi (IEEE 802.11 b/g/n) R Frequency range DECT: For assistance, please visit http://www.panasonic.com/help... - Page 8 R Power consumption Base unit: Standby: Approx. 2.0 W Maximum: Approx. 3.9 W R Operating conditions 0 °C – 40 °C (32 °F – 104 °F), 20 % – 80 % relative air humidity (dry) For assistance, please visit http://www.panasonic.com/help...
-
Page 9: Getting Started
(RJ11C) until you hear a click. A DSL/ADSL filter (not supplied) is required if you have a DSL/ADSL service. Note: R Use only the supplied Panasonic AC adaptor PNLV236. R Follow the directions on the display to set up the unit. -
Page 10: Intelligent Eco Mode
(without AC adaptor) to the same telephone line or to the same telephone line This feature automatically reduces handset jack using a Panasonic T-adaptor (page 3). power consumption by suppressing handset transmission power when the handset is close Note for battery installation to the base unit. -
Page 11: Controls
Eco mode is on. (page 10) n Control type Soft keys Noise reduction is set. (page 15) By pressing a soft key, you can select the feature shown directly above it on the Speakerphone is on. display. (page 14) For assistance, please visit http://www.panasonic.com/help... -
Page 12: Language Setting
“Español” as the display language. The turns off completely after 1 minute of default setting is “English”. inactivity if the handset is not on the base unit or charger. MMenuN (right soft key) #110 Activate the handset display again by: For assistance, please visit http://www.panasonic.com/help... -
Page 13: Dialing Mode
If you cannot make calls, change this setting according to your telephone line service. The default setting is “Tone”. “Tone”: For tone dial service. “Pulse”: For rotary/pulse dial service. MMenuN (right soft key) #120 MbN: Select the desired setting. MSaveN a MOFFN For assistance, please visit http://www.panasonic.com/help... -
Page 14: Making/Answering Calls
A pause is sometimes required when making disconnected. calls using a PBX or long distance service. When storing a calling card access number Mute and/or PIN in the phonebook, a pause is also needed (page 19). Press MMuteN during a call. For assistance, please visit http://www.panasonic.com/help... -
Page 15: Call Share
Note: may be interference. During an outside call, R A maximum of 3 parties (including 1 outside this feature is turned on automatically when party) can join a conversation using 2 necessary. extensions. (3-way conference) For assistance, please visit http://www.panasonic.com/help... -
Page 16: Intercom
MSaveN a MOFFN Note: R You can also select your smartphone in this feature using a handset, if your smartphone is registered to the base unit (page 42). Intercom Intercom calls can be made between handsets. For assistance, please visit http://www.panasonic.com/help... -
Page 17: Phonebook
MSaveN a MOFFN Storing a redial list number to the Character table for entering names phonebook While entering characters, you can switch MEN REDIAL between uppercase and lowercase by pressing * (A®a). For assistance, please visit http://www.panasonic.com/help... -
Page 18: Phonebook Entry
MEraseN a MbN: “Yes” a MSelectN To set group ringer tone MSaveN a MOFFN MbN: Select the current setting of the group ringer tone. a MSelectN a MbN: Select the desired ringer tone. a MSaveN For assistance, please visit http://www.panasonic.com/help... -
Page 19: Speed Dial
PIN in the phonebook as one phonebook entry, press MDN (Pause) to add Press and hold the desired speed dial key pauses after the number and PIN as (1 to 9). a MMenuN necessary (page 14). MbN: “Edit” a MSelectN For assistance, please visit http://www.panasonic.com/help... - Page 20 (1 to 9). a MMenuN MbN: “Erase” a MSelectN MbN: “Yes” a MSelectN a MOFFN Viewing an entry/Making a call Press and hold the desired speed dial key (1 to 9). To make a call, press M For assistance, please visit http://www.panasonic.com/help...
-
Page 21: Programming
#329 Play new message – – #323 Play all message – – #324 – – #325 Erase all message Greeting – #302 Record greeting Check greeting – #303 – #304 Pre-recorded (Reset to pre-recorded greeting) For assistance, please visit http://www.panasonic.com/help... - Page 22 Sub-menu 2 Settings Code – – #101 Date and time Memo alarm 1-5: Alarm1-5 1: Once #720 2: Daily 3: Weekly 0: <Off> *1, *3 – 1: <Caller ID #226 – Time adjustment auto> 0: Manual For assistance, please visit http://www.panasonic.com/help...
- Page 23 #6582 #6583 #6584 – – #217 Call block 1: <On> 0: Off #173 First ring *1, *2 1: On 0: <Off> #240 Block w/o num (Block calls without phone number) Speed dial – – #261 For assistance, please visit http://www.panasonic.com/help...
- Page 24 1: On #273 0: <Off> – 1: <On> 0: Off #165 – Key tone Caller ID edit – 1: <On> 0: Off #214 (Caller ID number auto edit) – 1: On 0: <Off> #200 Auto talk For assistance, please visit http://www.panasonic.com/help...
- Page 25 Manual (Static) Reset network – #730 Registration Register handset – #130 – #131 Deregistration – – #680 – Customer support Change language Display 1: <English> #110 2: Español 1: <English> #112 Voice prompt 2: Español For assistance, please visit http://www.panasonic.com/help...
-
Page 26: Ringer Volume
This setting is available when you have the key detector (KX-TGA20). Read the installation manual for more information on the key detector. For models with supplied key detectors, the display shows “1:Detector1”. If you register 2 or more key detectors. If you have 2 or more key detectors. For assistance, please visit http://www.panasonic.com/help... -
Page 27: Alarm
MMenuN (right soft key) #720 Proceed with the operation according to your selection in step 3. Select an alarm by pressing 1 to 5. a MSelectN n Once: Enter the desired month and date. a MOKN For assistance, please visit http://www.panasonic.com/help... -
Page 28: Silent Mode
If the phone number matches an entry in the call block list, the unit emits no sound to the For assistance, please visit http://www.panasonic.com/help... -
Page 29: Baby Monitor
Enter the phone number (24 digits sound. max.). Important: MSaveN a MOFFN R You should perform a test run of the baby monitor procedure to ensure that the baby For assistance, please visit http://www.panasonic.com/help... -
Page 30: Edit The Name If Necessary. A Mokn
MbN: Select the outside line. a MEditN MbN: “On” a MSelectN MMenuN a MbN: “Edit” a MSelectN MbN: Select “External” to monitor Edit the name if necessary. a MOKN from an outside line. a MEditN a MAddN For assistance, please visit http://www.panasonic.com/help... -
Page 31: Other Programming
MOFFN, then press M MMenuN (right soft key) a n When monitoring from an outside line: MSelectN To answer a call, follow the operation for your phone. MbN: Select the desired date. a MSelectN For assistance, please visit http://www.panasonic.com/help... -
Page 32: Registering A Unit
MOKN is displayed even when the handset is near the base unit), re-register the handset. MbN: Select the desired alarm tone. a MSelectN 2 times a MOFFN Handset: MMenuN (right soft key) #130 For assistance, please visit http://www.panasonic.com/help... -
Page 33: Deregistering A Handset
MMenuN (right soft key) #131 R All handsets registered to the base unit are displayed. MbN: Select the handset you want to cancel. a MSelectN MbN: “Yes” a MSelectN MOFFN For assistance, please visit http://www.panasonic.com/help... -
Page 34: Caller Id Service
“Missed call” disappears from the standby display if the following operation is back performed by one of the registered handsets: MCN CID – Being replaced on the base unit or charger. – Pressing MOFFN. For assistance, please visit http://www.panasonic.com/help... - Page 35 For example, you can use this feature to set the unit to ignore the area code of callers in your area, so that you can call these local numbers using caller information without dialing the area code. For assistance, please visit http://www.panasonic.com/help...
-
Page 36: Answering System
MMenuN (right soft key) #327 MMenuN (right soft key) #304 To turn off: MMenuN (right soft key) #328 MYesN a MOFFN MOFFN Note: R When the answering system is turned on, is displayed. For assistance, please visit http://www.panasonic.com/help... -
Page 37: Listening To Messages
MbN: “Yes” a MSelectN R “Message” is displayed in the message list if the unit cannot receive caller information. Rewinding the message Press and hold MFN until the unit plays the desired part of the message. For assistance, please visit http://www.panasonic.com/help... -
Page 38: Advanced New Message Alerting Features
MbN: “Notification to” a Audible message alert MSelectN a MAddN This feature allows the handset to beep to MbN: “Manual” a MSelectN inform you of a new message arrival when new messages are recorded. The handset For assistance, please visit http://www.panasonic.com/help... -
Page 39: Remote Operation
4 to play new remotely. This code prevents unauthorized messages (without entering the remote parties from listening to your messages access code). remotely. The default setting is “111”. For assistance, please visit http://www.panasonic.com/help... -
Page 40: Using The Answering System
(page 40). remote access code again and begin remote operation (page 39). Note: R If you do not press any dial keys within 10 seconds after a voice guidance prompt, the unit disconnects your call. For assistance, please visit http://www.panasonic.com/help... -
Page 41: Answering System Settings
(page 36). your service provider/telephone company rather than the unit’s answering system, turn off the answering system (page 36). R To use this unit’s answering system rather than the voice mail service provided by For assistance, please visit http://www.panasonic.com/help... -
Page 42: Smartphone Integration
SSID. If there is a “stealth apps installed on your smartphone. mode” setting, turn it off; if there is a “SSID broadcast” setting, turn it on. Change the appropriate setting before For assistance, please visit http://www.panasonic.com/help... -
Page 43: Smartphone Connect App
(WPS, DHCP)”, page 43, use the base unit and your wireless router too the procedure below to set the base unit’s IP close to each other. If they are too close, settings manually if necessary. For assistance, please visit http://www.panasonic.com/help... - Page 44 Confirm the signal strength. a MOFFN Resetting the base unit’s network settings All network-related settings will be reset to the default settings. No other information will be deleted. MMenuN (right soft key) #730 MbN: Select the desired setting a MSelectN. For assistance, please visit http://www.panasonic.com/help...
-
Page 45: Useful Information
Example: MVMN 1-222-333-4444 PPPP 8888 MMenuN (right soft key) #330 R The speakerphone turns on. VM access Pauses Password Follow the pre-recorded instructions. number When finished, press MOFFN. For assistance, please visit http://www.panasonic.com/help... -
Page 46: Error Messages
Caller ID service, this to Caller ID. message will not be displayed. R A wrong type of battery such as Alkaline or Manganese was rechargeable inserted. Use only the rechargeable Ni-MH batteries noted on battery. page 3, 6. For assistance, please visit http://www.panasonic.com/help... -
Page 47: Troubleshooting
R Demonstration mode is activated. Remove the batteries from begins operating the handset, and then insert the batteries into the handset automatically. again. Menu list Problem Cause/solution The display is in a R Change the display language (page 12). language I cannot read. For assistance, please visit http://www.panasonic.com/help... - Page 48 R The base unit’s Wi-Fi repeater mode feature is turned on and you are also using a Wi-Fi range extender. Do not use Wi-Fi repeater mode if you already have a Wi-Fi range extender. For assistance, please visit http://www.panasonic.com/help...
- Page 49 Edit the phone number with another pattern (page 35). Time on the unit has R Incorrect time information from incoming Caller ID changes the shifted. time. Set the time adjustment to “Manual” (off) (page 23). For assistance, please visit http://www.panasonic.com/help...
-
Page 50: Liquid Damage
Insert the batteries and charge fully before use. If the unit does not work properly, contact an authorized service center. Caution: R To avoid permanent damage, do not use a microwave oven to speed up the drying process. For assistance, please visit http://www.panasonic.com/help... -
Page 51: Network Connection Troubleshooting
My smartphone and other R Do not use Wi-Fi repeater mode (page 43) if you already have devices cannot access the a Wi-Fi range extender. Internet since I turned on Wi-Fi repeater mode. For assistance, please visit http://www.panasonic.com/help... - Page 52 DHCP, make sure that its DHCP feature is turned on. If DHCP is not available, set the base unit’s IP settings manually. See “Advanced configuration (static IP settings)”, page 43. For assistance, please visit http://www.panasonic.com/help...
-
Page 53: Fcc And Other Information
(if But if advance notice isn't practical, the applicable) when using this phone. Consult telephone company will notify the customer with your audiologist or Hearing Aid as soon as possible. Also, you will be For assistance, please visit http://www.panasonic.com/help... - Page 54 If this equipment does cause harmful interference to radio or television reception, which can be determined by turning the equipment off and on, the user is For assistance, please visit http://www.panasonic.com/help...
-
Page 55: Guía Rápida Española
4 Conecte el cable de la línea telefónica a la unidad y a la toma telefónica de una sola línea (RJ11C) hasta que escuche un clic. 5 Se requiere un filtro DSL/ADSL (no incluido) si tiene este tipo de servicio. Nota: L Use solo el adaptador de corriente alterna Panasonic PNLV236 que se suministra. Instalación y carga de la batería Cargue aproximadamente durante 7 horas. - Page 56 {Guardar} s {OFF} Fecha y hora (Auricular) Menú } (tecla de función de la derecha) (1)1 Introduzca el día, mes y año actuales. s {OK} Introduzca la hora y minuto actuales. {Guardar} s {OFF} Para obtener ayuda, visite http://www.panasonic.com/help (solo en inglés)
- Page 57 Sistema contestador de llamadas (Auricular) Para escuchar mensajes nuevos: Para escuchar mensajes {Reproducir} o {Menú} (tecla de función de la derecha) (323 Para escuchar todos los mensajes: {Menú} (tecla de función de la derecha) (324 Para obtener ayuda, visite http://www.panasonic.com/help (solo en inglés)
- Page 58 Esto no daña las baterías. L Oprima {CALL WAIT} cuando escuche el tono de llamada en ¿Cómo se contestan las llamadas en espera (segunda llamada)? espera. Para obtener ayuda, visite http://www.panasonic.com/help (solo en inglés)
-
Page 59: Appendix
For hearing or speech impaired TTY users, TTY: 1-877-833-8855 Accessory Purchases (United States and Puerto Rico) Purchase Parts, Accessories and Owner’s Manual online for all Panasonic Products by visiting our Web Site at: http://www.pstc.panasonic.com or, send your request by E-mail to: npcparts@us.panasonic.com... -
Page 60: Warranty (For United States And Puerto Rico)
If your product does not work properly because of a defect in materials or workmanship, Panasonic Corporation of North America (referred to as “the warrantor”) will, for the length of the period indicated on the chart below, which starts with the date of original purchase (“Limited Warranty period”), at its option either (a) repair your product with new or... - Page 61 L Send the unit to Panasonic Exchange Center, prepaid and adequately insured. L Do not send your unit to Panasonic Corporation of North America listed on the back cover or to executive or regional sales offices. These locations do not repair consumer products.
-
Page 62: Index
Index LCD backlight: 24 Wallpaper: 24 Index Eco mode: 10 Equalizer: 15 3-way conference: 15 Error messages: 46 Additional handsets: 32 Flash: 15, 25 Alarm: 27 Groups: 18 Answering calls: 14 Answering system: 36 Handset Call screening: 41 Deregistration: 33 Erasing messages: 37, 38, 40 Name: 31 Greeting message: 36... - Page 63 Index Speaker: 14...
- Page 64 Date of purchase (found on the bottom of the base unit) Name and address of dealer Attach your purchase receipt here. Two Riverfront Plaza, Newark, NJ 07102-5490 © Panasonic System Networks Co., Ltd. 2013 Printed in China *PNQX6115ZA* *PNQX6115ZA* PNQX6115ZA...
Need help?
Do you have a question about the KX-PRW120 and is the answer not in the manual?
Questions and answers