Table of Contents
Advertisement
Quick Links
Advertisement
Table of Contents

Related Manuals for GE Security DVMRe Pro


Summary of Contents for GE Security DVMRe Pro
-
Page 1: User Manual
DVMRe Pro User Manual... - Page 2 Copyright Copyright © 2006, GE Security Inc. All rights reserved. This document may not be copied or otherwise reproduced, in whole or in part, except as specifically permitted under US and international copyright law, without the prior written consent from GE.
- Page 3 Improper use of this equipment can cause equipment damage. Note: Notes contain important information about a product or procedure. * This symbol indicates electrical warnings and cautions. ** This symbol indicates general warnings and cautions. 0150-0294B GE Security DVMRe Pro...
-
Page 4: Table Of Contents
Unpacking ..........................8 Installation Environment ...................... 8 Associated Equipment......................8 The Back Panel ........................9 Power-Up..........................13 DVMRe Pro Basic Operations ................15 Principal Operating Modes....................15 The Front Panel ........................15 Live Viewing......................... 16 Playback ..........................17 Recording..........................20 Display Options ........................ - Page 5 Search Filters........................73 Retail Search........................74 Search Results........................77 WebBrowser ......................79 WaveBrowser Overview and Controls ................80 DVMRe Pro WaveLink ......................81 Technical Specifications ..................83 RS232 Event Generation/Text Insertion Protocol..........85 Message Structure ......................85 Message Type ........................85 Alarm/Event Fields ......................
- Page 6 Macro Tables ....................... 90 10.1 Macro Functions Table....................90 10.2 Scheduled Macro Table....................91 0150-0294B GE Security DVMRe Pro...
-
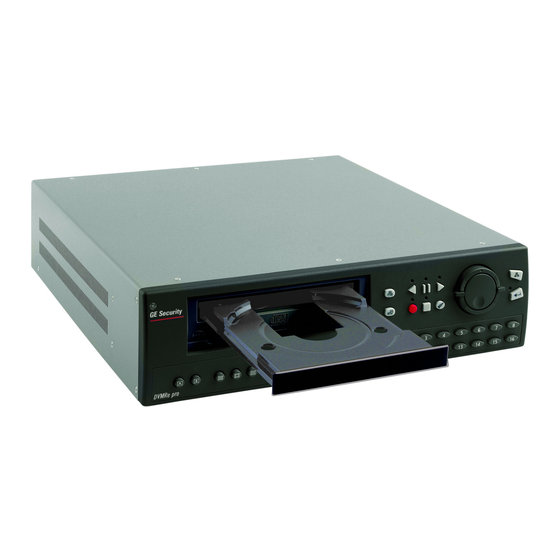
Page 7: Dvmre Pro Overview
VCRs, the DVMRe Pro records high-resolution pictures. Digital recording improves playback quality over VCRs, and eliminates the hassle of cleaning heads, changing tapes or servicing motors. Depending on the setup, the DVMRe Pro can store from a few hours to more than 3 years of color images. -
Page 8: Passwords
Provides access to the On-screen Language 5 4 1 5 Installer Language menu. Ethernet Deactivates the ethernet password, so that the unit may be Access 1 1 1 1 Installer accessed by any PC equipped with Reset WaveReader. 0150-0294B GE Security DVMRe Pro... -
Page 9: Unpacking
If the unit must be returned, it must be shipped in the original packing box. Package Contents • The DVMRe Pro unit. • The Alarm Interface Circuit Board (P/N 0090-0077). •... -
Page 10: The Back Panel
BNC connector of the same camera input. Make sure there is 75-Ohm termination at the end of the video line if the signal is looped through the DVMRe Pro. Time base correction is performed during digital capture. As a result, cameras do not require synchronization. - Page 11 Pin 12: Alarm Input 12. Alarm PCB Active alarm inputs vary by the DVMRe Pro model. 4 channel units have 4 active alarm inputs, 10 channel units have 10 active alarm inputs and 16 channel units have 16 active alarm inputs.
-
Page 12: Back Panel
Wire Type: Cat 5 network configuration: Connector Type: RJ-45 • For a DVMRe Pro that connects directly to a Hub Max. Cable Length: 100 meters / 328 ft. or Switch, use a straight through connection. Min. Cable Length: 6 feet / 1.8 meters •... - Page 13 RS232 Port 2 For Event Generation and ASCII Text Insertion. RJ-45 Pin Configuration For RS232 Port 2 2 3 4 5 6 7 Ground Reserved Not Connected Not Connected Ground Reserved RJ-45 socket on back panel. 0150-0294B GE Security DVMRe Pro...
-
Page 14: Power-Up
1. Energize the monitors and all of the cameras. Power: 60 Watt (5 Amp) 2. Energize the DVMRe Pro. Connector: 2.1mm barrel, center positive Once power is applied to the unit, it will begin its power-up procedure. The unit will begin by displaying the software version on Monitor-A, and then the unit will be ready for operation. - Page 15 Then play back the recording, selecting each camera for full screen display. Check the playback picture quality. AUX Port The back panel of the DVMRe Pro is equipped with an Aux Port (DB-9 style connector). Do not attempt to wire directly to the DB-9 DB-9 Connector on Back Panel connector on the back panel.
-
Page 16: Dvmre Pro Basic Operations
1. Power Indicator: Indicates power on/off condition. 2. Monitor Selection Button: Monitor A. 3. Monitor Selection Button: Monitor B. 4. Multiscreen Selection Buttons: Various Multiscreen buttons depending on the DVMRe Pro model. 5. Alarm Button: Allows user to acknowledge and silence alarms. -
Page 17: Live Viewing
Pressing the Camera number button again displays the Status Display Box. Pressing the same button a third time displays any Number Button associated ATM or cash register ASCII text, see section 2.9. 0150-0294B GE Security DVMRe Pro... -
Page 18: Playback
When the Play Forward button is pressed, the unit will play forward at the rate the data was recorded. While in Playback mode, the user may change the playback direction, playback speed, etc. To return to Play Forward operations, press the Play Forward button. Play Forward Button 0150-0294B GE Security DVMRe Pro... - Page 19 (i.e. 16-way or 10-way) repeatedly will cycle through all the available multiscreens. The 6-way and PIP multiscreen displays are not available in Playback mode. For detailed information about Multiscreen displays, see section 2.6. 0150-0294B GE Security DVMRe Pro...
- Page 20 If the Zoom button is pressed while in a multiscreen display, the camera from the last active NOTE cameo is selected for full screen display. Press the Zoom button again to activate the Zoom operation. 0150-0294B GE Security DVMRe Pro...
-
Page 21: Recording
Record Lock is ON. The DVMRe Pro also remembers its current record mode in the event of power loss. If the unit was recording during a power loss, then when power is restored the unit will put itself back in that mode. -
Page 22: Display Options
PIP: Use the Jog/Shuttle to adjust the location and size of the PIP display. Please note, that the PIP display is only available on Monitor A in Live mode. PIP is disabled when SVHS is enabled on Monitor B (See Camera Setup). 0150-0294B GE Security DVMRe Pro... -
Page 23: Active Cameos
Then, using a Number button, select any camera for full screen display. NOTE The unit must be in Full Screen Display mode before starting to create the sequence list. This initial camera is not part the sequence list. 0150-0294B GE Security DVMRe Pro... -
Page 24: On-Screen Indicators
Camera Titles are displayed on either the upper or lower corner of the left hand side of the screen. The camera title can be changed in the menu system (see section 3.14). The user can change display position and color. See below. 0150-0294B GE Security DVMRe Pro... - Page 25 Live connections are displayed as E1: ip.ip, E2: ip.ip, etc. (where ip.ip represents the last 2 bytes of the IP Address). POTS connection is displayed as IP 1.1. On Playback Fullscreen: • All the above, including Image Quality Setting: High, Medium, Standard. 0150-0294B GE Security DVMRe Pro...
-
Page 26: Triplex Mode
Pressing the Camera Number a third time displays an ATM/POS text display. This feature can be used during live viewing mode to verify that the DVMRe Pro is receiving ATM/POS text, or in Playback mode to review recorded text and video. - Page 27 Sequenced Full Screen Display While in a Full Screen display, press the Sequence button to begin full screen sequencing. The sequence list is programmable. For detailed information about programming the sequence list see section 2.8. Sequence Button 0150-0294B GE Security DVMRe Pro...
-
Page 28: The Print Image Button
The Printer and Print Server must be connected to the same local network as the DVMRe Pro. The DVMRe Pro must know the Print Servers IP address. The IP address can be input under Main Menu – Communications – Ethernet Advanced (See Section 3.16). -
Page 29: The Record Cd/Dvd Button
2.12 The Record CD/DVD Button The DVMRe Pro comes equipped from the factory with a built-in CD or DVD Writer. The NOTE only significant operational differences are; the DVD writer can write to a CDR or DVD+R disc and the DVD+R media holds significantly more data (4.7GB vs. 700MB minus overhead). - Page 30 The unit will choose an equal (if possible) amount of time before and after the selection. The time and size of the archived video can be adjusted by various amounts depending on where on the Hard Disk the data lies. 0150-0294B GE Security DVMRe Pro...
-
Page 31: Menu System Overview
Operator Password View Screen 5 Camera Setup Auto Disable Now View Screen 6 Quickwave Setup View Screen 7 Audio Setup View Screen 8 Communications View Screen 9 Front Panel Lock View Screen 10 Factory Settings Passwords 0150-0294B GE Security DVMRe Pro... -
Page 32: Menus In This Manual
Camera Button: In menu lists that provide settings per camera, a particular camera may be accessed directly by pressing on the associated camera button. Rotate the Shuttle to modify the setting. 0150-0294B GE Security DVMRe Pro... -
Page 33: The Main Menu
3.7 The Main Menu Main Menu Overview The Main menu contains the majority of programmable options for the DVMRe Pro. Each item in the Main menu is described in detail in this section of the manual. Main menu items appear in this section in the same order they appear in the menu. - Page 34 (including daylight savings time) for all of the Master Clock other units. Select One unit from the RS485 network as the master clock by selecting YES in this menu. All other units must be set as NO (Default). 0150-0294B GE Security DVMRe Pro...
- Page 35 Enter button. Network Time Protocol Setup Update Interval DISABLE NTP Primary Server 3. 37. 8. 26 NTP Backup Server [CANCEL] [OK] Last Update: Never Since Power-up Warning: Region/Time Zone must be set correctly! 0150-0294B GE Security DVMRe Pro...
-
Page 36: Sequencing
Perform disk maintenance by performing a Disk Test, Disk Maintenance Deleting, Un-deleting, or Destroying previously recorded Record Lock video. Auto Delete Mode • Specify how the unit will handle data overwrite issues once the hard disk becomes full. 0150-0294B GE Security DVMRe Pro... - Page 37 Use this menu to turn Turbo Mode On or Off. Turbo Mode Turbo Record Mode captures images at 120pps. While in Turbo Record Mode the DVMRe Pro devotes all system resources to capturing the images at 120pps. Monitor A ceases to display live images and displays the background color only.
- Page 38 RS232 Event: See section 9 for information about generating an Event via RS232, and optionally inserting ASCII text to mark the Event. Activity Detection Event: See Setup Parameters in section 3.13 for detailed information about configuring activity detection as an event in the menu system. 0150-0294B GE Security DVMRe Pro...
- Page 39 Record rates are measured in both Pictures Per Second (pps) and Seconds Per Picture (spp). The maximum record rate per camera is inversely proportional to the number of cameras connected to the unit. The fewer cameras connected, the higher the maximum record rate for each camera, and vice 0150-0294B GE Security DVMRe Pro...
- Page 40 Activity record mode only. The bottom line indicates the estimated recording time, taking into consideration the amount of time the unit will spend in Time-lapse, Activity, Event, and/or Alarm record mode. 0150-0294B GE Security DVMRe Pro...
- Page 41 2. To save changes and exit the menu: Select [OK], and then press the Enter button. 3. To exit the menu without making changes: Press the Menu button, or select [CANCEL], then press the Enter button. 0150-0294B GE Security DVMRe Pro...
- Page 42 Test Duration: This option is for the type of test to run; Fast or Thorough. The Thorough test will test significantly more sectors than the Fast test. GE recommends using the Thorough test. The Fast test can miss some disk failures. 0150-0294B GE Security DVMRe Pro...
- Page 43 Use this menu to set the Record Lock feature. This feature disables the front panel record button. Setting Record Lock to ON will start the unit recording if it is not currently in the Record mode. 0150-0294B GE Security DVMRe Pro...
-
Page 44: Alarms
Use this menu to configure the alarm handling features of the unit. Alarm Latch Alarm Action Alarm Record Mode Caution! The DVMRe Pro’s primary function is to furnish video Enable / Disable multiplexing and recording with a multiscreen display. Although Alarm History... - Page 45 Intrusion AND/OR: Use this feature to activate alarms by hardwired alarm inputs AND/OR Intrusion detection. Select from AND or OR. Motion Detection must be set to Intrusion and linked to the Alarm number. Rotate the Jog to navigate and the Shuttle to change the values. 0150-0294B GE Security DVMRe Pro...
- Page 46 The alarms number in the list. • The date of the alarm (month and day). 010- 03/15 05:12:16 04 • The time of the alarm (hours, minutes, and seconds). [OK] • The number of the camera input in alarm. 0150-0294B GE Security DVMRe Pro...
- Page 47 Main Menu → Alarms → Alarm Action Setup menu. This menu selection is not available on 4-channel DVMRe Pro units, since Fullscreen Alarm Mode is the only alarm mode available. Main Menu → Alarms → Relay Configuration...
- Page 48 Also, please note that the Region/Time Zone setting must be set correctly for Email notification to time stamp messages accurately. If the Notify Alarm or Notify Record fields are enabled you will be notified of the results of the Disk Test. 0150-0294B GE Security DVMRe Pro...
-
Page 49: Ge Security Dvmre Pro
This screen allows the user to setup the types of events to be notified of, and the IP addresses (up to two) of the PC(s) where the WaveReader software resides. WaveReader must be running on the receiving PC(s) and Alarm Monitoring must be setup. See Alarm Monitoring in the WaveReader Manual for details. 0150-0294B GE Security DVMRe Pro... -
Page 50: Macro
32 keystrokes are exceeded, the unit will end the macro recording automatically. 3. When finished programming, press the Function button then the Enter button to end the macro recording. A form is provided in section 10 to keep track of recorded macro functions. 0150-0294B GE Security DVMRe Pro... - Page 51 Select None to cancel the scheduled start time. Macro : 01 Time: Select the start time for the macro. [CANCEL] [OK] Macro: Select the desired macro number. A form is provided in section 10 to keep track of scheduled macros. 0150-0294B GE Security DVMRe Pro...
-
Page 52: Motion Detection
Setup Parameters detection. Setup Active Zones • Activate the on-screen motion detection indicator. Indicate Detection • Set motion detection as Activity detection or Intrusion Detection. • Configure the motion detection parameters on a per camera basis. 0150-0294B GE Security DVMRe Pro... - Page 53 If Activity is selected in Motion Detection Type field, the following parameters are enabled: Relay Output: The unit may be configured to activate a relay output when motion detection is present. Select either 1, 2, 1+2 (both relays), or None. 0150-0294B GE Security DVMRe Pro...
- Page 54 The disabled zones will be tinted. The enabled zones will be clear. Activity Grid Setup Screen Pressing the Function button will bring up the Help screen shown on the next page. This screen will overlay the current video image. 0150-0294B GE Security DVMRe Pro...
-
Page 55: Camera Setup
Enable or Disable SVHS output on Monitor B. Main Menu → Camera Setup → Camera Titles Use this menu to: Titles Display • Specify if the camera titles will be displayed on the monitors. Edit Titles Edit the title for each camera. 0150-0294B GE Security DVMRe Pro... - Page 56 Rotate the Jog to navigate and the Shuttle to change the values. Save changes and exit the menu: Select [OK], then press the Enter button. [CANCEL] [OK] Exit the menu without making changes: Press the Menu button, or select [CANCEL], then press the Enter button. 0150-0294B GE Security DVMRe Pro...
- Page 57 This feature detects which inputs have video signals and which are experiencing videoloss. When this feature is activated, the unit will automatically disable the inputs experiencing videoloss. The DVMRe Pro will also re-enable video inputs that were previously disabled if a video input signal is detected.
- Page 58 Enter. A confirmation screen will appear. Select from Yes or No and press Enter. The output of monitor B will change immediately. When this feature is enabled the PIP display mode is disabled. 0150-0294B GE Security DVMRe Pro...
-
Page 59: Quick Wave Setup
56k, and 5686 US Robotics modems in their default conditions. Consult with the modem manual before attempting to make any changes. It is strongly recommended that the modem initialization string only be modified by a qualified technician. 0150-0294B GE Security DVMRe Pro... -
Page 60: Baud Rate
Exit the menu without making changes: Press the Menu button. 19200 Baud 38400 Baud The RS232 port 2 is used for Event Generation and ASCII Text 57600 Baud Insertion. See Section 7 for the RS232 Protocol required to perform these functions. 0150-0294B GE Security DVMRe Pro... - Page 61 HTTP Port: Select the HTTP Port. Select from Port 0 to 65535. Shortcuts are available for port 80 (Camera 1 button) and 8080 (camera 2 button). Consult with a qualified Network Administrator or an MIS professional to configure these settings. 0150-0294B GE Security DVMRe Pro...
-
Page 62: Front Panel Lock
The DVMRe Pro does not include its IP address in the message. Instead the Dynamic DNS server extracts the IP address of the DVMRe Pro via the Ethernet source IP address. This guarantees that the correct IP address is used even when the DVMRe Pro is behind a NAT router. -
Page 63: Factory Settings
3. Highlight OK, then press the Enter button. ---- 4. Re-enter the password. 5. Highlight OK, then press the Enter button. The user will be prompted, indicating if the password was entered correctly and changed. 0150-0294B GE Security DVMRe Pro... -
Page 64: The Quickinstall Menu
1 1 1 1 password box shown above. The DDNS Password The DDNS password enables the DVMRe Pro to contact the Domain Name Server in order to provide IP to Domain Name translation. You must obtain this number by calling you Domain Name Service. -
Page 65: The Operator Menu
Main Menu → Camera Setup → Camera Titles → Titles Display 3.14 Title Display Main Menu → Alarm → Alarm History Alarm History 3.11 Main Menu → Archive Setup Video Archive Setup 3.15 Main Menu → Password → Operator Password Operator Password 3.20 0150-0294B GE Security DVMRe Pro... -
Page 66: The Systemview Menu
DHCP Lease Expires: No Lease • Last DDNS Update Status: No attempt Hardware Address (MAC) Last DDNS Update Success: NONE • DHCP Lease Expiration Date • Last DDNS Update Status • Last DDNS Update Success 0150-0294B GE Security DVMRe Pro... - Page 67 Relay Output: None, 1, 2, 1+2 • Link to Event: Yes or No • Rejection Ratio: High, Medium, or Low • Target Size: 1 through 256 • Alarm Camera: 1 through 4, 10 or 16 0150-0294B GE Security DVMRe Pro...
- Page 68 Full Screen Alarm: Yes or No. This feature is not selectable on the 4-Channel units. 4ch = Yes. • Global Alarm Record Rate: In pictures per second (pps). 30 pps • Pre Alarm Duration: In seconds. 001 • Archive Alarm: Enable or Disable. 0150-0294B GE Security DVMRe Pro...
- Page 69 Disk Test: Test Now, Test Periodically or Disable. • Test Frequency in hours: 0 – 1000. • Test Duration: Fast or Thorough. • Disk Test Results: Disk Test Success or Disk Test Failed. • Bandwidth: Unlimited, 5-250Kb 0150-0294B GE Security DVMRe Pro...
-
Page 70: Alarms
Live Alarms Displays Single Alarm: Unit switches to a full screen display of the camera in alarm on Monitor B. Additional Alarms: Unit switches to a sequenced display of all cameras in alarm on Monitor B. 0150-0294B GE Security DVMRe Pro... -
Page 71: Alarm History Box
Main Menu → Alarm → Alarm History. For detailed information about viewing the Alarm History Box see Alarm History in section 3.10. 4.7 Searching For Recorded Alarms See section 5. 0150-0294B GE Security DVMRe Pro... -
Page 72: Searching
Searching The DVMRe Pro provides a powerful search interface to access video files stored on the hard disk or an external archive device. Search Menu Overview Search Button Disk Analysis Screen Disk Analysis Screen Search Filters Disk Analysis Screen 01/21/2002 20:17:01... -
Page 73: Disk Analysis Screen
9. Press the Record button on the front panel when satisfied. 02:02:51P 02:20:09P 10. The CD Writer will open the CD tray when completed. Capacity: 557MB The video may now be viewed on any PC equipped with a CD-ROM. ‘RECORD’ to Archive 0150-0294B GE Security DVMRe Pro... -
Page 74: Search Filters
2. Once in the Parameter Box, use the Shuttle to navigate through the fields and the Jog to change the values. 3. To activate the parameter, use the Shuttle or the Enter button to place an [X] in the check box. 4. When finished, use the Jog to navigate to another parameter. 0150-0294B GE Security DVMRe Pro... -
Page 75: Retail Search
The creator of the retail text file is responsible to put the categories and sub levels into correct order. The DVMRe Pro will not sort the strings. A category has to have at least one sub level. The customer has to store this file as a .txt file named retail_search.txt. - Page 76 After uploading the file (and also after a reboot), the DVMRe Pro will read the contents of the file and store it in memory.
- Page 77 The user selections will be cleared when the user uploads a new retail text file. Like the other text searches, the results will display in thumbnail pictures and can be viewed through full screen playback with text. 0150-0294B GE Security DVMRe Pro...
-
Page 78: Search Results
‘PLAY REV/FWD’ to page up/down ‘PLAY REV/FWD’ to page up/down ‘ZOOM’ to select/deselect all items in this page ‘ENTER’ to play event; ‘SEQ’ to repeatedly play event. ‘RECORD’ to archive Follow the directions on-screen to select, archive, playback, etc. 0150-0294B GE Security DVMRe Pro... - Page 79 Hitting the Enter button again while in playback will cause the next selection from the search list to be played. Press the Sequence button to repeatedly play the selected event. Press the Record button on the front panel to write the selected data to CD. 0150-0294B GE Security DVMRe Pro...
-
Page 80: Webbrowser
WebBrowser The DVMRe Pro features an integrated WebBrowser interface. The WaveBrowser option allows the user to view video from any ethernet connected units with software version 4.09 or above. For WaveBrowser to function properly, certain ActiveX controls must be set correctly. To... -
Page 81: Wavebrowser Overview And Controls
Choose from the following displays: • 4-way Display • Single Camera Display Large • Single Camera Display Medium • Single Camera Display Small 0150-0294B GE Security DVMRe Pro... -
Page 82: Dvmre Pro Wavelink
6.2 DVMRe Pro WaveLink A new feature with the DVMRe Pro software version 5.00 is the DVMRe Pro WaveLink. This feature allows putting command codes in the URL when calling WaveBrowser to control actions the WaveBrowser is going to perform. - Page 83 This feature can be used by Web Developers to link various cameras to specific Web content. It will also be used by the DVMRe Pro’s Email feature to allow the recipient of an alarm email to click on a link in the email, which causes the WaveBrowser to connect and play back at the time when the alarm occurred.
-
Page 84: Technical Specifications
Video Signal Output Input Termination 75-Ohm (Auto Terminating) Display Memory 4 Megabytes Resolution Horizontal: 720 Pixels. Vertical: 484 Lines (576 for PAL). Gray Scale 256 levels Colors Y:U:V 4:2:2, 16.8 Million Colors Compression Standard Wavelets 0150-0294B GE Security DVMRe Pro... -
Page 85: Part Numbers
Status retrievable via RS232 port. Part Numbers CBR-KB3, CBR-KB3/J, KTD405. Includes motorized pan, tilt, and zoom Remote Keyboard controls. HP Printer HP DeskJet 3820 Hawking Print Server PN7127P (1-Port Mini-Internet Print Server) Replacement Manual 0150-0294 0150-0294B GE Security DVMRe Pro... -
Page 86: Rs232 Event Generation/Text Insertion Protocol
Event Generation/Text Insertion Protocol The RS232 Alarm/Event Generation /Text Insertion Protocol is designed to deliver Alarm, Event (commands), and Text data to the DVMRe Pro from serial interface devices through the RS232 port. NOTE Setting and Clearing Alarms with this Protocol is equivalent to activating and deactivating Alarms on the hardware alarm inputs. -
Page 87: Alarm/Event Fields
Start Alarm – 0000 01XXb If only the start bit is set, the DVMRe Pro will enter the Alarm mode. The selected camera will become the alarm camera. Pre-alarm video will be recorded and the Alarm Record Rate will be initiated. -
Page 88: Event Actions
8.5 Event Actions NOTE All Event messages will be ignored while an Alarm condition exists in the DVMRe Pro. No Event Change – 0000 0000b If both the start and stop bits are clear, there will be no change to the event status. The camera’s record rate will not be changed. -
Page 89: Rs232 Remote Control Protocol
13 Way Multiscreen Camera 16 16 Way Multiscreen Reserved 25 - 40 Print Key Menu Archive Key Enter Reserved *Must send a “No Button Pressed” command Macro immediately following any of these Reserved 45-49 commands. Monitor B 0150-0294B GE Security DVMRe Pro... -
Page 90: Configuration And Status
Configuration and status data can be read from written to. For details about the contents of DVMRe Pro. The data is arranged in the form of each block, contact GE-Security and request 16 byte blocks, numbered from 1 to 213. For the Block Data Structure for DVMRe Pro. -
Page 91: Macro Tables
Macro Tables Photo copy this page and use it to keep a record of the programmed macro functions. 10.1 Macro Functions Table Macro Description Number Function + Daylight Savings Time: Sets clock ahead one hour in April, and back one hour in October. -
Page 92: Scheduled Macro Table
10.2 Scheduled Macro Table Event Time Macro to Run 0150-0294B... -
Page 93: Contacting Technical Support
Many GE Security documents are provided as PDFs (portable document format). To read these documents, you will need Adobe Acrobat Reader, which can be downloaded free from Adobe’s website at www.adobe.com.
Need help?
Do you have a question about the DVMRe Pro and is the answer not in the manual?
Questions and answers