D-Link ShareCenter Pulse DNS-320 User Manual
Sharecenter pulse
Hide thumbs
Also See for ShareCenter Pulse DNS-320:
- User manual (223 pages) ,
- Quick installation manual (77 pages) ,
- Technical specifications (2 pages)
Table of Contents
Advertisement
Quick Links
Download this manual
See also:
User Manual
Advertisement
Table of Contents

Related Manuals for D-Link ShareCenter Pulse DNS-320


Summary of Contents for D-Link ShareCenter Pulse DNS-320
- Page 1 USER MANUAL ShareCenter™ Pulse DNS-320 VERSION 2.0...
-
Page 2: Table Of Contents
LAN Setup ................59 RAID Coniguration and Drive Mapping ....16 Dynamic DNS ...............61 Coniguration Summary and Drive Formatting ..17 Application Management ............62 Format Complete ..............18 FTP Server ................62 D-Link Storage Utility ..............20 UPnP AV Server ..............63 D-Link ShareCenter Pulse DNS-320 User Manual... - Page 3 P2P Downloads - Settings ..........91 P2P Downloads - Downloads .........92 Web File Server ..............93 AjaXplorer ................94 My Favorites..................95 Re-arranging the My Favorites View ......95 Add an Icon to My Favorites ...........96 Remove an Icon from My Favorites ......97 D-Link ShareCenter Pulse DNS-320 User Manual...
-
Page 4: Product Overview
The new drive will then be re-mirrored, allowing the ShareCenter Pulse to return to its full protection. 1 Hard Drive(s) not included. 2 D-Link cannot guarantee full compatibility or proper playback with all codecs. Playback capability depends on the codec support of the UPnP™ AV media player. D-Link ShareCenter Pulse DNS-320 User Manual... -
Page 5: Package Contents
• Computer with: 1GHz processor / 512 MB RAM / 200 MB available space / CD-ROM drive • Internet Explorer version 7, Mozilla Firefox 3 or Apple Safari 4 and above • Windows® XP (with Service Pack 2 or higher), Vista® or Windows® 7 • 3.5” SATA Hard Drive(s) D-Link ShareCenter Pulse DNS-320 User Manual... -
Page 6: Features
Features The DNS-320 is an easy to install data storage platform used for remote access through a local network or from the Internet. This ShareCenter Pulse supports up to 2 SATA hard drives and includes the product features listed below: •... -
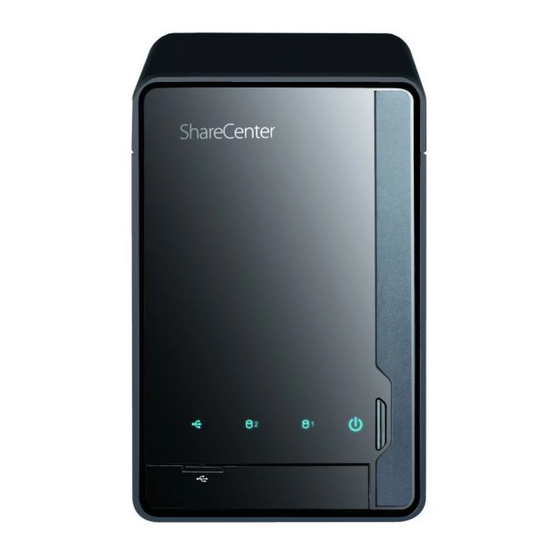
Page 7: Hardware Overview
Press once to power on the device. To power down, press and hold the button until it begins to blink. USB Copy / Press 1~3 seconds to copy data from a USB drive to your ShareCenter Pulse. Press and hold 5 seconds to Unmount Button unmount a USB drive. D-Link ShareCenter Pulse DNS-320 User Manual... -
Page 8: Rear Panel (Connections)
LINK (R) and Traic LED (L) to indicate connectivity and traic respectively to the local LAN Security Lock This lock can be used to tie the ShareCenter Pulse to the desk to prevent theft. Cables are sold separately. D-Link ShareCenter Pulse DNS-320 User Manual... -
Page 9: Getting Started
Getting Started ShareCenter Pulse Software CD To get started with the ShareCenter Pulse Setup Wizard, insert the supplied CD into your CD-ROM drive: Click the START button to start the ShareCenter Pulse Setup Wizard. D-Link ShareCenter Pulse DNS-320 User Manual... -
Page 10: Installation
Note: The computer used to access the ShareCenter Pulse web-based coniguration manager must be on the same subnet as the ShareCenter Pulse. If your network is using a DHCP server, the ShareCenter Pulse will automatically be in the same subnet. D-Link ShareCenter Pulse DNS-320 User Manual... -
Page 11: Install The Hard Drives
ShareCenter Pulse so that you can install one or two hard drives. Click Next to continue. Slide either one or two hard drives into the open hard drive bays of your device. Click Next to continue. D-Link ShareCenter Pulse DNS-320 User Manual... - Page 12 Click Next to continue. A standard CAT5E Ethernet cable with a RJ-45 connector is needed to connect your ShareCenter Pulse to your network. Click Next to continue. D-Link ShareCenter Pulse DNS-320 User Manual...
-
Page 13: Power And Device Selection
ShareCenter Pulse. If the connection is good then check that the hard drives are installed correctly and have no other issues. Click Next to continue. Note: When you select your device from the list, it will cause the LEDs to blink to conirm the device selection. D-Link ShareCenter Pulse DNS-320 User Manual... -
Page 14: Admin Password
Click Next to continue. In this step you can create a new password for the Admin username. It is recommended you set a password however you may also leave the ields blank. Click Next to continue. D-Link ShareCenter Pulse DNS-320 User Manual... -
Page 15: Network Setup
The name will be used whenever you map one of the ShareCenter Pulse volumes as a Network Drive. Click Next to continue. D-Link ShareCenter Pulse DNS-320 User Manual... -
Page 16: Dynamic Dns
No Radio button. Click Next to continue. If you clicked Yes, enter the DDNS parameters requested in this window so that your ShareCenter Pulse can be accessed by a URL over the Internet. Click Next to continue. D-Link ShareCenter Pulse DNS-320 User Manual... -
Page 17: Ddns Account And System Time
Section 3 - Installation DDNS Account and System Time f you want a DDNS account to use with your ShareCenter Pulse, D-Link provides a free DDNS account by clicking on the web link shown. You will need to do the following: •... -
Page 18: E-Mail Settings And Volume Information
Enter your e-mail information and settings and then click Next to continue. If you do not want to conigure your e-mail settings, click Skip to continue. This step is informational and shows any currently conigured Volumes previously setup on the ShareCenter Pulse. Click Next to continue. D-Link ShareCenter Pulse DNS-320 User Manual... -
Page 19: Raid Coniguration And Drive Mapping
For more information concerning the diferent RAID Disk Formats please refer to “What is RAID?” on page 98 Click Next to continue. This step allows you to map the volume(s) created as network drive(s) on your computer. Click Next to continue. D-Link ShareCenter Pulse DNS-320 User Manual... -
Page 20: Coniguration Summary And Drive Formatting
Click on the No button if you are unsure. During the hard drive formatting the wizard displays percentage complete bars. D-Link ShareCenter Pulse DNS-320 User Manual... -
Page 21: Format Complete
Section 3 - Installation Format Complete he wizard will show this window if the hard drive format(s) are successful. Click Next to continue. D-Link ShareCenter Pulse DNS-320 User Manual... - Page 22 Your device is now installed and ready for use. Your drives are network mapped from using the wizard so you will be able to access them under you My Computer icon. D-Link ShareCenter Pulse DNS-320 User Manual...
-
Page 23: D-Link Storage Utility
IP address before logging in or are unable to connect to the ShareCenter Pulse IP address, you can use the Storage Utility provided on the product CD to locate the device on your network and make any needed changes. work Storage The D-Link Storage Utility displays any ShareCenter Pulse devices it Device: detects on the network. -
Page 24: D-Link Sharecenter Pulse Dns-320 User Manual
ShareCenter Pulse. If your network is using a DHCP server and the computer receives IP settings from the DHCP server, the ShareCenter Pulse will automatically be in the same subnet. D-Link ShareCenter Pulse DNS-320 User Manual... -
Page 25: Coniguration
Note: The computer, used to access the web-based coniguration, manager must be on the same subnet as the ShareCenter Pulse . If your network is using a DHCP server and the computer receives IP settings from DHCP, the ShareCenter Pulse will automatically be in the same subnet. D-Link ShareCenter Pulse DNS-320 User Manual... -
Page 26: Web Ui General Layout
These icons and their coniguration sub-menus will be discussed in detail in the following pages of this manual. Note: After logging in to the ShareCenter Pulse for the irst time it is recommended to add a password to the admin account. D-Link ShareCenter Pulse DNS-320 User Manual... -
Page 27: Management
Section 4 - Coniguration Management his tab contains the Setup Wizard, Disk Management, Account Management, Network Management, Application Management, System Management and Status Icons. Click each of the icons to see the submenus. D-Link ShareCenter Pulse DNS-320 User Manual... -
Page 28: Setup Wizard (Web Ui)
ShareCenter Pulse has a System Wizard that allows you to quickly conigure some of the basic device settings. Click the System Wizard icon to start the Setup Wizard. Click the Run Wizard button to start the setup wizard. Click Next to continue. D-Link ShareCenter Pulse DNS-320 User Manual... - Page 29 It is recommended you set an admin password here. Enter the new password and re-enter it for conirmation. Click Next to continue. Set the appropriate Time Zone for your location. Click Next to continue. D-Link ShareCenter Pulse DNS-320 User Manual...
- Page 30 Selecting Static IP requires you to assign the IP information manually. Click Next to continue. Enter your workgroup, name and description, or leave the default values and click Next to continue. D-Link ShareCenter Pulse DNS-320 User Manual...
- Page 31 Click Finish to save your settings and complete the wizard. You may click the Previous button to go back and edit your settings or click Exit to end the wizard without saving the settings. D-Link ShareCenter Pulse DNS-320 User Manual...
-
Page 32: Disk Management
Note: You can still rebuild a drive using the RAID 1 functionality however you must initiate the rebuild manually. anual Rebuild Now: f you have disabled Auto-Rebuild then you can use the Manual Rebuild option by clicking this button. D-Link ShareCenter Pulse DNS-320 User Manual... -
Page 33: Hard Drive Coniguration Wizard
RAID type you would like to format your HDDs with. Click the Next button to continue or click Exit to cancel. This screen displays the currently installed HDD information. Any data on the installed hard drives will be lost by the formatting. Click Next to continue. D-Link ShareCenter Pulse DNS-320 User Manual... - Page 34 Auto-Rebuild. Auto-Rebuild will automatically rebuild a failed disk drive if it has been replaced with a new one. Set to disabled if you prefer to start this process manually. Click Next to continue. D-Link ShareCenter Pulse DNS-320 User Manual...
- Page 35 A Volume Coniguration Summary is displayed. Check the table and click Next to format the drives. Otherwise click the Previous button to make changes to your coniguration or click Exit to end the wizard. D-Link ShareCenter Pulse DNS-320 User Manual...
- Page 36 Section 4 - Coniguration During the formatting process a progress bar is displayed. When the formatting is completed the wizard displays the inished Volume Coniguration table. Click Finish to end the wizard. D-Link ShareCenter Pulse DNS-320 User Manual...
-
Page 37: S.m.a.r.t Test
S.M.A.R.T test sent to you by e-mail. reate Schedule: lick on this button in order to create a scheduled S.M.A.R.T test. You will be able to schedule a test on a daily, weekly, and monthly basis. D-Link ShareCenter Pulse DNS-320 User Manual... - Page 38 List: n the window all the created schedule lists will be displayed. Note: When performing a S.M.A.R.T. test, your hard drives will not be available over the network until it has completed testing. D-Link ShareCenter Pulse DNS-320 User Manual...
-
Page 39: Scan Disk
Scan Disk test then a window Window: with a progress bar will appear to monitor the test. Click the Exit button to abort the test if required or once the test has run 100 percent. D-Link ShareCenter Pulse DNS-320 User Manual... -
Page 40: Account Management
Delete button to remove a user from the coniguration. D-Link ShareCenter Pulse DNS-320 User Manual... -
Page 41: Adding New Users Wizard
Click on the Previous button to return to the previous window. Click on the Next button to accept the change and continue to the next window. Click on the Exit button to discard the changes made and return to the User/Group window. D-Link ShareCenter Pulse DNS-320 User Manual... - Page 42 Click on the Previous button to return to the previous window. Click on the Next button to accept the change and continue to the next window. Click on the Exit button to discard the changes made and return to the User/Group window. D-Link ShareCenter Pulse DNS-320 User Manual...
- Page 43 Click on the Previous button to return to the previous window. Click on the Next button to accept the change and continue to the next window. Click on the Exit button to discard the changes made and return to the User/Group window. D-Link ShareCenter Pulse DNS-320 User Manual...
- Page 44 After the new account has been created, a window will appear that states the account was created successfully. Click on the OK button to continue. tep 6: inal message appears indicating the user is successfully added to the ShareCenter Pulse coniguration.. D-Link ShareCenter Pulse DNS-320 User Manual...
-
Page 45: Adding New Groups Wizard
Click on the Previous button to return to the previous window. Click on the Next button to accept the change and continue to the next window. Click on the Exit button to discard the changes made and return to the User/Group window. D-Link ShareCenter Pulse DNS-320 User Manual... - Page 46 Click on the Previous button to return to the previous window. Click on the Next button to accept the change and continue to the next window. Click on the Exit button to discard the changes made and return to the User/Group window. D-Link ShareCenter Pulse DNS-320 User Manual...
- Page 47 Click on the Previous button to return to the previous window. Click on the Next button to accept the change and continue to the next window. Click on the Exit button to discard the changes made and return to the User/Group window. D-Link ShareCenter Pulse DNS-320 User Manual...
- Page 48 After the new group has been created, a window will appear that states the group was created successfully. Click on the OK button to continue. cess: inal message appears indicating the group was created successfully and added to the ShareCenter Pulse coniguration. D-Link ShareCenter Pulse DNS-320 User Manual...
-
Page 49: Quotas
Click on the blue font to set usage limits. In the Group Quota Settings table you can view the current group usage and limit setting. Click on the blue font to set the limit. D-Link ShareCenter Pulse DNS-320 User Manual... -
Page 50: Network Shares
Refresh button. If at any point the user wants to reset the network access list to the default coniguration, click on the Reset Network Shares button. D-Link ShareCenter Pulse DNS-320 User Manual... -
Page 51: Adding New Network Shares Wizard
Click on the Previous button to return to the previous window. Click on the Next button to accept the change and continue to the next window. Click on the Exit button to discard the changes made and return to the Network Shares Page. D-Link ShareCenter Pulse DNS-320 User Manual... - Page 52 Click on the Previous button to return to the previous window. Click on the Next button to accept the change and continue to the next window. Click on the Exit button to discard the changes made and return to the Network Shares Page. D-Link ShareCenter Pulse DNS-320 User Manual...
- Page 53 Click on the Previous button to return to the previous window. Click on the Next button to accept the change and continue to the next window. Click on the Exit button to discard the changes made and return to the Network Shares Page. D-Link ShareCenter Pulse DNS-320 User Manual...
- Page 54 Click on the Previous button to return to the previous window. Click on the Next button to accept the change and continue to the next window. Click on the Exit button to discard the changes made and return to the Network Shares Page. D-Link ShareCenter Pulse DNS-320 User Manual...
- Page 55 Click on the Previous button to return to the previous window. Click on the Next button to accept the change and continue to the next window. Click on the Exit button to discard the changes made and return to the Network Shares Page. D-Link ShareCenter Pulse DNS-320 User Manual...
- Page 56 Click on the Previous button to return to the previous window. Click on the Finish button to accept the change and complete the wizard. Click on the Exit button to discard the changes made and return to the Network Shares Page. D-Link ShareCenter Pulse DNS-320 User Manual...
-
Page 57: Adding New Iso Mount Shares Wizard
Click on the Previous button to return to the previous window. Click on the Next button to accept the change and continue to the next window. Click on the Exit button to discard the changes made and return to the Network Shares Page. D-Link ShareCenter Pulse DNS-320 User Manual... - Page 58 Click on the Previous button to return to the previous window. Click on the Next button to accept the change and continue to the next window. Click on the Exit button to discard the changes made and return to the Network Shares Page. D-Link ShareCenter Pulse DNS-320 User Manual...
- Page 59 Click on the Previous button to return to the previous window. Click on the Next button to accept the change and continue to the next window. Click on the Exit button to discard the changes made and return to the Network Shares Page. D-Link ShareCenter Pulse DNS-320 User Manual...
- Page 60 Click on the Exit button to discard the changes made and return to the Network Shares Page. tep 5: sing the D-Link Storage Utility the ISO Mount Share can now be mapped to your computer so that you can access it. D-Link ShareCenter Pulse DNS-320 User Manual...
-
Page 61: Admin Password
(Leave this blank if you have not set a password yet.) w Password: ter a new password. onirm Password: ter the new password again for conirmation. D-Link ShareCenter Pulse DNS-320 User Manual... -
Page 62: Network Management
LAN Settings allows you to enable LLTD and to conigure the Link Speed and the IP address as a DHCP client or Static IP. IP Settings lient: electing DHCP Client will cause the DNS-320 to obtain an IP address from the local DHCP server. -
Page 63: Link Speed And Lltd Settings
Then click the Save Settings button to save the new settings. TD: he device supports LLTD (Link Layer Topology Discovery) and is used by the Network Map application that is included in Windows Vista® and Windows® 7. Select to enable or disable LLTD. D-Link ShareCenter Pulse DNS-320 User Manual... -
Page 64: Dynamic Dns
Key: tatus: ys your DDNS status. When the user clicks on the “Sign up for D-Link’s Free DDNS service at www.DLinkDDNS.com” link, the user will be re-directed to the D-Link DDNS page. Here the user can create or modify a D-Link DDNS account to use in this coniguration. -
Page 65: Application Management
21 to some other port as listed in the Port section of the Web UI. Also, make sure to open the corresponding port on your router and forward that port from your router to the device. D-Link ShareCenter Pulse DNS-320 User Manual... -
Page 66: Upnp Av Server
Add button. To delete an existing folder, click on the Delete button. To refresh the list, click on the Refresh button. efresh All: the Refresh All button after adding new iles to be used by UPnP AV compatible devices. D-Link ShareCenter Pulse DNS-320 User Manual... -
Page 67: Itunes Server
Server he DNS-320 features an iTunes Server. This server provides the ability to share music and videos to computers on the local network running iTunes. If the server is enabled, the device will be automatically detected by the iTunes program and the music and videos contained in the speciied directory will be available to stream over the network. -
Page 68: Afp Service
AFP protocol. Select disable to prevent unnecessary CPU resource depletion when AFP is not being used. ave Settings: to save your AFP settings. Note: Enabling AFP service will disable oplocks. D-Link ShareCenter Pulse DNS-320 User Manual... -
Page 69: Nfs Service
NFS protocol. Select Disable to prevent unnecessary CPU resource depletion when NFS is not being used. ave Settings: to save your NFS settings. Note: Applying NFS service to any Share will disable oplocks. D-Link ShareCenter Pulse DNS-320 User Manual... -
Page 70: System Management
(>) “play” button. More than one language pack can be installed, but only one language pack can be used at a time. D-Link ShareCenter Pulse DNS-320 User Manual... -
Page 71: Time And Date
Time Protocol (NTP) synchronizes the device with an Internet time server. D-Link provides two time servers for your convenience. Select the one closest to your location. Click Save Settings to accept these changes. D-Link ShareCenter Pulse DNS-320 User Manual... -
Page 72: Device
By default, the device name is dlink-xxxxxx, where xxxxxx is the last six digits of the MAC address. ssign a device description to the device. Click Save Settings to accept these changes. D-Link ShareCenter Pulse DNS-320 User Manual... -
Page 73: System Settings
System Settings estart: ing to reboot the device. lick to restore the device back to the factory default settings. All previous settings that have been conigured will be erased. hutdown: to turn of the device. D-Link ShareCenter Pulse DNS-320 User Manual... - Page 74 Temperature ere the user can configure the system Threshold: temperature threshold value. This value can be set in Fahrenheit or Celsius. The device will automatically shutdown when it reaches the temperature set here. D-Link ShareCenter Pulse DNS-320 User Manual...
-
Page 75: Power Management
Of Hard Drive: et the amount of idle time before the drives go into hibernation. ower Recover: Enable or Disable. The Power Recovery feature will automatically restart your device from a previously unexpected shutdown due to a power failure. D-Link ShareCenter Pulse DNS-320 User Manual... - Page 76 Of Enable to turn on this function. Scheduling: Enable or disable the power of days using the check box and conigure the time for each day that the power of will occur. D-Link ShareCenter Pulse DNS-320 User Manual...
-
Page 77: Notiications
This address must correspond with the SMTP server conigured above. this option to use SMTP authentication. Authentication: est E-Mail: the Test E-Mail button to send a test alert and conirm your settings are correct. D-Link ShareCenter Pulse DNS-320 User Manual... -
Page 78: Sms Settings
Mobile Service Provider. est SMS button: this button to send a test message to your mobile phone to verify the settings are correct and the API URL is functioning with your provider. D-Link ShareCenter Pulse DNS-320 User Manual... -
Page 79: Adding An Sms Service Provider
URL. Enter your SMS Provider name here. Enter the HTTP API URL provided to you. Choose the appropriate type parameter in the drop-down menu for the parsed parameters of the URL on the left. D-Link ShareCenter Pulse DNS-320 User Manual... -
Page 80: Event Settings
Email or SMS settings by checking the events here. vent Settings: elect the information you want e-mailed to the above address or sent over SMS messages to the above mobile number. The items checked will be sent when necessary. D-Link ShareCenter Pulse DNS-320 User Manual... -
Page 81: Logs
Log: Clear Log to delete all the existing logs. ackup Log: Backup Log to save the existing logs to a text ile on your computer. D-Link ShareCenter Pulse DNS-320 User Manual... -
Page 82: Firmware Upgrade
Firmware Upgrade Page makes it simple to check for new irmware releases and upload them to the device. This section provides a link to check for new irmware on the D-Link support website. If a new irmware is available, download the ile to your local computer. -
Page 83: Status
Information: vice ys the workgroup, name, description, current Information: temperature, packet counts, and system uptime. olume isplays the hard drive information, including the Information: disk mode, total size, used and remaining drive space. D-Link ShareCenter Pulse DNS-320 User Manual... -
Page 84: Hard Drive Info
“Normal”. If your hard drive is not healthy, the status will display “Abnormal”. At any time, if you wish to view the S.M.A.R.T table of the hard drive, you can press the “Normal/Abnormal” button. After pressing the button a table appears with the S.M.A.R.T. data below the table of the Hard Drives installed. D-Link ShareCenter Pulse DNS-320 User Manual... -
Page 85: Applications
Click on Test to verify access to the site address and ile/folder. If you have chosen File from the above drop-down list, you must specify the exact ile in the URL path, including the ile extension. (e.g. http://example.com/test/testile.txt). D-Link ShareCenter Pulse DNS-320 User Manual... - Page 86 Current download statistics, such as % completed and download speed, are displayed for each event. A refresh button is also provided to produce updated listings at any time. D-Link ShareCenter Pulse DNS-320 User Manual...
-
Page 87: Remote Backups
You must select the remote backup job irst and then click the Modify button. e: o remove a Remote Backup job select the job in the list and then click the Delete button. D-Link ShareCenter Pulse DNS-320 User Manual... - Page 88 NAS or Linux ile system. Remote To Local: Sets the backup source as the remote NAS or Linux file system and the target destination for the backup iles as the local NAS. D-Link ShareCenter Pulse DNS-320 User Manual...
- Page 89 The subsequent backups in the incremental series contain new iles and folders plus the links to the irst incremental backup. D-Link ShareCenter Pulse DNS-320 User Manual...
- Page 90 Once - Select this option to run the Remote Backup once at a speciic date and time set. Scheduled: Select this option to set the backup to occur daily, weekly, or monthly per a speciic schedule. D-Link ShareCenter Pulse DNS-320 User Manual...
- Page 91 Navigation buttons: Use these buttons to move up and down in the list when there are multiple jobs conigured. Refresh Button: Click this button during a backup or recovery process to monitor the progress by updating the progress completed bar. D-Link ShareCenter Pulse DNS-320 User Manual...
-
Page 92: Local Backups
Files will only be overwritten if the ave To: ter a valid destination drive on the device, or click source ile is more recent. Browse to select the destination. ename: ter the renamed ile name here. D-Link ShareCenter Pulse DNS-320 User Manual... -
Page 93: Local Backups - Time Machine
Shares associated with the Time Machine backup. to add a NAS folder as a Time Machine destination. to delete a NAS folder setup. emove all Network eletes all of the NAS folders in the list. Shares: D-Link ShareCenter Pulse DNS-320 User Manual... -
Page 94: P2P Downloads - Settings
Torrent will be saved. yption: elect Enable or Disable. andwidth onfigure the maximum download rate and Control: maximum upload rate. Enter -1 to set the respective ield to unlimited. D-Link ShareCenter Pulse DNS-320 User Manual... -
Page 95: P2P Downloads - Downloads
/ Stop: he start and stop button allows the user to start and stop selected P2P downloads in the task list. orrent Scheduling: lick the Torrent Scheduling button to conigure a scheduling rule for the select P2P downloading task. D-Link ShareCenter Pulse DNS-320 User Manual... -
Page 96: Web File Server
D-Link ShareCenter Pulse DNS-320 User Manual... -
Page 97: Ajaxplorer
ShareCenter Pulse then you will have the users rights within the AjaXplorer interface. That users read/write access privileges to the shares of the ShareCenter Pulse will be applicable within the AjaXplorer interface as well. D-Link ShareCenter Pulse DNS-320 User Manual... -
Page 98: My Favorites
Once you have dragged the icon to the new location, release the mouse button and the other icons will automatically reorder themselves. D-Link ShareCenter Pulse DNS-320 User Manual... -
Page 99: Add An Icon To My Favorites
My Favorites tab (drag and drop method). You will see an white arrow pointing to the My Favorites tab which is highlighted when you start to drag the icon D-Link ShareCenter Pulse DNS-320 User Manual... -
Page 100: Remove An Icon From My Favorites
My Favorites tab simply right-click on it and select Remove From My Favorite in the context selection that appears. Right-click an Icon alias in the My Favorites tab and select Remove From My Favorite option. The Icon alias should disappear from the My Favorites tab view. D-Link ShareCenter Pulse DNS-320 User Manual... -
Page 101: Knowledge Base
Because the data is stored on multiple disks, fault tolerance means that if one drive fails, all data RAID 1 provides fault tolerance and protection, in in the array will be lost. addition to performance advantages. D-Link ShareCenter Pulse DNS-320 User Manual... -
Page 102: Mapping A Drive
Easy Search Utility to map drives to your computer. Insert the ShareCenter Pulse CD into your CD-ROM drive. Click Easy Search Utility The Easy Search Utility will load and detect any ShareCenter Pulse devices that are on the local network. D-Link ShareCenter Pulse DNS-320 User Manual... - Page 103 Available volumes will be displayed under Drive Mapping. Highlight the volume you want to map. Select an available drive letter from the drop-down menu and click Connect. e connected, your mapped drive(s) will appear in My Computer. D-Link ShareCenter Pulse DNS-320 User Manual...
- Page 104 Section 5 - Knowledge Base ouble-click the My Computer icon on your desktop. Double-click the mapped drive to access the iles and folders. D-Link ShareCenter Pulse DNS-320 User Manual...
-
Page 105: Mapping The Recycle Bin
Recycle Bin option with any of your Network Shares created, then you can map the recycle bin as a Network Drive to have access to it. he Recycle Bin will appear in the drive mapping area of the Storage Utility. e connected the Recycle Bin of the device will appear as a Network Drive. D-Link ShareCenter Pulse DNS-320 User Manual... -
Page 106: Usb Print Server
Note: Only the print function is supported. The device does not support the copy and scan functions of Multi-Function Printers. To add a printer, connect your printer via USB cable to the USB port of your device: The printer should appear in your in the System Info menu of the Status icon. D-Link ShareCenter Pulse DNS-320 User Manual... - Page 107 The Windows Add Printer Wizard will launch: ® Select the printer driver from the installed Manufacturer list or use the Have Disk button to browse for the printer driver ile. Click OK to continue. D-Link ShareCenter Pulse DNS-320 User Manual...
- Page 108 Section 5 - Knowledge Base Once you have selected the proper driver as shown in the browse list then click OK to install the printer. The printer is now installed and the printer queue will appear. D-Link ShareCenter Pulse DNS-320 User Manual...
-
Page 109: Yahoo! Widget Installation
Step 2: Click the coniguration button to conigure the Widget. Enter the IP Address of your device and click the Save button. Now you are ready to use your new D-Link Yahoo! Widget! D-Link ShareCenter Pulse DNS-320 User Manual... -
Page 110: Yahoo! Widget Display
Section 5 - Knowledge Base Yahoo! Widget Display he D-Link Widget is mainly used for monitoring the activities taking place. ystem: n the System window information about your Computer, DNS-320, IP Address, Firmware Version and Current Operational Temperature are displayed. -
Page 111: Usb Copy Function
USB Copy Function he DNS-320 supports on option where the user can enter a USB storage medium in to the USB port and with a click of a button automatically copy the contents of the USB storage medium into a folder on the device...
Need help?
Do you have a question about the ShareCenter Pulse DNS-320 and is the answer not in the manual?
Questions and answers